In general, Windows autostart is responsible for detecting each time we insert a CD or DVD into the computer automatically, to be able to carry out any action that we request. If this does not happen, it may be due to several reasons, which we are going to review to try to find a solution.
CD / DVD autostart does not work What happens?
Windows autoplay appears when inserting a CD / DVD or a removable drive (pendrive, memory card …) that has some type of accessible storage, both write and read only. It always appears in the form of a menu, and it will ask us how we want Windows to treat it. Then it will remember the desired option and apply it the next time it detects the same device.
Autostart problems can appear on any PC and cause it to not appear when inserting a CD / DVD. The causes can be several, such as a problem with the drivers, that we have deactivated it without realizing it or due to our antivirus. Likewise, some applications such as VMWare can disable these functions when a virtual machine is running, enabling them again when the machine is stopped.
But whatever the cause, today we are going to try to solve it, carrying out some checks within Windows 10 that help us solve the problem in a not very complex way.
Fix autoplay issues
Next, we are going to review the actions that we can perform within Windows 10 to solve the autostart problem when we insert a CD / DVD into the computer.
Check autoplay in Settings
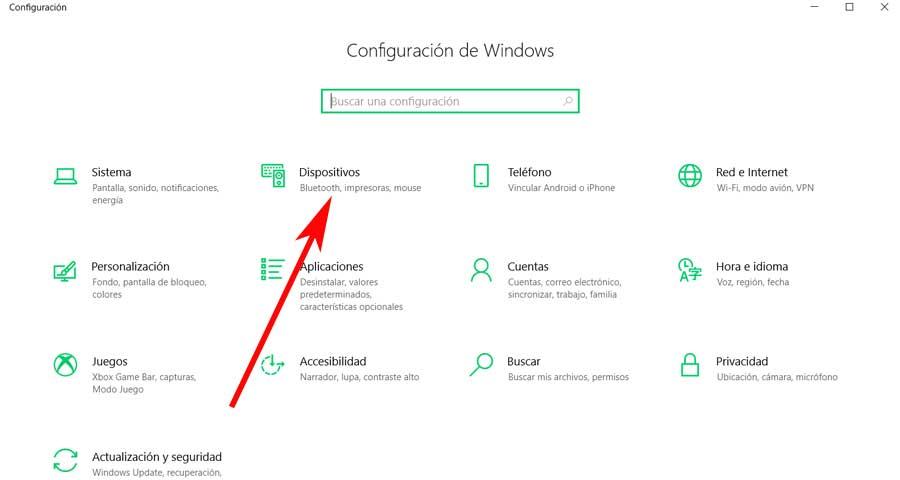
The first thing to do if the CD / DVD autostart does not work is to check the Windows 10 Configuration section. It is possible that we do not have the Automatic Play option configured or that we have disabled it by mistake, which is the main cause of the problem. To verify this, we are going to press the keyboard shortcut “Windows + I” to access the “Settings” menu. Once in the menu, click on the “Devices” section.
This will open a new window, and in the left column we select “Autoplay”. On the right side we make sure that the automatic playback for all media and devices is found activated, If not, we activate it in the corresponding button so that it appears in blue.
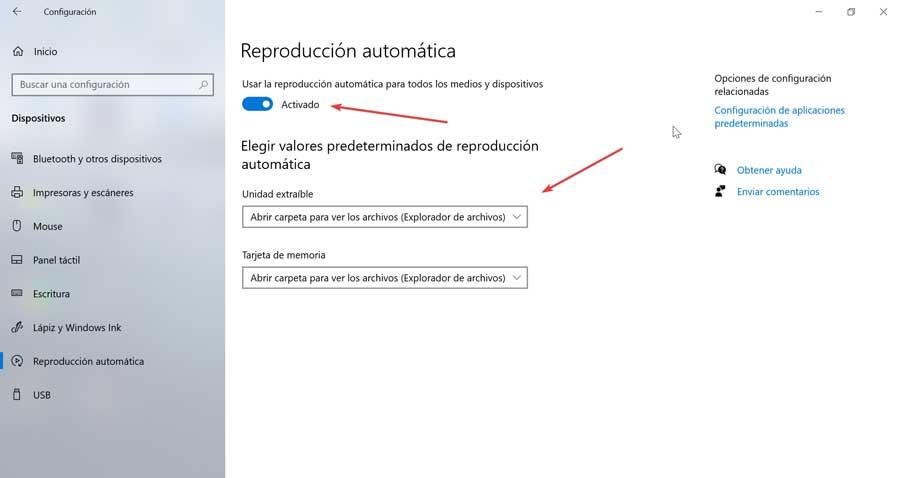
Later we choose the default values of automatic reproduction, displaying the corresponding tab, and choosing the desired option. Once the changes have been made, we check if the problem with autoplay has been fixed.
Check it from the Control Panel
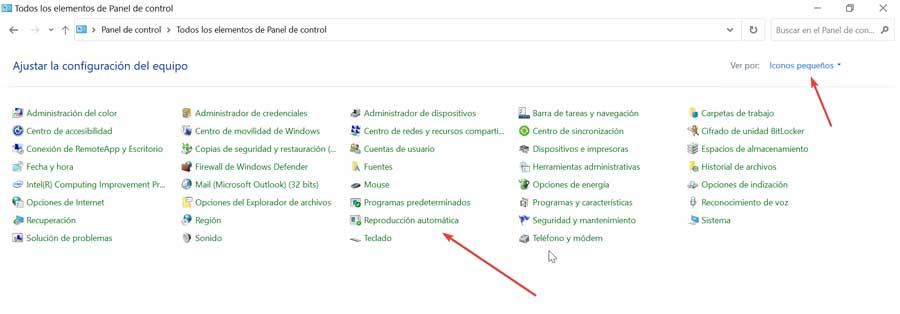
We can also check through the Windows “Control Panel” if the automatic playback is not correct, and be able to solve the problem. In order to verify it, we are going to write control panel in the search box of the Start menu and select this tool. Next, in the upper right part, we change the option from “View by” to “Small icons” and select the option “Automatic playback”.
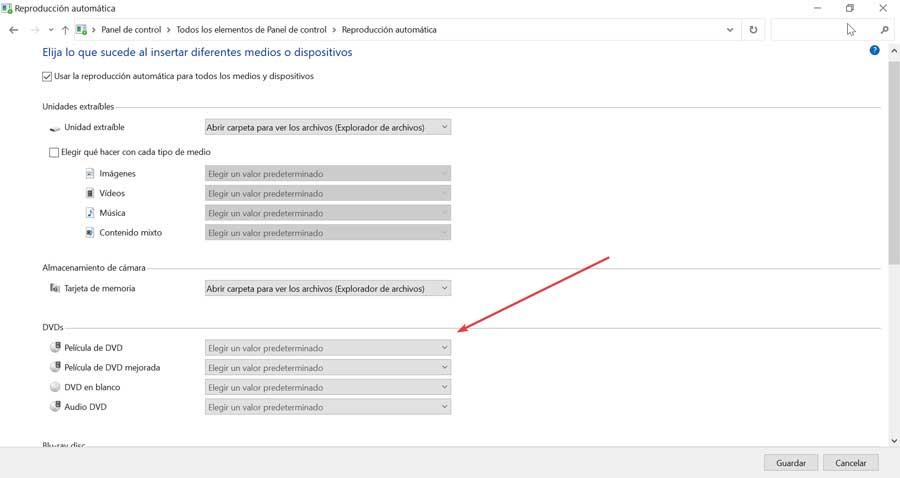
Here we can see that it is a similar method to the one found in the Settings menu, but with greater control over the automatic playback functions. We seek the option of DVD, CD or Blu-ray and we choose the default action for each support. Once finished, click on “Save” and check if this has solved the problem.
Reinstall the drivers from the CD / DVD
Another common cause of the problem may be related to the CD / DVD drivers. To solve it we must access Device Manager. To do this, we can press the keyboard shortcut “Windows + X” and select “Device Manager” from the menu. Next, we locate our optical drive, right-click on it and click on “Uninstall device.” Later a new confirmation dialog box will appear so we select “Uninstall”.
Once eliminated, we must restart the computer and with it the default driver should install automatically. After the driver is installed, we check to see if the problem has been resolved.
Check Policy Editor settings
If the CD / DVD autostart does not work it may also be due to a misconfiguration of the Local Group Policy Editor. In order to enable it, we must press the keyboard shortcut “Windows + R” to open the “Run” dialog box. Here we write gpedit.msc and press Enter or the “OK” button.
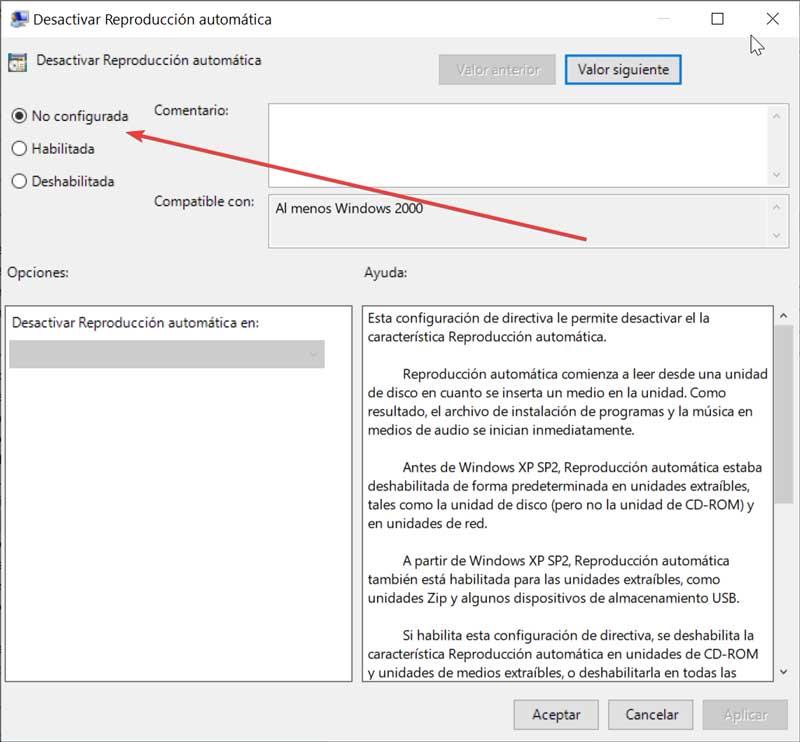
Next, in the left panel we select “User Configuration” and “Administrative Templates”. Then we click on “Windows Components” and on “Autoplay Directives”. Now, we double-click on the “Deactivate automatic playback” section.
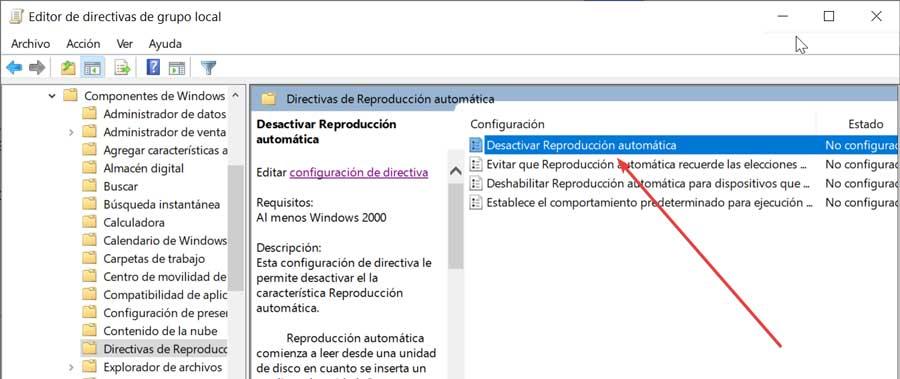
This will open a new window, where we must choose the “Not configured” option. Finally, click on “Apply” and “OK” to save the changes. Once this is done, the autoplay feature should be enabled and it will start working again.
Verify that it is not an antivirus problem
Another cause for which we can have problems with the PC’s autostart is due to our antivirus. Sometimes, to protect the device from malware, some of these softwares tend to disable autoplay function. In the event that our disk does not contain any malware, we can deactivate this automatic protection function of our antivirus and check if this is the reason for the problem.
We can also try to temporarily disable the antivirus, or if the problem persists, choose to uninstall it. If this solves the problem, we will have already verified the origin of the problem and we can do without the antivirus in question, as we can continue to be protected by Windows Defender, if it interferes with the automatic startup of the CD / DVD.
Monitors that the hardware discovery service is active
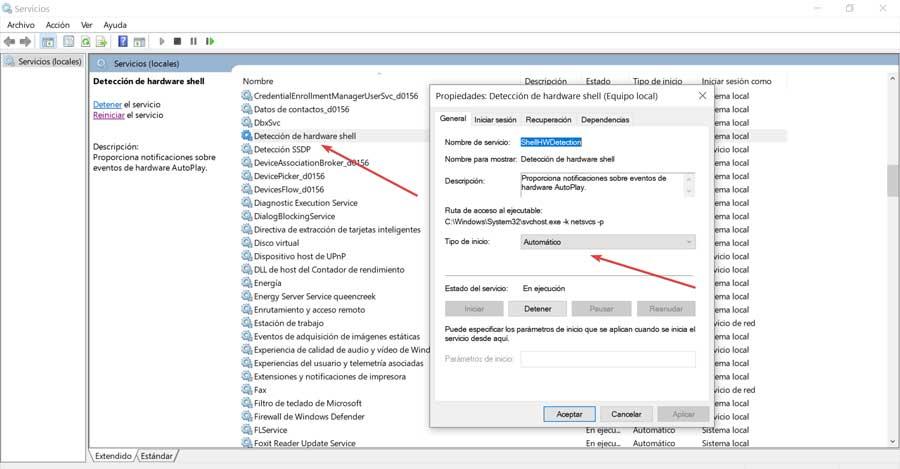
In the event that the Shell Hardware Detection service is not running, it may be a possible cause of the autoplay problem. To enable this service we must press the shortcut «Windows + R», write services.msc and press Enter or click the “OK” button.
Once the Services window opens, we must look for the option “Shell hardware detection” and double-click on this entry. Now we set the “Startup Type” to Automatic and in case the service is not running, we click Start. Finally, we press «Apply» and «OK» to save the changes.
Once this is done, the service should be enabled and the autostart issue should be permanently resolved.
Modify the Registry as a last option
The last option we have available to solve the problem of automatic reproduction of the CD / DVD, is that it is related to the registry, so we can solve it by changing a single value. Before, we must bear in mind that any unwanted change in the Registry can cause instability problems in Windows, so we must use it with caution and under the responsibility of each user.
To access the Registry Editor, we press the keyboard shortcut “Windows + R”, we type regedit and press Enter or click on the “OK” button. Later we navigate to the route:
HKEY_LOCAL_MACHINE / Software / Microsoft / Windows / CurrentVersion / Policies / Explorer

Right click on the Explorer folder and select «New» and «DWORD Value (32 bits)». We set as name NoDriveTypeAutoRun and in its data value 00000091.
Once this is done, we close the Registry Editor, restart the computer and verify if the problem has been solved.