For example, there may be some kind of problem in the power settings that we have set before. Likewise, it may be the case that some of the hardware components that we have installed on the PC are the culprits of all this. In addition, we must take into consideration that when turning off or restart windows there are many configurable options behind it all. But do not worry, we are going to review the most common points to solve all this that we are telling you and that the equipment does not turn on by itself.
Troubleshoot the computer’s power failure
The inconveniences that this process of automatic ignition to which we refer, is something that we should not allow. To begin with, there is a completely useless energy consumption that does not benefit anyone. At the same time, certain processes may occur or run in the background that we do not want to start without our consent. To all this, we can add the scare that we can get in the middle of the night if the computer is nearby and starts up by itself.
Locate the faulty hardware components
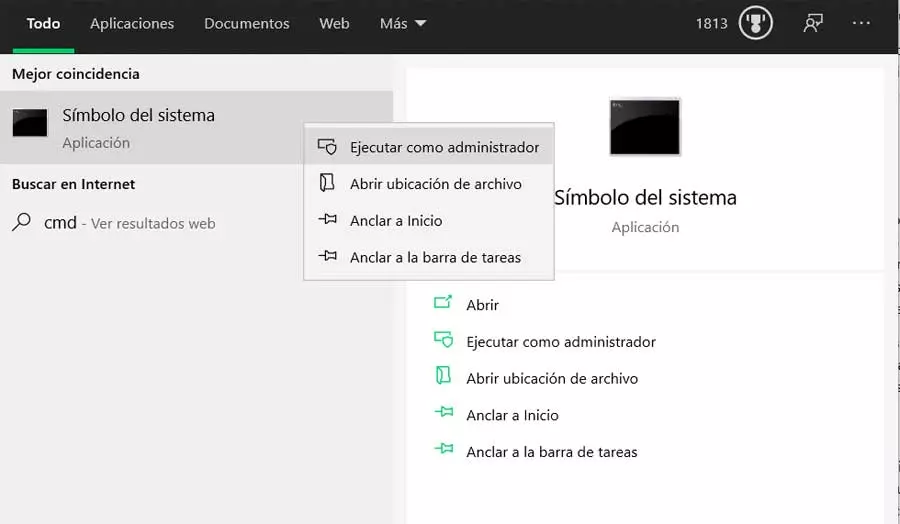
Between this point, the first thing we are going to do is take a look at what component or components may have put our computer into operation. This is something we can accomplish by opening a command prompt window with administrator permissions, something we accomplish by typing cmd in the search box.
Next, we execute the following commands in the window that appears:
powercfg -lastwake powercfg –devicequery wake_armed
It is worth mentioning that the first of them lets us see the last device I can run the equipment. Meanwhile the second shows a list with the devices that can activate the Windows computer to check the cause that it turns on only because of the hardware.

Disable fast system startup
At the same time we must bear in mind that not only the hardware that we have installed in the PC can be the culprit of all this. It may be the case that some type of configuration or parameter activated in the operating system is responsible for the failure. For example, this can be given by the start mode that we will have configured in Windows.
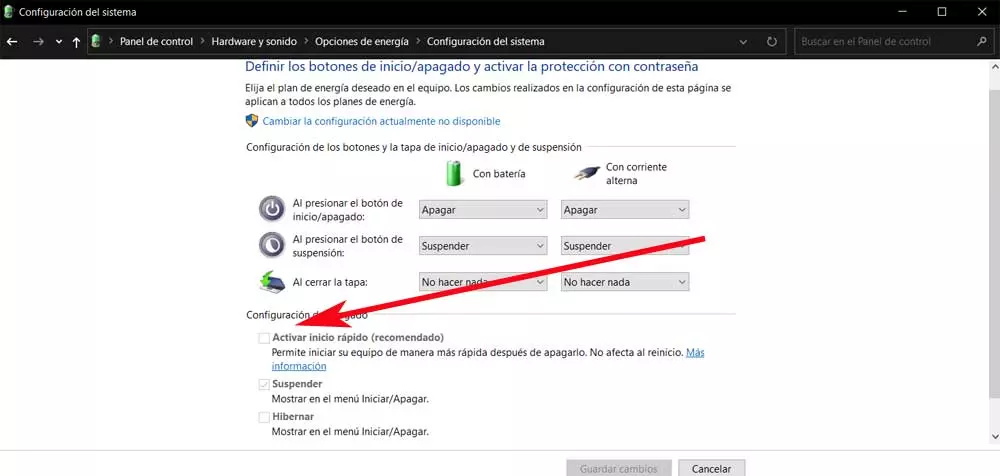
What we should know here is that Microsoft software offers us, in order to save time, a faster startup mode. This is something that allows us to speed up the process of starting the computer, but it can also be the cause of this failure. Therefore, below, we are going to show you the easiest way to disable this quick start that we are talking about. It should be noted that this mode does not completely turn off the PC, so it can lead to an automatic start. To do this we click on the battery icon on the taskbar to select Power Options.
In the window that opens, in the left panel, click on choosing the behavior of the Start / Shutdown buttons. then here we will see that the option of Enable quick start, which we should uncheck.
Remove wake-up timers
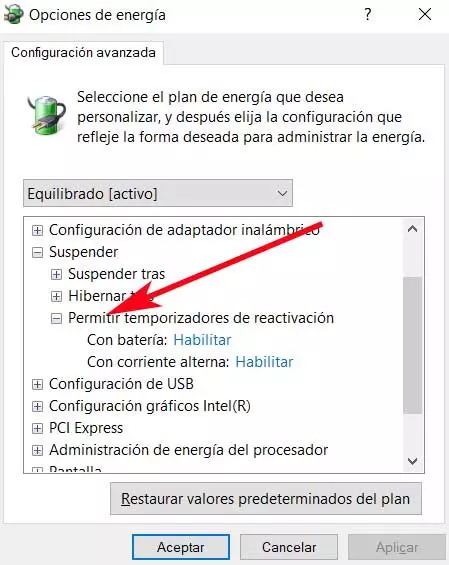
Another function that we do not pay too much attention to and that can cause the PC to fail are the action timers. Here we mean a task scheduled at a specific time that ensures that Windows turns on by itself. To solve the problem send the configuration of these, we go back into the energy options mentioned before.
In this case, in the left panel, we click on the link that says Change the frequency with which the computer goes into sleep. Next, we click on Change advanced power settings, which brings us to a new small window. In this we display the suspension list, and we can already see the option of commented timers. So now we only have to deactivate them definitively to fix the bug.
Eliminate automatic system reboot
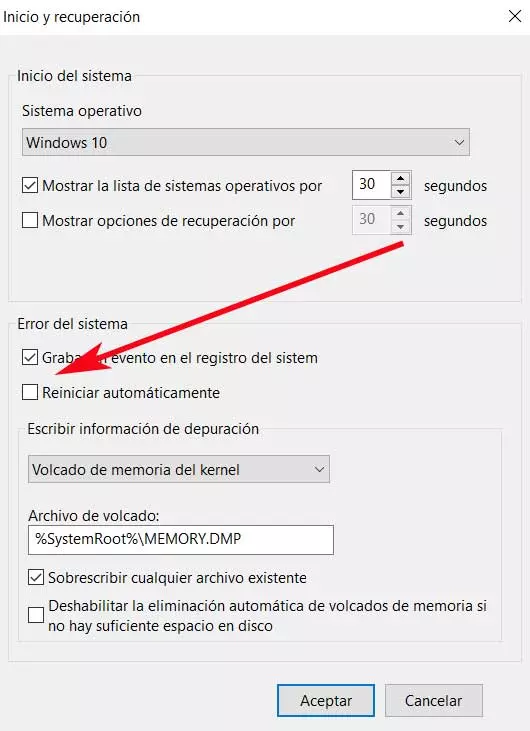
Along these same lines, we also want to talk about other functionality that can sometimes be very useful, but not now. This is a functionality that by default is activated by i if the PC fails. Specifically, what it does in this case is that the system restarts itself. What we are going to do now is deactivate this automatic restart, for which we use the key combination Win + R. In the execution box we type the following:
sysdm.cpl
In the window that appears, we go to the Advanced Options / Settings tab in the Startup and recovery section. We go to another new window in which we already have the possibility to uncheck the box Reboot automatically.
Limit power on by keyboard, mouse, and network
There are several devices that we generally have connected to our computer. But if there are two that are especially important, it is worth highlighting both the keyboard and the mouse. However, it must be borne in mind that these have the ability to put our PC into operation with a simple movement. However minimal, these elements can cause the PC to start up on its own or without our realizing it.
Therefore, what we can do in this sense is to prevent these hardware components from behaving in that way. We will achieve this through the device manager that we can access by right-clicking on it. start menu. Here we have to locate the keyboard input on the one hand and the mouse input on the other and right-click to access their properties. In the window that appears, we only have to go to the tab called power management and uncheck the Allow this device to reactivate the computer box.
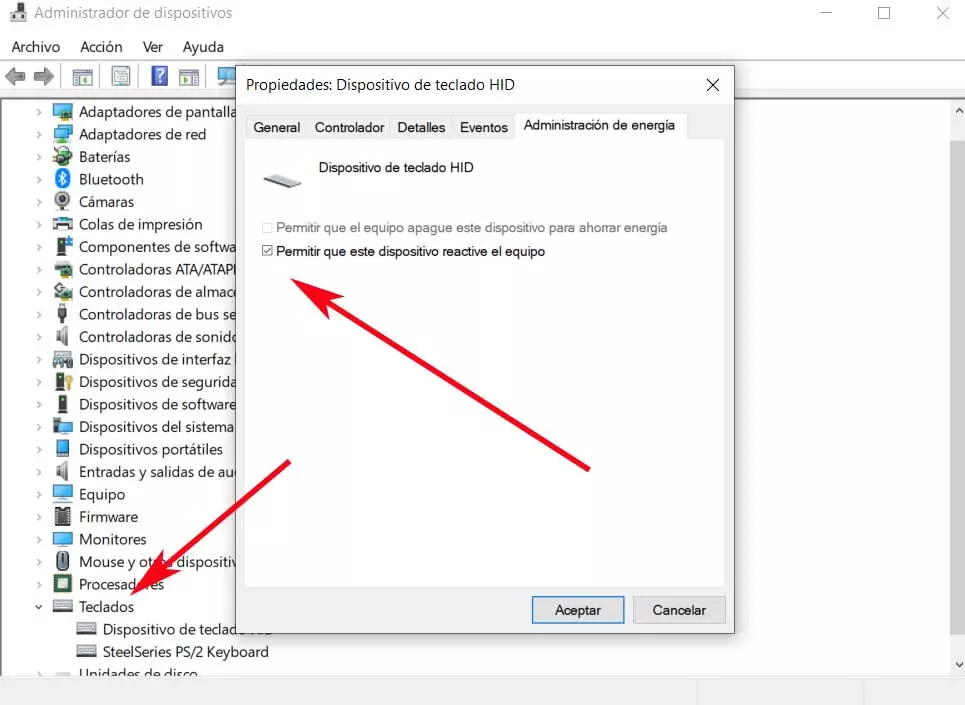
Keep in mind that this same process will have to be carried out on both devices, the mouse and the keyboard. However, the same can be produced by the function Wake On Lan if we have Windows connected to a network. It may be the case that Windows turns on by itself when another computer needs to communicate or exchange data. To avoid this, as before and from the Device Manager, now we access the properties of the network card in the Power Management tab, we uncheck the Allow this device to reactivate the equipment box.
Prevent startup for an update
When we work on a Windows PC, we can set a series of active hours in which we do not want to be disturbed. But at the same time it is possible that an update has caused Windows to turn on the Pc to complete. Thus, Automatic Maintenance mode can make the system start at a set time. But this is something that, as you can imagine, we can avoid.
We type in the search box of the taskbar Security and maintenance, where we display the Maintenance section. At that time we can click on Change maintenance settings. Therefore, in the window that appears, we have the possibility to change the time in which this automatic maintenance is executed, or uncheck the box so that the computer does not start up by itself.