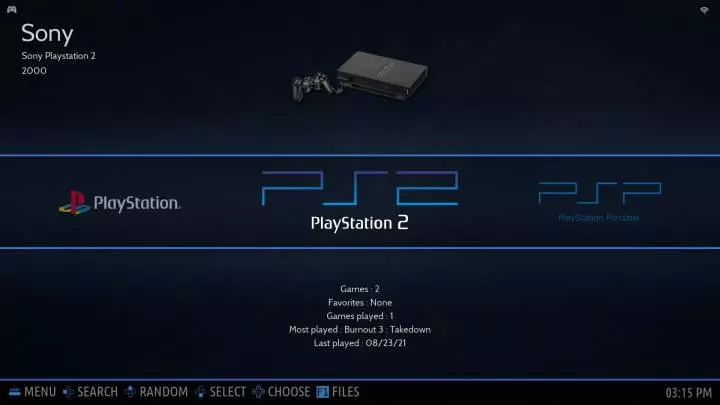
Using the arrows we can scroll through each of the consoles that is registered in this Linux, and using the accept button we will enter it to see all the games. Depending on the hardware of our PC or the device where we load it, we will be able to emulate some consoles or others, although we will almost certainly be able to move to the PS2 if the device, or PC, is relatively powerful.
The retro consoles that it is capable of emulating this Linux operating system are as follows:
- 3DO Interactive Multiplayer
- Adobe Flash Player
- Amiga AGA / CD32 / CDTV / OCS/ECS
- Amstrad CPC/GX4000
- Apple II / IIGS
- Atari 800 / 2600 / 5200 / 7800 / Jaguar / Lynx / ST
- Atomiswave
- Cannonball
- Cave Story
- Channel-F
- ColecoVision
- Commander Genius
- Commodore 64 / 128 / PET / Plus4 / VIC-20
- Daphne
- DevilutionX
- Two (x86)
- EasyRPG
- ECWolf
- Family Computer Disk System
- Final Burn Neo
- Fujistu FM-TOWNS
- Future Pinball
- Game and Watch
- Game Boy / Color / Advance / Super
- Luther
- mom
- Mattel Intellivision
- microsoft xbox
- Moonlight Embedded
- Mr Boom
- MSX 1 / 2 / 2+ / Turbo-R
- MUGEN
- NEC PC-8800 / PC-9800
- Neo-Geo / CD / Pocket / Pocket Color
- nintendo ds/3ds
- Nintendo 64
- NES – Nintendo Entertainment System
- nintendo gamecube
- nintendo wii
- Odyssey2
- OpenBOR
- PC Engine / CD
- PC FX
- Peak-8
- Pokemon-Mini
- PrBoom
- pygame
- satellaview
- ScummVM
- SdlPop
- Sega 32x / CD / Dreamcast / Game Gear / Master System / Megadrive
- Sega Model 2 / Model 3 / Naomi / Saturn / SG1000
- Sharp X1
- Sharp X68000
- Solarus
- Sonic Retro Engine
- Sony PlayStation 1 / 2 / 3
- sony playstation portable
- Steam
- SuFami Turbo
- Super Cassette Vision
- Super Disc System (MSU1)
- SNES – Super Nintendo Entertainment System
- supergrafx
- Thomson–MO/TO (Theodore)
- ICT-80
- TyrQuake
- Uzebox
- Vectrex
- VirtualBoy
- Watara Supervision
- Wii U
- Windows
- Wonder Swan / Color
- Xash3D-FWGS
- ZX81
- ZXSpectrum
This system offers users a large number of customization options, being able to adjust each of the aspects of the interface to our tastes and needs. In addition, it has internal optimizations that will allow us to emulate even the most demanding and complicated consoles in a stable way, as long as the hardware of the computer is capable of moving it.
Devices where to install it
The system or device where we want to install Batocera does not matter. Its developers offer all kinds of images to be able to launch this system on the platform that we want. Besides putting it to work on a 64 bit computerand on Apple Mac computers, we will also find it for the following platforms:
Hand consoles:
- Anbernic RG351P
- GPi Case
- Odroid Go Advance / Go Super
- PowkiddyRGB10
- RK2020
- game force
- RG552
Raspberry Pi:
- RPi 0W/WH
- RPi Zero 2
- Raspberry Pi 1 / 2 / 3 / 4 / 400
- Raspberry Pi CM3 / CM3+
Odroid microcomputers:
- C2
- XU3
- XU4
- XU4Q
- N2
- N2+
- C4
- gtking pro
Rock chip plates:
- Asus Tinkerboard
- ROCKPro64
- MQmaker MiQi
- NanoPi M4V2
- Rock960
Other devices:
- Amlogic S905/S905x
- Amlogic S905 tvbox gen3
- Libretech H5
- Khadas VIM2
- Khadas VIM3
- orangepi-pc
- Capcom Home Arcade
In addition, we also have specific versions to run this operating system on old computers with 32-bit processors, and even on computers with very old graphics cards, prior to the NVIDIA GTX 750, thanks to its Legacy versions.
How to start Batocera
It is possible that some of the platforms that we have just seen have a specific step that requires a change in the process. However, for most devices (such as the PC, or the Raspberry Pi), the process will be the same, and with it we will be able to have our own totally portable distro for retro games, on a USB or a card. memory
The first thing we will do is download the image that corresponds to the equipment where we want to start this system from the following link. We are going to use the 64-bit PC version in the example, which occupies around 2 GB. If we download the version for the Raspberry Pi (for example), it has a much smaller size, 1.2 GB. The download can be done by direct download, and also through the torrent network.
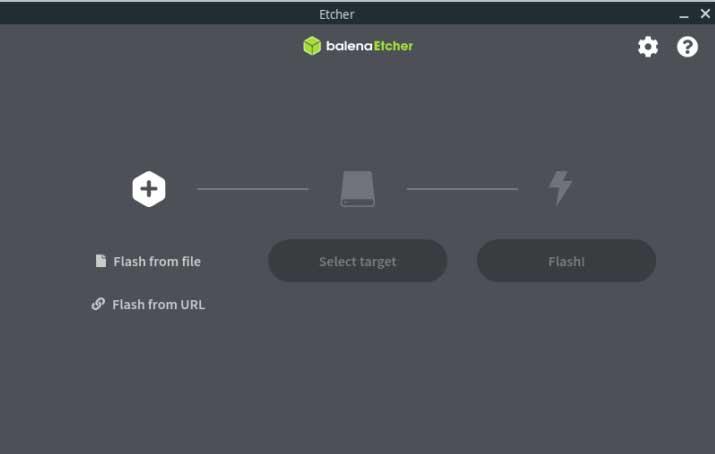
In addition to downloading the main image of the system, we will also need to use a well-known program called Etcher, which will allow us to save the file that we downloaded (in .tar.gz format) to the USB memory or SD card. This program is also free.
We recommend using a USB or an SD of at least 32 GB. We must bear in mind that this Linux distro will sometimes have to download updates and add-ons from the Internet, and if we have little space it will not be able to do so. In addition, we will need enough space to save all the games that we are going to emulate.
Once the file is downloaded, we connect the USB or memory card, open Etcher, select the Batocera file that we just downloaded, select the drive where we want to save it and click on the «Flash» to start the process. Now we only have to wait for the system copy to finish, a process that will take a few minutes, but not much more.
Once the image is recorded, we disconnect the USB or memory card from the computer and that’s it. We already have our Batocera ready to work. If it is a Raspberry Pi, we simply insert the card into the micro-computer and connect it to power. If we are going to use it on a PC, what we have to do is open the boot menu and select the drive from which we want to boot. It should be noted that Batocera is compatible with UEFI systems and with Secure Boot, so, initially, we should not have to make many changes to the system.
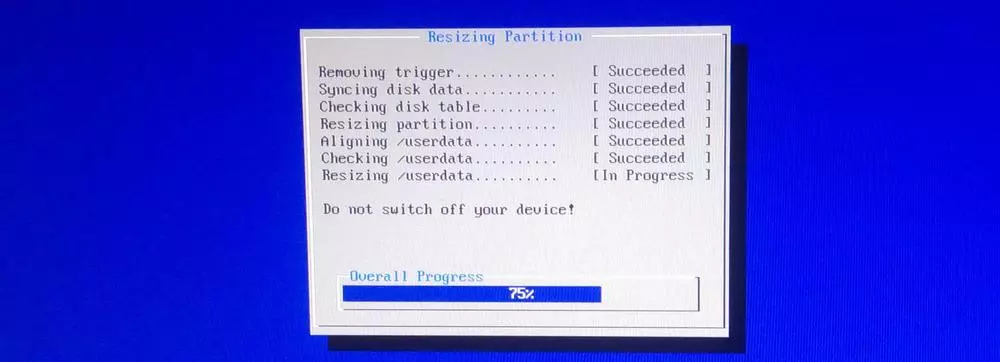
At the first boot, Batocera will expand partitions automatically to be able to use 100% of the drive space. This process is automatic and will take a few seconds.
When finished, it will restart again and we will have the system ready to work at 100%.
How to pass games and BIOS
We already have our retro computer assembled, but for now it hasn’t done much, since, by default, it only comes with the Linux system and the emulators, but it doesn’t come with BIOS or games for legal reasons. Therefore, we are the ones who must copy everything to this system.
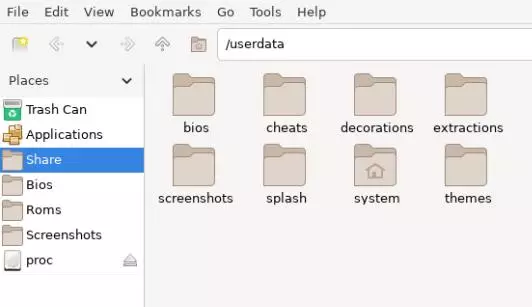
We can do this in various ways. We can use a USB or an external hard drive to stop them to the unit. We simply connect it to our Batocera and we will use the integrated file explorer, PCManFM, which we can launch using the F1 key on the keyboard to copy these roms to the internal Linux storage space. The BIOS to the BIOS folder, and the roms to the Roms folder, respecting, yes, the folder structure.
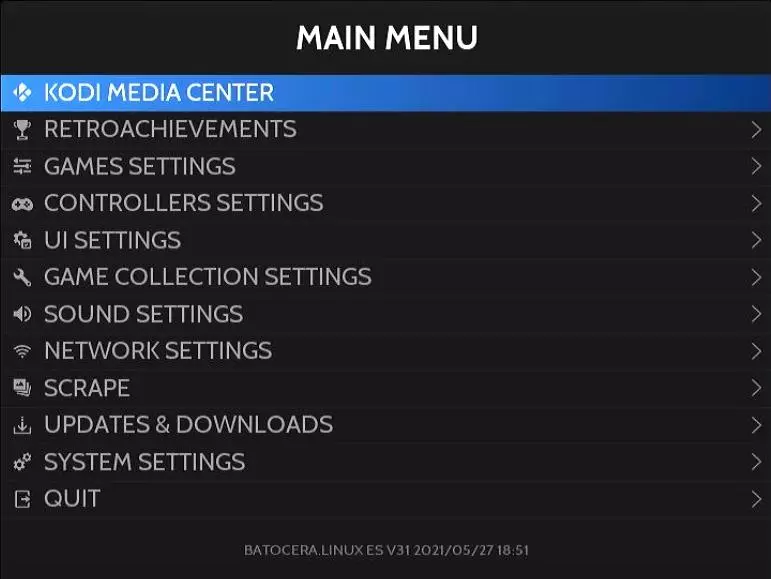
In addition, we will also be able to pass both the games and the BIOS over the network if we connect the Batocera to our router, either by cable or Wi-Fi. To do this, we must open the main menu of EmulationStation ES by holding down the START button (if we use a controller) or the space bar on the keyboard to enter the «Network Settings» or «Network Settings» section, depending on the language.
If we are connected by cable we can see that the connection is correct. But if we are going to connect via Wi-Fi we will have to check the “Enable Wi-Fi” option and enter our network data (SSID and password) to be able to connect to the local network.
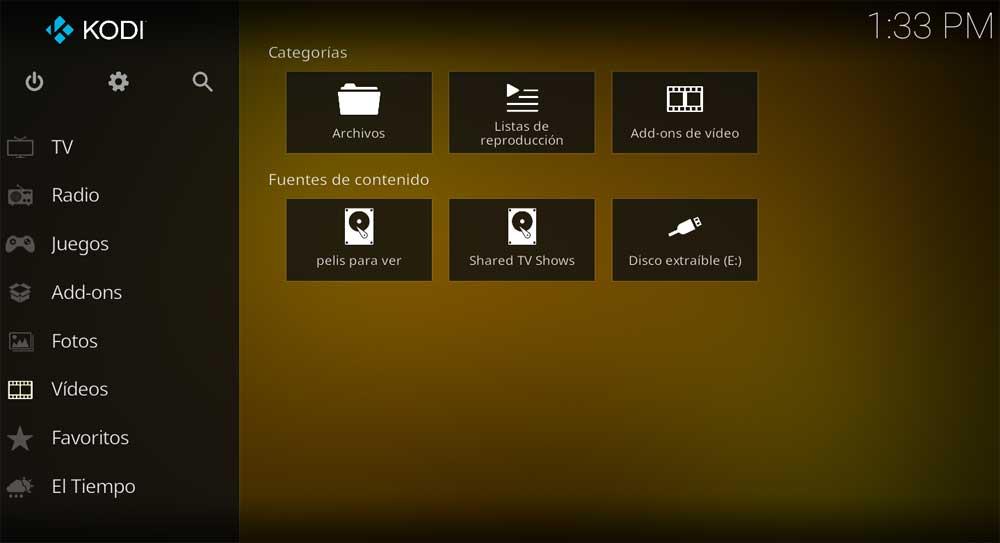
Once inside, the Batocera will appear as another network computer, and we can connect to it and pass the games through the SMB protocol.
It is important to note that the games will not appear as soon as you copy them to the system. We will have to restart our Batocera so that, at startup, it will index them and appear within their respective categories.