Check that it is not a software glitch
All users have the ability to check the battery status of your iPhone through Settings, and this is one of the reasons why many of them make the decision to change the battery of their device. However, this indicator may not show fully the battery status and the percentage it marks is often questionable. If you want to consult it on your iPhone, all you have to do is follow the following steps.
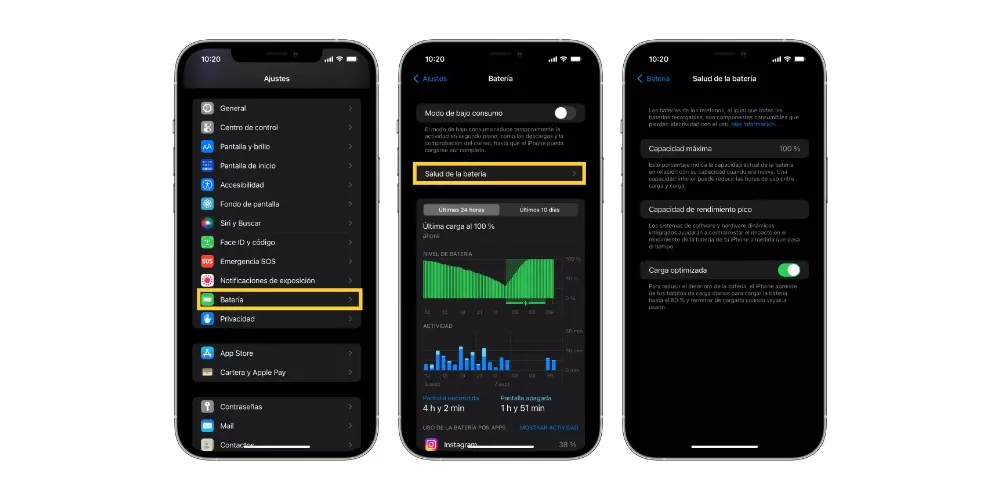
- Open the App of Settings on your iPhone.
- Click on “Battery”.
- Choose “Battery health».

First of all, you have to know that the percentage provided is the result of a calculation made internally by the device itself, so a software mismatch can make this data not totally reliable. For this reason, it is vital that if this metric has been the trigger for your decision to change the battery, you check that the data provided is really reliable.
For this there are two processes you can follow to ensure the status of your battery. The first one is to carry out a battery calibration, and the second consists of restore device and leave the phone as it was the day you took it out of the box, that is, without installing any backup on it. After performing both processes, you can rest assured that the percentage provided by the iPhone Settings app is correct.
Change the battery on your own
Carrying out a replacement of the iPhone battery manually is a process that entails several risks, so the first thing we want to tell you is that our recommendation is and will always be that this replacement be carried out by a professional, either in a Apple Store through the technical service of the Cupertino company or through a technical service authorized by Apple itself, since a series of knowledge is needed first, as well as sufficient skill and the necessary materials.
Do you know the risks it has?
Obviously, if even knowing that the most recommended thing is that this replacement is carried out by a qualified personnel, you continue with the idea of doing it yourself manually, you have to know, before starting, the risks that this repair implies for your iPhone. So at least you will be fully aware of what can happen after carrying out the replacement manually.
First of all, the moment your device is opened by a person not authorized by Apple to do so, it you will lose all warranty you may have, automatically. In addition, to be able to change the battery you have to get another copy and really, the batteries that Apple or its authorized technical services use for replacements are not for sale anywhere, so you have to know that the battery you put to the iPhone will always be a not original and not official battery, so its performance may be quite different from what you initially expected. In addition, during the replacement process, if you do not have sufficient knowledge, skills or appropriate materials, you can damage other parts of the device being able to leave the iPhone totally useless.
Where to buy the battery
If after knowing all the risks involved in changing the battery of your iPhone 6s manually, you continue with the idea of carrying out the replacement, the first thing you have to do is get a new battery. As we said, one of the handicaps of this process is that you will not be able to use the official Apple battery since it is not for sale.

However, there are many stores that provide good quality batteries so you can change the one in your iPhone 6s and give the device a new life. Obviously, the performance of these batteries will not be the same as those offered by Apple. Here is a link to Amazon where you can buy a battery that also comes with a kit to make things easier for you thanks to the tools it provides.
Steps to change the iPhone 6s battery
Before starting with the steps you have to follow to manually change the battery of your iPhone 6s, we want to remind you again, for the last time, to do a very deep reflection to really assess if it is worth changing the battery in this way. of your iPhone with all the risks that this entails. If after this you are still sure of it, then we leave you the steps you have to carry out.
- Turn off your iPhone.
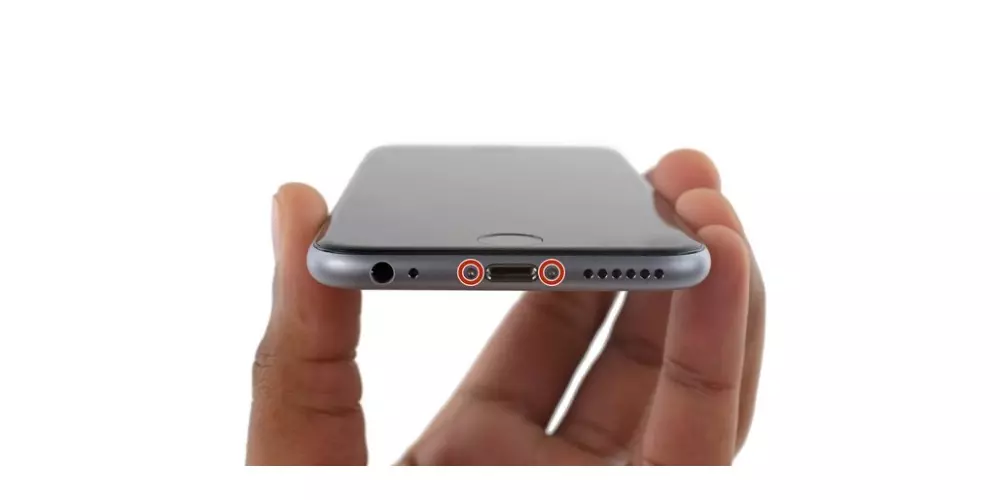
- Remove the two 3.4mm Pentalobe P2 screws near the Lightning connector on the bottom edge of the iPhone.
- Apply gentle heat to the bottom edge of the iPhone, this will soften the adhesive and make it easier to open.
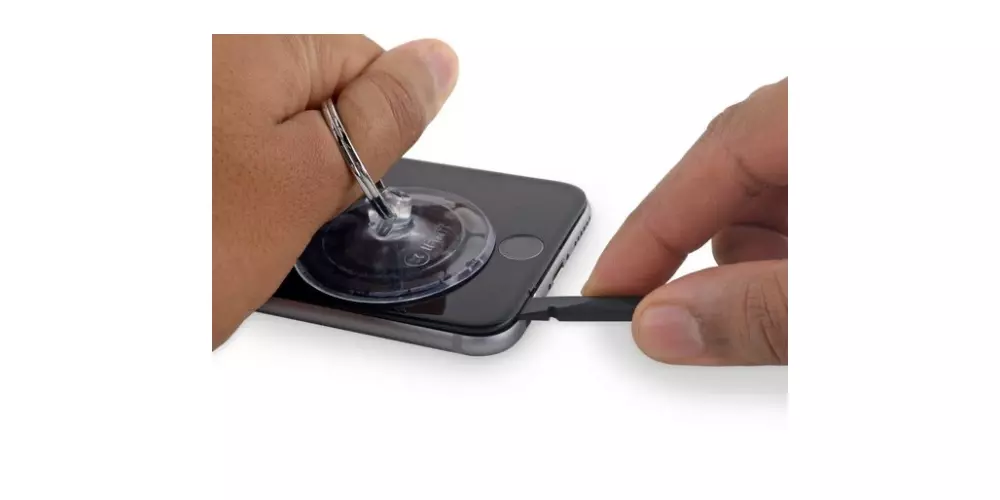
- Apply a suction cup to the lower left corner of the display assembly. Be very careful not to place the suction cup on the start button.
- Pull the suction cup upwards with firm and constant pressure to create a small space between the front panel and the back case.
- At the bottom of the iPhone, just above the headphone jack, there is a small notch. This is the safest place to pry open the phone. Place the flat edge of the spudger tool in this space.
- Twist the spudger to widen the gap between the front panel and the rest of the phone.
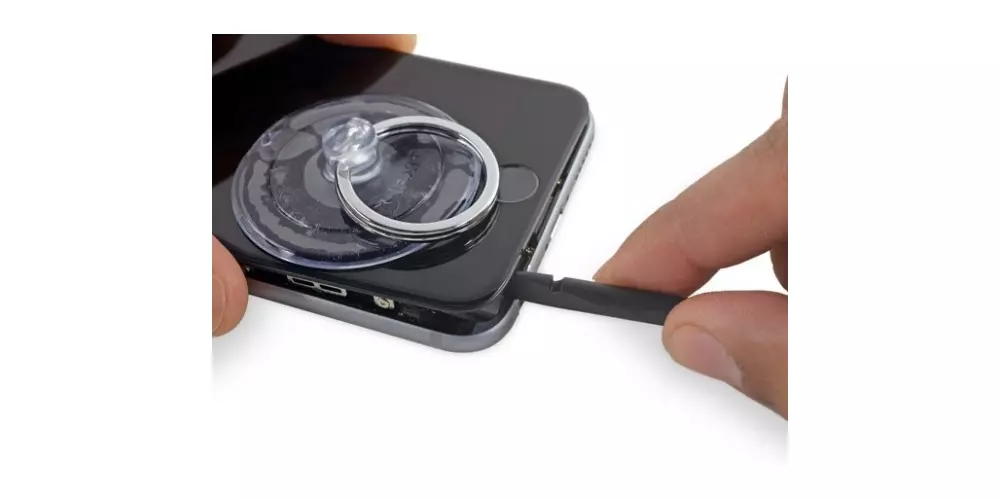
- Insert the flat end of the spudger into the left side of the phone, between the screen and the back case, and then slide it down the side of the phone to separate the adhesive and pop the clips.
- Remove the spudger and reinsert it at the bottom edge, where the open iPhone is already. Now slide it to the right, along the bottom edge.
- Slide the spudger all the way down the right side to further separate the adhesive and pop the clips off the screen.
- Use a suction cup to open the screen and remove all the adhesive.
- Pull up on the suction cup to remove the front panel.
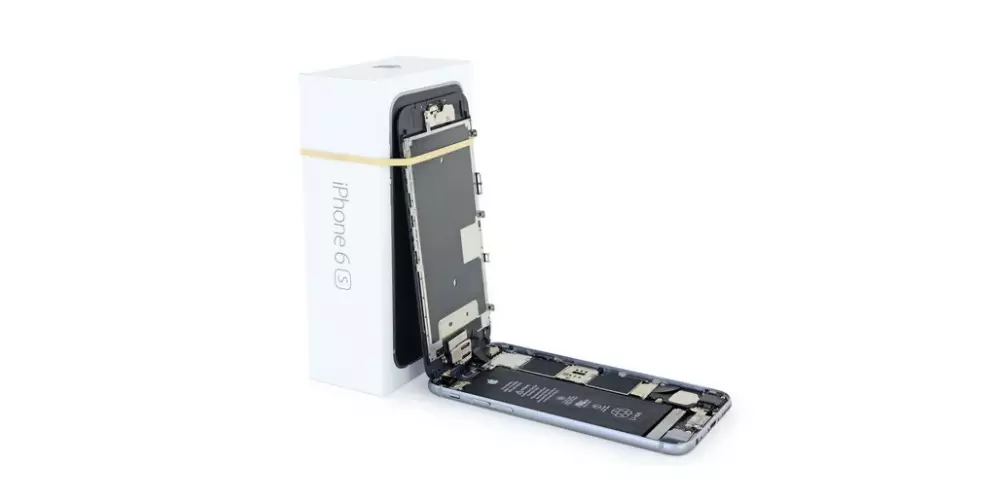
- Gently grasp the display assembly and pull it up to open the iPhone, using the clips at the top of the front panel as if they were a hinge.
- Open the screen at a 90º angle and tilt it against something to keep it supported while you are working with the device.
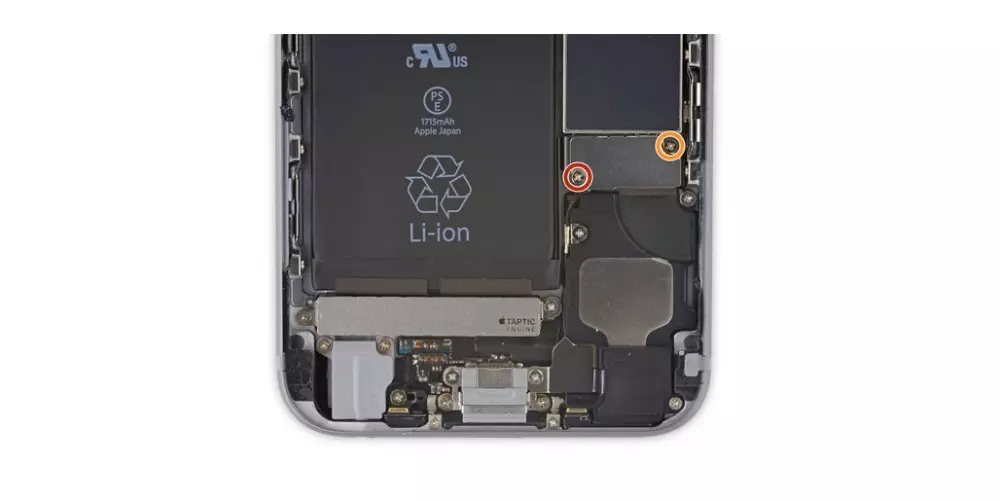
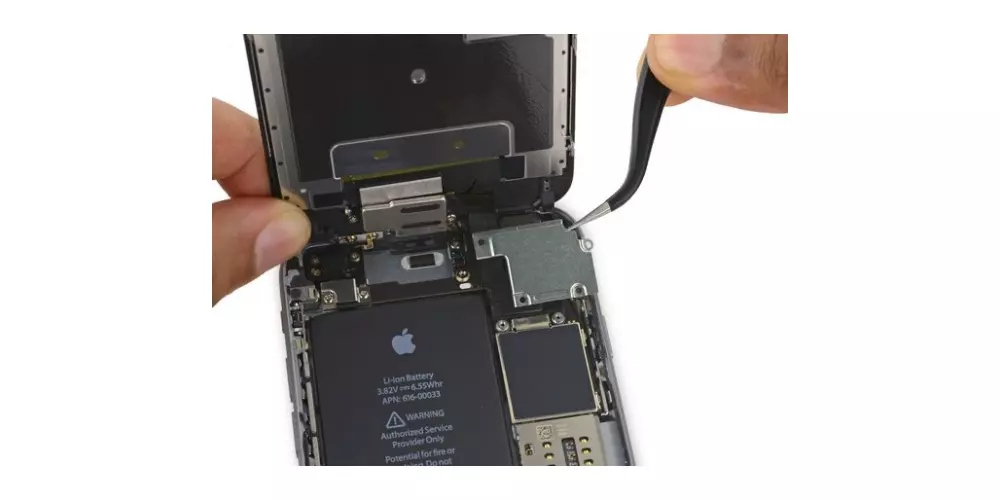
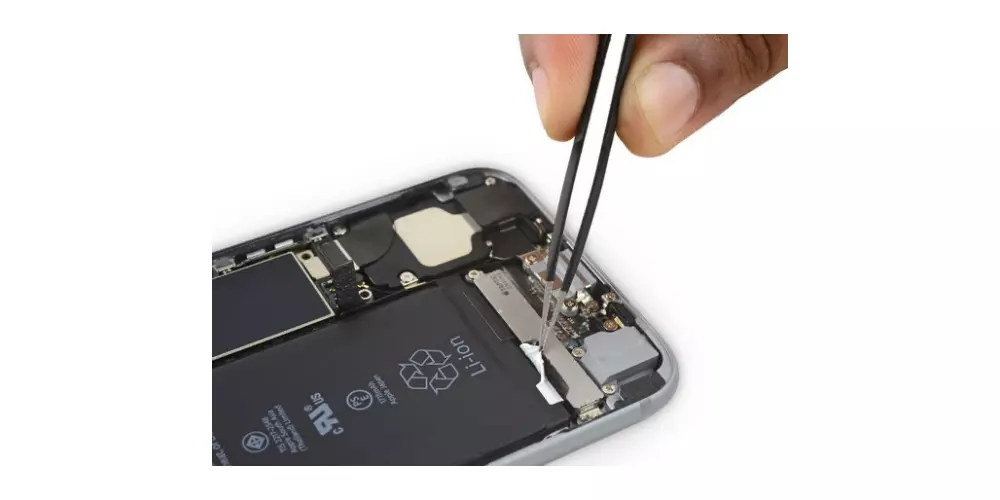
- Remove the two Phillips 000 screws that secure the battery connector bracket.
- Remove the battery connector bracket from the iPhone.
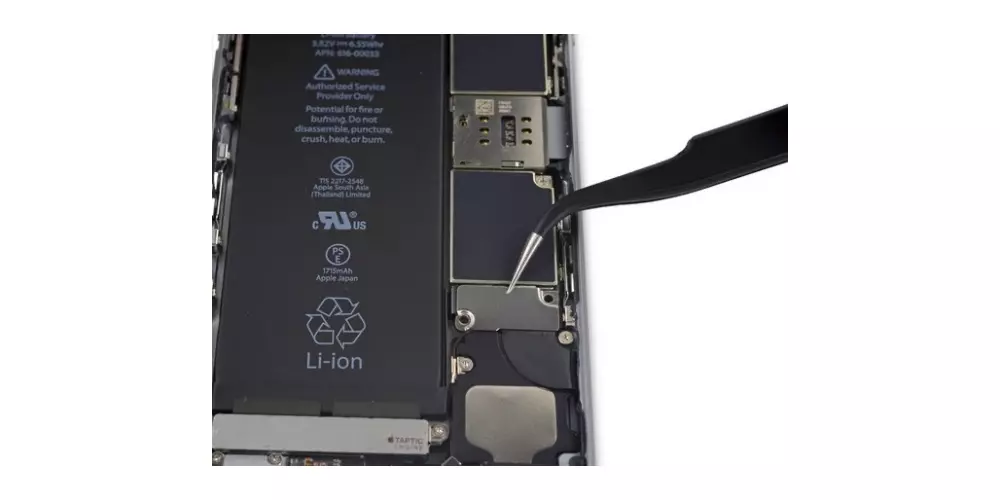
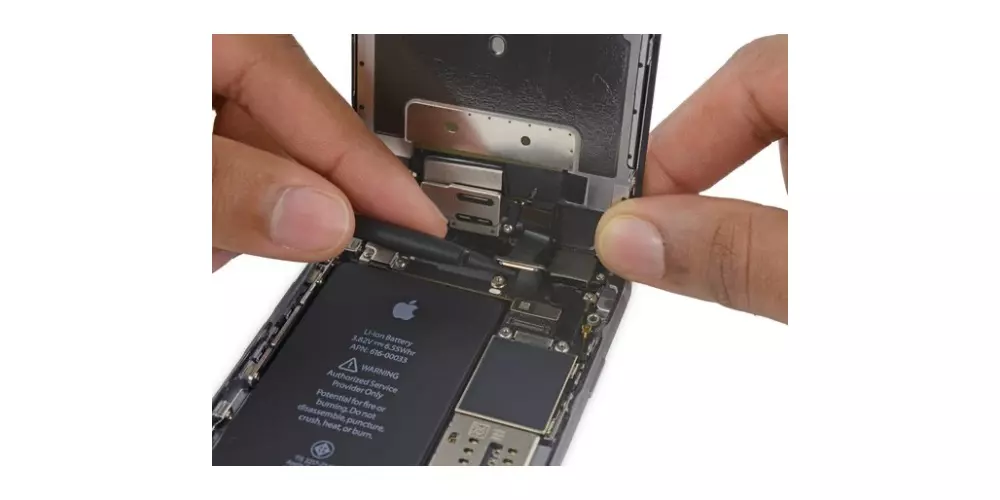
- Use the point of a spudger to disconnect the battery connector by prying up the logic board.
- Push the battery connector away from the motherboard until it stays clear of its socket, to avoid any accidental connection to the battery while you work.
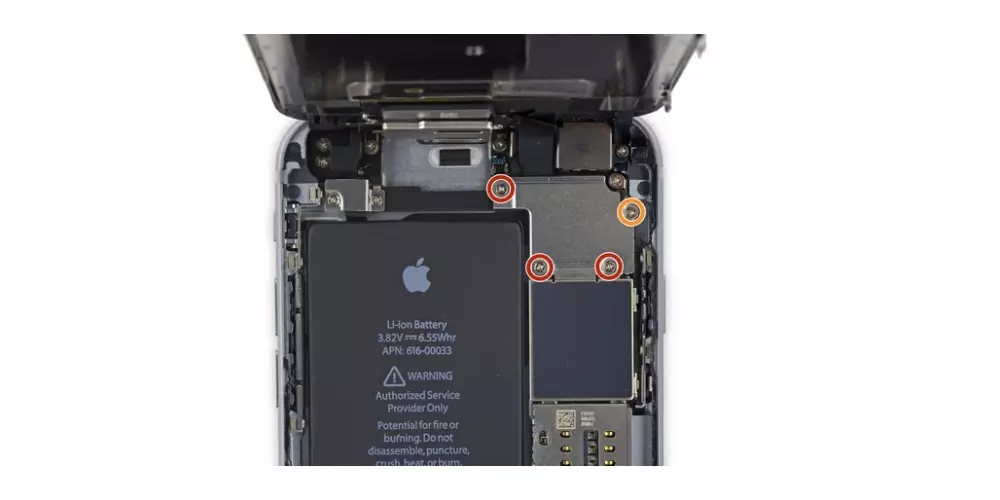
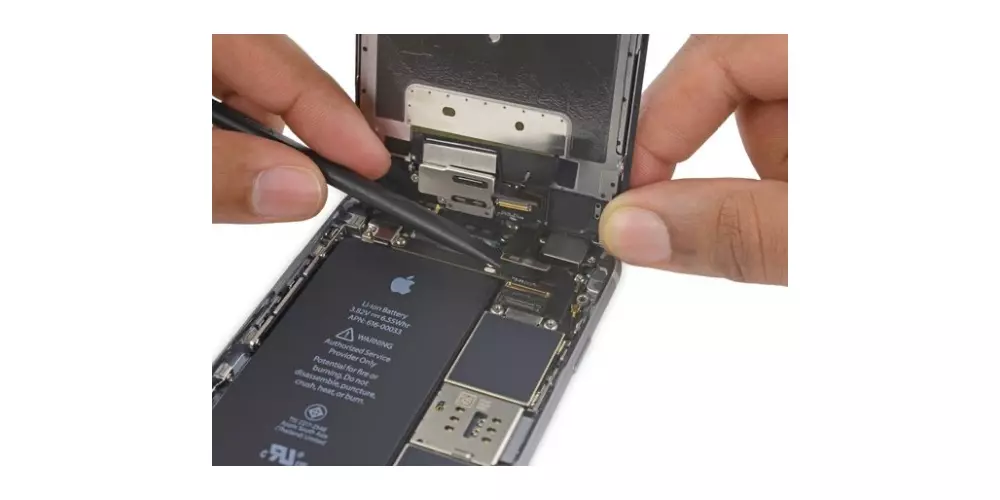
- Remove the four Phillips screws that secure the display cable bracket.
- Remove the display cable bracket.
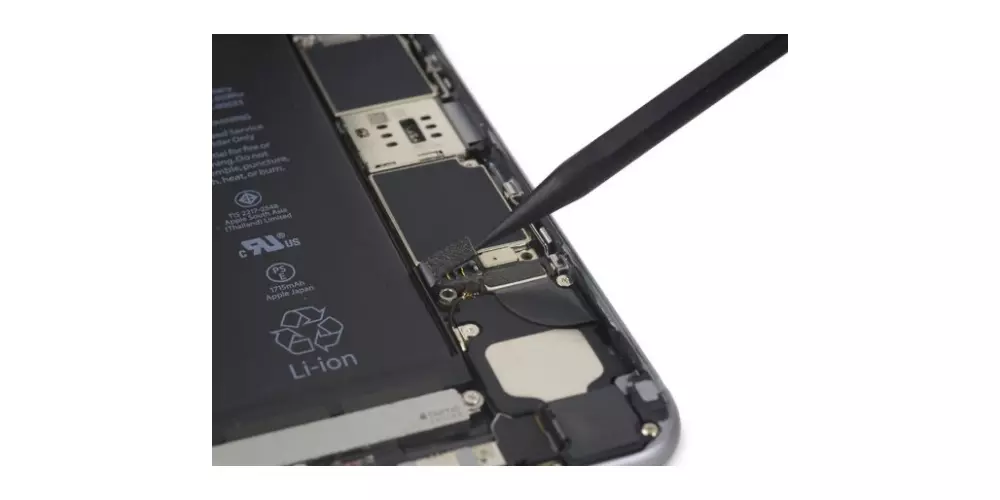
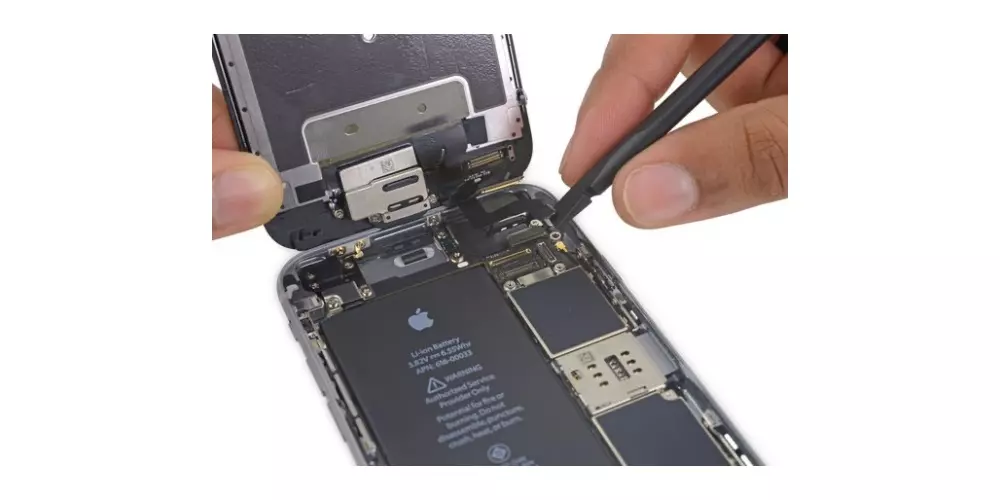
- Use the flat end of a spudger, or a fingernail failing that, to be able to disconnect the cable from the front flex chamber by prying up from the corresponding base on the logic board.
- With the flat end of a spudger, or again, failing that, a fingernail, disconnect the digitizer cable by prying up from the corresponding base on the logic board.
- Disconnect the display cable by prying it up from its socket on the logic board.
- Remove the display assembly.
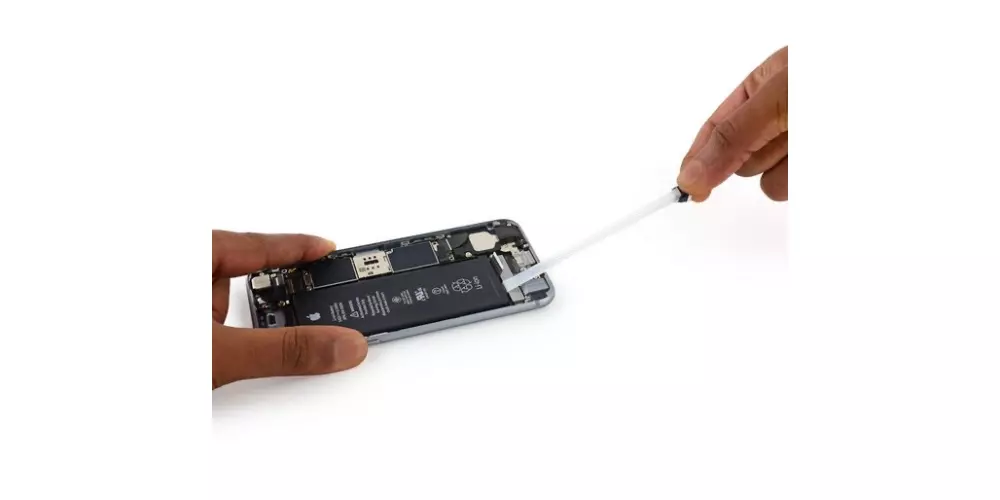
- Using tweezers, peel off the tips of the two adhesive strips along the bottom edge of the battery. You can also use your fingers very carefully.
- Very carefully and slowly, pull one of the adhesive tabs on the battery, towards the bottom of the iPhone. Do this continuously, keeping a constant tension on the strip until it slides between the battery and the back cover. Ideally, do it at an angle of 60º or less.
- Do the same process with the second strip.
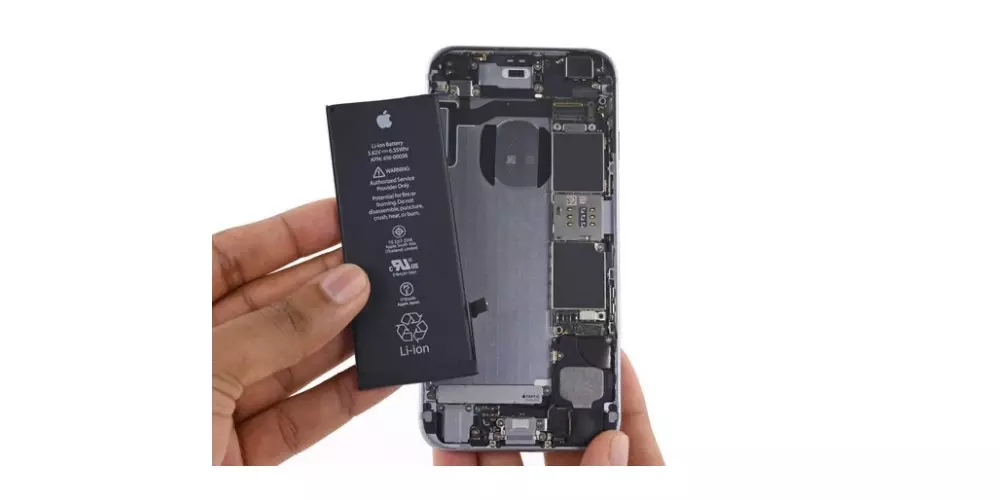
- Remove the battery.
- Do the whole process in reverse, with the new battery, to finish the process of replacing the battery of your iPhone 6s.