In this tutorial we are going to explain everything you need to do on your home router. Depending on the router you are using, it is likely that you do not have the same configuration options that we teach you, but you will be able to make the vast majority of these recommendations. The ideal thing in a home environment would be to be able to segment the network into VLANs and different subnets, control communication between the different subnets with a router / firewall, and even apply security policies on the switches when you go to connect via cable.
However, this type of routers / firewall and manageable switches with advanced security options are aimed at a field of small and medium-sized companies, and are generally much more expensive than domestic equipment, for this reason, we are going to stick to options of specific configuration that we can find in home routers.
General network settings
The ideal would be to have two Internet connections With its corresponding router, one connection will be dedicated specifically for work, and the other Internet connection will be dedicated for personal use of the Internet connection. In this way, we will not have personal and work teams “mixed” in the same network, in addition, we will have an Internet connection dedicated specifically for work, so we will have all the fiber optic bandwidth at our disposal. The negative part is that we will have to hire an additional Internet connection, generally the houses are prepared in the PAU to have a single Internet connection via FTTH and not several, so new wiring would have to be laid for the installation. We would also have to pay for two Internet connections, unless the company covers the cost of the additional Internet connection.
However, with an Internet connection and a router that allows you to create different networks (main and guest) we can do this without problems with a single Internet connection. The first thing we must do to ensure the communications we make while we telecommute, is split the main network into two networks. A network will be specifically dedicated to connecting teleworking equipment, such as a computer, laptop via WiFi or work smartphone. The second network will be specifically dedicated to connecting home devices, such as personal smartphones, Smart TVs, consoles, voice assistants and other devices with similar characteristics.
In the following examples we will use an AVM FRITZ! Box 7590 router, one of the best home routers for its hardware and for its complete FRITZ! OS operating system, which will provide us with a large number of configuration options, in addition, the German manufacturer has improved its firmware to focus also on telecommuting from home.
Wired network setup
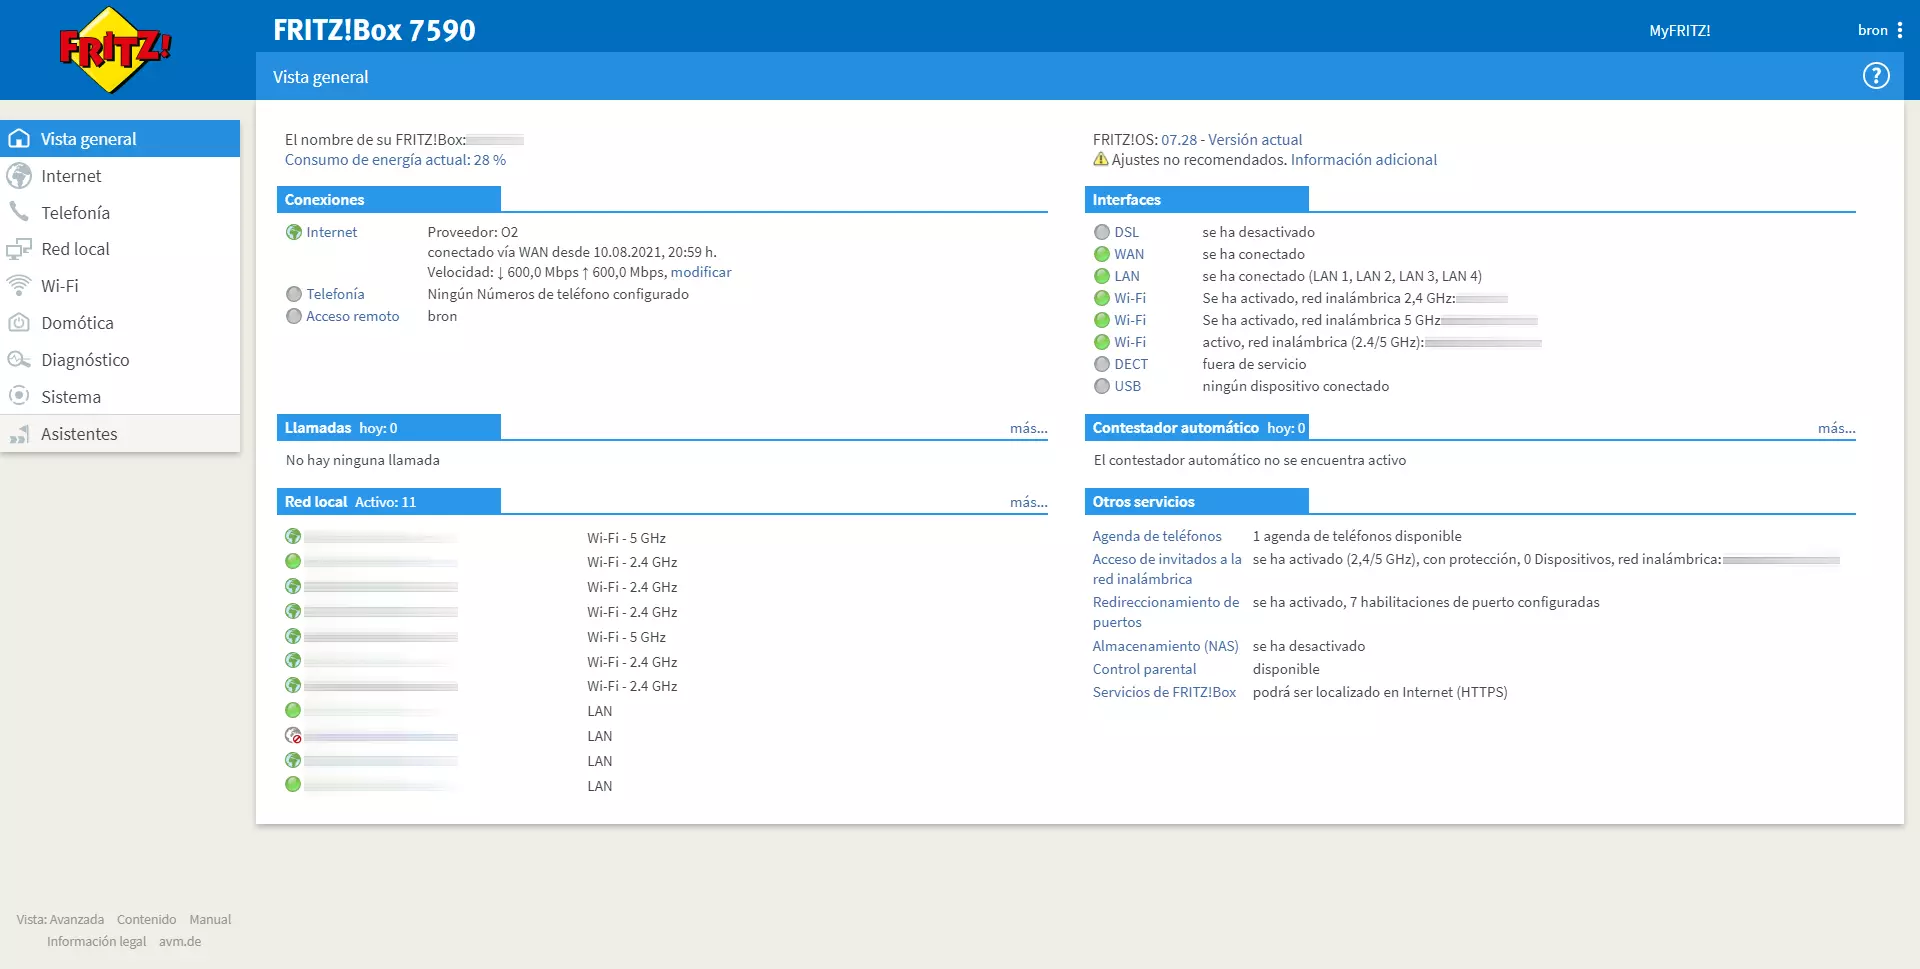
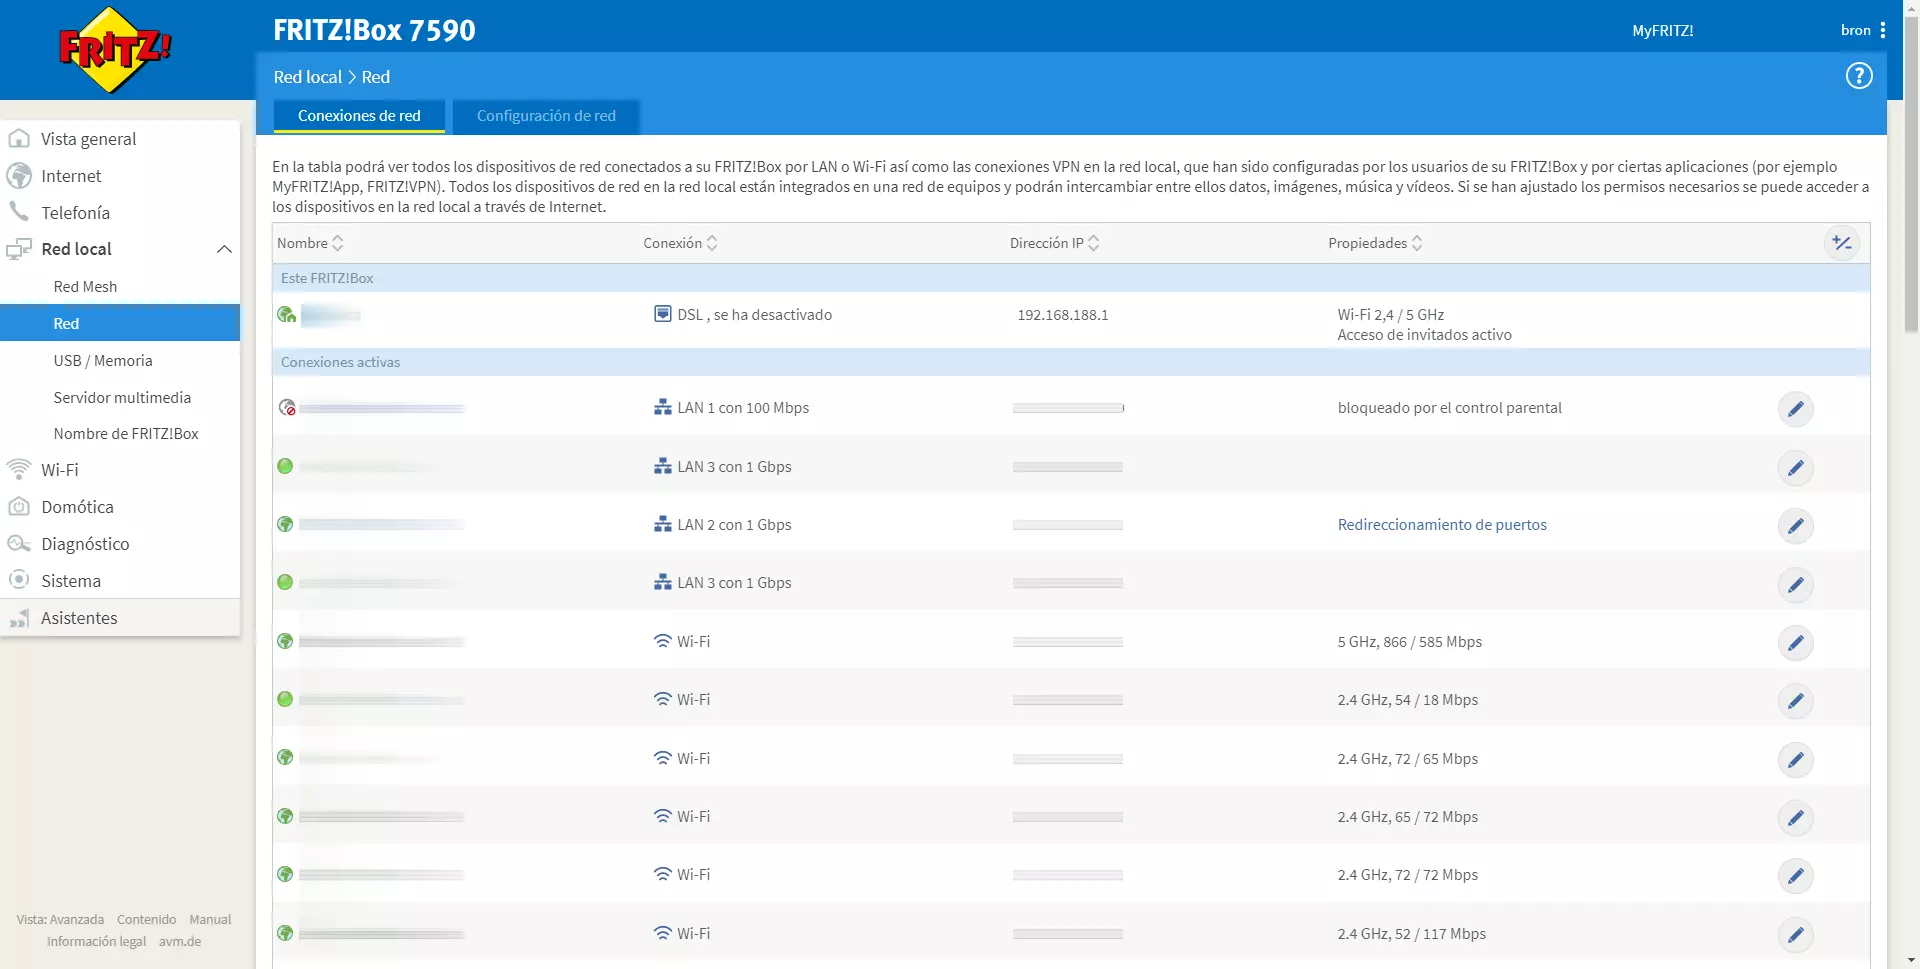
In the main menu of the router we can see all the devices that are connected, both from the main LAN and WiFi network, as well as from the guest network, both from the LAN and from the WIFi. A very important feature is that the FRITZ! Box routers allow you to create a subnet for LAN and WiFi separate from the main network, in this way, we will have a specific subnet for the main network where we will connect the teleworking equipment, and also a subnet of guests to connect the rest of the devices in our home.
In the section of “Local network / Network / Network connections»We will be able to see the status of each and every one of the devices connected to the home local network, here we will be able to control which devices are connected and even eject them so that they do not have access to the Internet or access to the home network, whether they are wired or wireless devices .
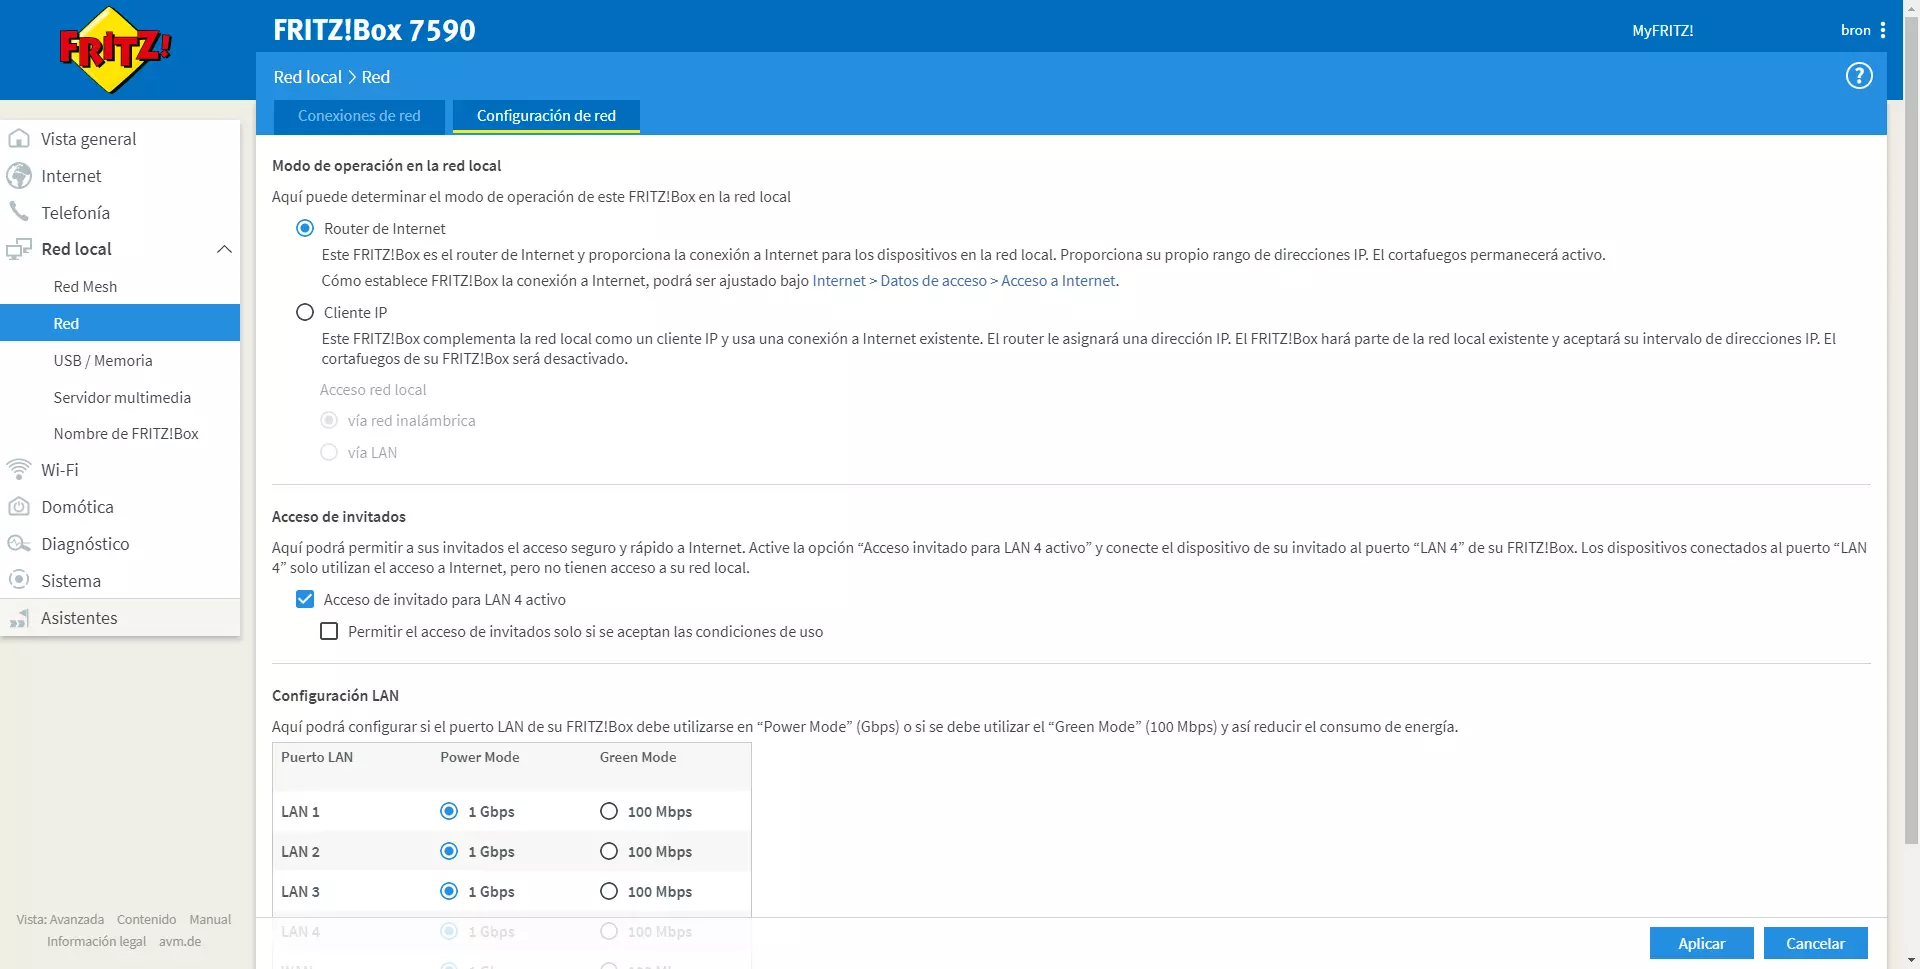
In the section of “Local network / Network / Network settings»Is where we can activate the« Guest access »for LAN port 4, all the devices that we connect via cable to this port will be located in the dedicated subnet specifically for guests. If you need to connect more than one device via cable to the router, then it is advisable to buy a 5 or 8 port unmanaged switch, depending on our needs we will have to buy one with more ports or fewer ports.
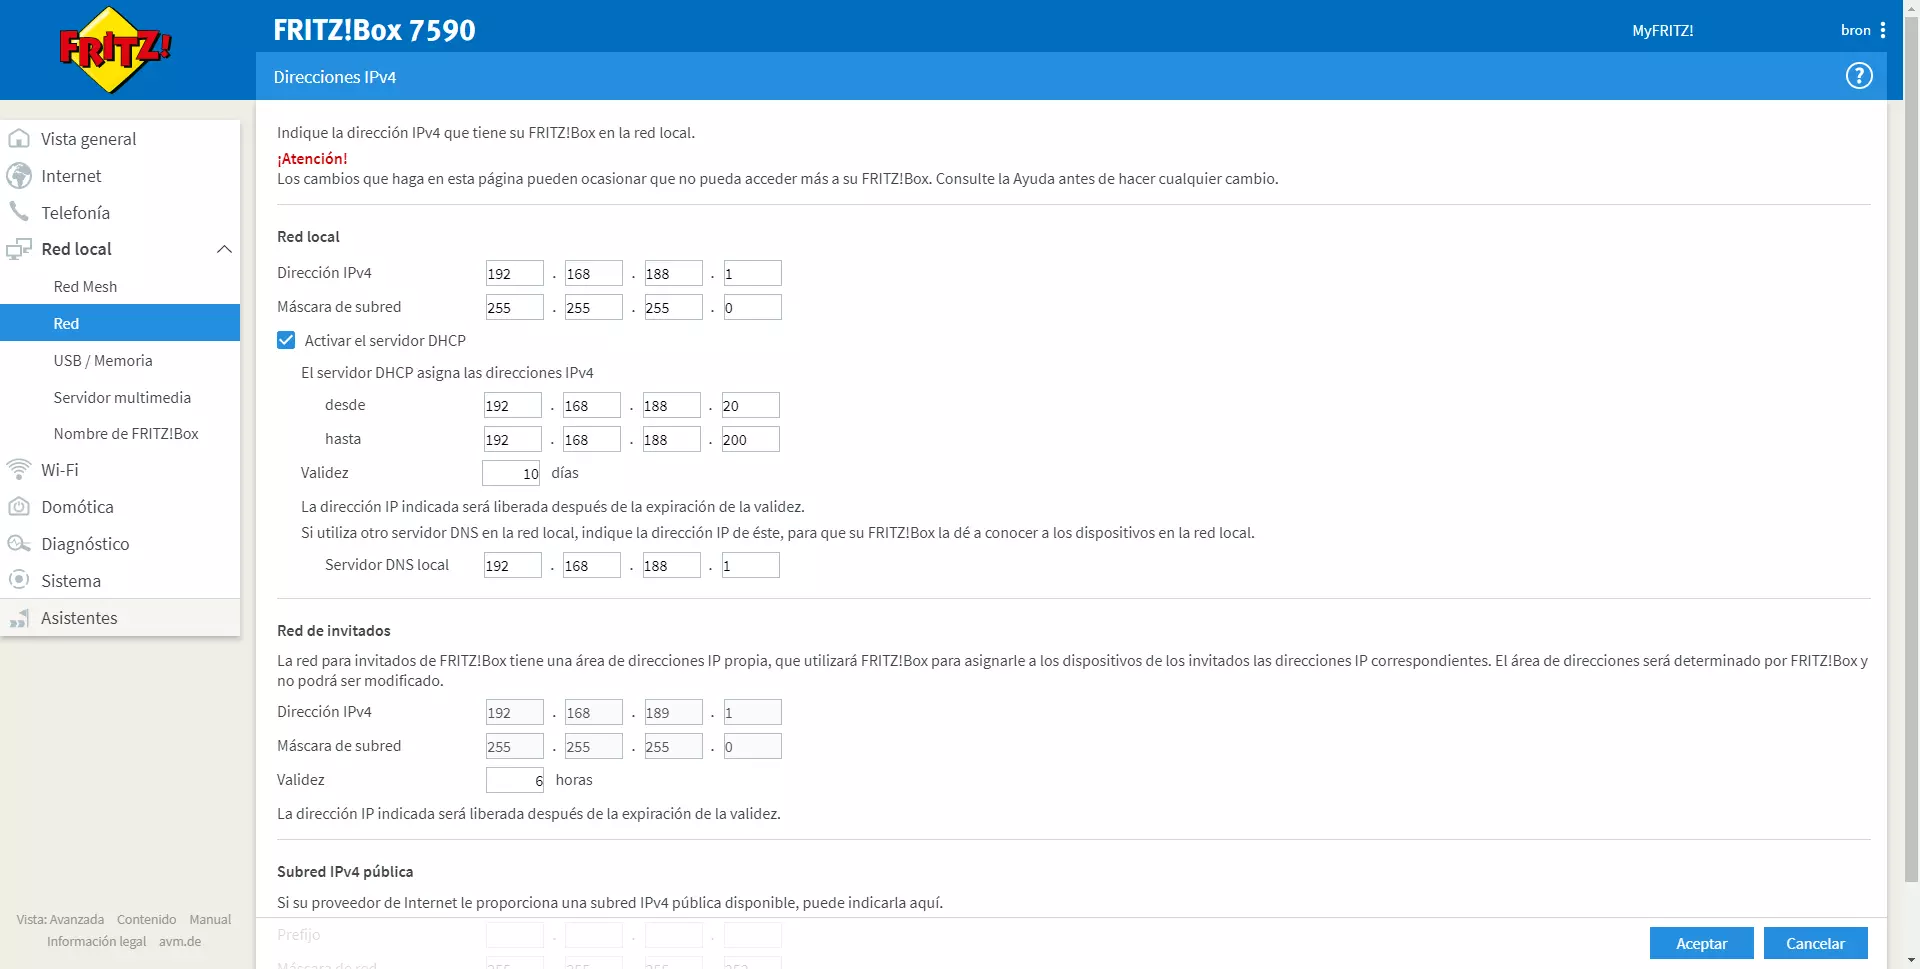
At the bottom of the previous menu we can click on the button «IPv4 addresses», this is where we will have the configuration of the main network, in our case it is the 192.168.188.0/24 subnet with its corresponding DHCP server. Just below we will have the default configuration of the guest WiFi network, which has a 192.168.189.0/24 subnet with its corresponding DHCP server.
All the computers that we connect to the main network will have an IP 192.168.188.X and the computers that we connect to the guest network (either via cable or WiFi) will have a 192.168.189.X network. Therefore, when we are going to connect the different devices in our home to the guest WiFi network, it is highly recommended to look at what IP address the router has provided, to make sure that we are in the correct subnet.
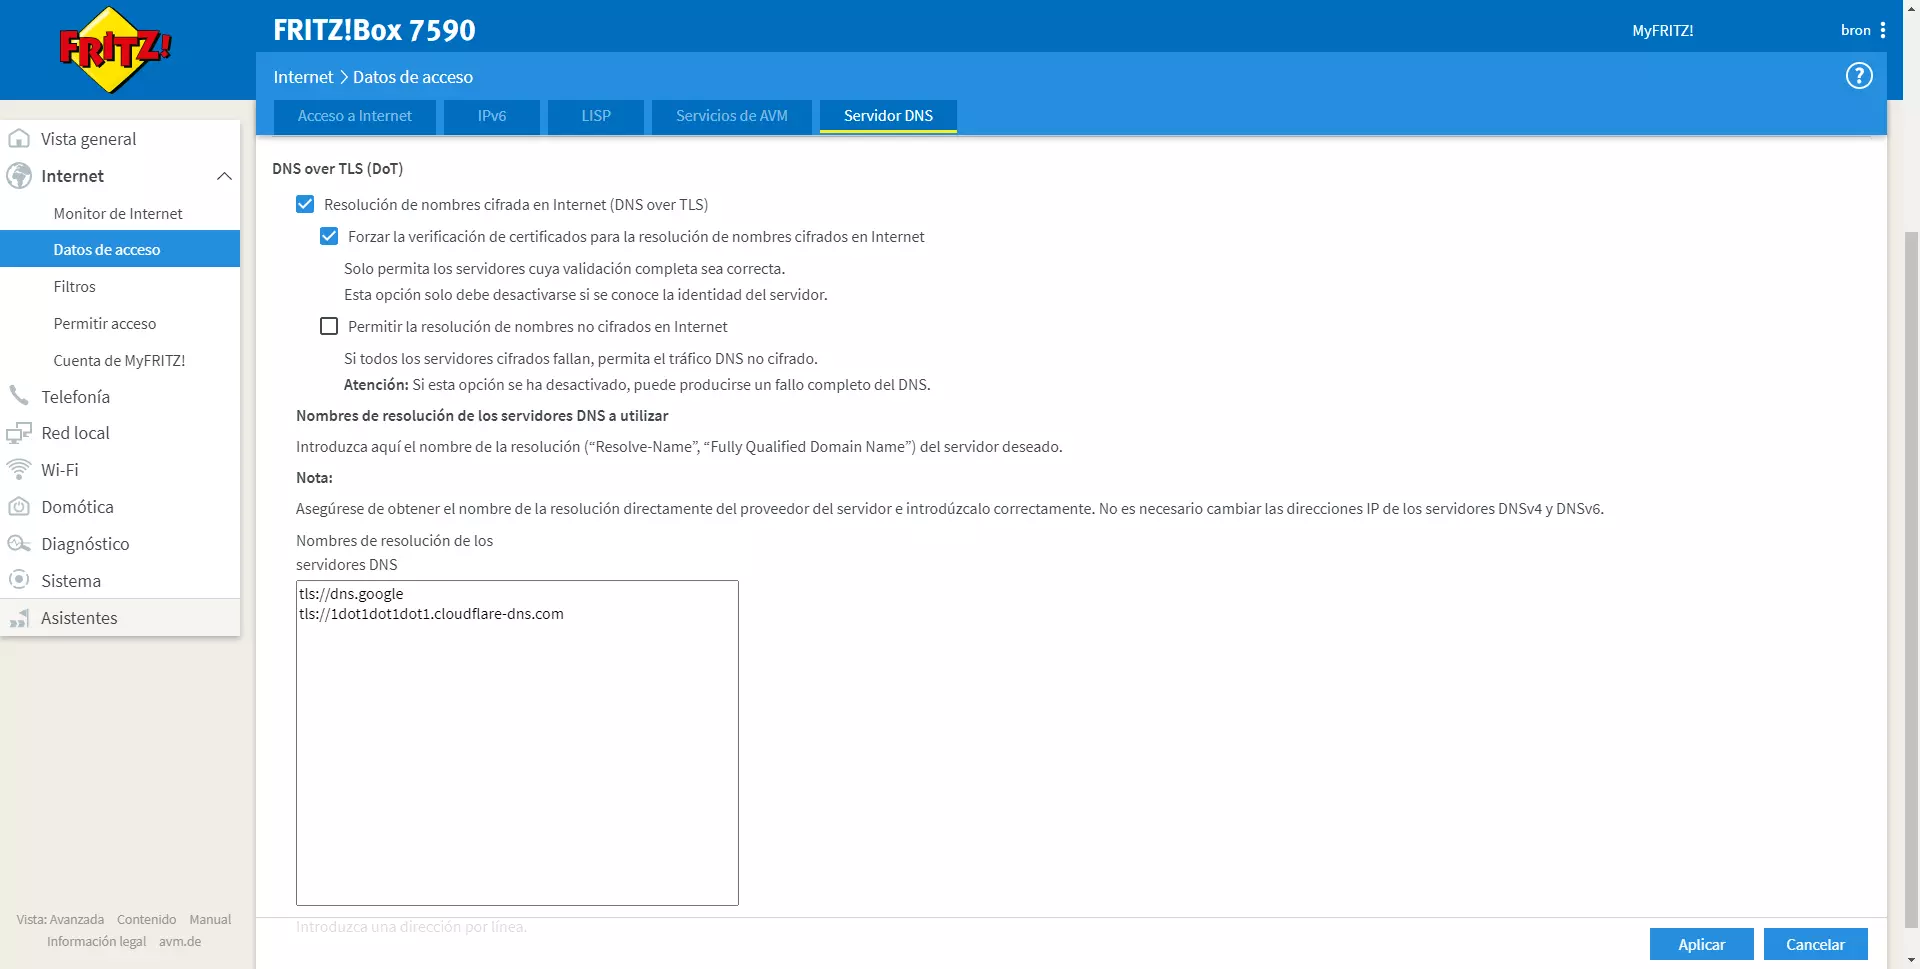
Another configuration that we must make to maintain our security and privacy when we browse the Internet is DNS over TLS, this configuration is reached through «Internet / Access Data / DNS Server«. This router supports the DoT standard, or also known as DNS over TLS, thanks to this protocol all the DNS requests that we make will be encrypted point to point, from our router to the DNS server that we define, in the example below you can see the Google and Cloudflare DNS servers.
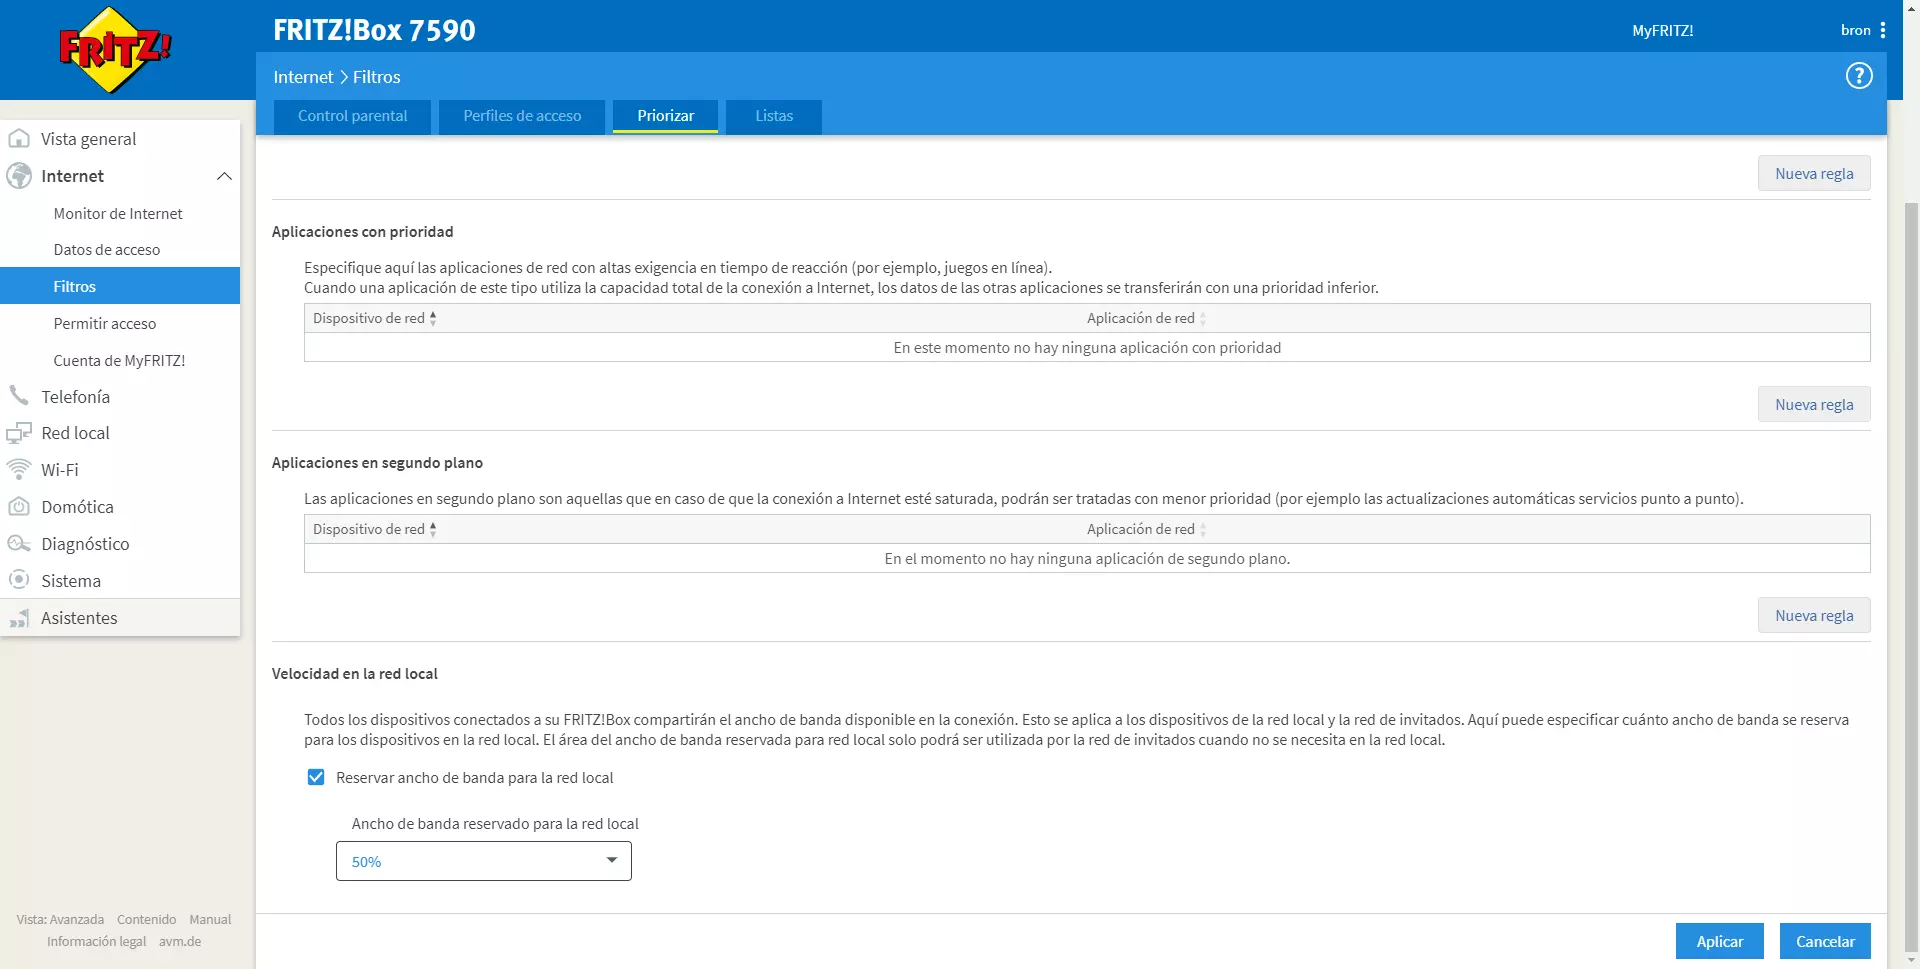
Other router configurations are in the «Internet / Filters / Prioritize«. In this menu we can configure different applications so that they have the highest priority, for example, VoIP calls, video calls with different programs or any other use that we make to work. Depending on the priority of these applications, we can place them in “Real time, priority or background”.
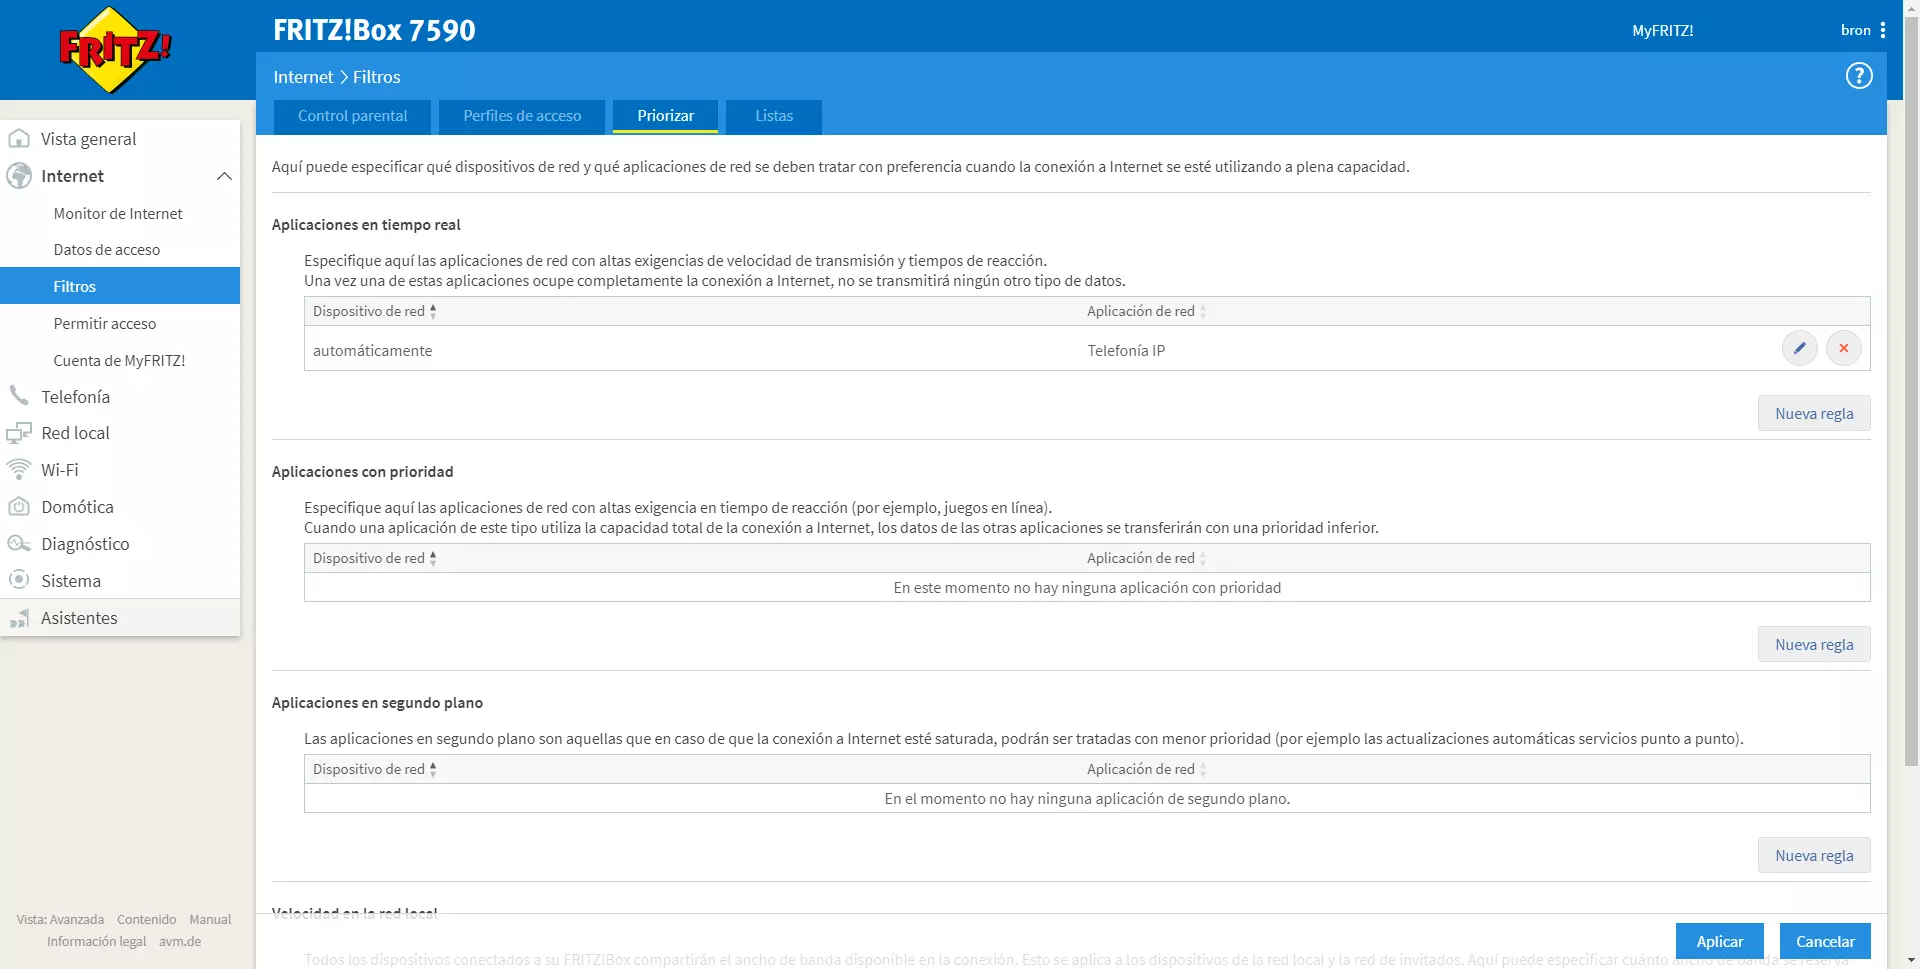
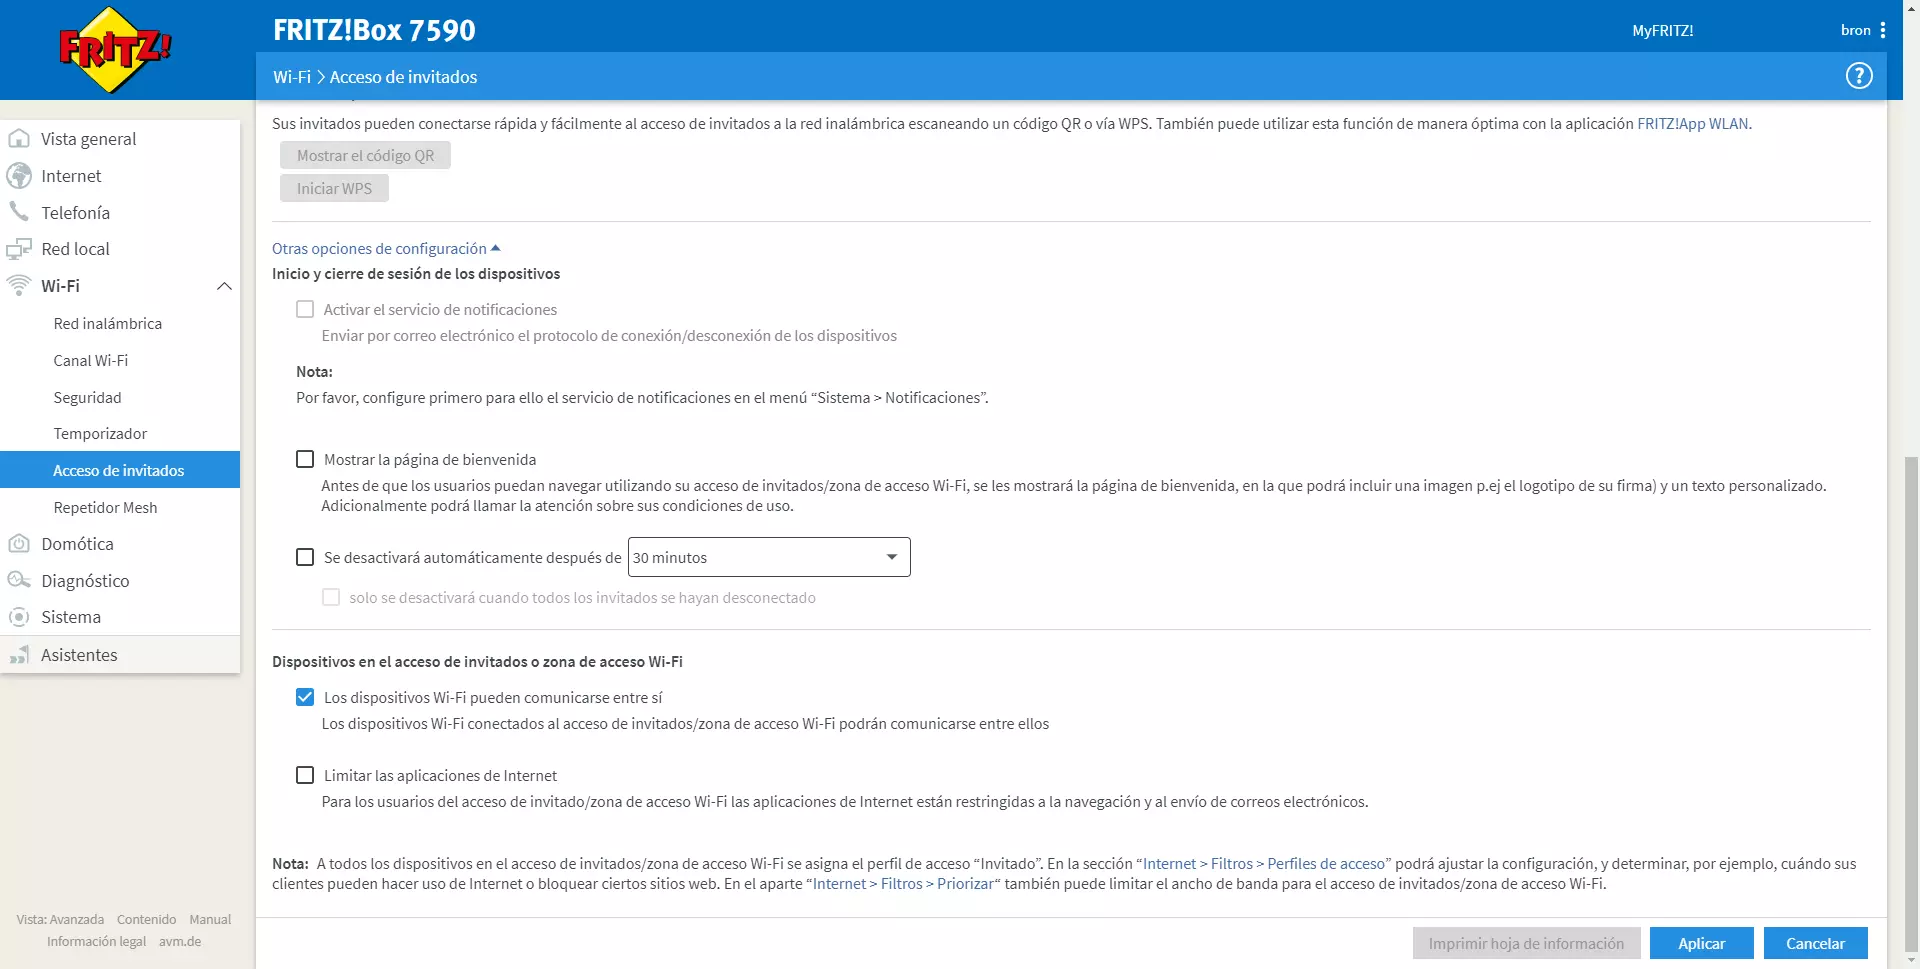
In the lower area there is a really interesting configuration, the section of «speed in the local network»Will allow us to reserve a bandwidth for the main work network, so that it always has the highest possible priority. This system consists in that, if the guest WiFi network is being heavily used, the Internet connection of these devices is automatically limited by reserving a certain percentage of the bandwidth for the main network. In case the main network is not in use, then the router will be able to provide all the bandwidth to the guest WiFi network, but as soon as there is traffic back on the network, it will prioritize these connections from the main local network.
In the section of “Internet / Filters / Lists»We can configure a list of filters, to allow or deny certain websites with their domain or IP addresses. In addition, we can also configure the internal firewall of the router in stealth mode, in order to have the best possible security by blocking any packet that reaches the Internet WAN without having previously requested it. We can also filter other types of traffic such as email on port 25, netBIOS, Teredo and WPAD.

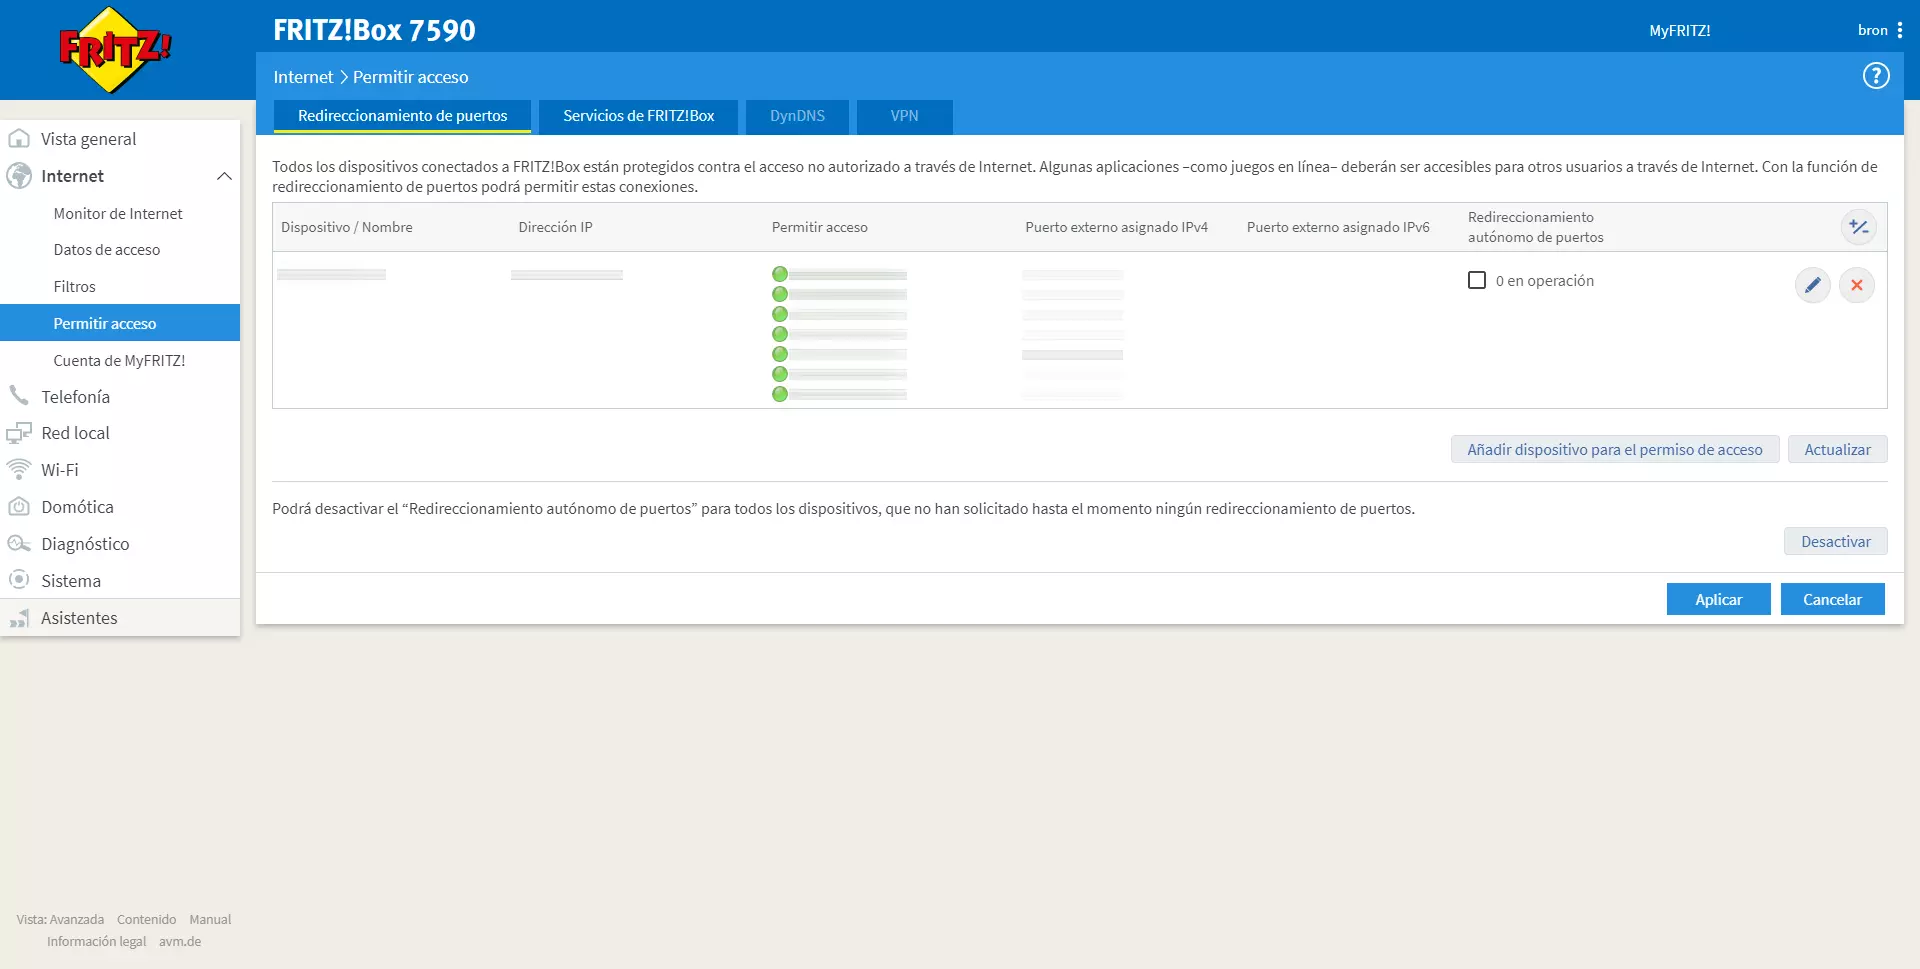
Finally, if you need to open ports to carry out any activity with our work team, in the «Internet / Allow access / Port forwarding»You can find all the configuration options. By default, the UPnP protocol (autonomous port forwarding) is disabled For security, if we want to enable it we will have to go device by device enabling it. Without a doubt, a great security policy.
Once we have seen all the configurations at the wired level that we can do with this router, we are going to see what configurations we have available in the WiFi network.
WiFi network configuration
The first recommendation that we can make is to use different SSIDs for each frequency band, in this way, you can connect to the one that suits you best. If you don’t want to worry about which frequency band to connect to, then disable the option “Different names for wireless networks in the 2.4GHz and 5Ghz bands” to have Smart Connect or Band-steering. This configuration does not influence security in any way, it is a functionality that will allow us to not worry about which frequency band to connect to.

In the section of “Security»Is where we will have to choose the WPA mode, it is recommended to choose WPA2-Personal or WPA3-Personal if available. In this case, FRITZ! Box allows you to choose WPA2 + WPA3 so that WiFi clients connect with the best security, however, for practical purposes it is as if you were using WPA2-Personal, because an attacker could perform a downgrade attack and force the connection with WPA2 and capture the handshake to crack the password.
The option of «The active wireless devices displayed here will be able to communicate with each other«. Taking into account that in the main network we are going to connect the work teams, it does not matter to have this function enabled, however, you could disable it to prevent the WiFi clients of the main network from communicating with each other.
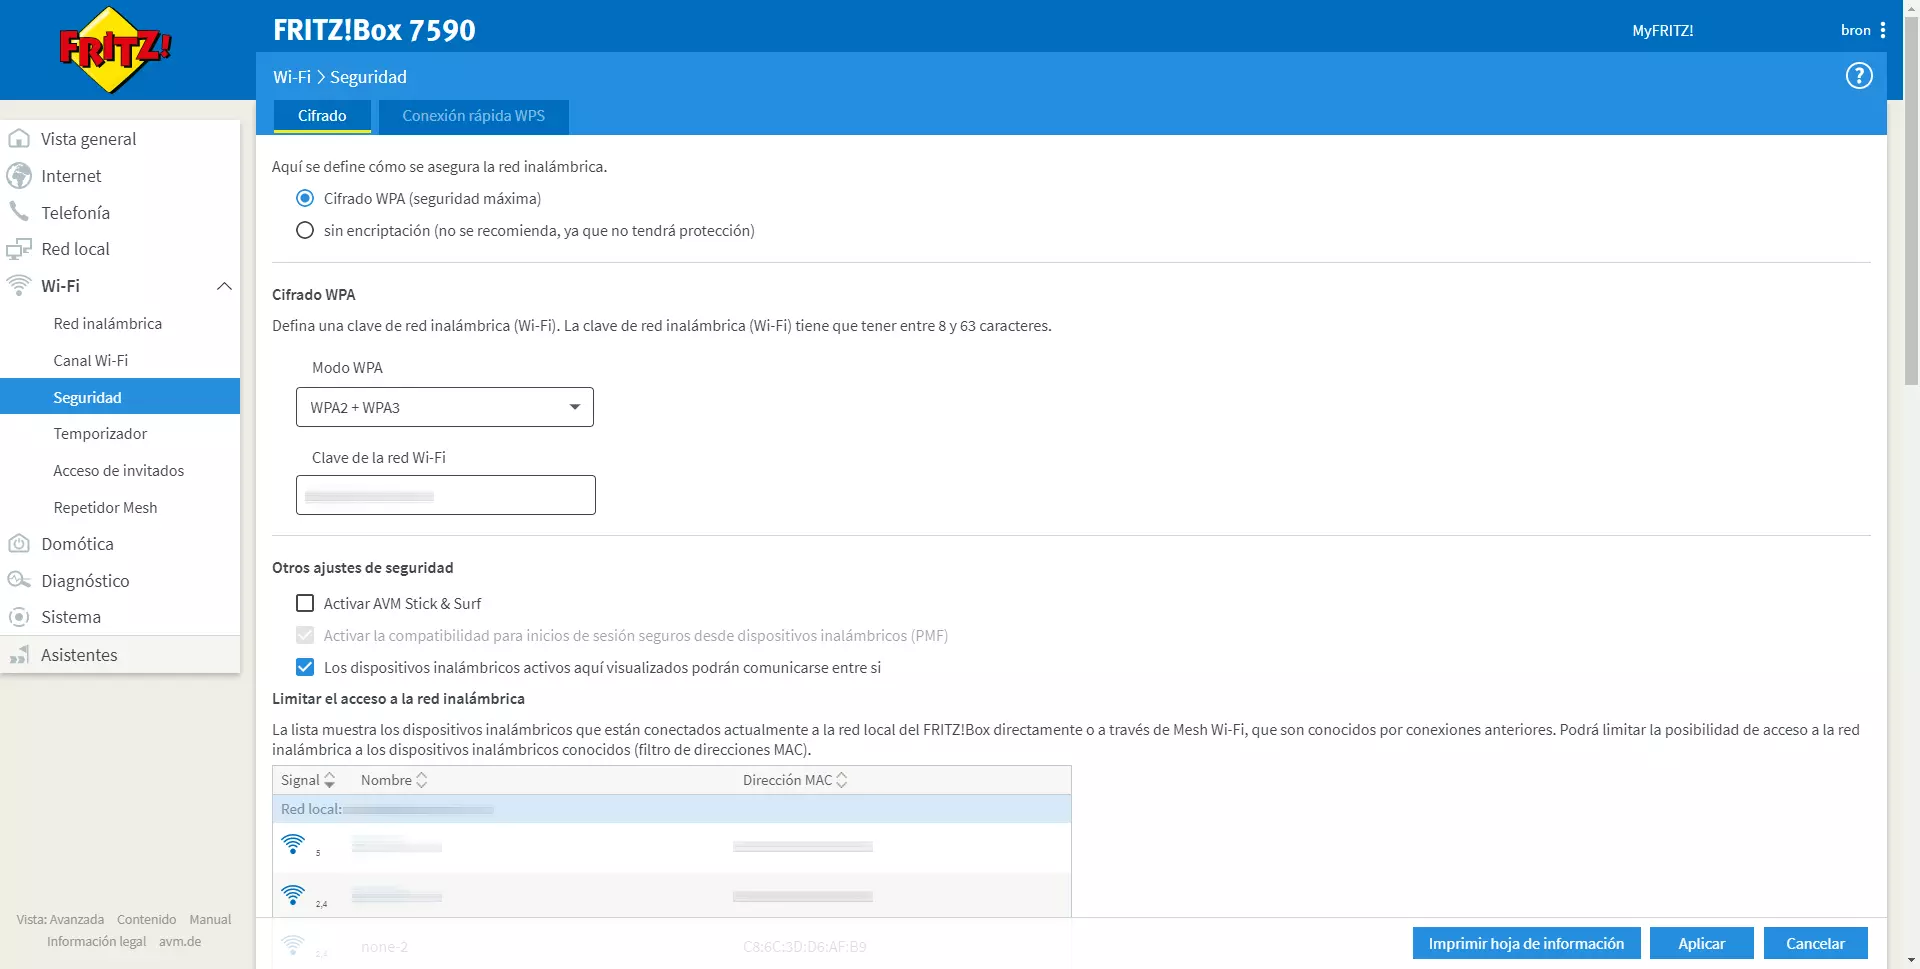
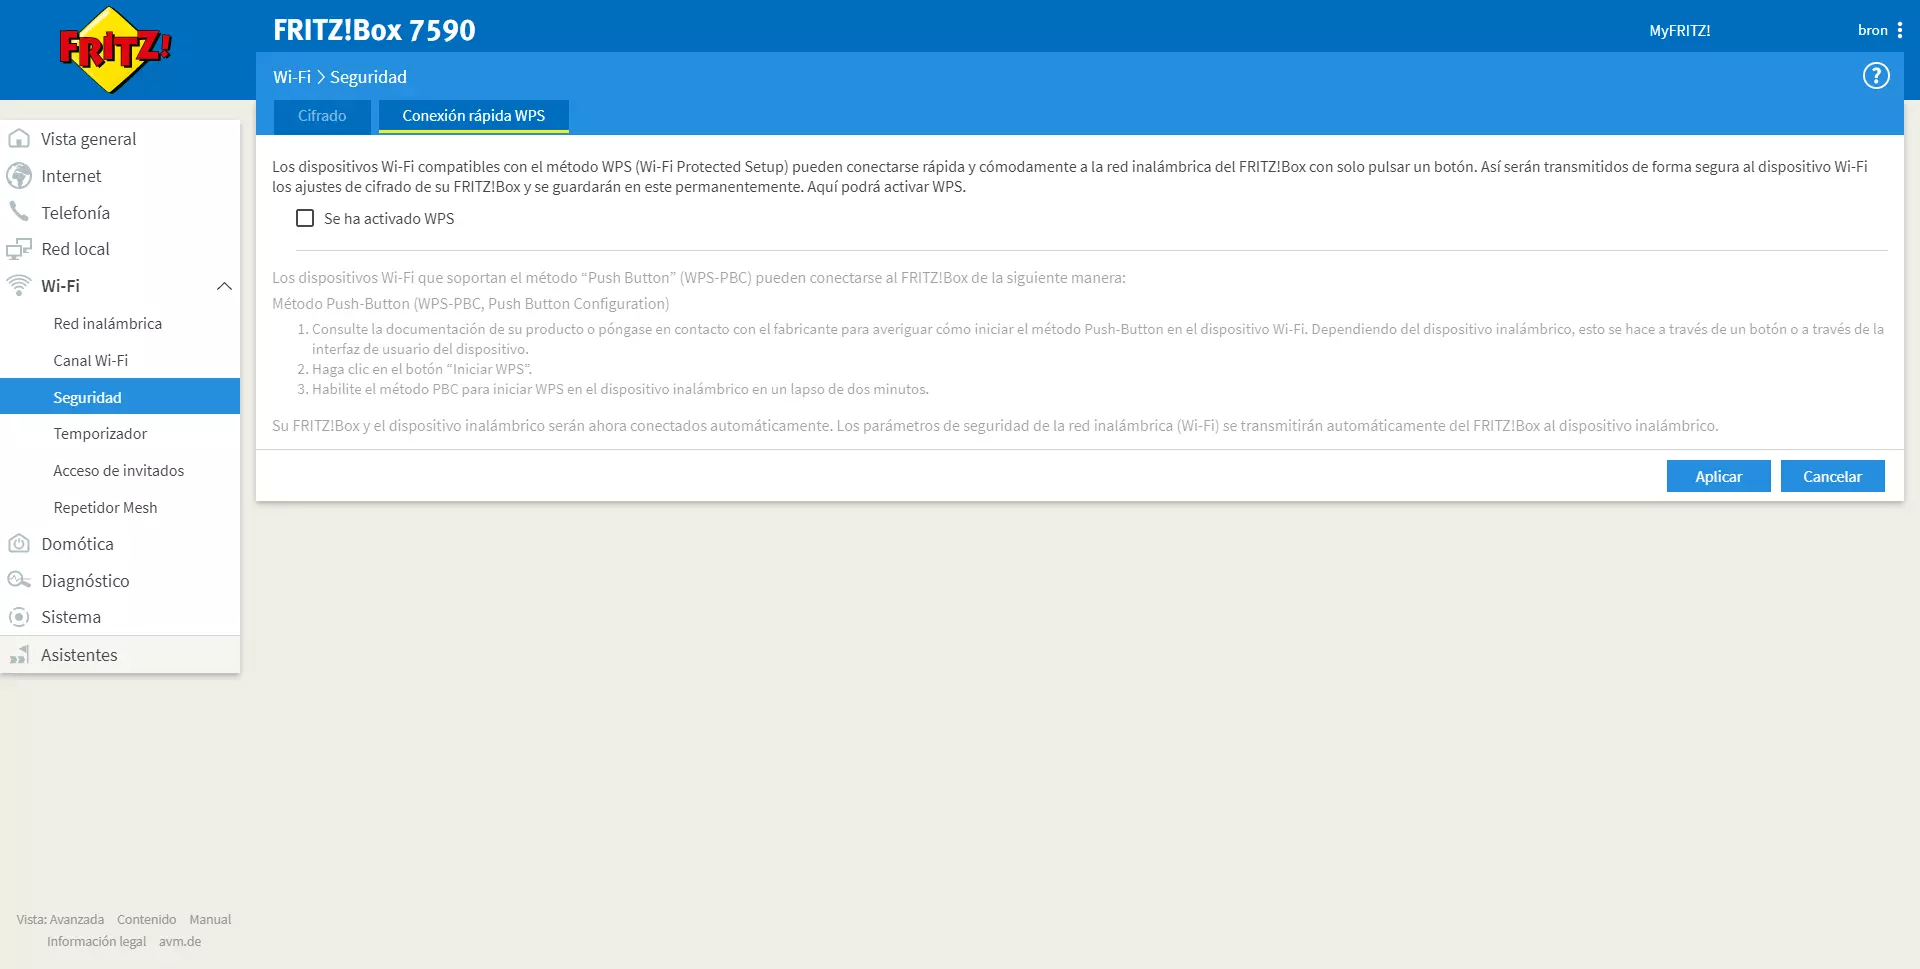
The WPS protocol, for security, it is always advisable to disable itIt does not matter that it only works with the physical WPS button of the router, we disable it to never use it.
As for the guest WiFi network, it is where we will connect all the devices in our home such as IP cameras, smart plugs, Smart TV and personal smartphones. We will activate the guest WiFi network and choose the option «Private guest access to the wireless network«, To have to enter an access password, as if it were the main WiFi network.
In the configuration of the guest WiFi network we must put an SSID, choose the type of encryption WPA2 + WPA3 and also the passphrase, logically we must choose a robust password following the good practices of using passwords.
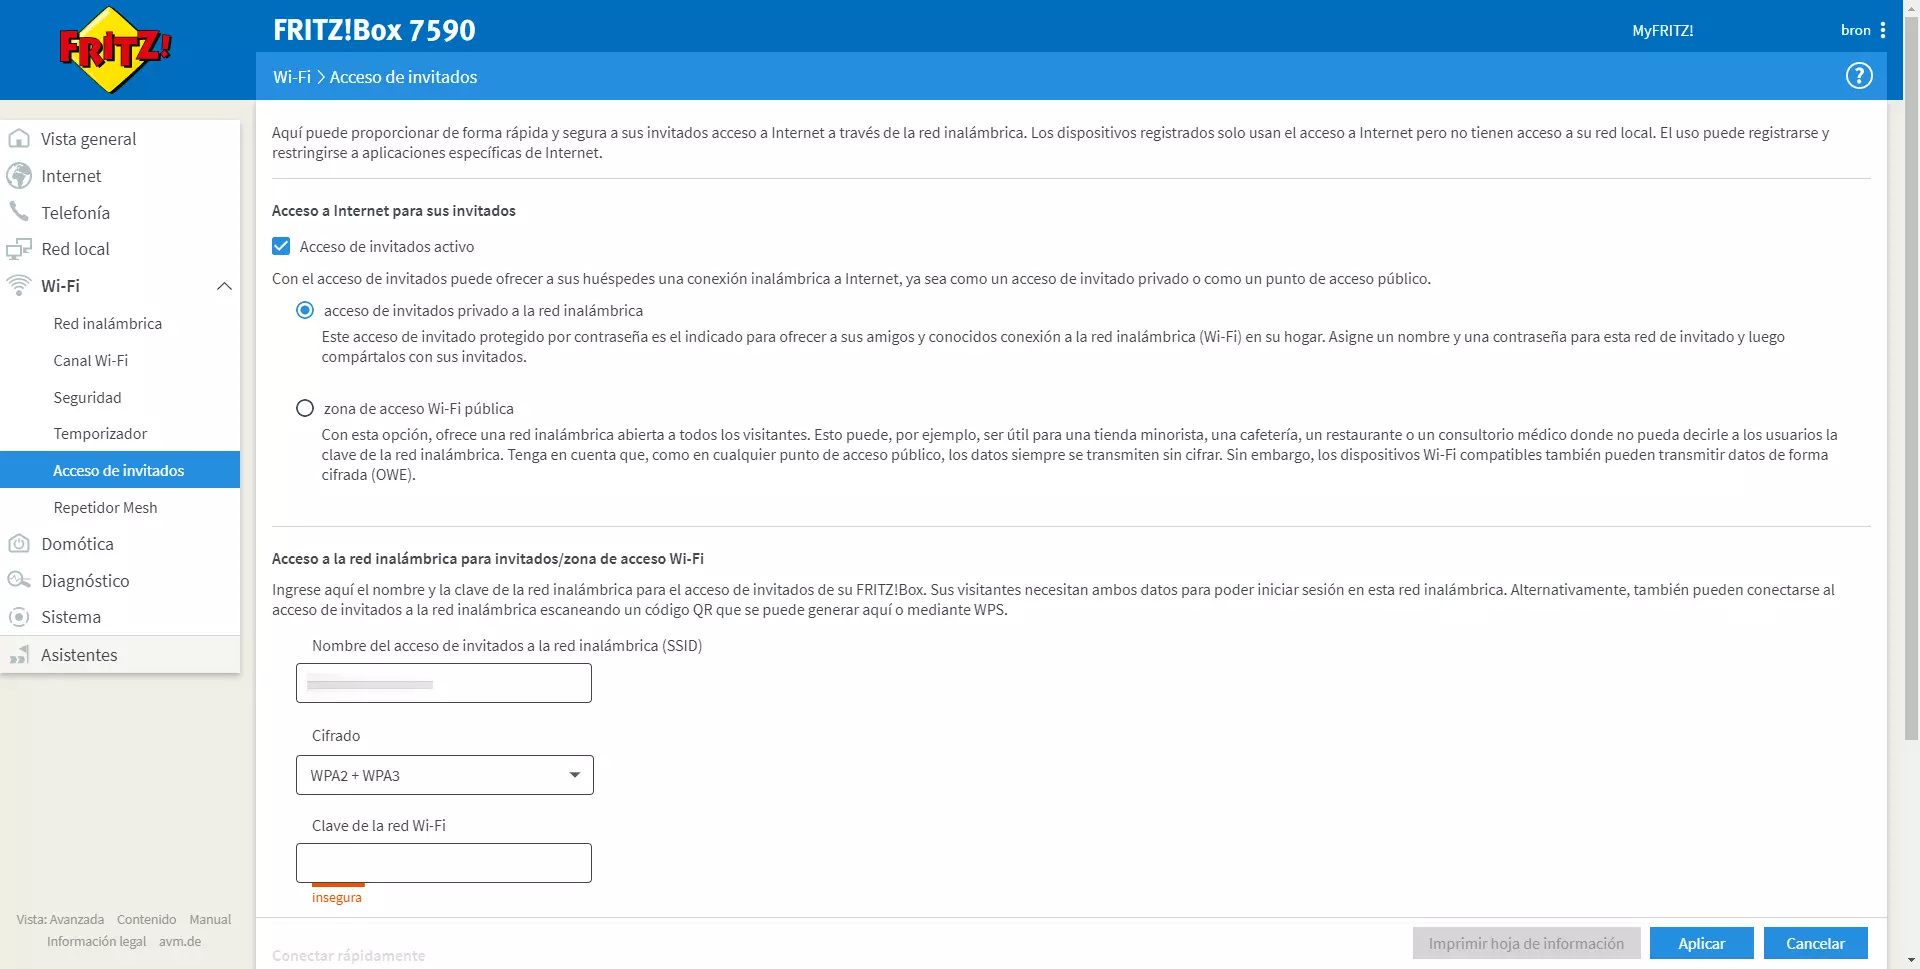
At the bottom we can allow WiFi devices to communicate with each other, this is only oriented to the guest WiFi network, where the different wireless clients will be able to communicate with each other. It does not mean that, if we activate this option, they can communicate from the guest WiFi network to the main network.
Once we have seen the configuration of the WiFi network, both the main network and the guest network, we are going to see other configurations to make to telework safely.
Other configurations to be made
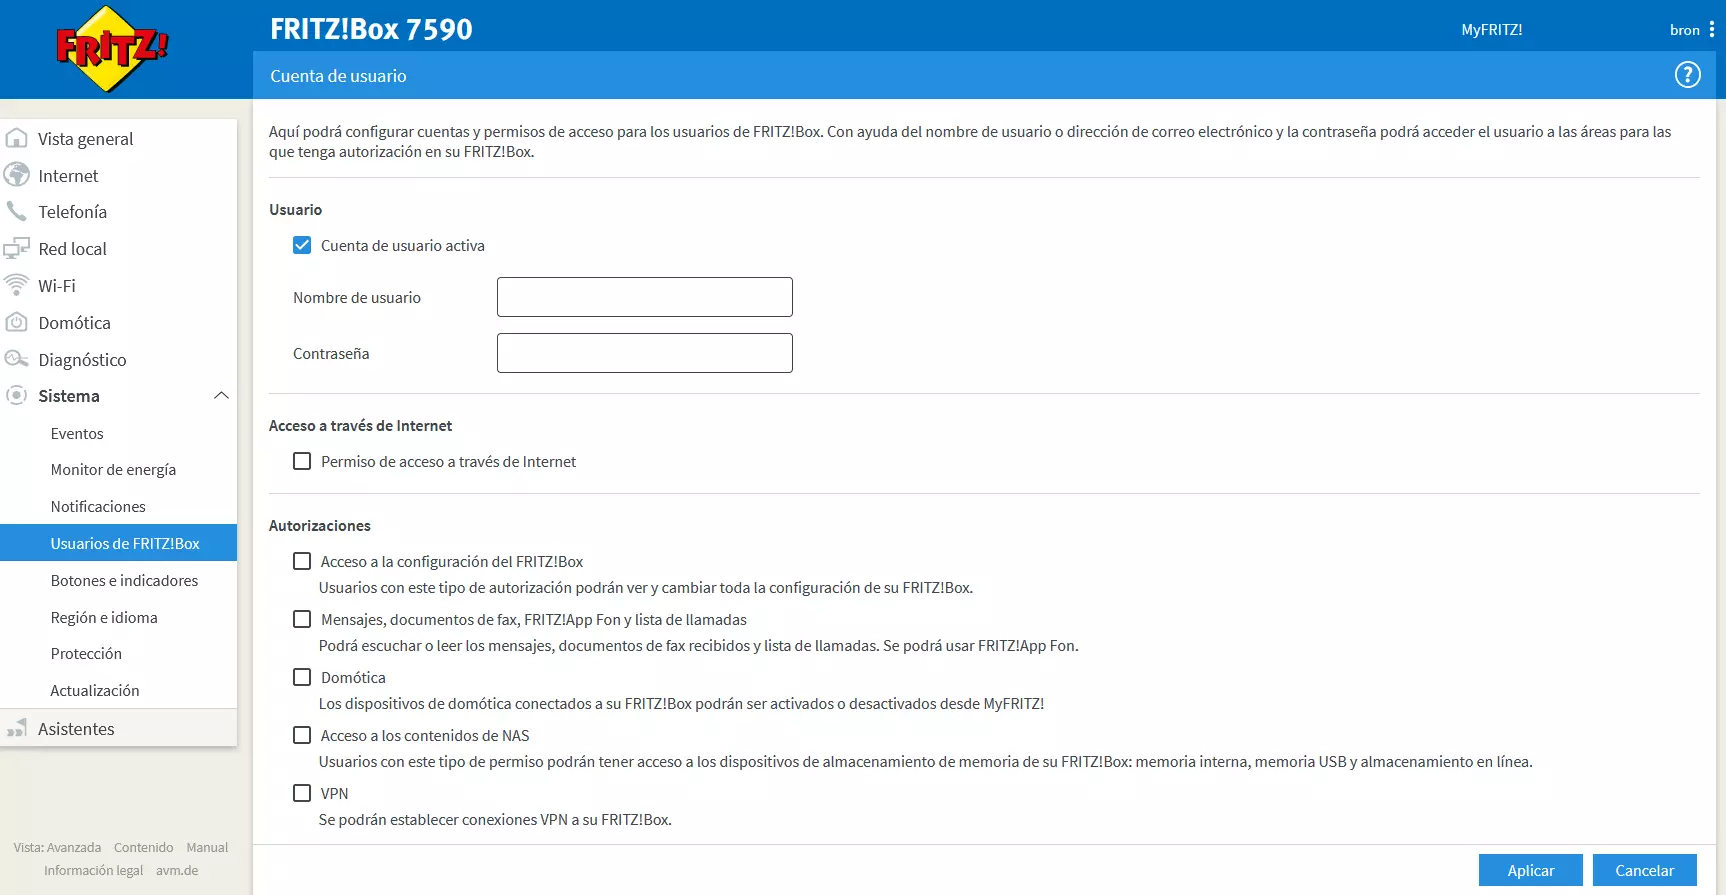
Other configurations to be made at the network level to be sure, is to change the administrator password to access the router, in this way, we will make sure that no one can access the router’s administration except us. In some routers like the FRITZ! Box, we can create different users / passwords with different permissions, in case it is necessary to access the VPN, NAS and other services, as you can see here:
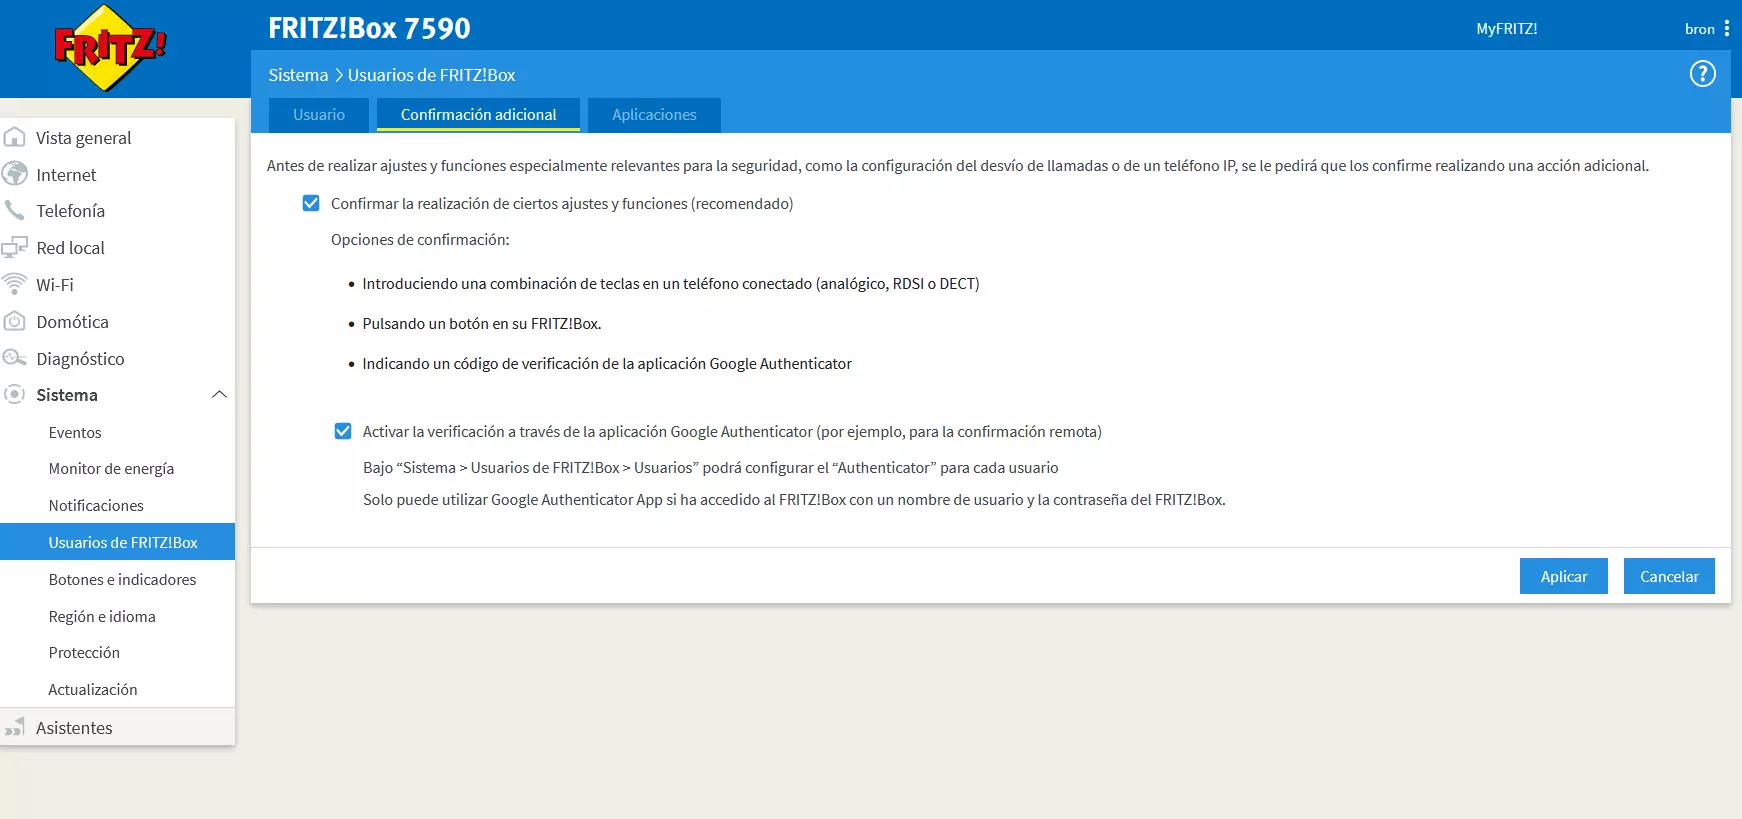
And we can even configure additional parameters to confirm certain configurations to be made, if someone enters the router administration via WiFi, even if we are ourselves, if we make any configuration we will be asked for a confirmation, either through a physical button or using a second authentication factor using Google Authenticator, in order to protect the router configuration.
As you have seen, we can telework safely in our home and with our home’s Internet connection, however, it is advisable to make certain settings on our router to protect work equipment such as computers, laptops at the network level. or smartphones. If we are going to telework, it is possible that our company has provided us with a VPN connection, this is an additional security measure so that all traffic from our computer to the company’s VPN server is encrypted and authenticated, providing us with extreme data confidentiality to extreme.