And is that the Adobe editing program is the most popular worldwide. Despite being a payment tool, its purchase is more than justified for both professionals and lovers of publishing. The application is full of functions that will help us to carry out all kinds of tasks and jobs that are related to photography.
Characteristics of a DNI size photo
When making and printing our own photographs to be used with official documents, we must take into account a series of characteristics that they must have in order for them to be valid. The photograph will serve as visual identification for which it must meet a series of requirements.
For example, the photograph must show the oval of the face, it must be in high resolution and on good quality photographic paper. Its background must be white and smooth, as well as taken from the front with the face totally uncovered, with nothing that may prevent or hinder our identification.
The necessary size for passport photos to be used in official documents in Spain must be 3 x 4 centimeters, specifically a width of 26 millimeters and a height of 32 millimeters.
All these premises are important to be able to have valid passport photos to obtain the DNI or other documents. If you want to use Photoshop to create them, today we tell you the steps to follow to achieve it.
Make ID-size photos with Photoshop
The first thing to do is download the latest version of Photoshop in case we do not have it from your website. Its price is from 24.19 euros per month and allows us to obtain a 7-day free trial version, how well it can serve us for the creation of our passport-size photos.
Once downloaded, we open Photoshop so that its main menu appears. Here we must go to the “File” and “Open” tab to select the image that we want to convert into a passport-size photograph.
Adjust the photo to official measurements
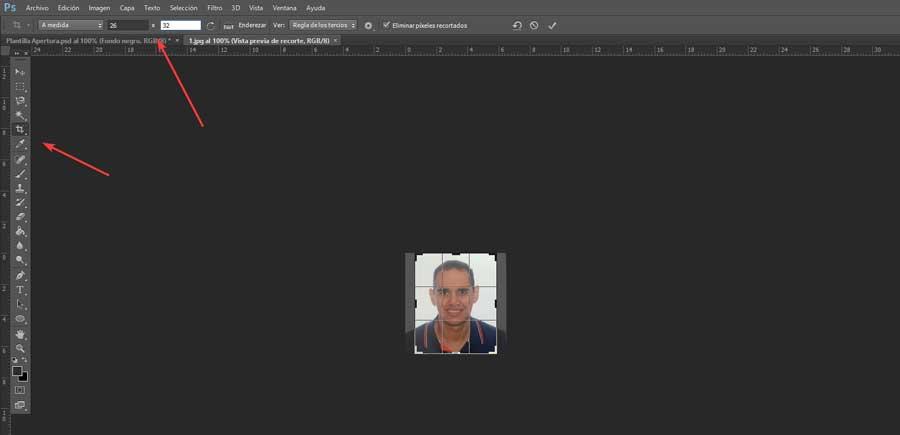
Once we have added the photo to Photoshop, we must click on the “Cut” tool, which we can find on the toolbar or click directly on the letter C on the keyboard.
At the top we are going to establish the official proportions that the photograph must have in order for it to be valid to be used both for the DNI and for the rest of official documents in Spain. Therefore, we will write 32 mm for height and 26 mm for width. Next, we must move the image inside the square to adjust it to the measurements and be able to make the cut.
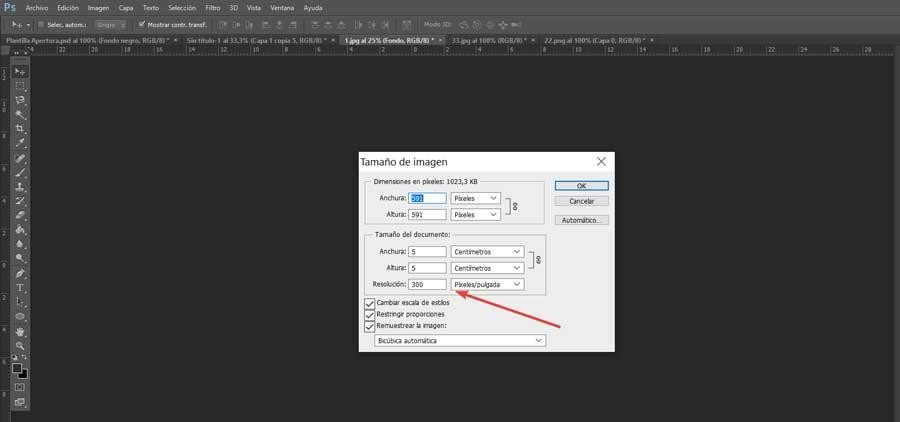
Later, once the cropping is done, we will click on the Image tab, which will display an Options menu from which we will select Image size. Once open, we will select 300 dpi as standard resolution for these types of photographs, as well as a document size of 5 x 5 centimeters.
Create a template for multiple photos
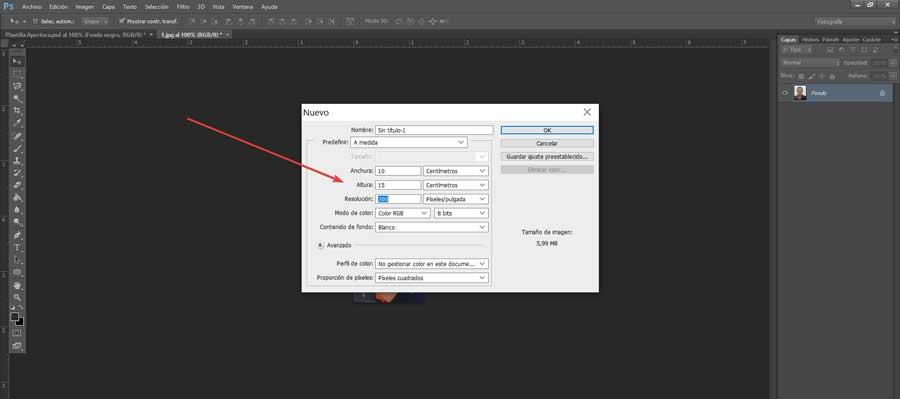
Once we have adjusted our image, now we are going to create a template where we can attach several passport-size photos to be able to print them at the same time. To do this, click on the File tab and select New to create a new project. A new window will appear where we must establish the measurements 15 cm wide by 10 cm high. In the Resolution section we will establish the same as in our image, that is, 300 dpi.
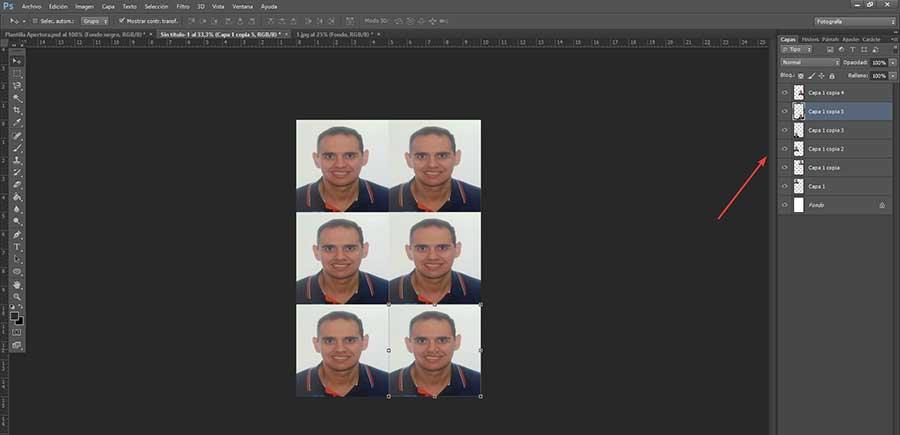
Now we just have to drag and drop our cropped image to the template we have created. In this way, we can place it until we obtain a total of 6 passport-size photographs, in a 2-column, 3-row arrangement. As an option, we can do it faster by using the “Ctrl + J” key combination to get all the layers until the template is filled.
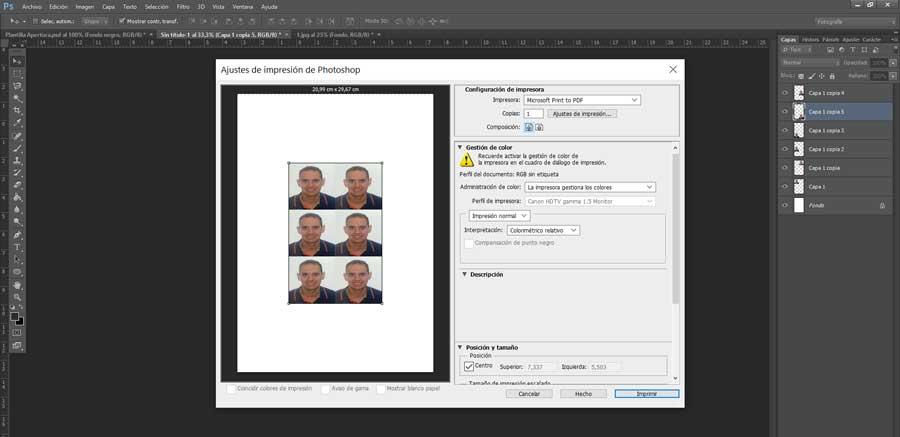
Once finished we can print the template with the photos from the same program, by clicking on the “File” and “Print” tab. This will bring up a window with the “Print Settings”, with a preview of the image, as well as choosing the printer and some print settings. Finally, click on «Print» to start the process.
Use IDPhoto4you as a free alternative
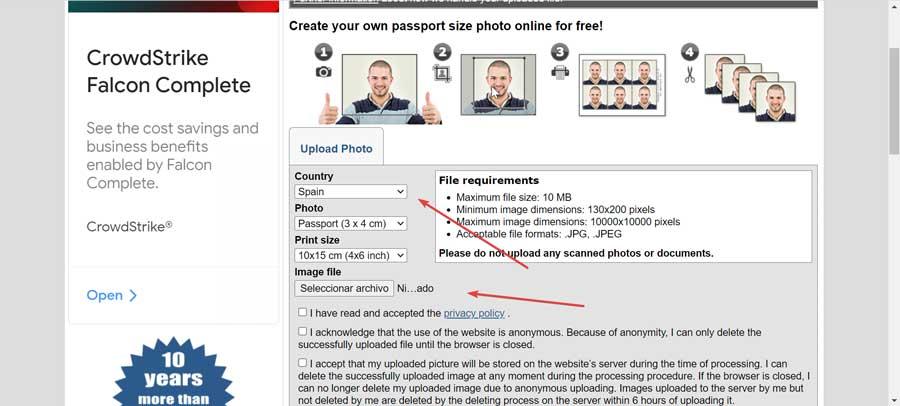
In the event that we need to create our own passport-size photos and we don’t feel like using Photoshop for it, we can use a free online application named IDPhoto4you. This tool will help us create a passport-size photo according to the standards of several countries, including Spain, avoiding having to resort to the expensive Adobe photo editor. This application supports the photo identification requirements of 73 countries, including Spain. Therefore, it will only be necessary to select it from the list and customize the photo to our choice. It is a safe tool because it is responsible for encrypting the image during the upload and download procedures, so it guarantees that they are safe.
To use it, simply access its website by clicking on this link. Subsequently we select our country the size of the photo and the size of the print. We just have to take into account that the maximum file size are 10 MB, and must have a minimum dimensions of 130 × 200 pixels, and a maximum dimensions of 10,000 x 10,000 pixels, as well as a file format JPG and JPEG. Next, within the Image file tab, click on Select file and choose the file that we want to adapt to the passport size. We accept all the conditions of use and click on the «Upload» button.
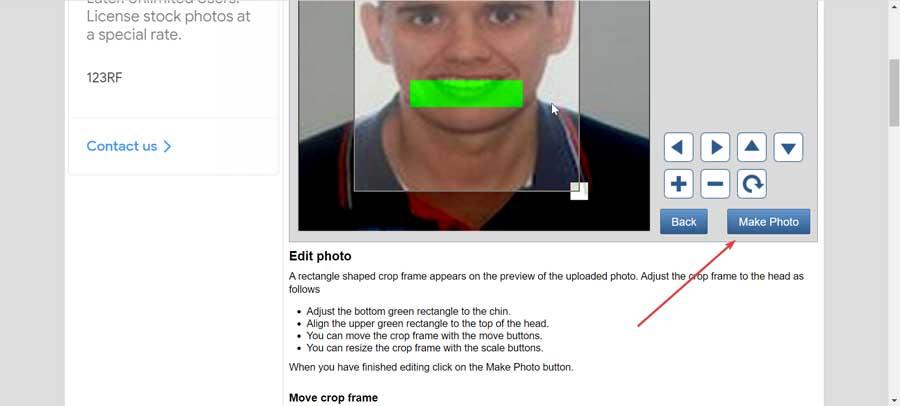
Once the image is uploaded, a new screen will appear where we will be able to configure the brightness and contrast through the help of sliders. We must bear in mind that if we increase the brightness it is advisable to increase the contrast to half the brightness value. Once finished, click on «Next». Finally, we only have to edit the image to adapt it to the desired proportions, and once finished, click on «Make Photo».
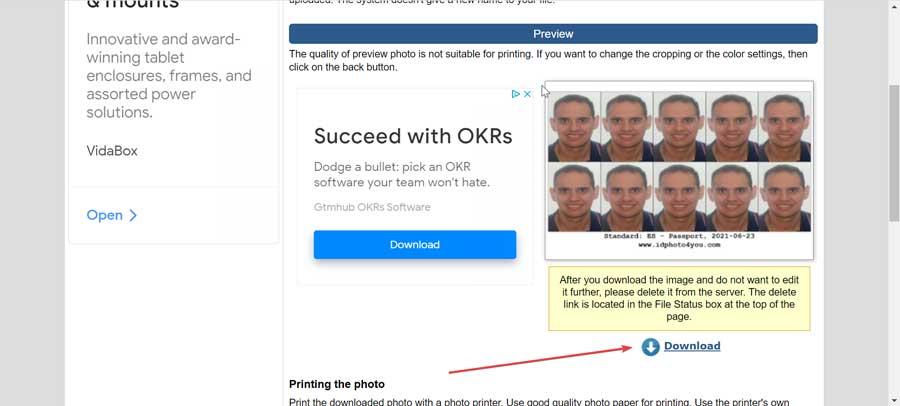
Once we have finished making the pertinent adjustments to the photographs, we go to the last screen where we will see a preview of our template with the photographs, so we only have to click on the «Download» button to begin downloading.
