In these times, the use of programs focused on spreadsheets it is the most common. These are of enormous help when dealing with numerical data, be it business, personal, or related to education. Despite the many applications that we find in this same sector, there is no doubt that Excel is one of the most powerful and used. In fact, we could say that Office is one of the most important projects that Microsoft has had for years.
You already know that here we are talking mainly about numerical data, data that we can use to carry out simple accounts, or to keep the accounting of an entire company. For this, the program offers us everything we need in order to try to make things easier for us in this regard. There are many elements that we can use in this program, as it happens in the rest of the programs that make up the office suite that we comment on. Therefore, although the base is numerical data, we can also find graphs, images, tables, figures, formulas or texts.
Change font and size of texts in Excel
In fact, it could be considered that texts They are one of the complementary elements to the most important numerical data that we will deal with in Excel. This is something quite easy to understand, since for many numbers, formulas and results that we expose, the texts will help us to make everything more understandable. We can say that one of the big mistakes we make when working with spreadsheets is that we don’t structure or configure them properly.
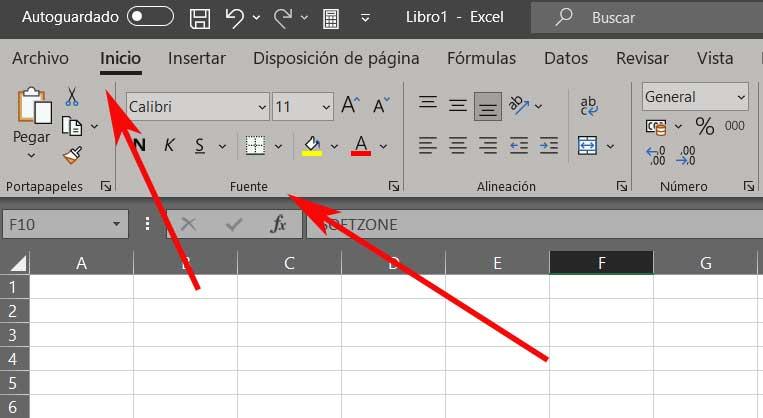
Precisely for all this, below we will see how to use the most appropriate font and size for the texts that we talk about in the Office program. To carry out this change we can do it in several ways, all of them quick and easy. In the first place we have the possibility of clicking with the right button of the mouse on the cell that contains the text. At the top of the contextual menu that appears, we will see the corresponding sections to modify the font and size of the marked texts.

But that’s not all, since we still find these Settings in the main menu of the program interface. To give us an idea, we just have to go to the Start menu and locate the Source section. Here, as in the previous case, we will have in view the fields corresponding to the type of font and the size of the text where we are located.
Modify the colors of the texts
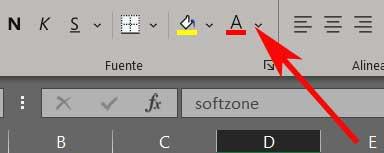
When we use one of the two configuration sections that we talked about before, here we not only find parameters for the fountain and the size of the text. In the same way we see two sections that refer to the colors that we can use in the selected cell or cells. As you can imagine, this will be very helpful when it comes to changing the color of these texts with which we are dealing.
Of course, something that we must be very clear about is that one thing is to change the color of the text as such, and another is to customize the background color of the cell. It is common for us to confuse both parameters, since they are located next to each other and it is not easy to distinguish which is the one that interests us. But to give us an idea and not get confused, the icon that interests us in this case in Excel to change the color of the text, it is represented by a capital A. So we just have to click on it and select the tone that we want to use in that case.
Adjust paragraph alignment in the program
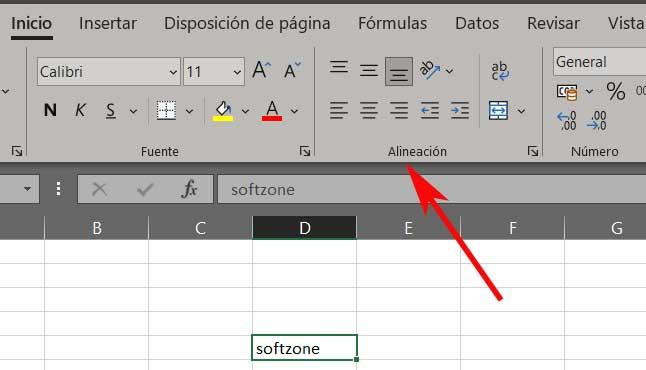
As it happens in type text editors Word that we use in a conventional way, this spreadsheet program also allows us justify and align texts. There are times when we will need more than one line included in the same cell, so its correct alignment and placement will be essential for understanding the content. To solve this, we will have to go back to the Start menu of the main interface. Next we locate the section called paragraph, where we find different icons corresponding to the alignment of the texts.
It may also be the case that we want to delve a little deeper into this same customizable section. If so, the best we can do is go to the cell corresponding to the text, and click with the right mouse button. Among the contextual menu options, in this case we opted for Cell format. Here a new window will appear, in which we go to the tab Alignment.
Customize text orientation in Excel
We are going to find a series of interesting parameters that will help us greatly to make the texts more readable. We achieve this thanks to parameters such as their automatic adjustment, their orientation, vertical or horizontal alignment, etc.
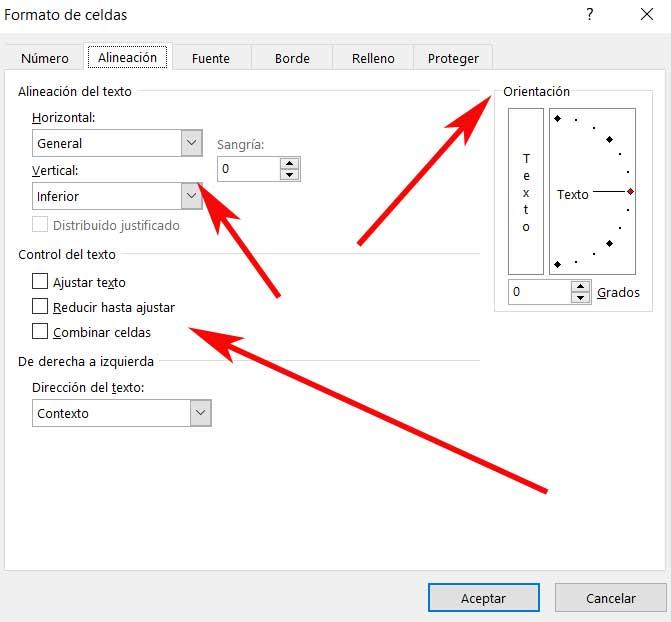
This is a window with which we must take special care, especially if the amounts of text with which we deal in our spreadsheet are large. At the same time we must bear in mind that all the changes that we make here can be made effective both individually and for a cell set. As you can imagine, this will save us a great deal of time when it comes to giving the correct or more appropriate format to our texts in Excel.
Anyway, and largely due to the amount of parameters available here, we can always go testing. Moreover, it is most recommended that we try various changes in this configuration window so that the paragraphs that we use in the sheet are adapted to what we need. Finally, we remind you that the legibility of both the texts and the numerical data in Excel it is essential.