What is DNSRoaming and what is it for?
DNS is a program that works as a service in Windows 10 and Windows 11 operating systems. The objective is to act as a DNS client to guarantee that the DNS servers that we configure in the program are used depending on rules and policies that we will be able to define. This program is ideal for laptops that are connecting to different networks, we can define the DNS servers to use in each of these networks easily and quickly. For example, we can force the PC to use Cloudflare DNS with parental control and antimalware if we are connected to a specific network, and Google DNS if we are at home. If you have a personal laptop that you also use on a professional level, it can be a very good option to avoid having problems with the DNS servers that we have.
This program also allows us to differentiate between networks connected via cable or WiFi, in this way, we can change the DNS servers completely automatically if we change the type of network. This is especially important, if we connect our equipment via cable and use a specific DNS, we can define that via WiFi we use DNS servers that are more suitable to block advertising, malware and malicious sites, in order to protect our privacy.
Other quite interesting functionalities are that custom network interfaces have been added to use third-party VPN clients, such as NordVPN or OpenVPN, in this way, we can use the DNS servers we want when we have these network interfaces activated. We could also add our own network interface types via the CustomNetworkInterfaceTypes configuration file in XML format located in “ProgramDataDNSRoamingOptions”.
Download and install
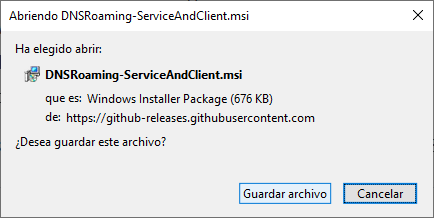
To download this program we can enter the official GitHub account, or directly to the download section to download it and install it on our computer with Windows 10 or Windows 11. The file that we have to download is the “DNSRoaming-ServiceAndClient.msi”, as you can see here:
Once downloaded, we proceed to double click to execute it, click to accept the license terms and proceed with the installation of the program. This program takes up very little and we will have it installed in seconds. Once installed, we can click on «Finish» to finish this installation wizard.
Once we have installed it, we can search for the program to proceed with its configuration.
How DNSRoaming works
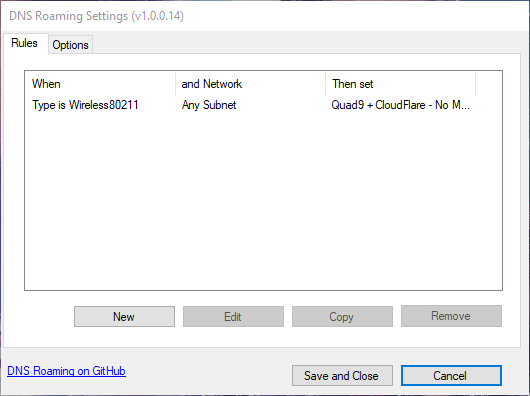
The operation of DNSRoaming is very simple, in the main menu we will be able to configure the different rules to later apply the DNS servers that we want. The default rule does the following:
- When the network is WiFi, and is on any subnet, it will automatically use Quad9’s and Cloudflare’s DNS.
Of course, we can add new rules, modify the one that has already been created and even copy it to later modify some parameter. Finally, we can delete this rule that we have by default in the program.
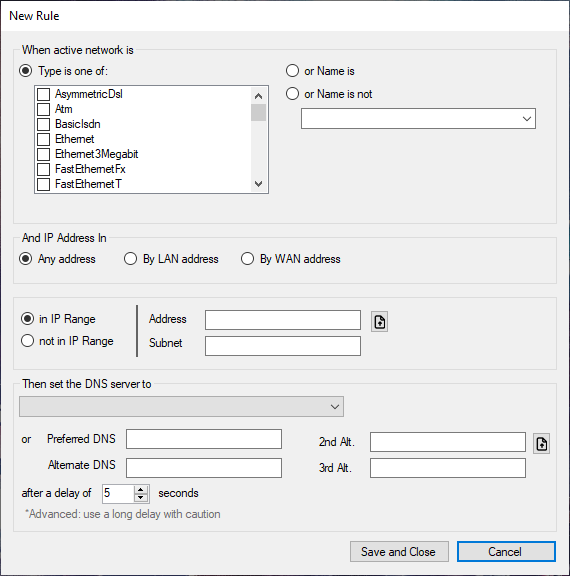
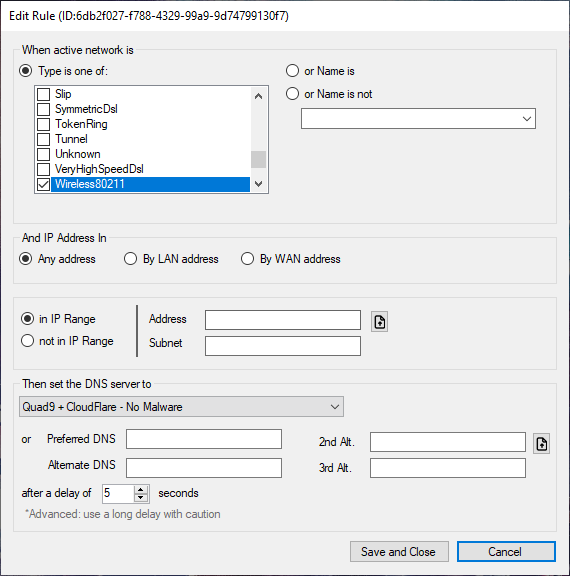
If we click on «New» we will be able to see all the rules that we can apply. For example, we can choose from a large number of network types, and we will even be able to filter by type of network (wired or WiFi) and also by the name of the network to which we have connected. Of course, we can also choose if we want to use a specific DNS for any IP, for the LAN address and even the Internet WAN address. Just below we will define if we want it to be within a certain range or outside that range, to later apply the rule.
Regarding the DNS servers, we will be able to configure those that are already registered by default in the program, but we can also configure the DNS that we want manually.
The rule that is configured by default is the following, as you can see:
This program has a large number of default DNS servers, specifically you can use the following:
- AdGuard
- DNS alternative
- CleanBrowsing in all its modalities (filtering for adults, family and security)
- Cloudflare in all its forms (without malware and without malware or adult content)
- FourthEstate
- Quad9
- Quad9 + Cloudflare malware free
The vast majority of users always use the DNS servers provided by their operator, otherwise, they will use those of Google or Cloudflare, which are the most used.

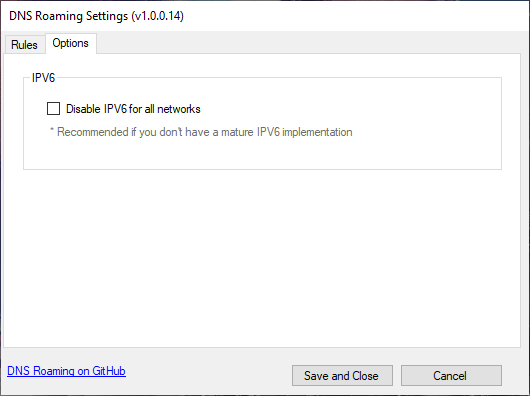
In the “Options” section we can disable this program to work with IPv6 networks to avoid connectivity problems.
In the task bar we can see an icon of the program indicating that it is running, from here we can access the configuration of the program as we have taught you, but we can also see the records (logs) of the DNS client, the record (logs) of the DNS service and even open the folder where we can see these records in text format. In this folder you can open in “Options” the file “CustomNetworkInterfaceTypes.xml” to edit it in case we have a specific name of a network interface. In the «Settings» folder we can see the rule or rules that we have configured in the program in XML format, this text file should not be touched unless you know the specific syntax of the program, otherwise it will stop working correctly.
As you have seen, thanks to the DNSRoaming program we will be able to configure the DNS servers on our PC in a dynamic and automatic way, without having to do it manually or use complicated programs to carry out this task. What we liked the most about the program is that it is very easy to configure, and the application of changes is done really quickly when it detects a change in the local network.