And, above all, since the arrival of smartphones, the GIF format has regained its best moments. Normally it is said that an image is worth a thousand words, but if this image is animated on top, its value is even greater. That is why it can be interesting for us to be able to obtain an animated GIF file of one of our screen recordings, something that we can easily do if we have the appropriate tools.
Advantages of using GIF instead of video
The term GIF is an abbreviation for Graphics Interchange Format (Graphic File Exchange). In this case we are talking about a type of image format that has become very common to find on social networks, WhatsApp and web pages. It is mainly characterized by supporting animations, so it is possible to create a fast playback of images consecutively. These animations are made quickly and are repeated in a loop. Thanks to the fact that they have a maximum of 256 colors, they are very light files, which is why they can be easily viewed in both webs and applications.
Using the GIF format instead of video can be very interesting in certain circumstances, as the size of the file is much lighter, which allows it to be viewed in applications without having to depend on the player or codecs that can always be used. give compatibility problems. This causes the GIFs to have become a form of digital expression and faster than video, text or photographs.
Make a GIF when recording the screen with these programs
If we are interested in obtaining an animated GIF of our screen recordings, we can do it with the help of some applications that will allow us to perform this operation and that we are going to review to know how we can do it.
ScreenToGif, create and edit a screen recording to create a GIF
It is a simple but useful application that will allow us to make screen recordings of our desktop, edit it and save it as a GIF file. We are talking about an open source program, free and with an interface completely in Spanish to be able to carry out all the steps comfortably. It has both a version with an installer and a portable version, compatible with Windows. We can download it from their website.
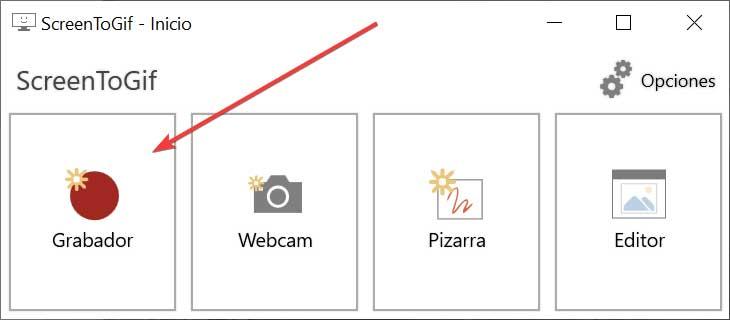
Once we run the application, its interface will appear where we can access its functions of «Recorder», «Webcam», «Blackboard», as well as its «Editor».
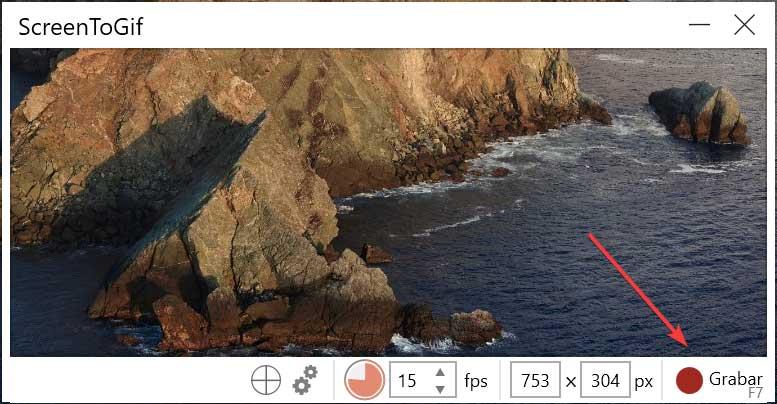
Click on the “Recorder” option, which is what interests us this time and a new window will appear. From here we can choose the capture speed established in frames per second, which by default is 15 to which we want to record and the dimensions of the recording by adjusting the desired area. Once these data have been adjusted, click on the “Record” button or press the F7 key to start.
Once we finish the recording, click on the “Finish” button or the F8 key, and a new window will appear with its editor. From here we will be able to make the necessary adjustments before saving the result as a GIF. It will be possible to apply filters, transitions, add texts, adjust or cut the size, etc.
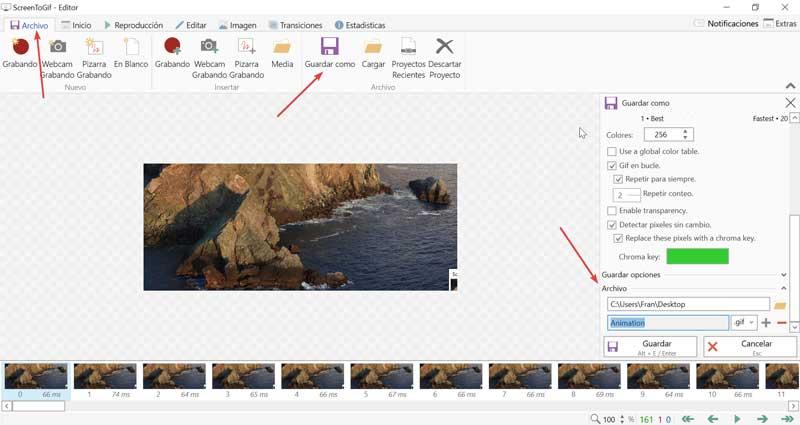
Once we have finished any edition we wish to make, we will click on the «File» tab and select the option to «Save as». This will open a small side window, where you can make small final adjustments to the GIF and choose the destination path where it will be hosted. Finally, click on “Save” and we will have our GIF based on a screen recording.
Gifcap, record screen and get GIF from browser
It is a tool with which to make screen recordings and create an animated GIF from it. It is a free web application so we will not need to download any software, since all the steps are carried out from our web browser by clicking on this link.
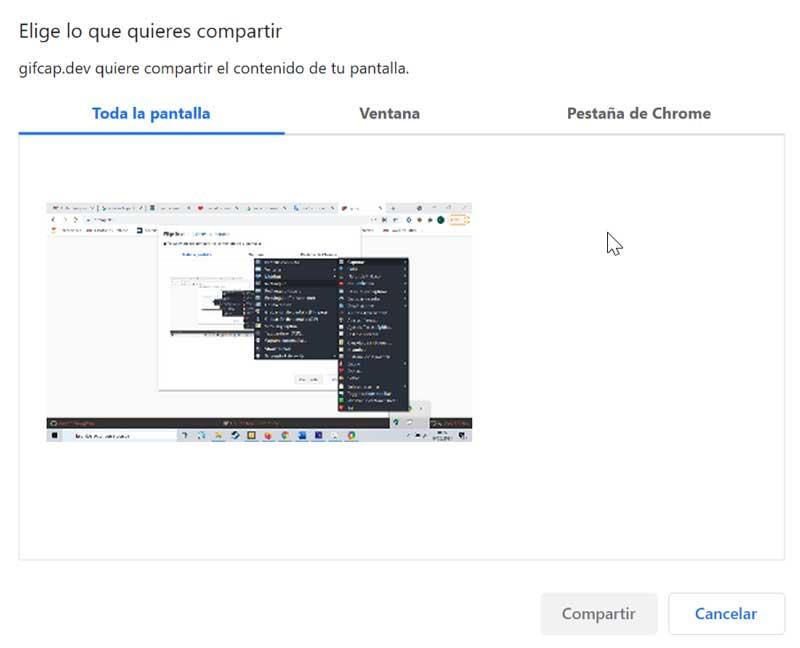
Once we have accessed your website we must press the Start Recording button and a window will appear where we can choose the type of recording. We can choose whether to record the entire screen, just a window or a tab of our browser. Once selected, click on Share.
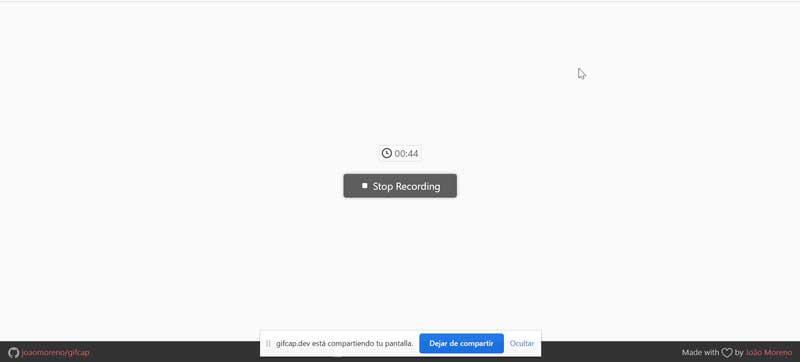
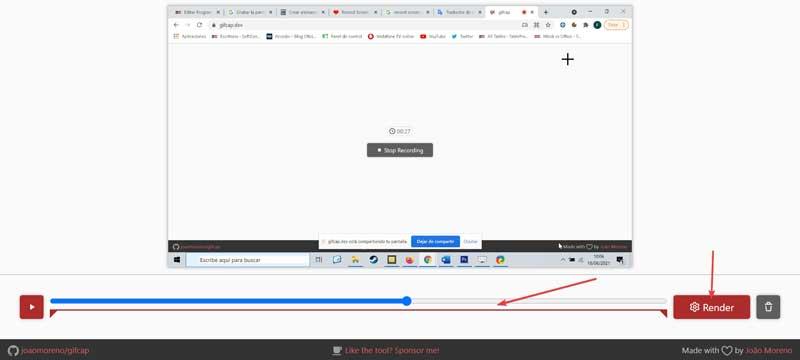
From this moment on, the application will start recording the screen and it will show us the time that has elapsed. Once finished, it will only be necessary to click on the «Stop recording» button.
Later we will see the playback of the recorded video on the screen that we can adjust using the red timeline at the bottom to adjust it to the size of the GIF. Next, we click on the Render button.
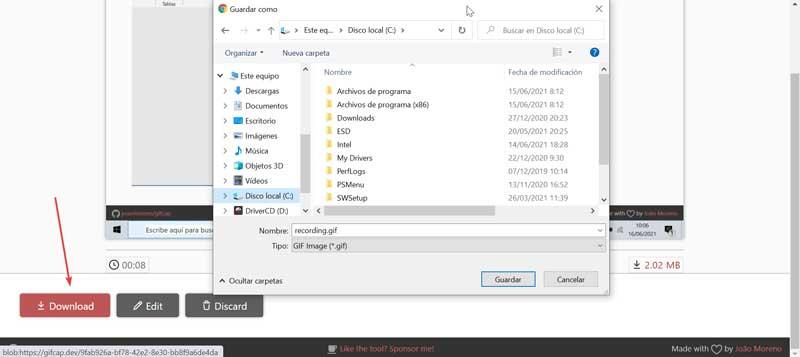
Finally, the GIF created will appear on the screen, so if it is to our liking, we can only press the Download button to save it on our computer.
Gif Recorder, simple and effective although paid
This application is a GIF recorder with which we can make recordings of our desktop screen really quickly. It has a version and another portable version that we can run without having to do any installation on our computer. The application has a cost of $ 29.95, but allows you to download a free trial version that will add a watermark to the recording made.
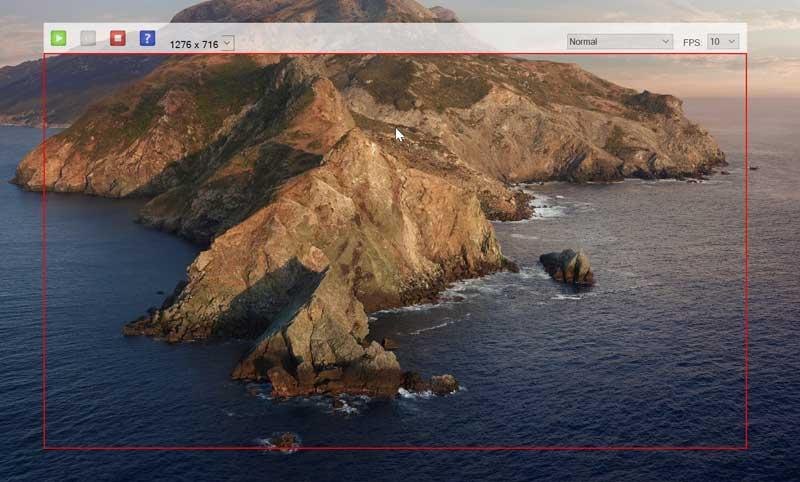
Its operation could not be simpler. Once we start it, a red frame will appear that will help us to establish the range of the screen to be recorded. In the upper right we can edit its size depending on the pixel ratio, as well as the recording speed, which by default is 10 fps. Later, it will only be necessary to press the «Play» button to start the recording, which we can pause at any time and stop by clicking on the corresponding buttons.
Once the recording is stopped, a Windows Explorer window will automatically appear so that we can give our GIF file a name and save it in the desired path on our hard drive. In this simple way, it is possible to obtain a GIF file of a screen recording made with Gif Recorder.
