This client has an intuitive interface, easy to use, and from which we will be able to browse both the local files of our PC, to upload them to the server, and the remote files. To do this, the first thing will be to get to know the application thoroughly, to later download it, install it and finally configure it.
What is FileZilla
We are talking about a software tool as an FTP client that is one of the most popular options, since it is open source, free and multi-device, which allows us not only to use it on Windows but also on other operating systems such as macOS and Linux. Through its use allows users connect to ftp servers to be able to exchange files at high speed. Also, it not only supports other protocols like FTP with encryption, SFTP and FTPS.
Among its many functions we can highlight the most important:
- site administrator: allows us to create and store a list of FTP servers and associated connection data.
- Directory Comparison: Allows a user to compare the contents of a local and remote directory.
- File and folder view: Allows the user to modify files and folders and provides the ability to drag and drop items between local and remote directories.
- transfer queue: Shows the status of file transfers in progress or waiting to be processed.
Additionally, FileZilla Pro is also distributed, which has additional protocol support for WebDAV, Amazon S3, Backblaze B2, Dropbox, Microsoft OneDrive, Google Drive, Microsoft Azure Blob and File Storage and Google Cloud Storage. Its price is 19.99 euros.
Free download
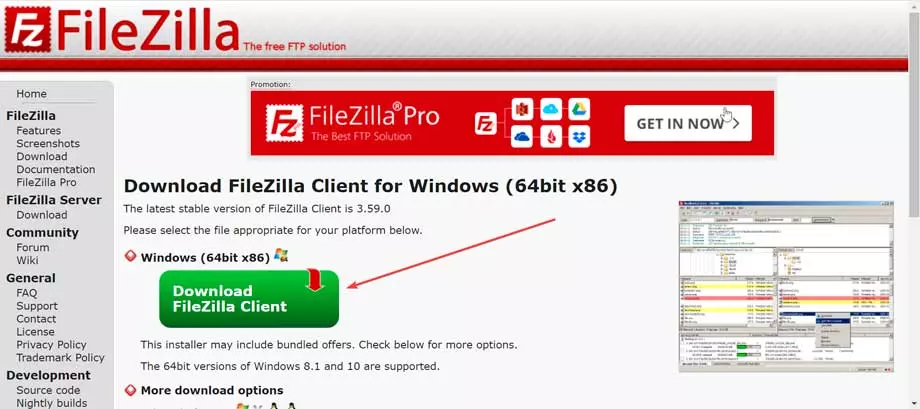
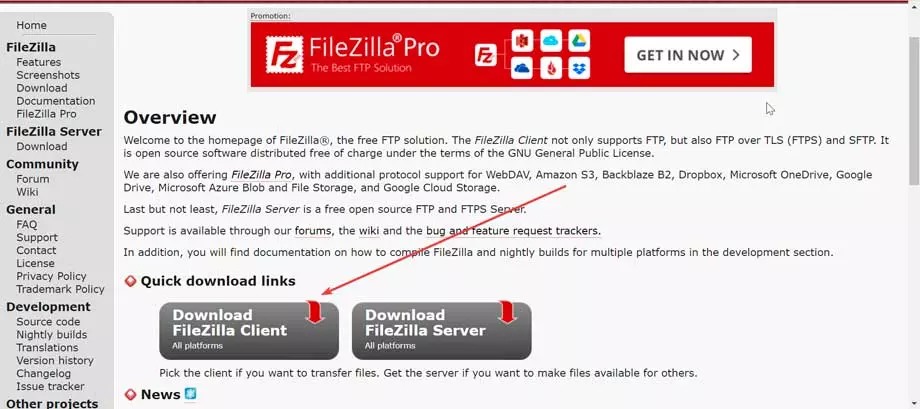
Downloading and installing FileZilla is a quick and simple process, but it’s always a good idea to follow these steps to make sure everything runs smoothly. The first thing we have to do is access its official website, and click on the button Download FileZilla Client.
This will take us to a new page where it will indicate the latest available version and the recommended version according to our operating system, since it is compatible with both 32-bit and 64-bit versions. Therefore, we click again on the button Download FileZilla Client.
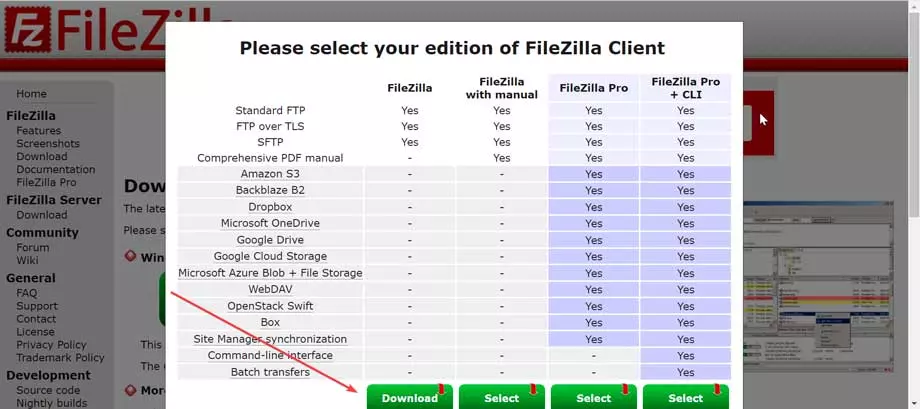
Then a pop-up window will appear for us to choose the edition we want. In our case, we are going to download the first option, FileZilla, so we click on the button Download at the bottom for the download to begin.
Step by step installation
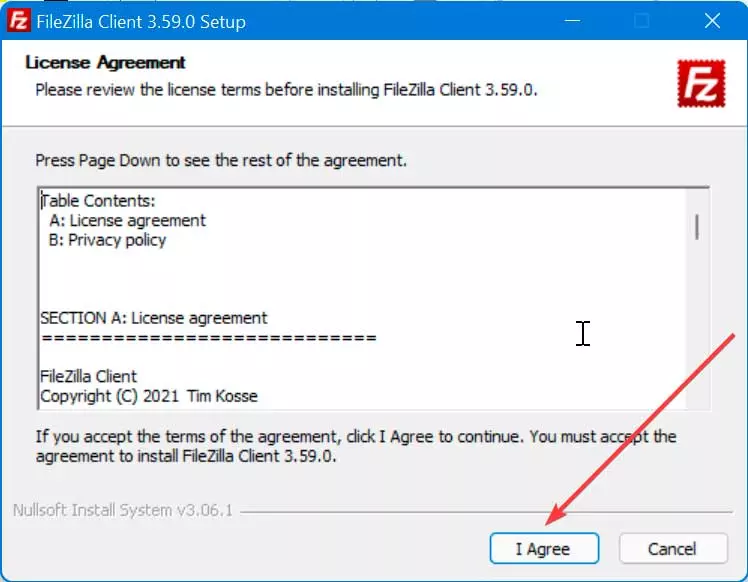
Once downloaded we will obtain a file called FileZilla_3.59.0_win64_sponsored2-setup (in the event that we download the 32-bit version, it will change to win32), we double click on it and the installation wizard will appear as a window, where it will show us the license. We can read it (it is in English) and if we agree, we click on “I Agree”.
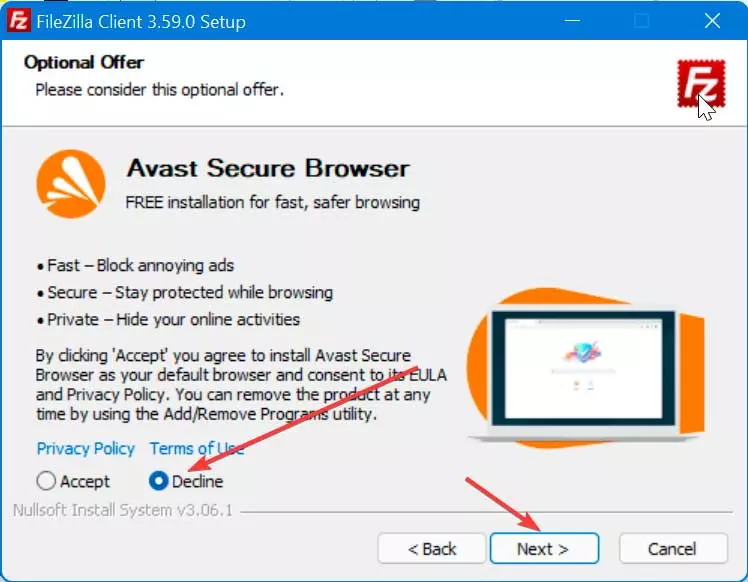
Later it will offer us the possibility of installing other software optionally that we will not need at all, so to prevent it from being installed we mark the “Decline” box and click on the “Next” button.
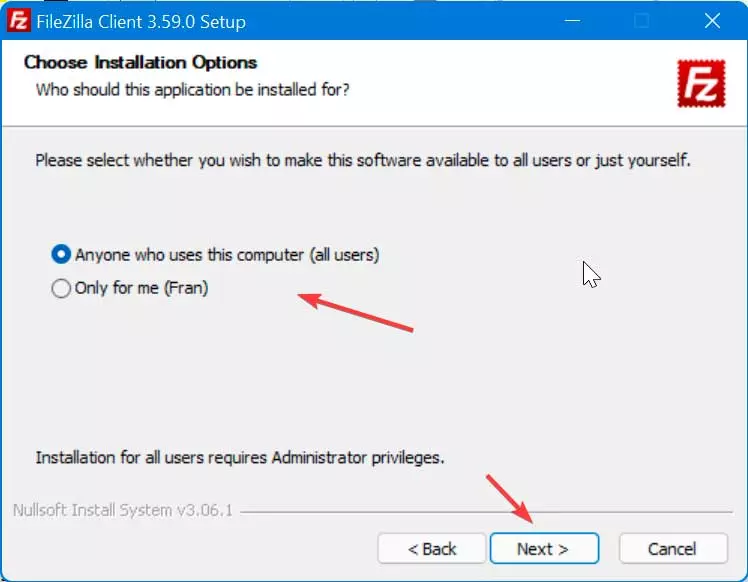
We now go to a new screen where we must select if we want the application to be available so that it can be used by all users of the computer or only for the current account. Select and click on “Next”.
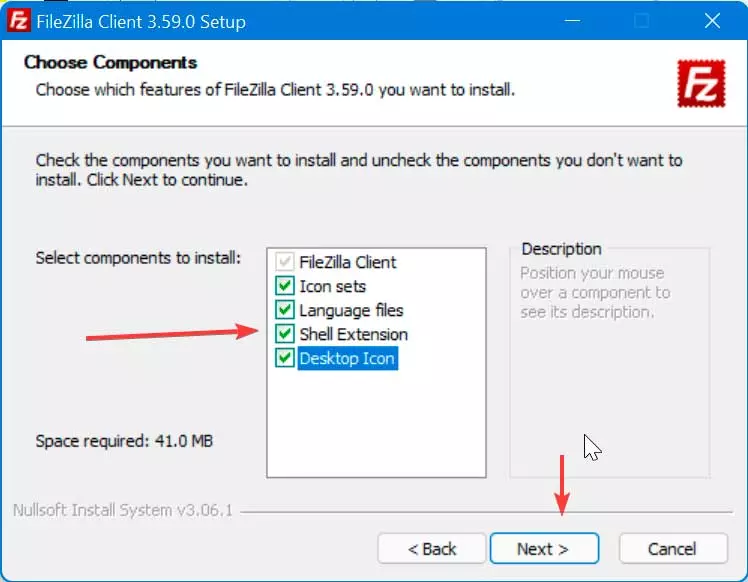
Now, on the new screen, it gives us the option to choose if we want to add additional plugins to the installation such as icons, language, extensions and direct access to the application. We can mark them all, which will take up just 41 MB in total and click on “Next” to continue.
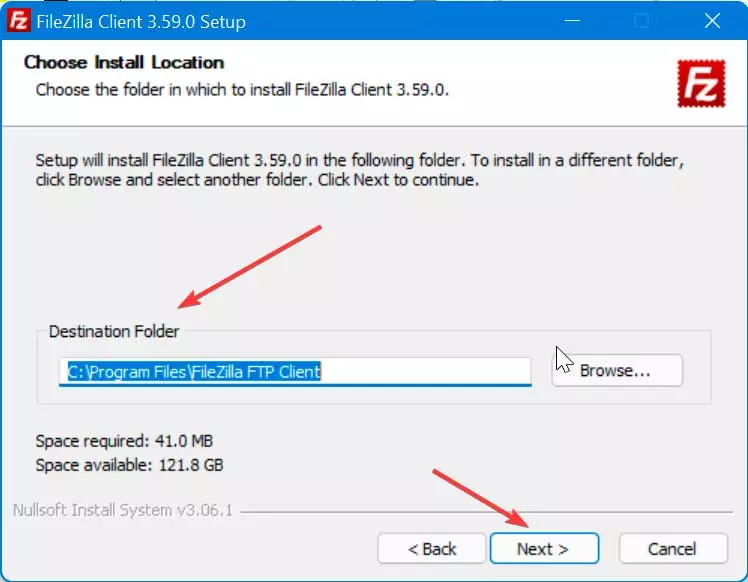
Next we choose the location where we want to host the installation. We can leave the one that comes by default that will install it in the Program Files folder and click on «Next».
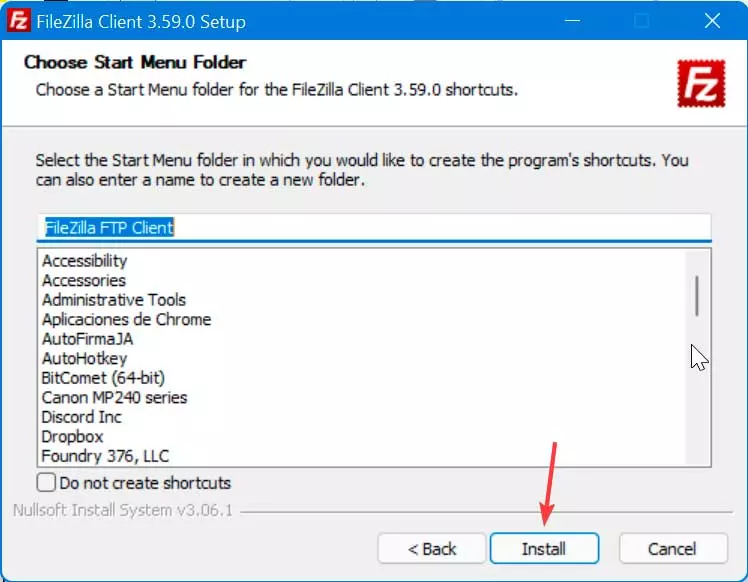
Finally, we have to select how we want the application to be displayed in the Start menu. We can leave FileZilla FTP Client that comes by default and click on the button Install.
The installation is fast and will only last a few seconds, after which a window will appear indicating that it has been installed correctly. If we check the box «Start FileZilla now», the program will be executed when closing the window by clicking on the button Finish.
Connect to an FTP server from FileZilla
Once the main screen of FileZilla appears, an interface divided into six windows and everything perfectly in Spanish. When connecting to a server, we can do it in two main ways, either through a quick connection or by configuring specific connections that we can save later.
Fast connection
In the main menu we will have a quick menu at the top to connect to the server. To do this, it will only be necessary to enter the IP address or the name of the server to which we want to connect in the Server section. Later we enter the username and password along with the connection port. Finally, we press the Quick Connect button.
Most normal FTP servers use port 21, SFTP servers use port 22, and FTP over TLS (implicit mode) uses port 990 by default. However, these ports are not required, so it is better to allow outgoing connections to arbitrary remote ports.
Make Specific Connections
If what we want is to configure more specific ones that we can store, we must click on the “File” tab. This will open a menu where we select the option to site managers, where it will be possible to create a folder to save and keep our servers organized. We can also access it using the keyboard shortcut “Ctrl + S”.
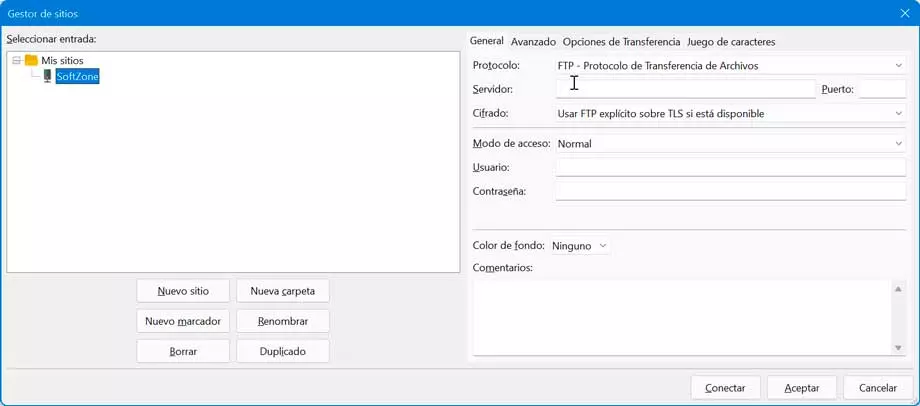
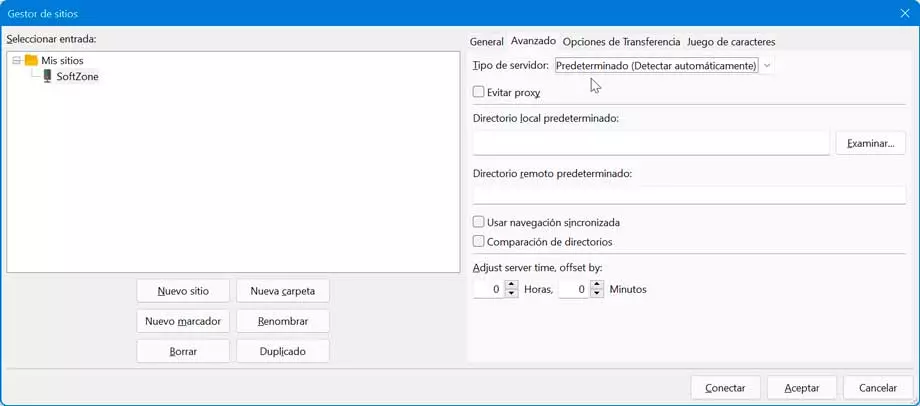
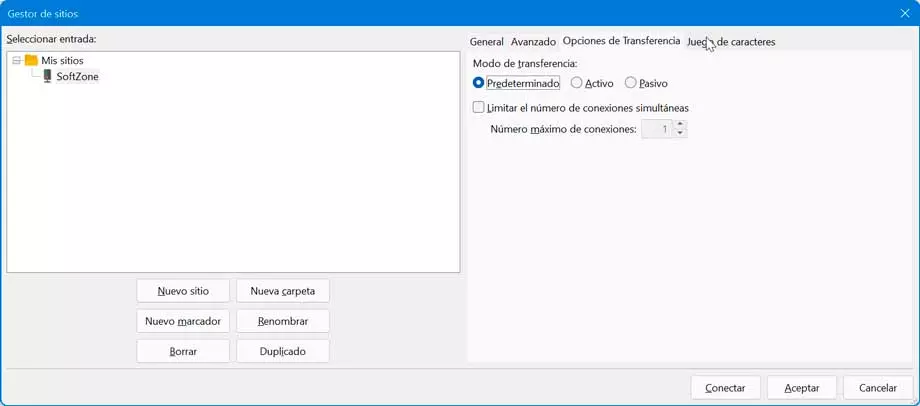
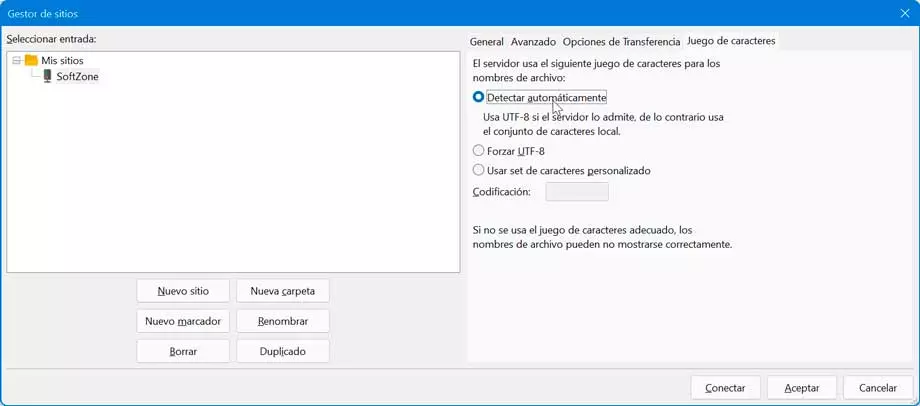
Next, a new window appears where we can use the button New folder to create a folder where to save the servers and the New site button from where we can create a new connection with a server. By clicking on the button new sitethe menu that we have on the left will be enabled with different tabs to fill in such as General, Advanced, Transfer Options and Character Set.
- General: in this tab we are going to choose the connection protocol (FTP, SFTP, Storj). Later we enter the data of the server and port, as well as one of the available encryptions. Next, we select the access mode (Anonymous, Normal, Ask for password, Interactive or Account). Finally, we select the username and password, as well as a color for the background.
- Advanced: here the first thing will be to choose the type of server to which we want to connect, which we will leave as Default (Detect automatically). Later we will choose which will be the default local directory so that when we connect, which folder will be displayed in the Local Site window that appears in the main interface.
- Transfer Options: from here we will be able to limit the number of connections that are made simultaneously, up to a maximum of 10. It is worth putting several simultaneous connections in order to make the most of the connection’s bandwidth.
- Set of characters: in this last section we can change the configuration that we want the server to use in case we need it.
In this way we can configure different types of connections that we need that will be saved inside the My Sites folder, as well as in the different subfolders that we create.
