The first thing we must bear in mind is that the disk drives of our PC are one of the most important elements and what else we have to take care of. Next to the RAM or the processor, hard drives are essential components in our computer, so faults in these elements can be somewhat problematic.
It may be the case that when we are carrying out a system restore in Windows, we find this error message that we are commenting on. Specifically, we are referring here to an error message that tells us that we must enable system protection for this disk drive. Therefore in these same lines we are going to try to help you to know what we have to do when it comes to solving it. At the same time we are going to identify some of the possible causes that can trigger the commented error.
How could it be otherwise, we are also going to provide you with possible solutions that will help us solve this problem.
What to do about disk protection failure
To begin we will tell you that the error message appears when we use the function of Restore Windows system. Therefore this prevents users from running this utility on the chosen disk drive. The message we are talking about refers to the status of the selected disk unit that we want to restore.
Therefore, if we face this problem that recommends us to enable system protection for the disk, let’s see what to do. You can try our recommended solutions below and see if that helps solve the problem. In particular, we are going to talk about some solutions that you can try to make the commented error disappear when restoring Windows.
Enable disk protection through PowerShell
If we refer to this first solution, the first thing we are going to need is to start Windows without problems. Once he operating system is in operation, we will use a simple command. This will help us to recover the protection function of the disk unit that we want to restore. After doing this we can go to the System Restore settings to check if we can enable disk protection.
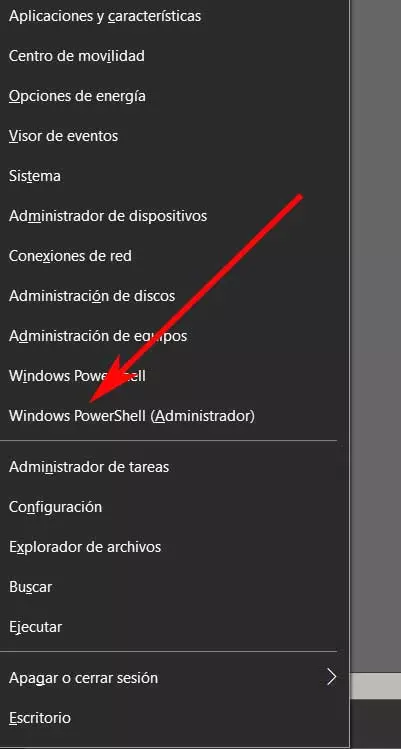
Well, the first thing to do is to use the Win + X key combination to open the menu with a multitude of options.
Then we press the A key to start PowerShell with administrator permissions. Once we have the PowerShell console on the screen, here we write the following commands pressing Enter after each line:
enable-computerrestore -drive "c:"
vssadmin resize shadowstorage /on=c: /for=c: /maxsize=5%
checkpoint-computer -description "Done”
Keep in mind that these commands will take a couple of seconds to execute, after which we have to restart the computer. Once we have done all this, we can try to run the System Restore function again in Windows. If everything went well, the error message that we should turn on disk protection should no longer appear.
Restart the Volume Shadow Copy service
Another of the possible solutions that we can use if the previous one does not work, is the following. And it may be the case that the Volume Shadow Copy or VSS service is not running or is damaged. Also, the system protection used for the Windows restore function may not work properly. This means that we receive the error message discussed earlier.
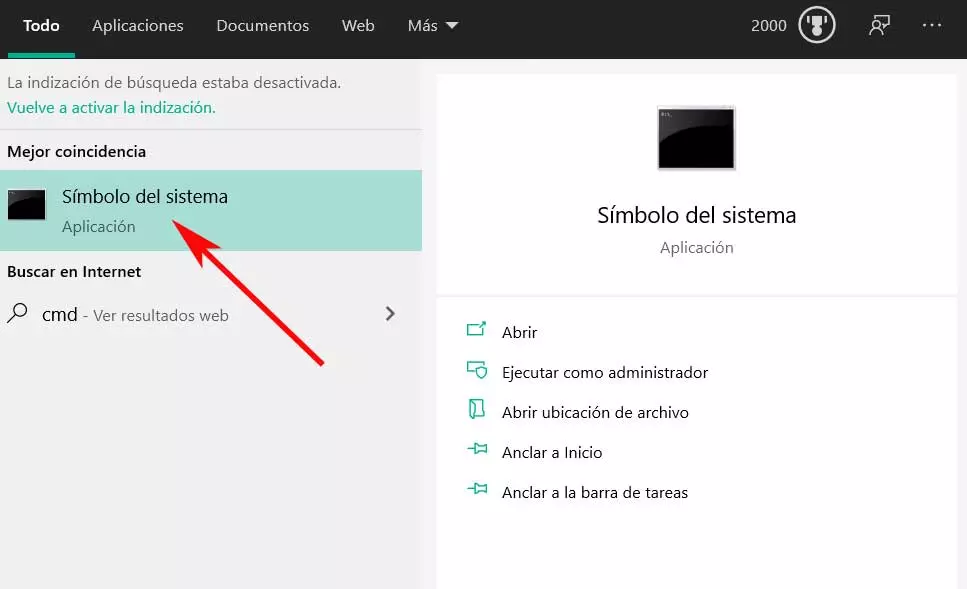
Therefore in this case you should restart the service Volume Shadow Copy before running Windows Restore again to see if the problem is resolved. At this point, it is worth mentioning that we can stop and restart the commented service through a command prompt window. We can access this by just writing CMD in the operating system search box. In the event that we cannot access Windows, we can also open a command prompt window from startup in safe mode.
Thus, in the command prompt window we write the following commands and press Enter after each line:
net stop vss
net start vss
After executing both commands, we could try again to execute the Windows restore function after restarting the PC. So if this solution has worked, the error to activate disk protection should no longer appear.
Rename the system file
As we have commented before, due to this failed to enable disk protection, the Windows restore function does not work. This happens even when trying to run it through a command prompt window. Since this problem occurs mainly when we cannot access the operating system, we will have to execute the safe boot mode. As in the case described above, from here we can open a command prompt window.
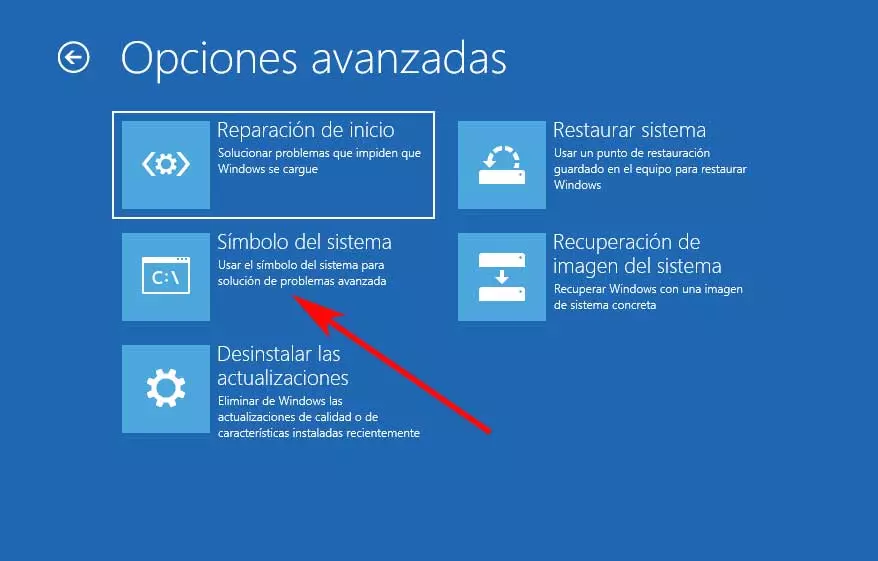
Once we have started Windows in safe mode, for the option called Troubleshoot that appears on the screen. In the next one, we will be able to open a command prompt window, which is what interests us in this case. In it we will have to write the following command and press Enter to execute it:
cd %systemroot%system32config
Once we have navigated to the Config folder within System32, it is time to rename two system files. This is something we can do by typing the two commands that we show you below and pressing Enter after each of them:
ren SYSTEM system.001
ren SOFTWARE software.001
After executing both commands, we can now execute the System Restore functionality from this same CMD window:
rstrui.exe /offline:C:windows=active
From now on the functionality of windows restore It should now work without any problem. This means that the error message when activating disk protection should no longer appear anywhere.