For this reason, today we are going to learn a little more about what this security filter consists of and how it works. In case we need to disable it, we can also do it in different ways, either by accessing the Windows Defender Security Center, such as from the Local Group Policy Editor or the Windows Registry Editor.
What is SmartScreen Filter
The SmartScreen Filter works as a alert system which is in charge of automatically analyzing all the files in our system, the programs, the digital signature of all the applications we download and the websites we visit. To do this, it uses a large database containing whitelisted and blacklisted items to analyze whether something can be opened safely. In this way, it allows us to decide if it is a reliable application or, on the contrary, it could be a threat to our security.
It usually works like a additional security layer for our system that is responsible for checking everything that happens in it regardless of whether we have other security applications installed. This security layer is completely invisible, runs in the background and does not affect system operation or performance. When it is displayed, it does so through a large blue box that indicates that “Windows protected your PC” by blocking a program or a website.
If it is a program, we will usually have the option to “Run anyway”, in case we are sure that it does not present risks. If SmartScreen appears when we visit a website that we know to be safe, you can click “More Info” and mark it as a safe website. It is generally a useful security layer, however it can sometimes prevent us from downloading content or prevent us from visiting a website that we know is safe but that it is not verified, so in this case we can choose to deactivate it.
Ways to disable this security filter
If we want to temporarily or permanently disable the SmartScreen filter in Windows 10 or Windows 11, we have different ways to do it.
Use Windows Defender Security Center
If we want to have access to the Windows security options, we can find them grouped within Windows Defender, so from here we can access the SmartScreen filter. To access it, simply use the Start menu search engine and type Windows Security.
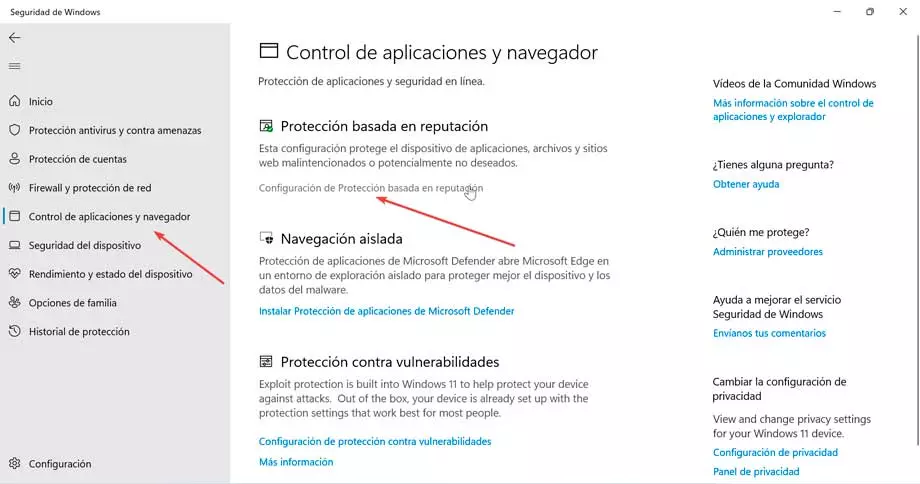
Once we have accessed, in the left column click on “Application and browser control”. Then, in the right column, in the “Reputation-based protection” section, click on “Reputation-Based Protection Settings”.
In the new screen that appears we can see the different layers of security that SmartScreen offers us to protect our files and that we can deactivate and reactivate when we need it.
- Check Apps and files. It analyzes all the applications and files on our computer and warns us when any of them could be dangerous.
- SmartScreen for Microsoft Edge. It protects our browsing and helps protect us from both malicious websites and dangerous downloads.
- SmartScreen for apps from the Microsoft Store. It helps us avoid downloading malware from the Windows Store.
- Block potentially unwanted applications. Protects the system from applications with a bad reputation that can cause unexpected problems. It allows us to block both applications and downloads.
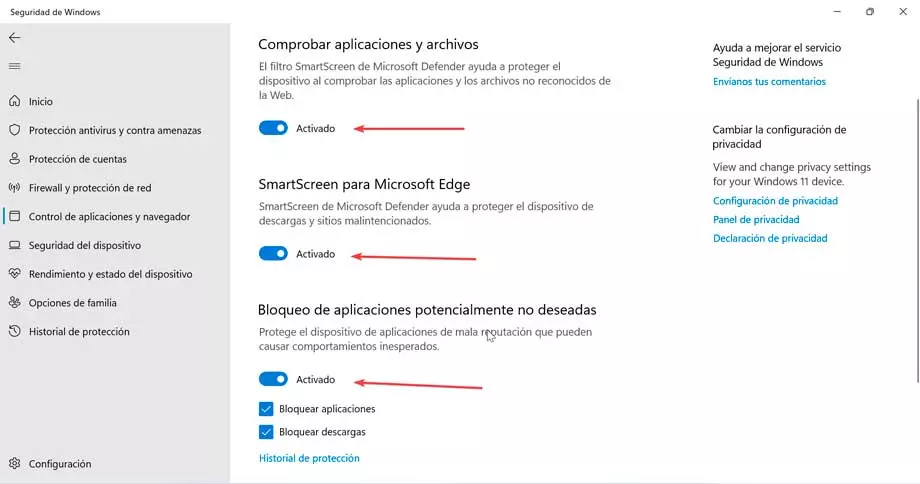
All these options are usually activated by default, so if we want to deactivate them, just click on the button where it says Activated and it will become Deactivated for each function that we indicate. At any time we can click the switch again and mark it as On again.
Using the Group Policy Editor
We can also disable SmartScreen through the Local Group Policy Editor, using different filters or permanently disabling these filters. We can also make changes to those filters at the user level and the respective options in Windows Security will be grayed out. This Editor is available for users with Windows 10 Pro or Enterprise and Windows 11.
To access it, press the keyboard shortcut Windows + R to launch the Run command. Here we write gpedit.msc and press Enter or the OK button.
Once inside, we will find different group policies available that we can use to deactivate the Windows SmartScreen filters on a case-by-case basis and that we can find by navigating through the left panel to their respective paths.
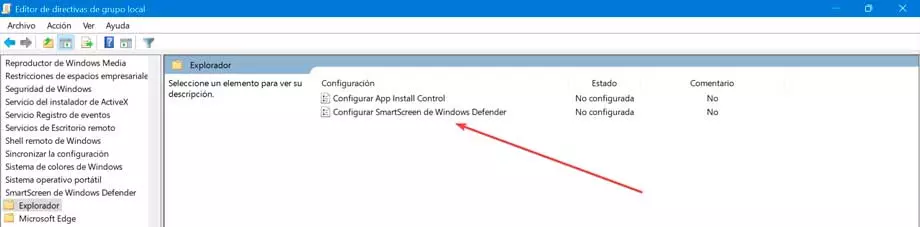
Configuración del equipo / Plantillas administrativas / Componentes de Windows / SmartScreen de Windows Defender / Explorador / Configurar SmartScreen de Windows Defender
This policy setting turns on Microsoft Defender SmartScreen generally to check apps and files on your device. To deactivate it, double click on it and in the next window we mark Deactivated.
Configuración del equipo / Plantillas administrativas / Componentes de Windows / SmartScreen de Windows Defender / Explorador / Configurar App Install Control
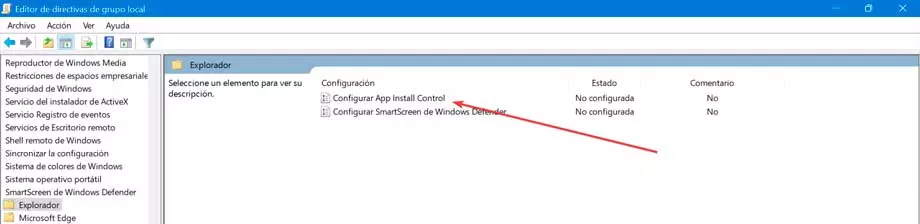
The purpose of this setting is to prevent malicious content from being able to affect users’ devices by downloading executable content from the Internet. It does not protect against malicious content from USB devices, network shares, or other non-Internet sources. To deactivate it, double click on it and in the next window we mark Deactivated.
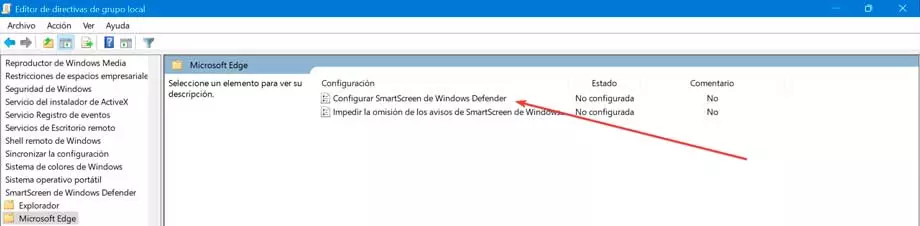
Configuración del equipo / Plantillas administrativas / Componentes de Windows / SmartScreen de Windows Defender / Microsoft Edge / Configurar SmartScreen de Windows Defender
This policy setting turns on Microsoft Defender SmartScreen for the Microsoft Edge browser for protection against websites and downloads. To deactivate it, double click on it and in the next window we mark Deactivated.
Configuración del equipo / Plantillas administrativas / Componentes de Windows / SmartScreen de Windows Defender / Microsoft Edge / Impedir la omisión de los avisos de SmartScreen de Windows Defender para sitios
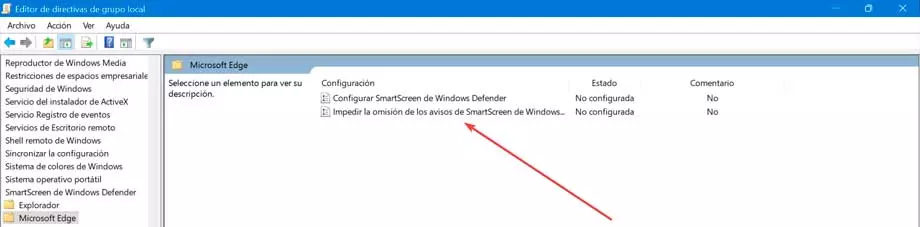
This policy setting prevents users from bypassing Microsoft Defender SmartScreen warnings about potentially malicious sites. If we enable this setting, it prevents employees from bypassing the warning, which prevents them from going to the site.
Using Registry Editor
Another method that we have available to disable SmartScreen is to use the Windows Registry Editor. In order to access it, we are going to first press the Windows + R key combination. Here we write regedit and press Enter or the OK button.
Later we will navigate to the following route:
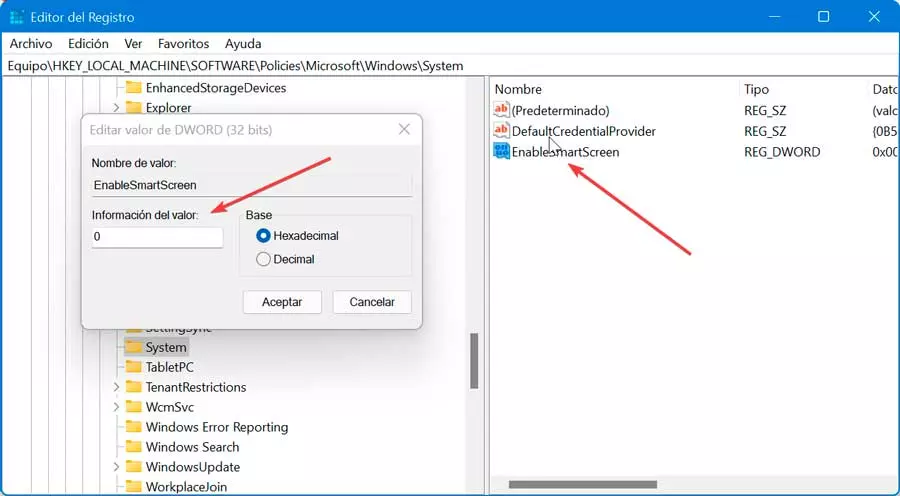
HKEY_LOCAL_MACHINE / SOFTWARE / Policies / Microsoft / Windows / System
Once here, we right-click and select New and Value DWORD (32-bit) and we give it a name EnableSmartScreen. We double click on the created value and configure the Value data section by typing 0 to deactivate SmartScreen.
Next, we right-click again and select New and String Value. name we put ShellSmartScreenLevel and double click on it. Now in the new string value, within the Value information section we write Warn (Warning) or Block (Block) according to our preferences.
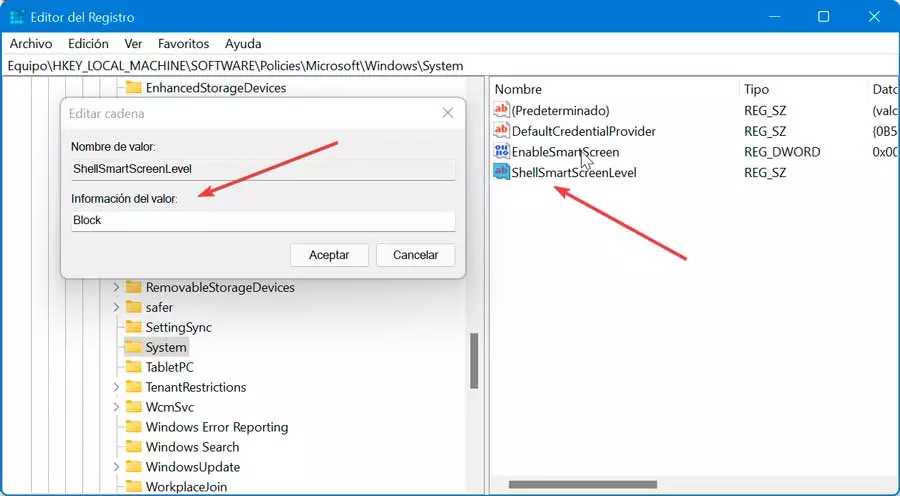
By using Warn it will show us a SmartScreen warning message which we can ignore and if we use Block it will show us a warning message and also prevent us from running the app or file manually.