This change is the simplest of all since we can easily make it from the Windows 11 Settings menu. To do this, press the keyboard shortcut Windows + I, and once in the Settings menu, click on Personalize and later in Taskbaryes Now, we click on the section Taskbar behavior Y Taskbar Alignment We change the option from “Center” to “Left”.
In this way, the Start menu will be placed and open on the left side and the icons on the taskbar will also be aligned on the left side.
Use Windows 10 wallpapers
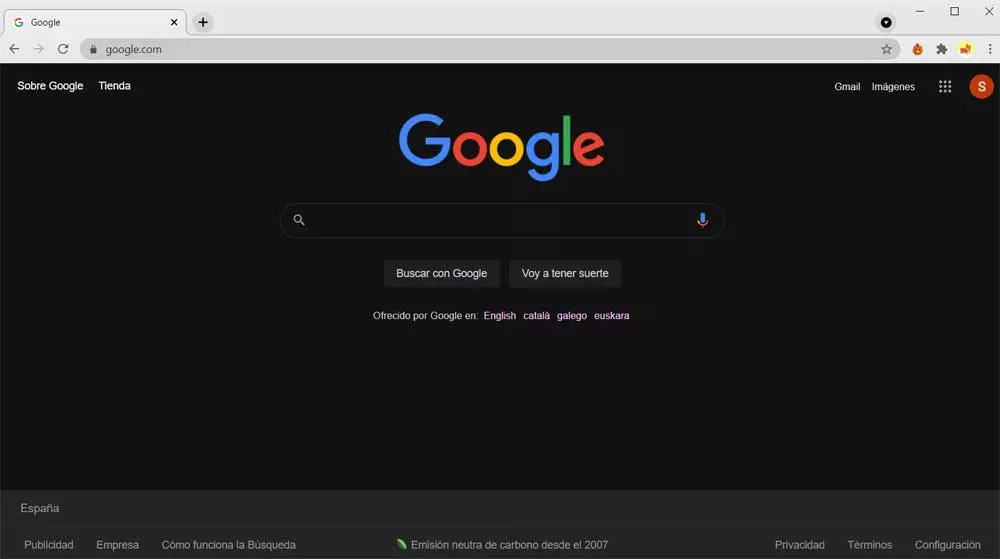
If we don’t like the new wallpapers that Windows 11 has by default either, it is possible to recover those that we had available in Windows 10. We can download these from the Internet, for example, from the WallpaperCave.com page, at which we can find all those predetermined funds. We can simply use the search engine to show all the available ones.
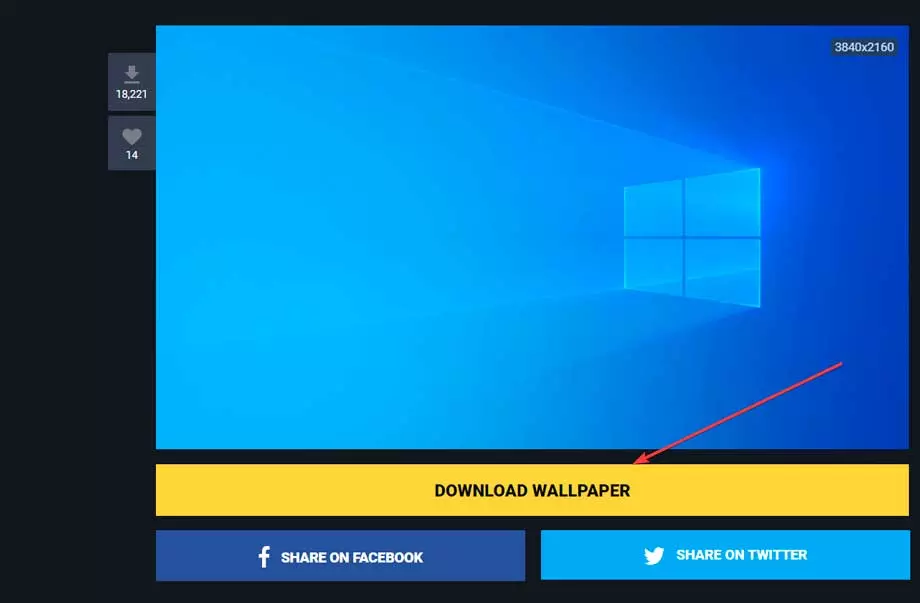
Later we click with the right button on the background that we want to use and select Save as to download it or press the button Download Wallpaper. Then we click with the right mouse button on a blank space on the Desktop and select Personalize.
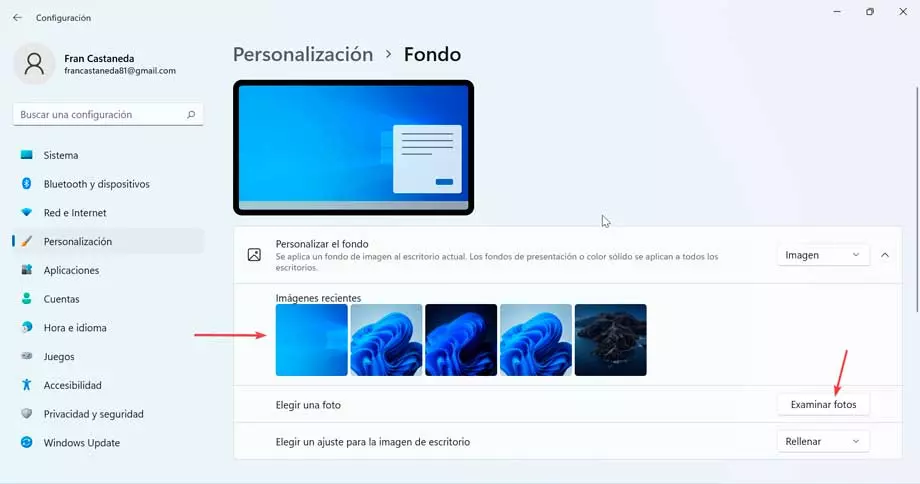
Next, we click on Background and make sure that the Custom Background option is set to Image. Later we click on Browse photos and locate the downloaded wallpaper that will run and be displayed.
Change the Start menu
If we want the Start menu to not only be on the left side, but also to look much more like Windows 10, then we will have to choose to use third-party software, such as StartAllBack. This application is paid, we can download a free 30-day trial version and if it convinces us we can choose to pay for its license, which costs 4.99 dollars to continue using it.

Once downloaded and installed, the menu will appear. StartAllBack Configuration from where to select a Windows 10 theme. Clicking on one or the other will automatically show the theme on the taskbar and clicking on the Windows icon will open the selected Start menu. In case we don’t like it, we can always put the Windows 11 menu back.
Get full context menu
Another of the most conflicting changes in Windows 11 has been its context menu that now only shows some options and in many cases the most important is left out. For the full menu to appear, it will be necessary to click on More options, which will give us access to the classic contextual menu.
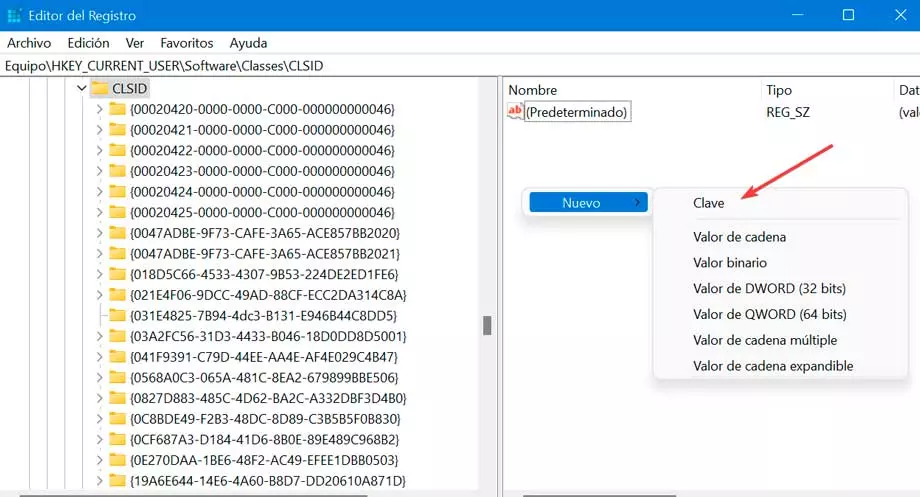
To directly use the classic Windows 10 context menu, we can use a trick within the Windows 11 registry. We do this by pressing the Windows + R keyboard shortcut and accessing the Run command. Here, we type regedit and hit Enter.
Next, we must navigate to the following route:
HKEY_CURRENT_USER / SOFTWARE /CLASSES /CLSID
Here we need to create a new registry key under CLSID. To do this, right-click on the right pane of the window and select “New” and “Key” and assign it as a name {86ca1aa0-34aa-4e8b-a509-50c905bae2a2}.
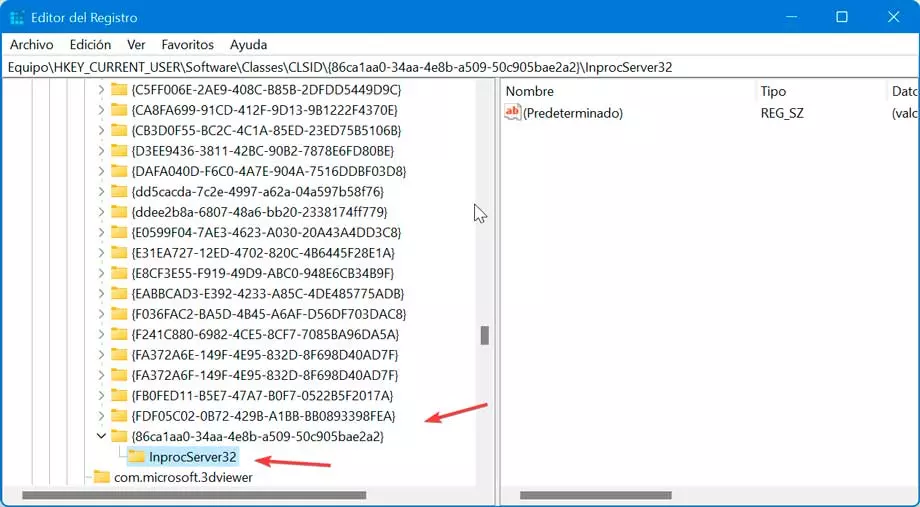
Below we create another key called InprocServer32. We open it and set its blank value. Finally, we click OK. We close the registry editor and restart. We will check with the context menu now it opens in the classic style. In any case, we can return to the default Windows 11 context menu just by deleting the InProcServer32 key.
Change File Explorer
The new File Explorer in Windows 11 has a similar layout to Windows 11 but it does not have a ribbon menu and some of its items are almost hidden within the options submenu. Even the cut, paste and rename buttons only include the icon without the text above it. To return to the old Explorer we must make some changes in the registry.
To do this, press the Windows + R key combination and launch the Run command. Here we write regedit and press Enter. Next, we navigate to the route:
HKEY_LOCAL_MACHINE / SOFTWARE / Microsoft / Windows / CurrentVersion / Shell Extensions
Here, we create a registry key called Blocked. Later we click with the right button and select New and Key and assign it as a name {e2bf9676-5f8f-435c-97eb-11607a5bedf7}.

We close the registry editor and restart the PC so that our computer shows the classic Windows 10 File Explorer again, although the design of some icons may be somewhat different.
Go back to the Windows 10 Recycle Bin
To get the full look of Windows 10 we will use the same Recycle Bin icon. This is something that we can carry out as long as we have access to a copy of Windows 10 since we will need to recover the file imageres.dll.mn from folder:
C:/ Windows / SystemResources
We save the file on our Windows PC in a place where we are going to keep it permanently, where we are not going to move it.
Next, we right-click on the desktop and click on Personalize. We click on Topics and we click on Desktop Icon Settings. Next, we select Desktop Icon Settings. Here we select the Recycle Bin (Full) and click Change Icon. Now, click on Browse and select the imageres.dll.mun file. Later, we repeat the process with the Recycle Bin (empty).

From now on, the icons of the Recycle Bin must be changed to the appearance of Windows 10. We can always recover the original trash by clicking on the Restore default button.