To begin with, we will tell you that from the Settings app from the operating system itself we have access to this element. We only have to open the application that we are commenting on through the Win + I key combination.
Open the Windows Firewall GUI
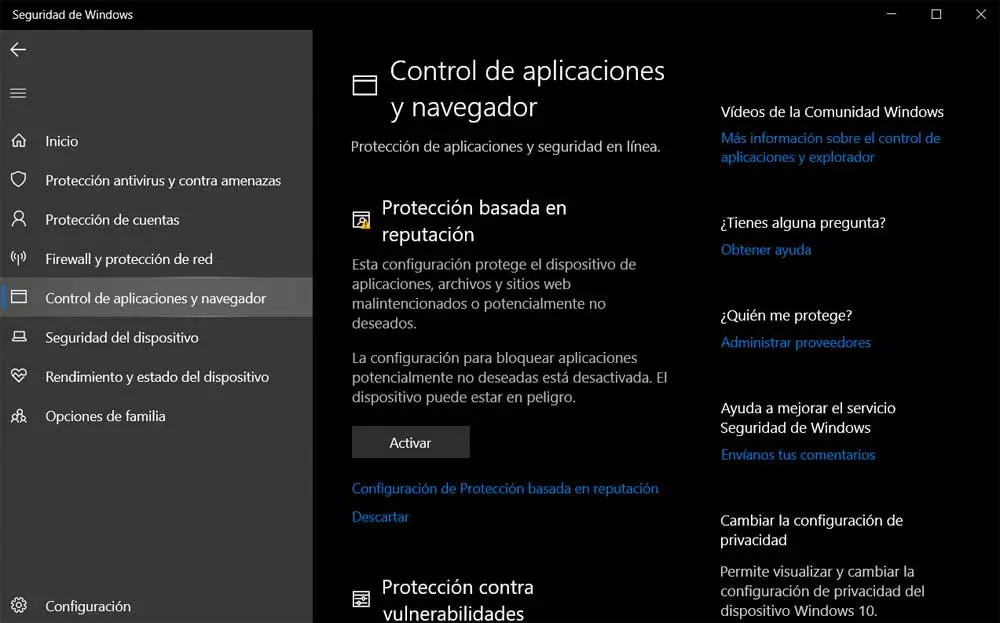
Next, we go to the Update and security section. In the left panel we click on Windows Security to finally click on the button Open Window Securitys.
At that time we fully entered into everything related to the antivirus that is part of this operating system, Windows Defender. But at the same time in this window we find a section called Firewall and network protection. From that moment on, we will be able to control all the functions that this security element offers us in the system.
In the same way, we find a good number of parameters that we can customize and configure. This will help us to have a firewall that works as we wish while using our PC connected to the internet.
But this is not the only way we can interact with this element. Perhaps more advanced users of the operating system are interested in knowing that using PowerShell this Firewall can be easily configured from the command line. Precisely below we are going to show you the most common commands used for these tasks with the Windows firewall.
Use Firewall from PowerShell
The first thing to know In this sense is that Windows incorporates a module called NetSecurity. This one offers it to us Microsoft and contains all the necessary functionality to add, remove and modify Firewall rules. To be able to use all these commands that we are talking about, the first thing will be to open the PowerShell. We do this by simply typing your name in the Windows 10 search box.
List the rules available for this security element
From that moment on, the window belonging to this element of the system will open.
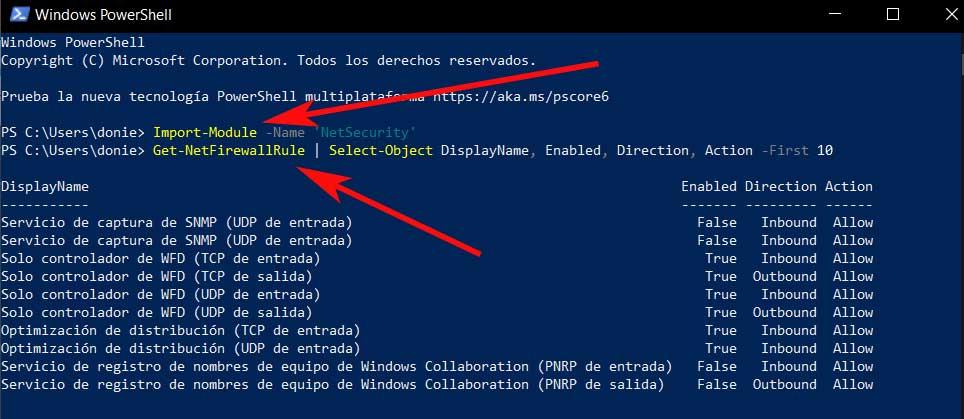
To load the module NetSecurity as such, we simply have to import it as we will see below:
Import-Module -Name 'NetSecurity'
Once we have loaded the module that we need in the operating system, we are going to obtain a list with the firewall rules that we have at our disposal. We must bear in mind that there are many that we can use, that will depend on the needs of each one or how much we want to delve into this topic.
To see all the firewall rules existing, we will do it through the following command:
cmdlet, Get-NetFirewallRule
However, as we mentioned, there are many that we can use, but if, for example, we want to see only the first 10 and have them displayed on the screen, this is how we do it:
Get-NetFirewallRule | Select-Object DisplayName, Enabled, Direction, Action -First 10
Create a new rule for the Firewall
It may also be the case that we need create a new rule own and personalized. This is something that will be very helpful for users who want to protect their Windows computer as much as possible. Say there are many different ways to create a new rule for this Firewall from the PowerShell. But the command that does it is the following:
Net-NewFirewallRule
We must also bear in mind that for this to work correctly there are some basic properties that we must add. Among the most important, these are some of the ones that you must use almost obligatorily:
- DisplayName: refers to the custom name of the new Firewall rule.
- Direction: URL from which we want to block the traffic that comes out of the computer or the one that reaches us.
- Action: the action to be taken if the rule is met, i.e. Let or To block, so we use the Allow and Block parameters.
Modify an existing rule
It can also be the case that we need or want to modify an existing rule without deleting and recreating it completely. Say that this is something that we can also do directly from Windows PowerShell. For this we must execute the following command:
Set-NetFirewallRule
As we told you, this will allow us to modify the rule of the firewall that we specify in the command itself. Of course, we must bear in mind that as it happened in the creation, here we must use the same parameters that we told you before, that is, DisplayName, Direction and Action. These will help us to establish the new behavior of the rule that we had created at the time.
Also, it is interesting to know that this same command that we discuss here, has the ability to operate on multiple rules at the same time.
Delete an existing Firewall rule
Finally, we are going to see how to delete an existing rule that is part of the Windows Firewall. We can make this decision in the event that it is no longer necessary to be available in the system. As you can imagine this, we can also carry it out from PowerShell through a command. Therefore, we only have to open a new window in this section of the system and use the following command that we mention:
Remove-NetFirewallRule
All we have to do here is specify the actual name of the existing rule. What we need to keep in mind here is that when using this command in particular, it is often advisable to use the following parameter:
WhatIf
It is worth mentioning that this parameter that we are commenting on will be very useful to verify that the rule we refer to here is the correct one before eliminating it completely. At the same time it is important to point out that thanks to this delete command we have the possibility of delete multiple rules at once. However, we also recommend that you use it carefully. The main reason for this is that we can make mistakes and delete rules by mistake.
We will also tell you that a useful command but dangerous, is the one that helps us to eliminate all the Firewall rules that have been created previously:
Remove-NetFirewallFule