These recordings that we are talking about can be very helpful to, for example, make backup copies of our personal files. This way we will have the possibility to save them in safe places in case some misfortune happens with our PC. But not only that, but we also tend to burn our CDs and DVDs with multimedia content such as videos and music and thus play them on other specific devices.
As we mentioned before, this is something that we can carry out quickly on the PC with some type of software. But if there is a program that has been characterized by offering us everything we need in this regard, that is Wildman. Specifically, we are talking about a program that has been with us for a good number of years offering recording functions. In addition, with the passage of time, its functionality has grown significantly in order to adapt to current times.
It is for all this that below we are going to talk about how you can make samples of your own CD recordings and DVD with this software solution. Despite how much it has grown over time, the functionality we are talking about here has changed rather little, as we will see.
How to burn a CD or DVD with Nero
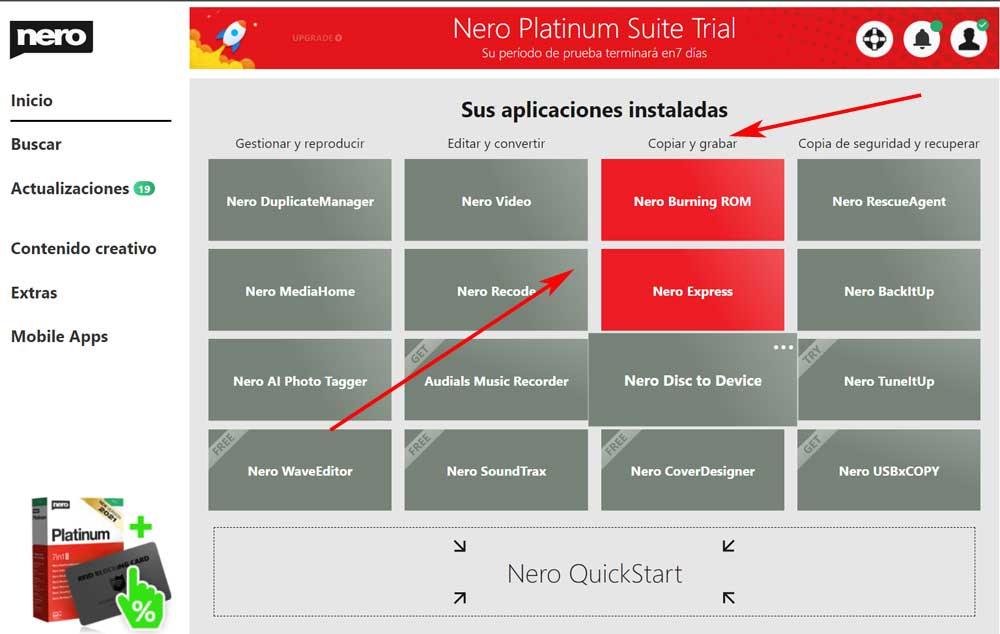
As we have told you, this is a Program which currently has a multitude of additional functions to the recording itself. We can download it from this link and then install it on our computer. Once the process is finished, we find a complete user interface in which we see all the available functions. In fact, these are divided into four categories that we see at the top of each of the columns. Therefore, what interests us in this case is the so-called Copy and Record.
In turn, here we find four different functions directly related to the recording of content.
Set up CD or DVD burning
Therefore, to burn the CD or DVD, which is what we are looking for in these lines, we click on the option of Nero Burning Rom so that the window we are looking for appears in this case. In fact, those of you who have used this program before are sure that this interface is more than familiar to you. This is because over the years its appearance has remained quite similar to the beginning.
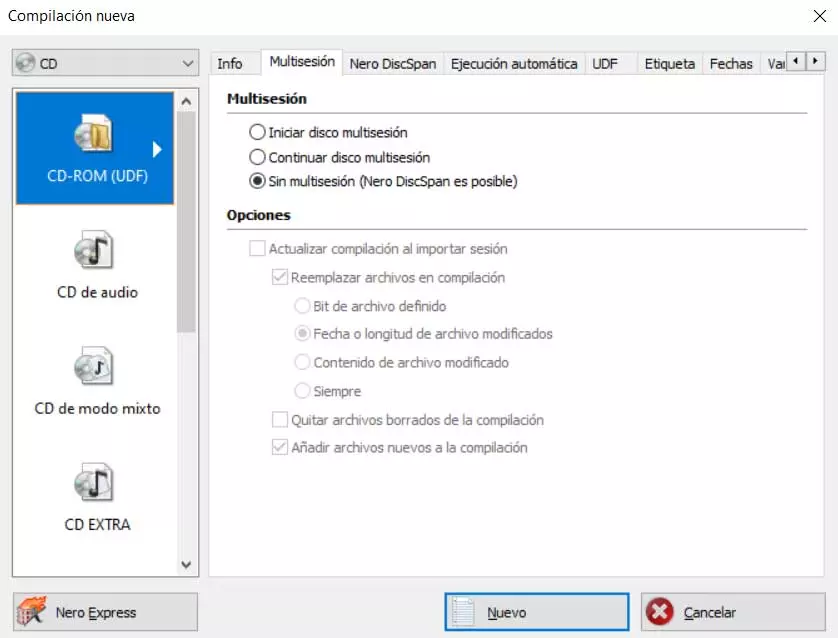
But of course, it has evolved a bit to update itself according to current times. Thus, in the window that we now have on the screen and which is called New Compilation, the first thing we do is choose the physical medium that we are going to record. Specifically in the upper left corner there is a drop-down list where we choose the support that we are commenting on, CD, DVD or Blu-ray.

At the same time, in the panel that we see on the left of this window, we will have the possibility to choose the type of recording that we are going to do. We refer to the data that we are going to add to the support. Among others we can choose an audio CD, bootable, mixed, an ISO, etc. On the other hand, in the right part of the window, we can choose if the support is going to have a single session or several. In this way Nero will leave the CD or DVD open or not so that we can burn content later.
Start recording
In this same window we find, in addition to the call Multisession, with other tabs. These will allow us to additionally customize and configure the recording that we are going to carry out a little more. For example, we will have the possibility to establish a label, specify the dates of the volume, limit the size of the files to be recorded, etc.
Once we are done with the setting Of the new recordingWe will only have to click on the New button located at the bottom of the window. This will lead us to a new one in which we can now select the content that we are going to add to the CD or DVD.
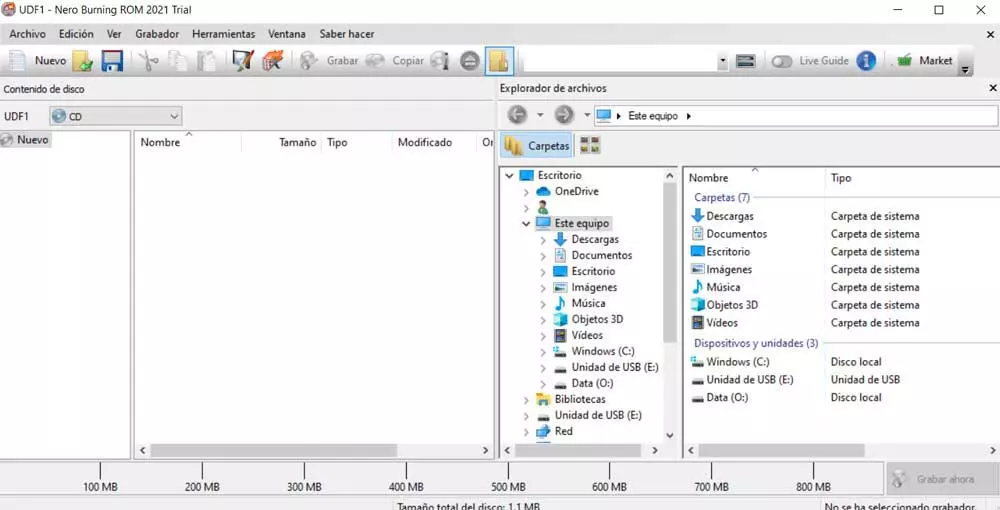
Here we only have to drag the corresponding files that we are going to record from the local disk drives. These are located on the right side of the interface, so we have to drag them to the left panel. At the bottom of the window we will see how a bar that acts as an indicator lets us see how much space we have occupied. To finish we just have to choose the recording unit and start the process.
Other types of recordings that we can do with Nero
However, as we mentioned before, at the moment Nero has become a complete suite packed with features. That is why below we are going to talk about some of the most interesting that you can carry out additionally from this program.
And it is that something that we must take into consideration is that this complete suite allows us to make compilations or recordings of all kinds of data. In this way it adapts the CD, DVD or Blu-Ray support to those contents that we are going to dump from here.
Burn movie or game .VOB files
It may be the case that our disk drives have a large number of files in.VOB .IFO or .BUP. These generally correspond to a DVD of either a game or a movie. Thus, in the event that we do not know how to record these files, we are going to help you. Also keep in mind that sometimes these files are compressed.
Therefore the first thing we do is unzip the files in case we have them like this. We keep all the extracted files in the same folder so that they are visible among them. We then return to the Nero Burning ROM interface. Here what we have to do is select the DVD support and click on the option Video dvd. When we click on the New button, we find two folders Video_TS and Audio_TS.
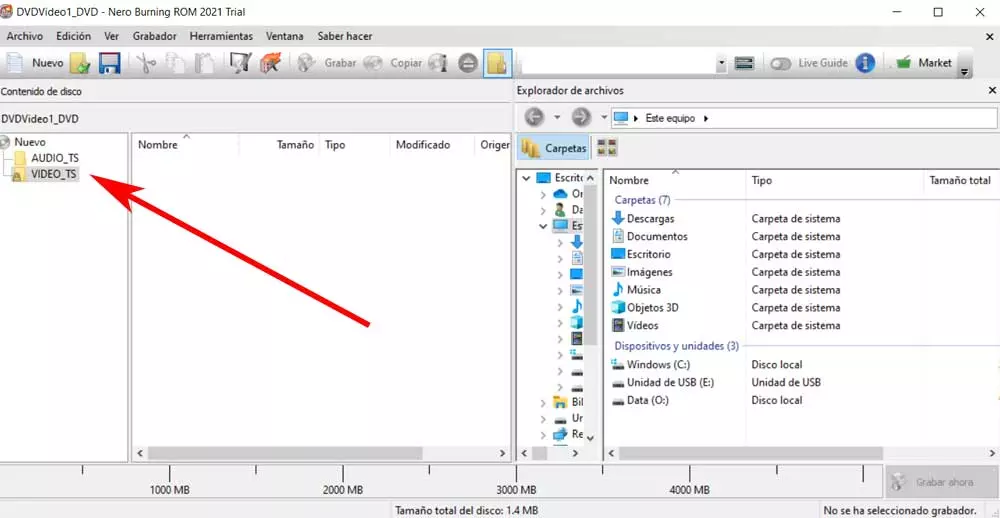
Now what we have to do is move all the .VOB files to the VIDEO_TS folder so that Nero will detect them and create the video DVD.
Record movies in different formats with the program
It may also be the case that we have video files, for example, corresponding to a movie or series. That is why we will now see how to burn several videos or movies with Nero on a single CD or DVD. With this we achieve that this is reproduced in all types of devices. Once again, the first thing we do is open Nero. However, in this case we are going to use Nero Express, since for this type of data it is much faster and easier.
In the window that appears when Nero Express is run, we must choose the Videos section and choose AVCHD File.
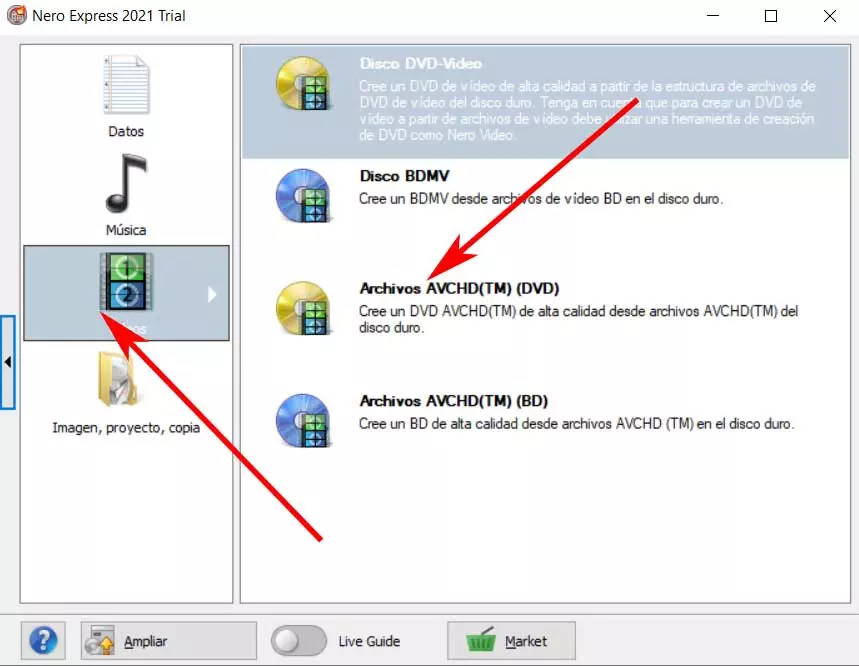
In the window that appears below we must add all the records that we want to be added to the new album. We can also see, at the bottom of the window, the space occupied and available on our CD or DVD. Once the video files that we want to record from Nero have been added, we follow the wizard to finish the content recording process.
Burn MP3 music files to CD with Nero
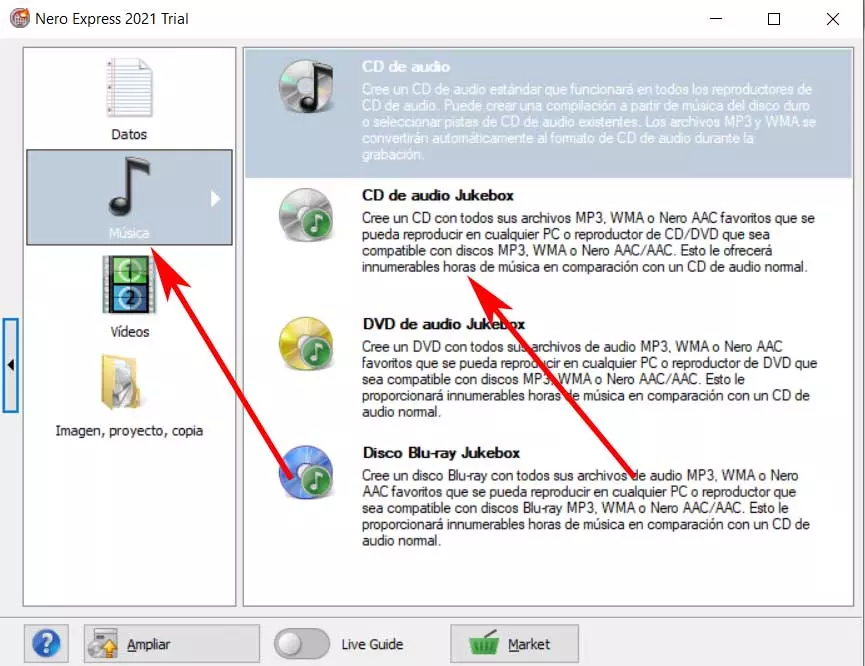
Changing the third a bit, from Nero we also have the possibility of recording music songs in MP3 format on a single CD. This will allow us to play it in any MP3 music player, since the data is not recorded like a conventional music disc. For all this that we tell you again, we open the recording program and as before we are going to use Nero Express.
In the new window that appears, select Music and tell the program that we want to create a new Jukebox audio CD.
Next we must add all the songs in MP3 that we want to record on the CD. Then the usual wizard of the program will appear to finish the recording process in the simplest way. Once the recording as such we can now play this CD with songs on any music player.