If we come across any of these problems, we should not despair since all of them have possible solutions that we can carry out in a simple way and that will allow us to use the player correctly again.
Main problems and bugs
Next, we are going to review the most common errors that we can find when playing content in VLC and different ways to solve it.
VLC won’t start
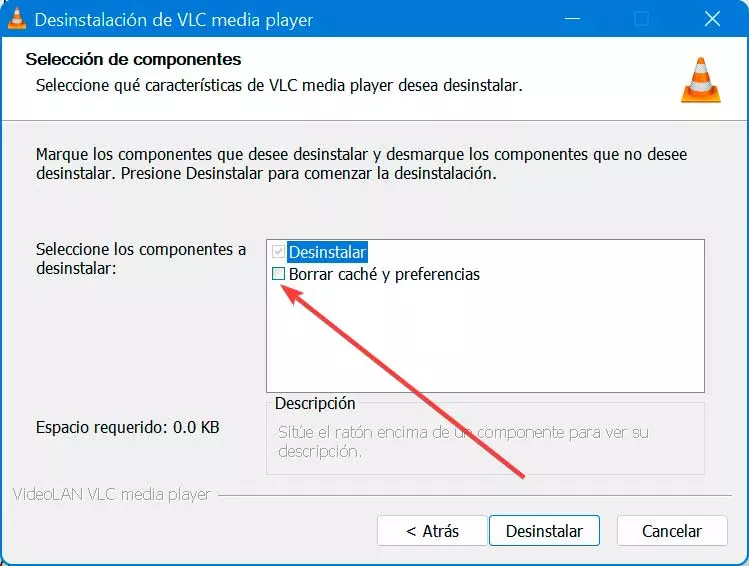
In the event that the program stops working after a change has been made, its behavior is not as expected, or it simply does not even start. In this case we must uninstall it thoroughly to reinstall it later.
To do this, press the shortcut “Windows + I” and access the Configuration menu. Here we click on “Applications” and “Applications and features”. We locate the VLC application and click on uninstall.
Later, after the uninstall path, a new screen will appear where we see a selector that indicates “Clear cache and preferences” which by default is unchecked, so we must mark it so that the elimination of the program is carried out completely. Thus, after reinstalling it, it will return to normal and boot.
VLC crashes
In the event that VLC crashes during video playback, we have different ways to solve it. For one thing, we close the app, open File Explorer, click View, and choose Show Hidden Files. Later we navigate to the following address:
C:/User/User_Name/AppData/Roaming/VLC
Now we right-click on VLC and it will we change the name.

Another option from the File Explorer, we look for the program execution file. We right-click on the .exe file and select Properties from where we should run it in compatibility mode.
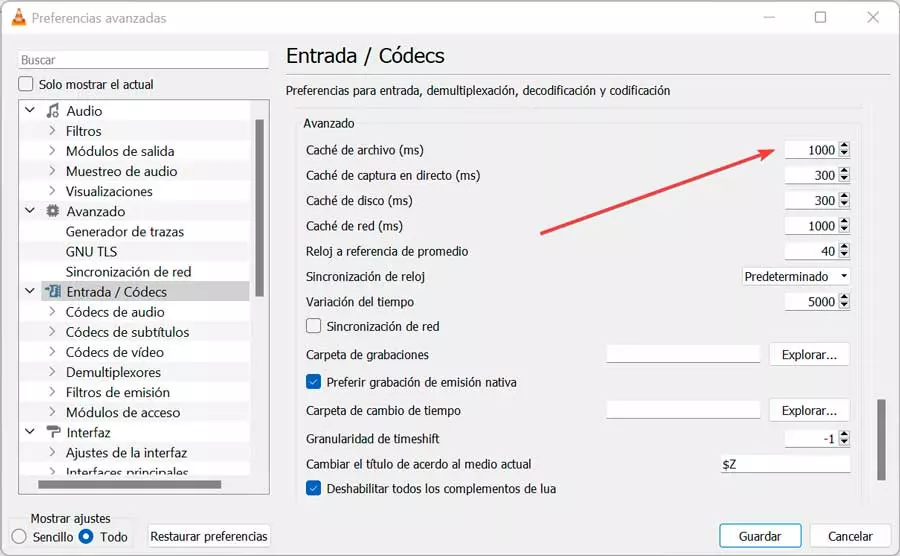
Stutters, delays and skipping
It is possible that when playing content in VLC we find stutters, delays and jumps that make video playback become an odyssey.
To try to solve it we can try to change the value of the file cache. We will do this from the Tools and Preferences section. In the Show Settings section, select All. Now in the section Input/Codecs we change the value de File cache to 1000 and click the Save button.
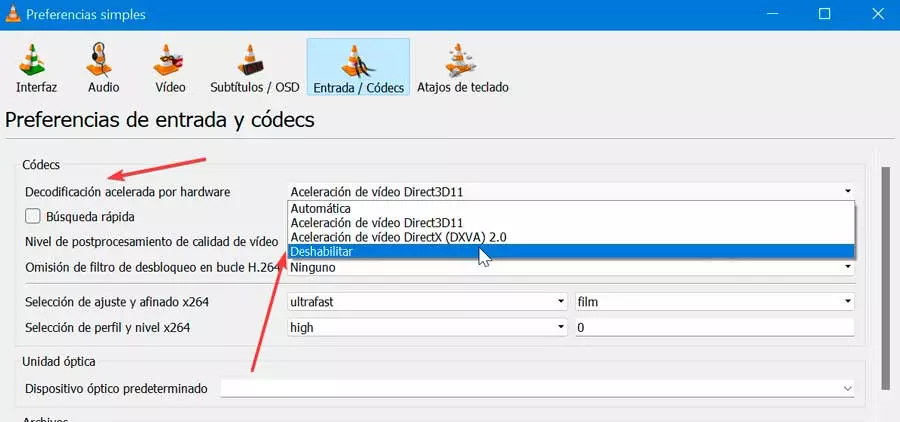
Another option is from the Tools and Preferences section, we show the settings as Simple and in the Advanced hardware decodingwe select To disable.
Finally, inside your preferences again, we now go to the Video section and in the Output section, we display its menu and try other options until we find the one we like the most.
Video playback is encrypted
If we have problems playing certain files, it is possible that the video playback is encrypted. In order to solve it, in the event that we have an old version of VLC, we must access the Tools and Preferences section. Here, within the Video section, in the Screen section we uncheck the option of Accelerated Video Output (Overlay) and save the changes.
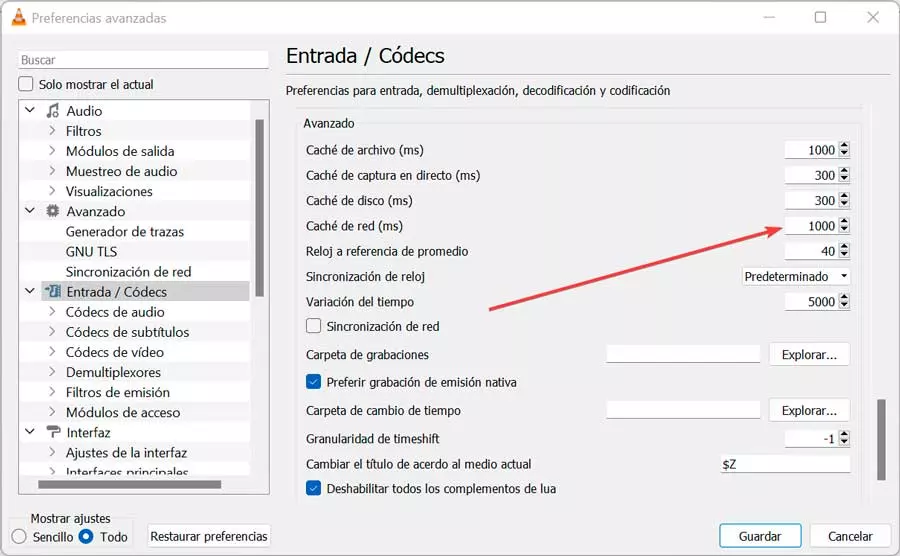
We can also try in this same Preferences section and select Input / Codecs. In the Show settings section we select All and in the Advanced section, we locate Network cache (ms) and we increase its size to 1000.
Finally, we can try, instead of playing the video from a network drive or DVD, to copy it to our hard drive to play it later. This should often work.
subtitle issues
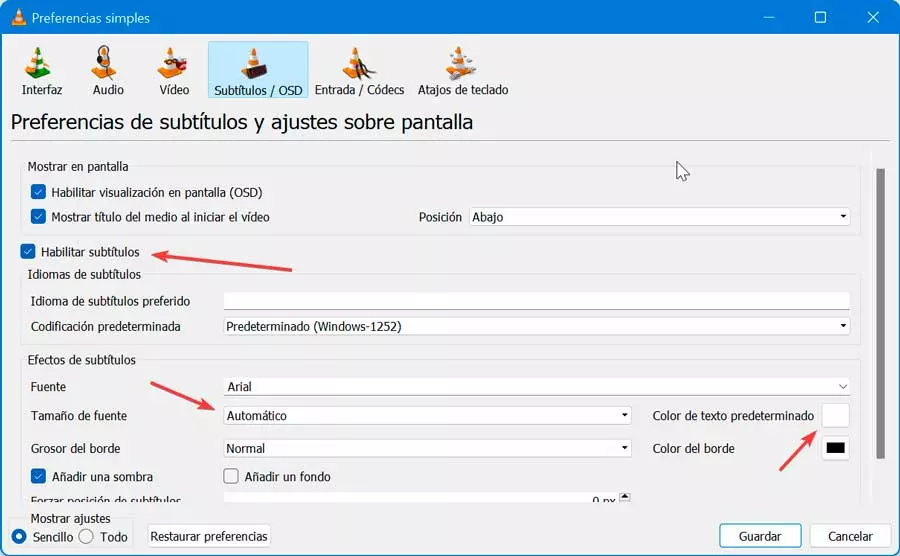
In the event that we cannot play subtitles in VLC, we may need to enable them beforehand. To do this, we access Tools and Preferences and within the Subtitles / OSD tab we check the Enable subtitles box. We must also select the “Automatic” option in the “Font Size” drop-down menu and make sure that the option “Force the position of the subtitles” is set to 0px and save the changes.
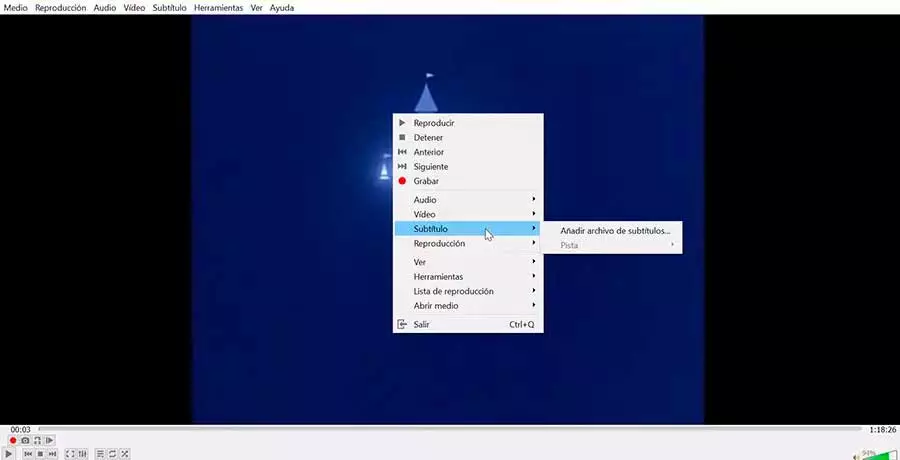
Next, we open the video that must have subtitles. If they do not appear, we press the screen with the right button and select «Track», where we can choose the file with the subtitles. If it is not enabled, this means that the video does not contain subtitles, so we can add them through the “Add subtitle files” option.
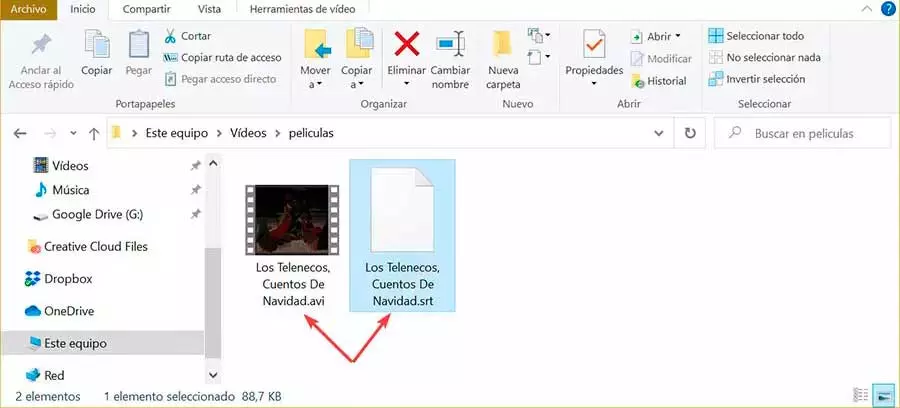
We must also verify that the SRT subtitle file matches the name of the video. The first thing is to make sure that both files, both the video and the subtitle, are in the same folder. Then we right-click on the subtitle file, select “Change name” and enter exactly the same name as the video file. Also, we need to make sure that the subtitle file has the SRT extension at the end.
Loss of color intensity in VLC
In the event that we find the appearance of problems of distortion and loss of color intensity when playing videos, we can carry out the following adjustments.
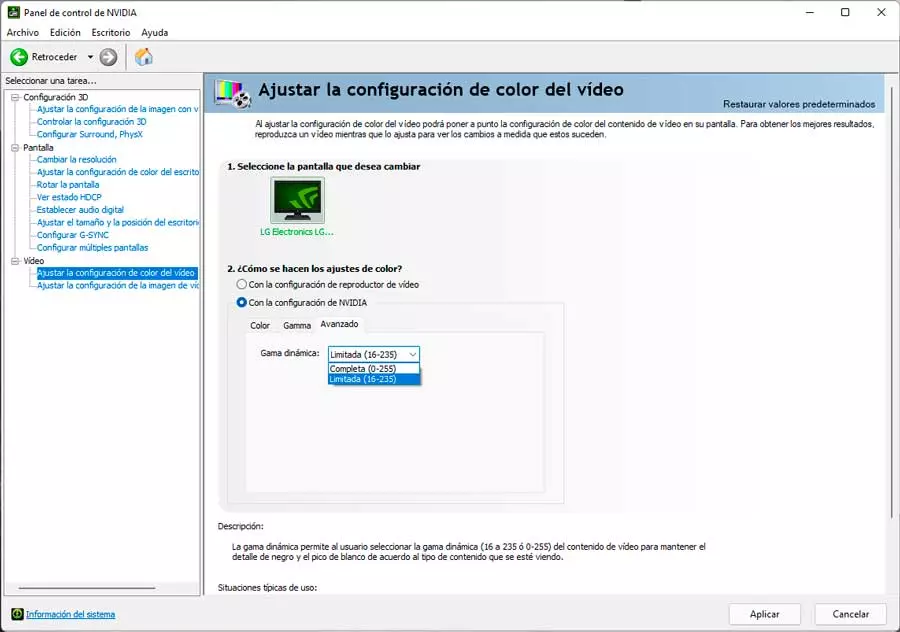
The first thing will be to make an adjustment in the color configuration of our graph, which varies depending on the manufacturer, and whether it is NVIDIA, AMD or Intel, since we will surely have an incorrect color configuration, so we must access the application corresponding to the brand. There are two options, full (0-255) and limited (16-235). Full helps reproduce the full color of the video and displays all color ranges as much as possible. If our color setting is Limited, we will surely experience some color fading problem, so we should change it to Complete.
Next, in VLC, click on Tools and Preferences to access the Video section. In the Output section, we display the menu and select DirectX video output (DirectDraw) and click Save.
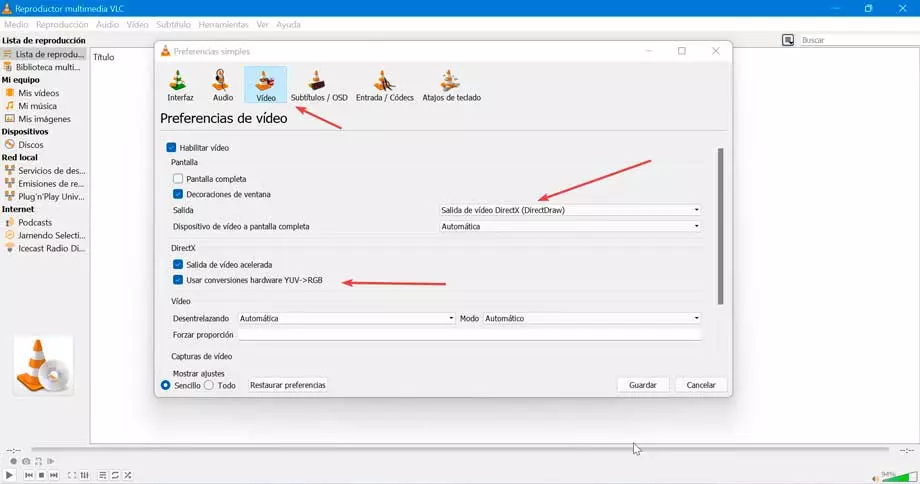
If this does not solve it, we can also uncheck the box “Use YUV -> RGB hardware conversions” in the section called “DirectX”, a little further down.
Most common error codes
Next, we are going to see what are the most frequent error codes that we can find when using VLC.
Error 0xc0000005
When we try to run a video file in VLC, we can get this error code that indicates that the application could not start correctly. It is a common error and can occur due to a virus attack, the presence of corrupted files or because the player has not been updated to the latest version available. That is why it is convenient to pass our antivirus or reinstall the application again.
VLC Error Code 36
Occurs when VLC Media Player crashes or crashes while playing. running and appears as an annoying on-screen notification. This error appears due to VLC-related file corruption or accidental or malicious deletion. It can also occur due to a memory problem and having an outdated graphics driver, so it is advisable to review it and update the latest version available.
VLC Error Code 1814
It is generally known as a form of “runtime error” and is commonly seen during application installation on older versions of Windows, such as Windows 7. It is usually fixed by running the installation file with administrator rights. .
Error: code ‘401 Unauthorized'(200)
This error code appears when we try to search for subtitles both by hash and by title, appearing on the screen every time we try to start a search. This is because the site where the vlsub extension looks for subtitles is www.opensubtitles.og. So we must create an account and once confirmed, we simply have to add the username and password to the vlsub configuration to be able to perform searches.