In addition, it is also we can use it to create a independent Wi-Fi signal to our router creating a wireless signal with a different key than our network, and thus prevent our guests from accessing the content stored on our devices if we share their content over the network.
Turn a computer into a Wi-Fi repeater from Windows
The process to share the Wi-Fi signal from a computer is very similar in both Windows 10 and Windows 11, however, the latter offers us additional functions that we will not find in Windows 10, such as the possibility of selecting from which band (2.4 or 5 GHz) we want to share the signal, regardless of which band we are using.
The 2.4 GHz bands have greater coverage, but their transfer speed is lower than that offered by 5 GHz networks, whose range is much more limited. Taking into account the particularities of each one, we must choose the one that meets our needs.
With Windows 10
To convert our computer, whether it is a desktop or laptop, from Windows, the first thing we must do is make sure that we are connected to a network, either through the Wi-Fi signal or using an ethernet cable. It goes without saying that the equipment also needs to have a wireless connection, either built into the board or using a USB stick.
Next, we access the Windows configuration options (Win + i), and click on the section network and internet.
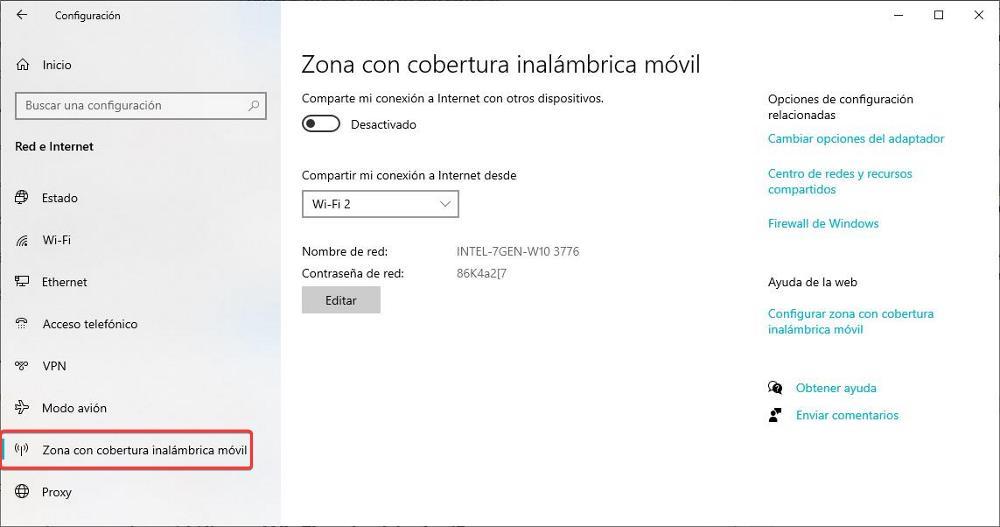
Within this section, in the column on the right, click on Mobile wireless hotspot. In the section on the right, click on Edit to establish the name and password of the network if we do not like the default option that Windows offers us. Next, we select if we want to share the wireless signal of our equipment or the signal that comes from the network card. Finally, we activate the switch Share my internet connection with other devices.
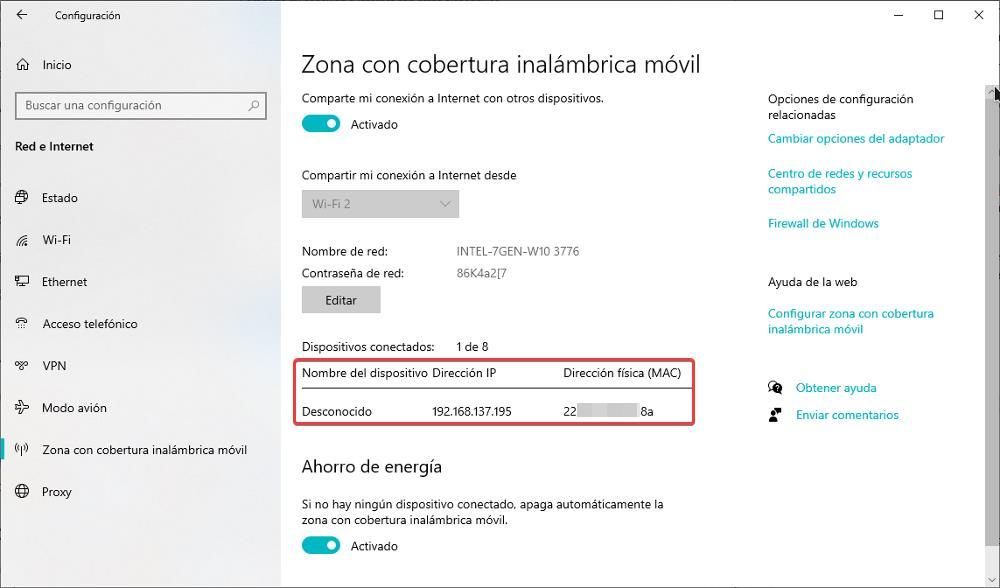
If we want to reduce the battery consumption of the equipment we are using when it is not being used, we can mark the switch located in Energy saving, so that the signal stops sharing or there is no connected device. When a device connects, in this same section, the name of the device (if it is identified by the equipment) will be displayed, together with its IP address on the network and its MAC address.
Since Windows 11
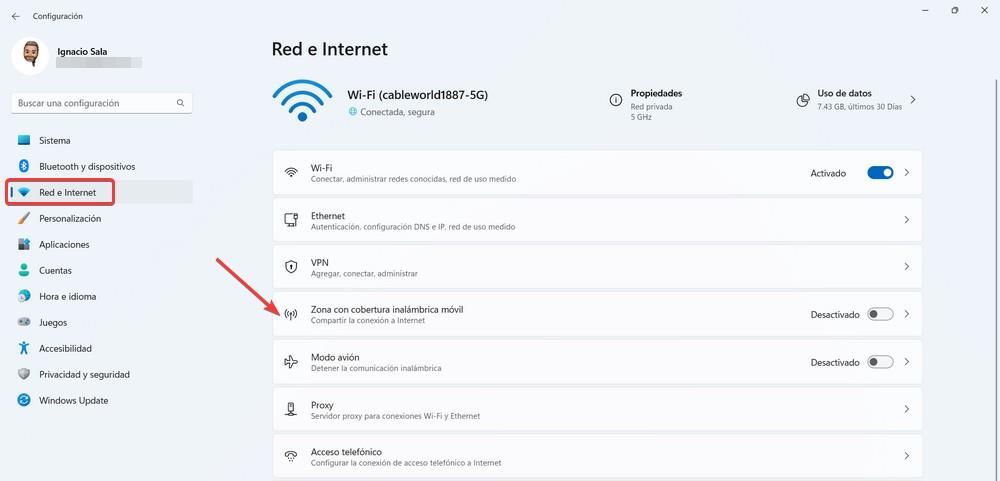
If we want to share the internet signal using our computer, the first thing we must do is access the Windows configuration options through the Win + i keyboard shortcut by clicking on the gear wheel available in the start menu. Next, in the left column, click on network and internet. In the section on the right, click on Wireless mobile hotspot.
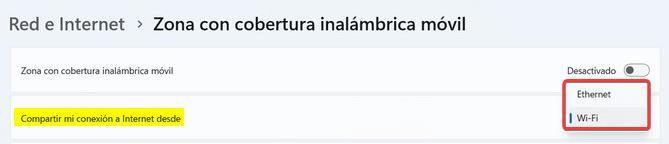
Within this section, click on the drop-down box Share my internet connection from and we select if we want to share the signal of our network from the ethernet connection or from the Wi-Fi connection of our device.
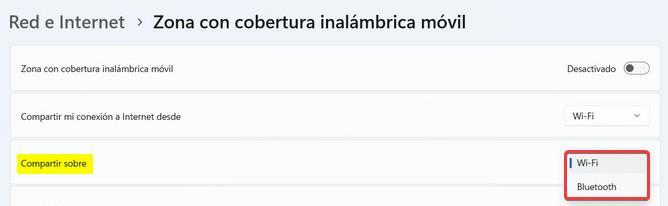
Next, we click on share about and click on the drop-down box to select Wi-Fi. We can also select to share the connection via Bluetooth if the device has it.
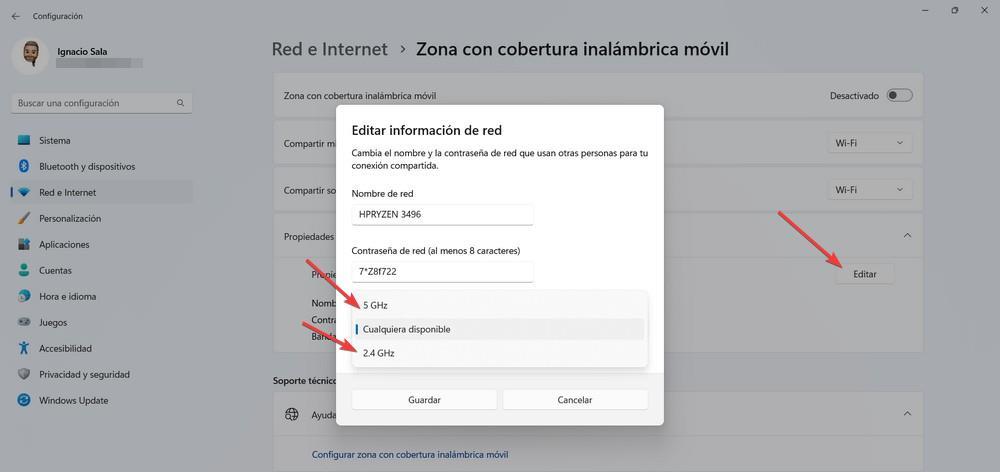
The Properties section shows the name of the Internet connection that we are going to share along with the password that Windows has set by default. Click on Edit to modify both the name and the password and choose on what network type we want to repeat the Wi-Fi signal: 2.4 GHz or 5 GHz.
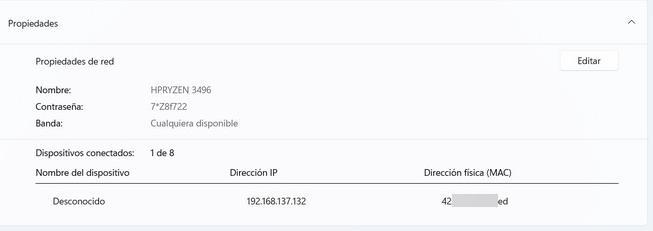
Once we have configured all the options according to our needs, we go to the top of this section and activate the switch Area with mobile coverage. When any device is connected, it will be displayed at the bottom along with its name, assigned IP and MAC.
Turn a PC into a Wi-Fi repeater from PowerShell
Both Windows 10 and Windows 11 include PowerShell, the, we could call it, vitaminized CMD. Regardless of which version of Windows we are using, we can use PowerShell to quickly share our computer’s network signal. In addition, we can create a script to activate and deactivate this function more quickly, both to activate it and to deactivate it.
To turn a computer into a Wi-Fi repeater using the PowerShell command line, we must open this application with administrator permissions, a process that we can do by clicking on the Windows start button with the right mouse button and selecting Windows PowerShell (Admin).
Next, we are going to use the following command to create the Wi-Fi network.
netsh wlan set hostednetwork mode=allow ssid=nombredelaconexión key=contraseña
In that command line, we must replace connectionname for the name of the Wi-Fi network that we are going to create and password for the password that we want to establish to protect your access.
Once we have created the Wi-Fi connection, to activate it we must write this command:
netsh wlan start hostednetwork
And, to stop it, the command that we must use is the following:
netsh wlan stop hostednetwork
Use a computer as a Wi-Fi repeater from CMD
The process to convert a computer into a Wi-Fi repeater from CMD is exactly the same as using PowerShell, therefore, once we have opened a CDM window with administrator permissions, we must enter the following line to create a wireless network with the name and password that we want to use.
netsh wlan set hostednetwork mode=allow ssid=nombredelaconexión key=contraseña
To activate the connection and deactivate it, the commands that we must use are:
netsh wlan start hostednetwork
netsh wlan stop hostednetwork
The first activates the connection while the second deactivates it.
Limitations when sharing the Wi-Fi signal from a computer
Using a computer to share the Wi-Fi signal is an excellent option to take into account in certain situations, however, it is not the best option when it comes to sharing an internet signal, since it offers us a series of limitations that we cannot we will find using a router.
The maximum number of devices that can be connected to the computer and take advantage of the Internet signal that it is sharing is 8, which may be a limitation at certain times. In addition, although it offers us information about the MAC of the devices that connect, we cannot establish any type of limitation to prevent them from connecting or establish limitations on the connection.
Another of the negative points is that the encryption used is WPA2, it is not the strongest currently available, it is more than enough to safely enjoy our connection.
With third-party apps
Windows offers us different methods to create a Wi-Fi network by sharing the network signal it receives. As we have been able to see the process is very simple both using the graphical interface and the command line. But, if we don’t just like these options, we can use other applications.
MyPublicWiFi
MyPublicWiFi is a completely free application that allows us, very quickly and easily, to turn a PC into a Wi-Fi repeater or access point. Unlike the limitations that we find in Windows, with MyPublicWiFi it allows using a system of users who must use a password to identify themselves and be able to access the network, a user who can have restricted your access to certain web pages.
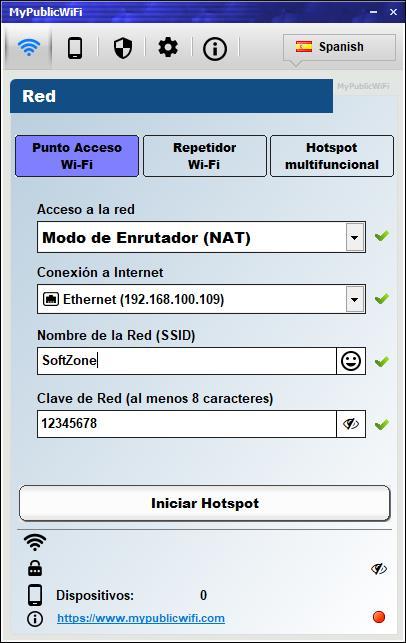
We can download MyPublicWiFi through its website by clicking on this link. The application is completely translated into Spanish, so the language will not be a barrier to get the most out of it.
Maryfi
Another interesting application that is also free and completely translated into Spanish that we have at our disposal to turn our PC into a Wi-Fi repeater is Maryfi. MaryFi is a compatible application from Windows 7 onwards that allows us to create Wi-Fi networks through the network signal of our equipment. The application includes an assistant that will guide us through all the necessary steps.
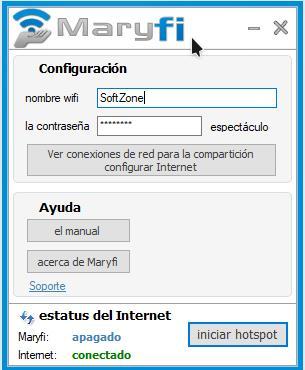
Unlike MyPublicWiFi, it does not have a user control system that allows limiting access to certain websites or services. The download of MaryFi is available from its website through the link Download Spanish Editionlocated in the right column, in the Download section.