Why should you adapt the dimensions of a video?
As we mentioned before and as we have already done in successive posts in which we have talked to you about different important aspects when editing a video in Final Cut, aspect ratio is a critical factor in all audiovisual creations. At the end of the day it consists of the dimensions of the same and adapt them to the viewer and platform they are essential points to obtain an optimal result.
Videos have usually always had horizontal dimensions that could vary minimally, however, with the rise of mobile devices and consequently, of social networks, more content is consumed in portrait format every day, which has caused the audiovisual content to be adapted to each of the platforms through which the viewer is going to consume it.
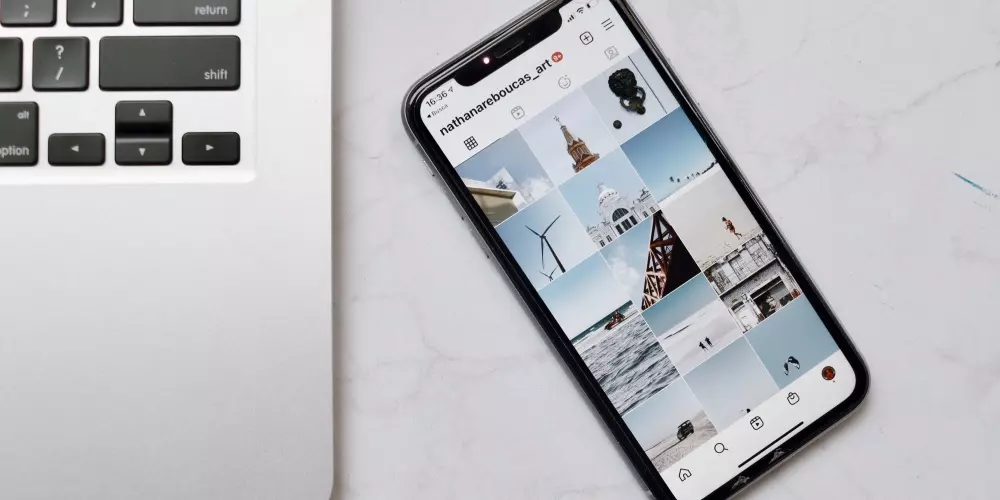
A very practical example can be found in two of the most popular social networks in the world, Youtube and Instagram. In the first, the videos uploaded by the creators are mainly in horizontal format, because viewers can consume it through different devices such as smartphones, tablets, computers or even televisions. However, Instagram is a social network with content in vertical format, and therefore the ideal is to publish content with the dimensions adapted to this social network, in fact, the same happens with another social network that has broken into with great force such as TikTok.
Obviously, both on Instagram, on YouTube, as on any multimedia content consumption platform, videos can be uploaded both vertically and horizontally, but if you really want to stand out and take advantage of the full potential of each platform, the ideal is that you adapt the content to the way in which the users of each of them consume it. That is why it is so important to know the steps to follow in order to adapt your content to the appropriate aspect ratio for each moment and place, and here, in this post, we are going to tell you about it in detail.
These are the dimensions available in Final Cut Pro
As you well know, Final Cut Pro is the video editing software that Apple has developed for professionals in this sector. Therefore, it has a wide variety of options when it comes to adjusting the aspect ratio of all your videos. However, before entering fully to tell you what steps you have to follow to be able to do it easily, we want to tell you what are the options that this application provides you.
Choose one of the default options
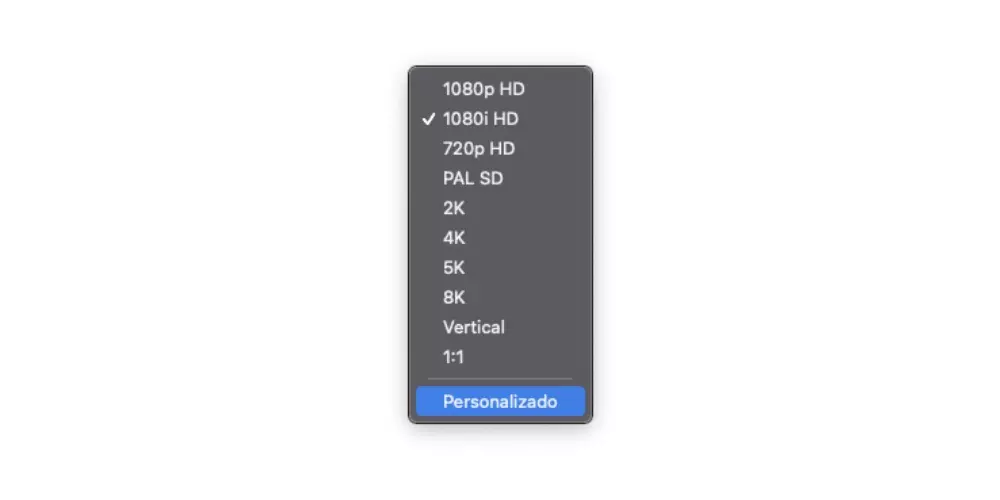
As we said, Final Cut Pro offers its users a wide variety of options that you can use to adjust the aspect ratio of your video. These will be higher or lower depending on the video format you have chosen. Below you can see all the available options.
- 1080p HD
- 1920 × 1080
- 1440 × 1080
- 1280 × 1080
- 1080i HD
- 1920 × 1080
- 1440 × 1080
- 1280 × 1080
- 720p HD
- PAL SD
- 720 × 576 DV
- 720 × 576 DV Anamorphic
- 720 × 576
- 720 × 576 Anamorphic
- 2K
- 2048 × 1024
- 2048 × 1080
- 2048 × 1152
- 2048 × 1536
- 2048 × 1556
- 4K
- 3840 × 2160
- 4096 × 2048
- 4096 × 2160
- 4096 × 2304
- 4096 × 3112
- 5K
- 5120 × 2160
- 5120 × 2560
- 5120 × 2700
- 5760 × 2880
- 8K
- 7680 × 3840
- 7680 × 4320
- 8192 × 4320
- Vertical
- 720 × 1280
- 1080 × 1920
- 2160 × 3840
- 1: 1
These are the different aspect ratios that you have available in Final Cut Pro, where as you can see the video format and its resolution must be taken into account. Most of them are designed to export the video in horizontal format, since it is the most common, but if you already look at Final Cut you have the possibility of exporting it in vertical format, and even in square format. However, this is not the only alternative you have. Here’s how you can customize the aspect ratio of your video to your liking.
Customize the dimensions of your video
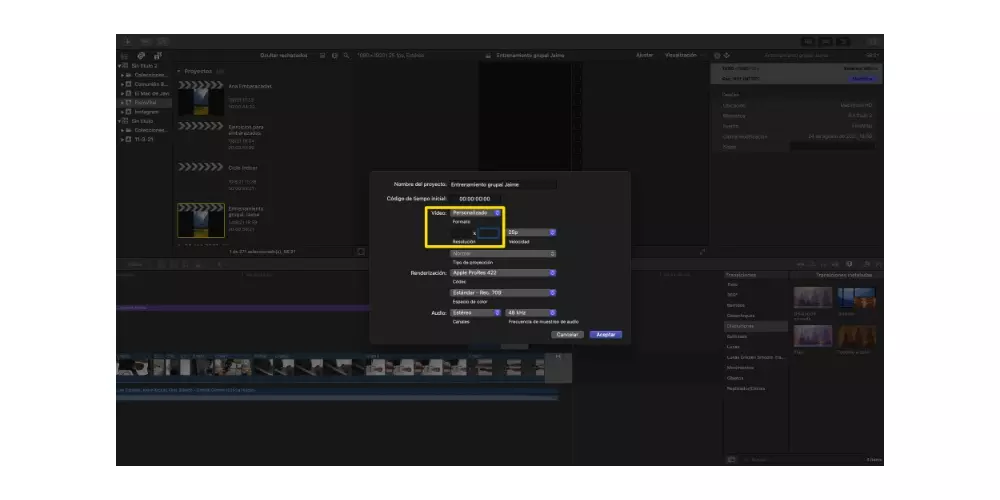
Although Final Cut offers a wide variety of options, it may happen that the aspect ratio you need is not found by default and you have to configure it manually. Fortunately, this is an option that Apple has weighed in on and that it has developed in its editing program designed for professionals.
The only thing you have to do to be able to customize these parameters in is to click, in the format drop-down menu, on the option “Personalized”. In this way you can enter the resolution values you need to be able to adapt the aspect ratio of your video to your liking. One of the moments in which you may need to use this alternative is to upload a post in video format to Instagram, since although it is a vertical format, the optimal dimensions are different from the usual ones. “720 × 1280”, “1080 × 1920” or “2160 × 3840”, in fact the proper resolution is “1080 × 1350”.
Steps to modify the aspect ratio of your video
Once we have already explained everything you need to know about the aspect ratio for your video. The time has come to tell you what are the steps you have to follow to be able to change it and adapt it perfectly to your needs. As you will be able to observe, the steps are really simple, so much so that they are carried out in just a few seconds. The most important thing is that you are clear about the aspect ratio that you have to use to achieve the objectives you have with your video. The steps to follow are those.
- In the bar Libraries select the event that contains the project you want to modify.
- Select the draft.
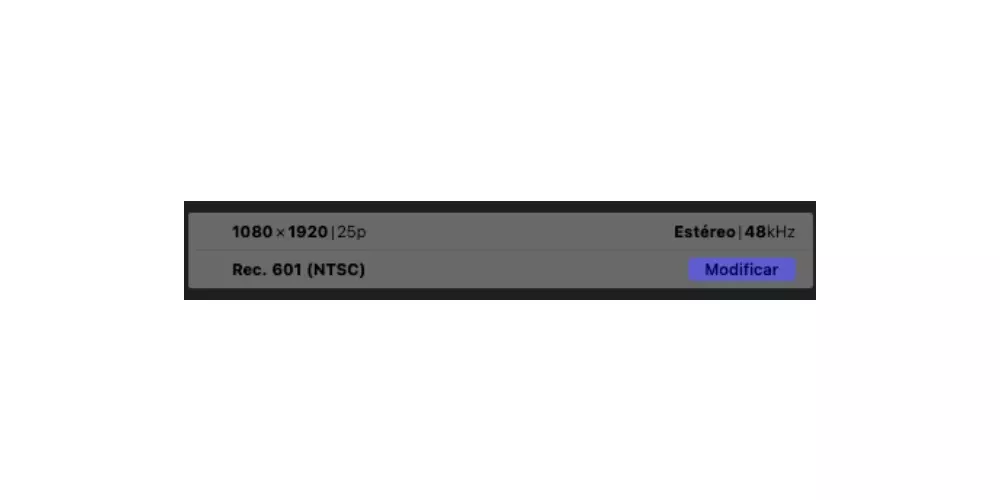
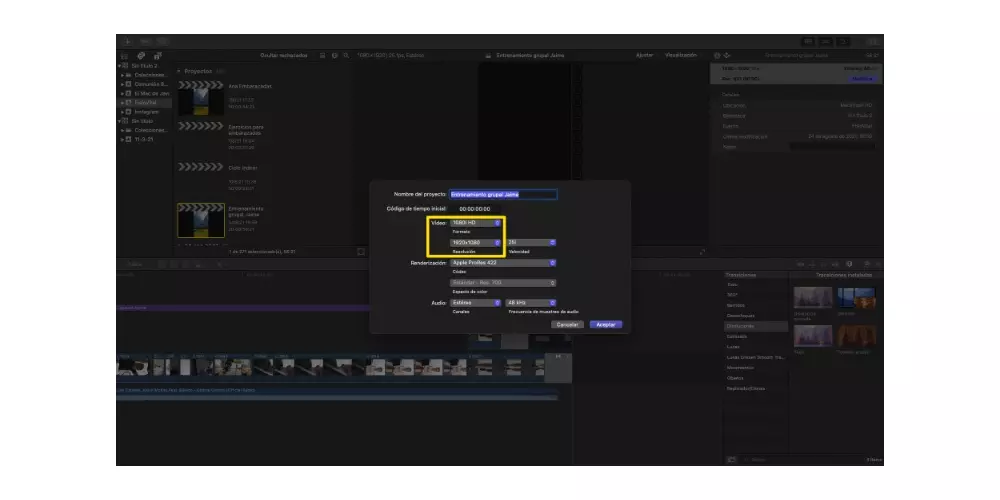
- Click the button Inspector from the toolbar or select Window, and then Project Properties.

- In the project properties inspector, click on the button Modify which comes out in purple.
- In the drop down menu, change settings depending on your needs.
- Click on To accept.