That Windows sleep mode does not work can be a nuisance, since it will force us to always save our work and turn off the computer. When we need it, it will be necessary to turn it on again and restore all the programs that we use, with the consequent loss of time.
Reasons why Windows won’t sleep
The use of the Windows 10 sleep mode has many benefits that help us save energy on our computer when we are not using it, at the same time that it allows us to return to the point where we left it with all the programs open as they were before entering in that mode. Windows not being able to enter sleep mode is a fairly common problem that can be due to various reasons, such as:
- Third-party software interference.
- Improper power settings.
- Device driver problems.
- External peripherals that keep the PC active.
- Screen saver problem.
Whatever the reason, the truth is that the problem that Windows cannot enter sleep mode can be very annoying and forces us to have to turn off the computer every time we are not going to continue using it. To avoid this, we are going to comment on some adjustments that we can make to solve it.
Steps to follow to solve the problem
Next, we are going to see a series of actions and adjustments that we can perform to get Windows 10 to enter sleep mode again.
Enable sleep mode manually
Windows may not be able to enter sleep mode automatically because of an update or the installation of a program that may have changed the power settings. To reset it, it is possible enable sleep mode manually.
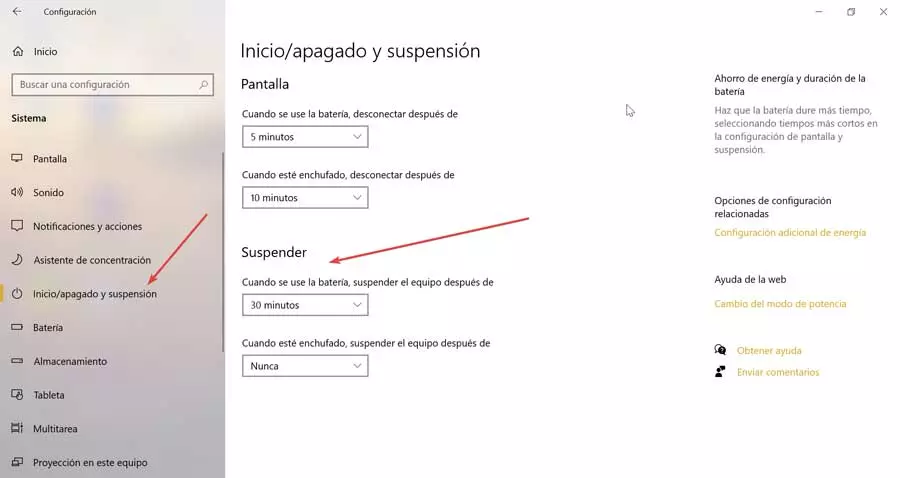
To do this, we are going to access the Settings menu by pressing the keyboard shortcut “Windows + I”. Once opened we select “System”. In the left panel, we select “Start / shutdown and sleep.” In the right panel within the “Suspend” section, we choose the time to suspend the equipment both when it is plugged in and when it is on battery.
We restart the computer and check if the device can enter sleep mode as usual.
Check the screen protector
The screen saver allows the PC to enter sleep mode to save power. However, Windows could randomly go to sleep if we configure the screen protector incorrectly. To do this, click on “Windows + I” to bring up the “Settings” menu and select “Personalization”. In the search bar we write «activate or deactivate screen saver» and select it from the options that appear. This will make a pop-up window appear where we must choose “None” from the Screen Saver drop-down menu.

Restore power options
Let’s try change power options to check that we do not have the sleep mode disabled. To do this, we write control panel in the search box of the Start menu and select it. Later in “View by”, select “Small icons” and click on “Power options”.

Next, we select “Change plan settings”, next to the option we have selected. On the next screen, click on «Change advanced energy settings». This will open a new window for us. Here we can check that within the “Multimedia Settings” we have enabled the option Allow the computer to enter sleep mode. We can also choose to click on “Restore plan defaults”, which should change all the items where suspend are allowed in Windows 10.

Prevents the mouse or network card from waking up the PC
Some connected devices such as the mouse or the touch panel of our laptop can affect the sleep mode of the PC. For this reason, we must make sure that these devices do not interfere with the suspension configuration since any vibration could keep the equipment awake.
The first thing to do is to press the “Windows + X” combination and select “Device Manager”. Later we deploy the Mouse and other pointing devices section. We right-click on our device and select “Properties.” We click on the “Power Manager” tab and uncheck the box “Allow this device to wake up your computer.” We accept and save the changes. In this way the movement of the mouse will not influence so that Windows does not go into sleep mode.

Next, we expand the tab “Network adapters”. We check each of the options by clicking the right mouse button and selecting “Properties”. In the tab “Power Management” uncheck the box “Allow this device to activate the computer” and click OK.
Disable Bluetooth-connected devices
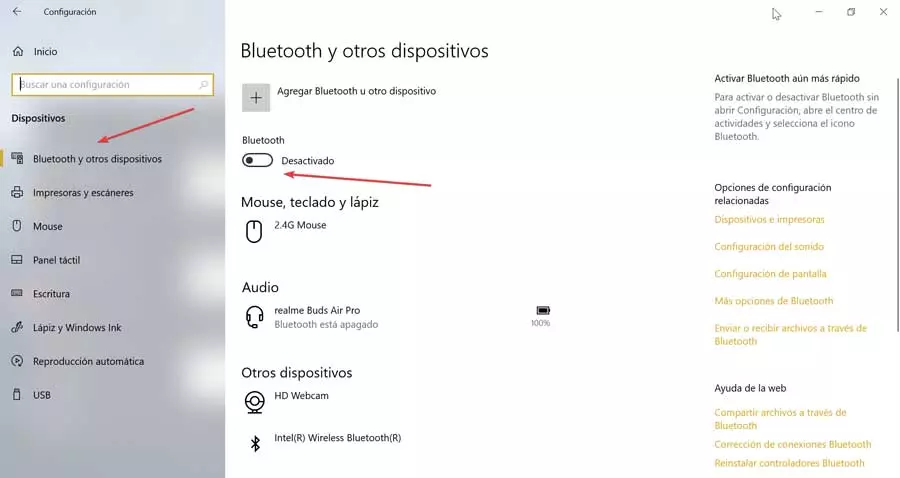
If we have the Bluetooth activated of our computer with some peripheral connected as a controller to play, it is possible that it is the culprit that the sleep mode does not run. Therefore, we must try to turn off the Bluetooth, something we can do from the Settings menu.
To do this we press the shortcut «Windows + I». Once in the Settings menu, click on the “Devices” section. Here we make sure that the Bluetooth button is disabled. In case we have several devices and some are necessary, such as the mouse, we must deactivate others that we have connected.
Use the power troubleshooter
It is possible that we have been able to modify or customize different sections of our power plan that may cause a problem so that Windows can enter sleep mode. With the power troubleshooter, the operating system will be able to fix problems related to sleep mode, resetting the settings and informing us how to avoid them again.
To do this, press the key combination “Windows + I” and select the “Update and security” section. In the list of options in the left column we choose “Troubleshoot”. Subsequently, in the screen on the right, we click on “Additional troubleshooters” on the bottom. In the new window, we select the option “Energy” to solve the problems related to it.

Update Windows 10
Having outdated device drivers can cause the sleep mode not to work in Windows 10, so it will be necessary to update the operating system to the latest version available to update all the drivers available for our PC. After this, the sleep mode should be able to work without problems.

To do this, press “Windows + I”, and select the “Update and security” section. In the next window, we check if there is any update available within Windows update. If so, we proceed to install them and check if this solves our problem.