In this way, we do not ensure that the applications that we install on our equipment do not collect information that they do not need for their operation and share it with third parties, that they do not make unnecessary changes to the system that put its security and stability at risk.
But, at the same time, it has a series of associated problems, since the number of applications available in the Microsoft Store today is still very small compared to other application stores.
Also, many applications, especially open source ones that are widely used, are not available.
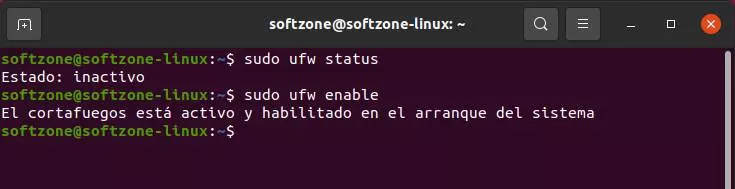
Block external apps by hand
Windows 11, just like Windows 10, allows users to set the font(s) of the app(s) they install on their computer. Natively, the option is set to From Anywhere.
But, in addition, it also offers us other three options that allows us to be aware of all the applications that we install on the computer.
- Anywhere, but let me know if there are any comparable apps in the Microsoft Store
- Anywhere, but let me know before I install an app that isn’t available in the Microsoft Store
- Only from the Microsoft Store
The first option, If we install an application on our computer that is also available in the Microsoft Store or that performs the same functions, the system will invite us to take a look at it and see if it convinces us instead of the one we want to install.
By selecting the second option, whenever we want to install an application that is not available in the Microsoft Store, Windows will display a notification informing us that it is an application from outside the application store and allowing us to continue the process. process.
Only from Microsoft Store is the option that we must select if we only want the computer to be able to install applications that are only available in the Microsoft Store.
Depending on the use that the user is going to give it, this option can become a problem, since, in the Microsoft application store, there are not yet as many applications available as we would like.
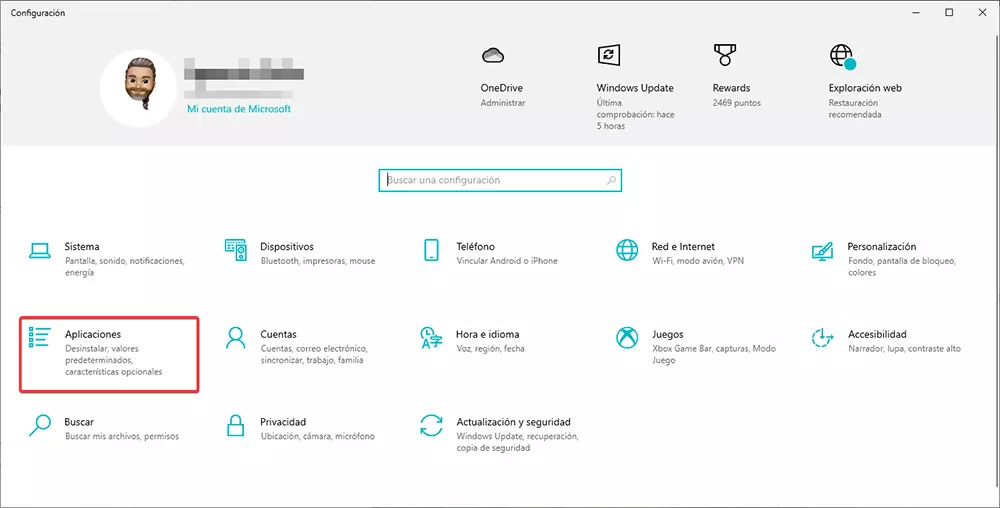
On Windows 10
From the Windows configuration options, which we can access through the keyboard shortcut Windows + i, we access the applications section.
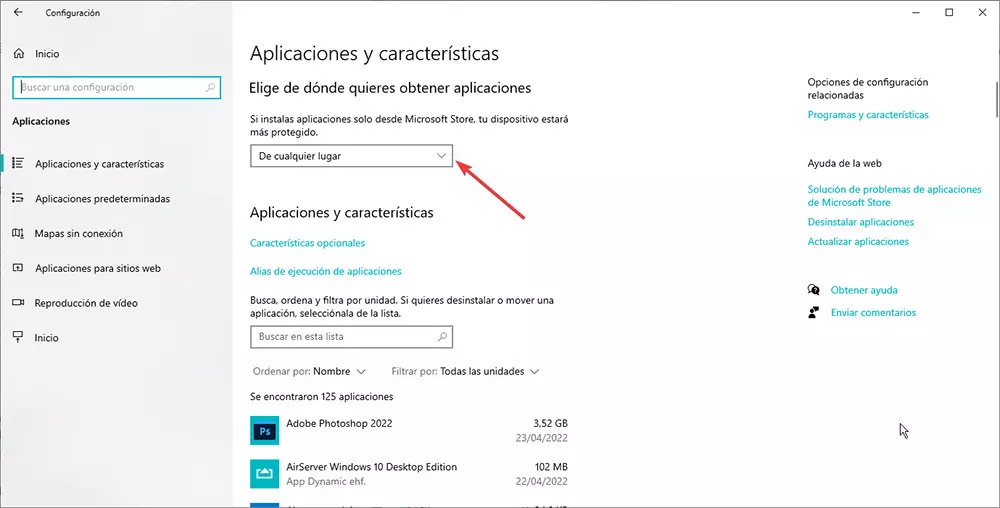
In the section on the left, in the section Choose where you want to get applications from, click on the drop-down where it is indicated From anywhere and select Only from the Microsoft Store (recommended).
On Windows 11
To limit the installation of applications so that they only come from the Microsoft Store, we must carry out the steps that I detail below.
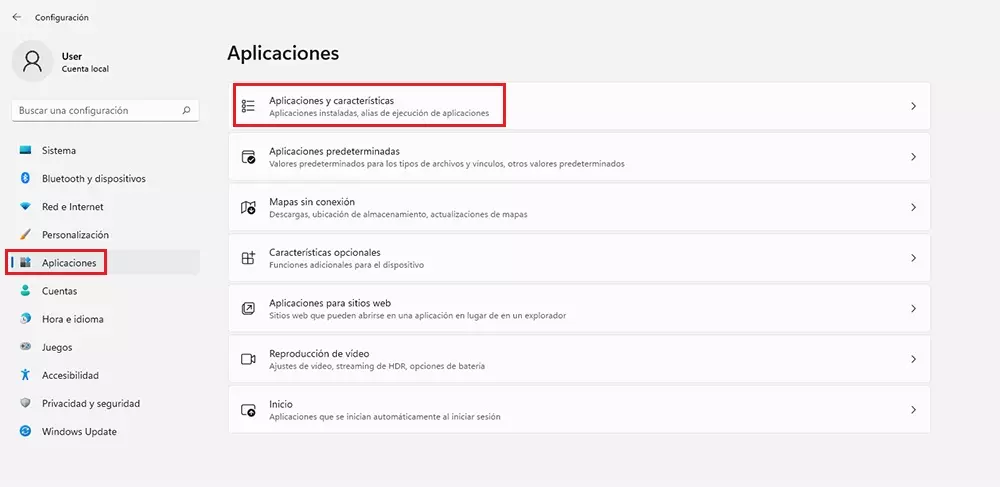
We access the Windows configuration options (Windows key + i), click on Applications and, within applications, click on Applications and features.
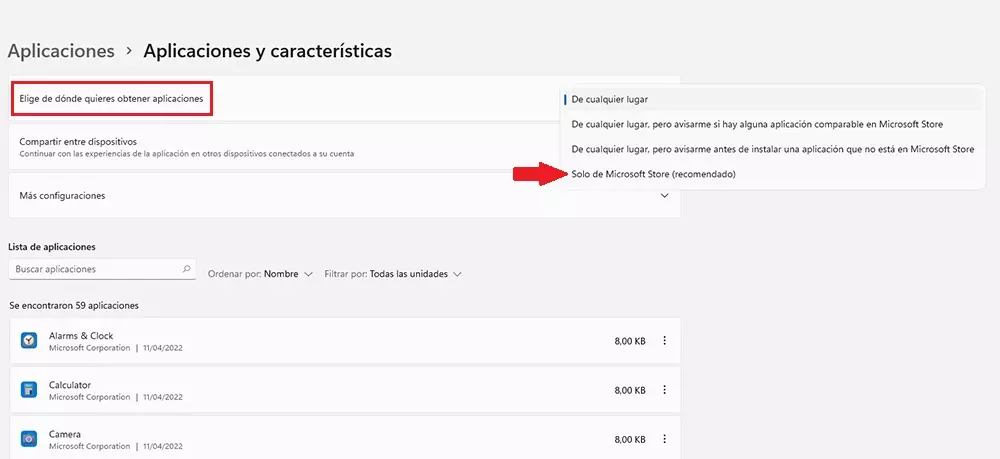
In the right section at the top is the Choose where you want to get apps from option. Click on the drop-down on the right and, among all the options, select Microsoft Store only (recommended).
Buy a Windows Home in S Mode
Both Windows 10 and Windows 11 make S Mode available to users. This mode is nothing more than a limited version of Windows that only allows you to install applications from the Microsoft Store and is designed for less powerful computers.
This version is not sold independently, but we can only access it on devices that already include it pre-installed from the factory. Windows allows users to switch out of S mode and access the corresponding full version of Windows Home to remove that limitation.
However, once we have left that mode, we cannot activate it again. The only solution would be to limit the installation of applications in Windows 10 and Windows 11 as we have explained in the previous point.
Create a standard user account
In particular, I believe that the best method to prevent members of our family or work environment install applications without any controlis to create user accounts without privileges.
Windows allows us to create two types of user accounts: administrator and standard user. While administrators can install apps and make changes to device settings, standard user accounts can only run installed apps.
If you want to install an application that does not come from the Microsoft Store, need the PIN code from the account of the administrator(s) of the team.
In addition, in the case of user accounts of a minor, we may establish age criteria so that you can only access content available in the Microsoft Store that is appropriate for your age.
If you want to create a standard user account in both Windows 10 and Windows 11, in order to limit the number of applications you can install, we must perform the steps that I show you below:
With Windows 10
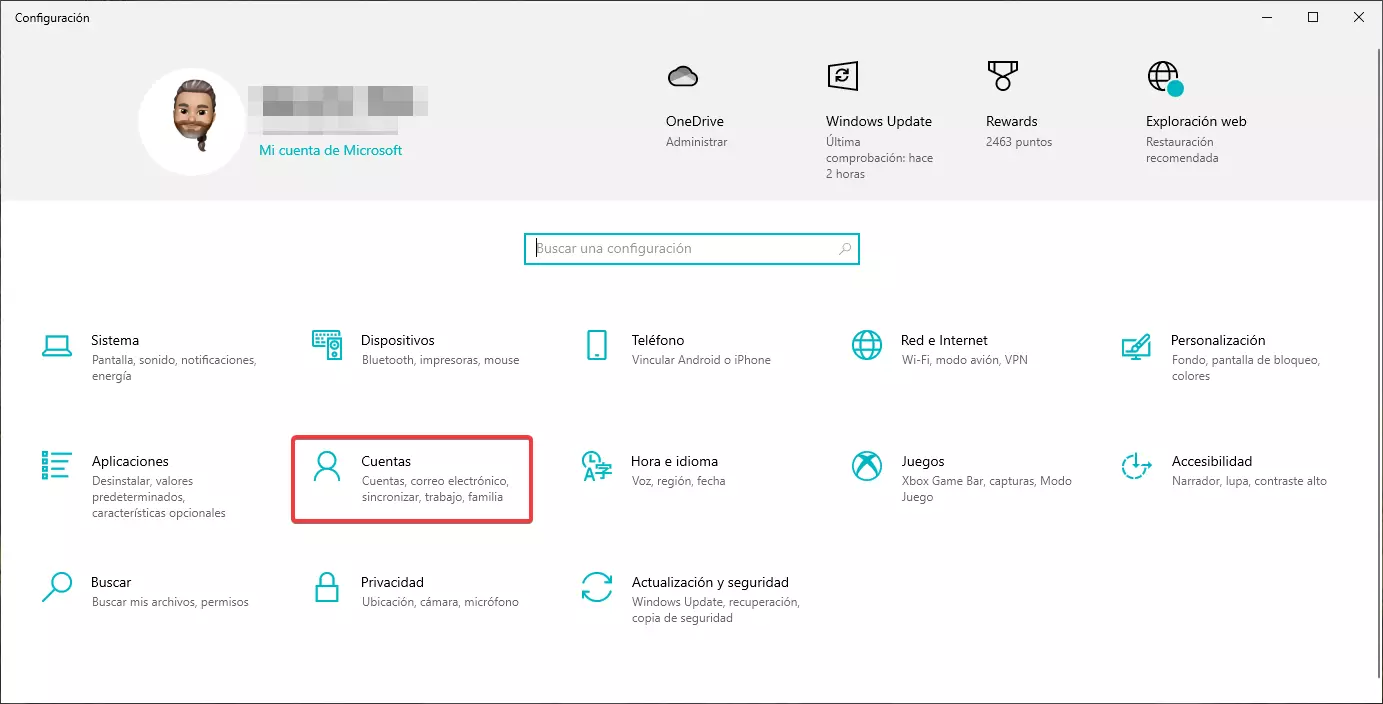
To create a standard user account in Windows 10, we access the Windows configuration options (Windows key + i) and click on Account.
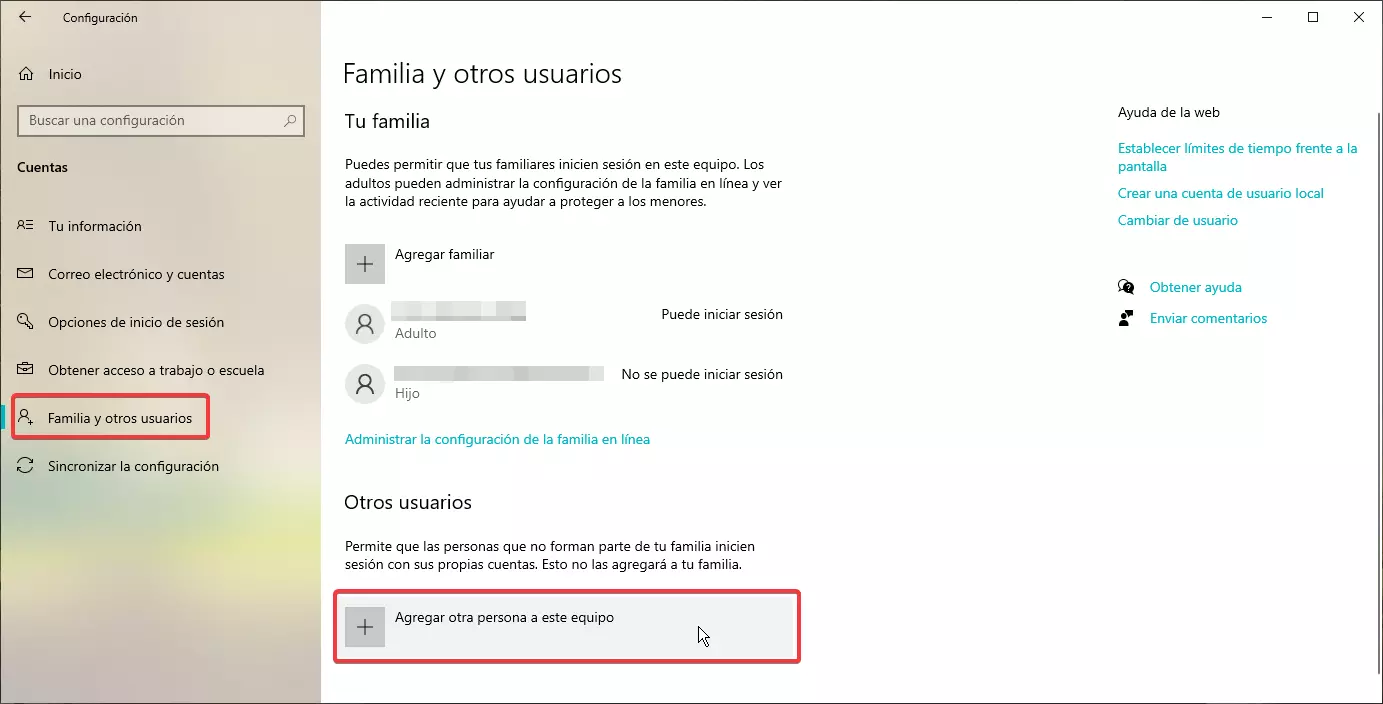
In the right column, click on Family and other users. Now we go to the section on the left and go to the Other users section to click on Add another person to this team.
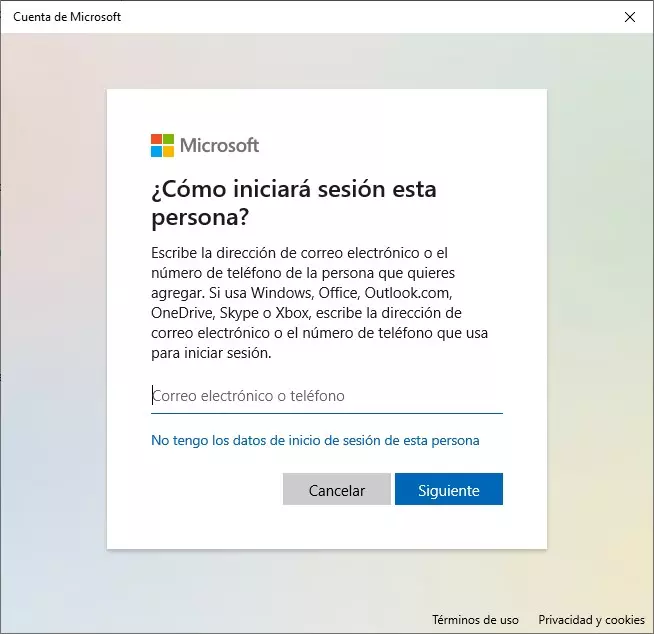
If the user already has a Microsoft account, we write the email address to which it is associated and click on next. The user will receive an email informing him that we have added him as a user.
The first time you log in you will need to enter your account password and create a PIN code to protect access to your account.
If the account a minor will use it and you don’t have an account yet, it’s a good idea to create one for them by clicking I don’t have this person’s login details and create one in the next step.
By clicking on the same option, we can create a user account locally, without needing to have a Microsoft account.
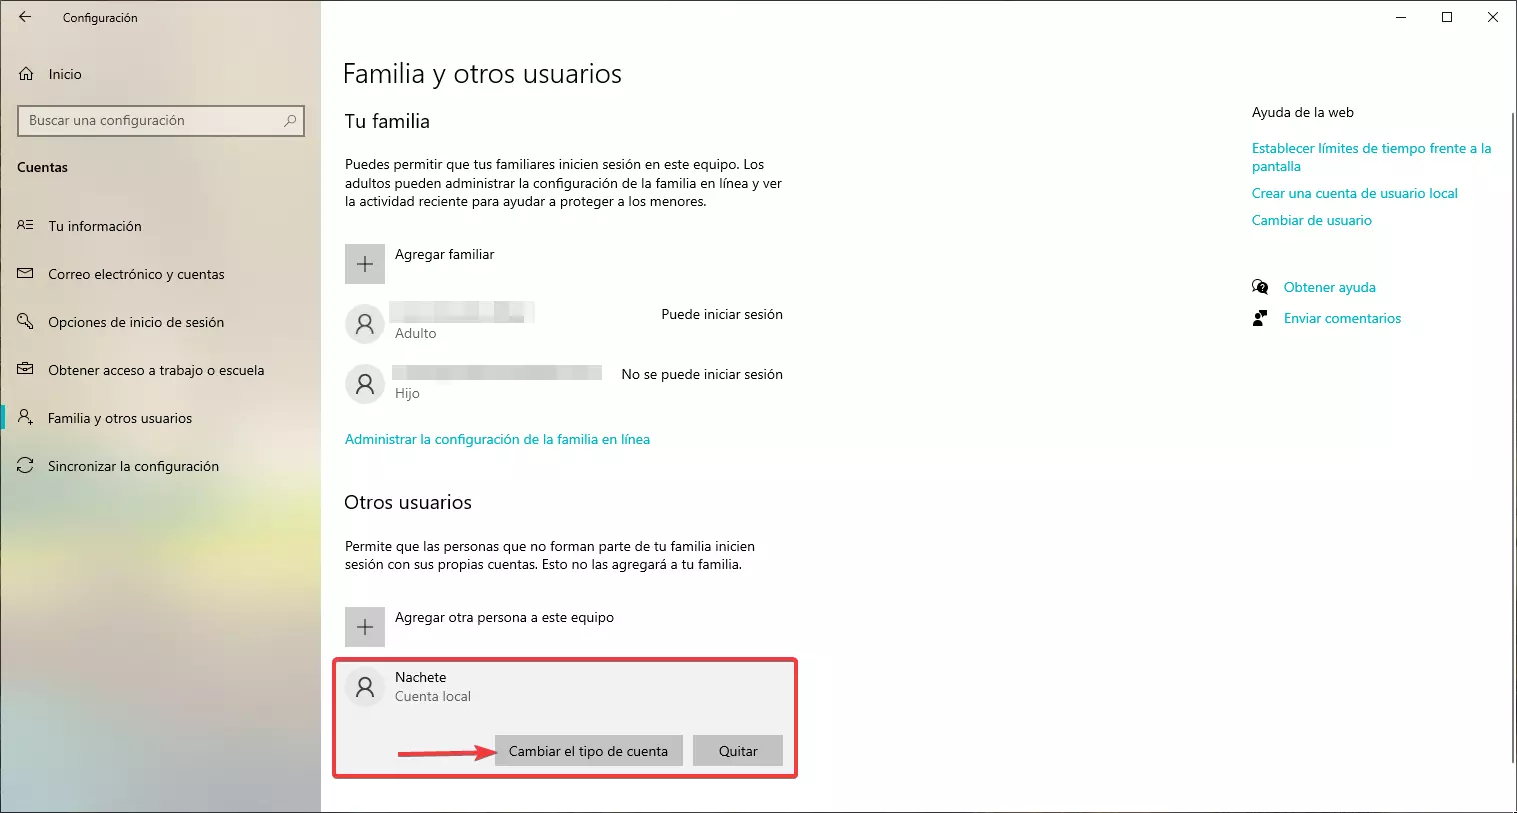
Once the process is complete, the Family and other users section is displayed. In the Other users section, the name of the user we have created will be displayed.
If we click on Change account type, we will confirm that the account created is for a standard user, with the limitations that this type of account entails.
From Windows 11
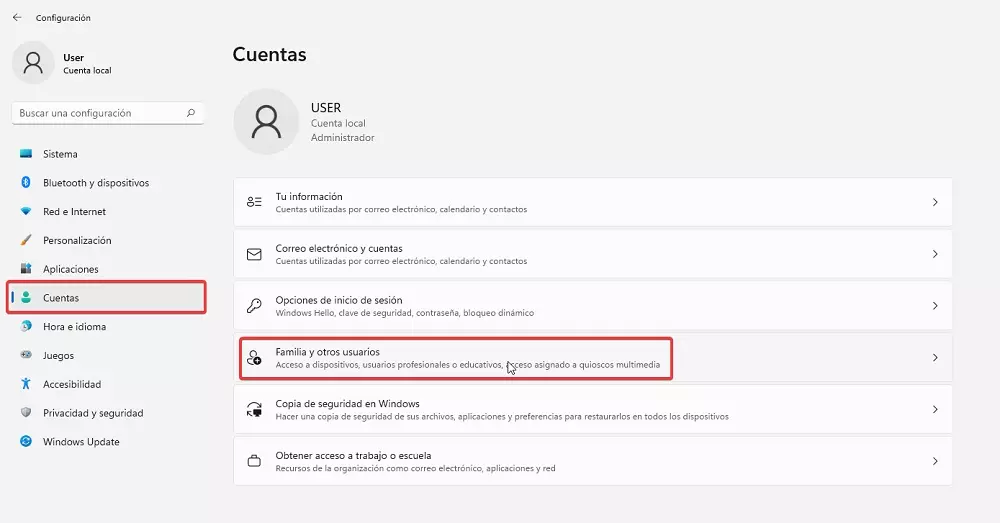
We access the Windows configuration options (Windows key + i) and click on Accounts. Within the accounts section, click on Family and other users.
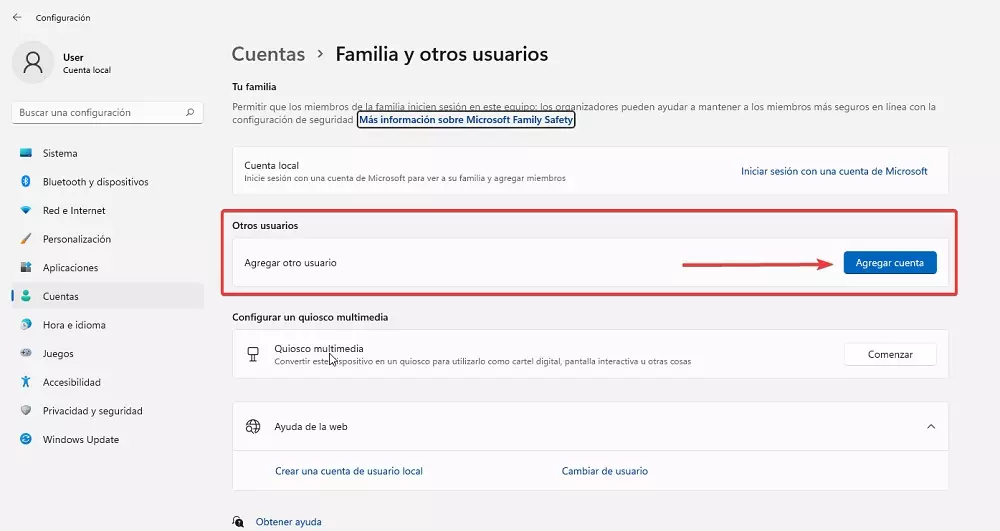
Next, we go to the Other users section and click on the Add account button.
Then we enter the email of the user’s Microsoft account that will use the standard account that does not allow installing applications from outside the Microsoft Store and click Next.
By using one account, you can automatically sync bookmarks, sync files through OneDrive, and associate all your Microsoft apps with the same account.
It’s a good idea to use an account for minors to limit the type of age-appropriate content available in the Microsoft Store.
If we don’t know the account, click I don’t have this person’s login details and create a username and password.
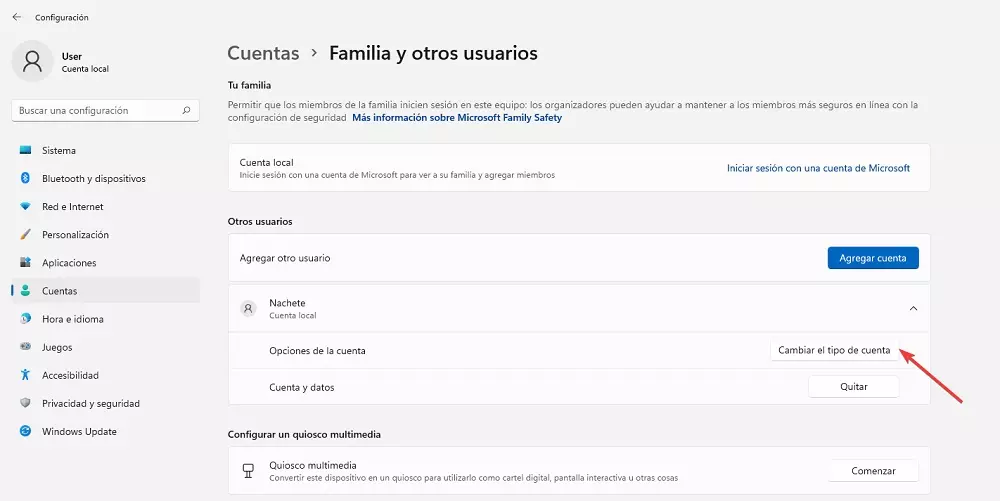
Once the account has been created, we return to the Family and other users section where the name of the new account will be displayed. To verify that it is a standard user account, click on Change account type.
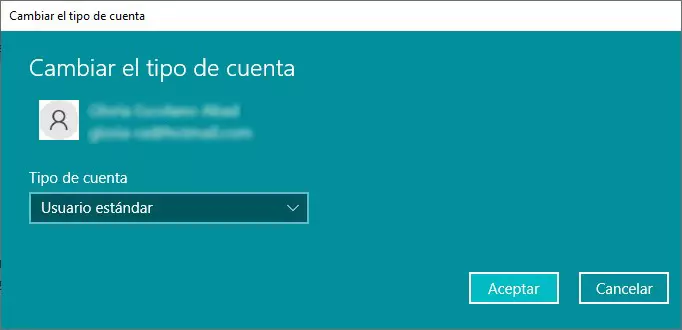
By default, when creating a user account in Windows, it is of the standard user type. If we want to make it an Administrator so that it can install applications from any source, we press the Account type drop-down box and change it to Administrator.