Rule out that it is not a software failure
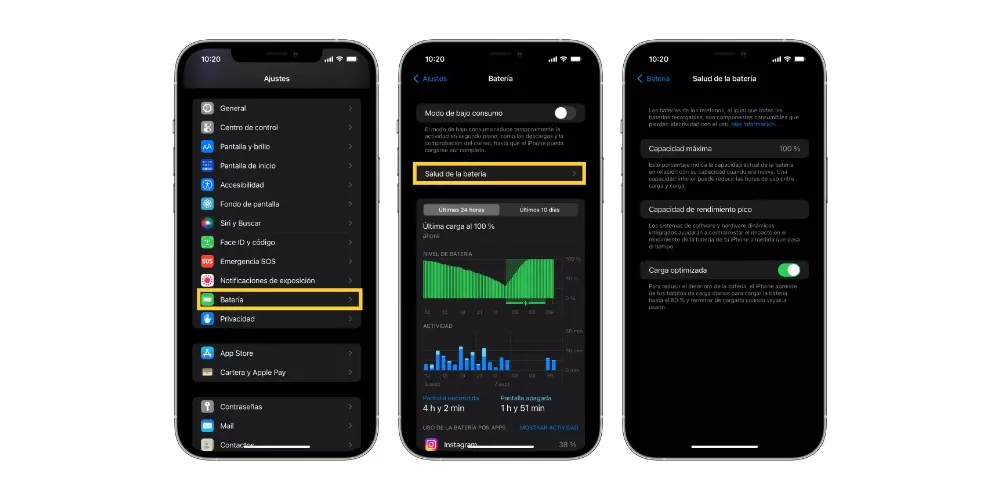
One of the reasons why many users decide to change the battery of their iPhone is due to the battery percentage that is marked in Settings. This is a metric that Apple uses to give users an approximation of the health of their iPhone battery, however, there are times when it can be more confusing than clarifying. Here are the steps you have to follow to be able to consult this information.
- Open the Settings App on your iPhone.
- Click on “Battery”.
- Select ‘Battery Health’.
As we told you, on some occasions this percentage is capable of confusing users due to the variation that it may suffer at certain times for no apparent reason. The first thing you have to know about this percentage is that it is the result of a calculation made by the device, therefore, a failure in this calculation derived from a software failure can make this data erroneous and does not represent reality.
In case you doubt the veracity of the battery health percentage of your iPhone, there are two processes to be able to make sure that the data shown by the iPhone is correct. First of all, what you have to do is perform a battery calibration. If even so, the percentage of battery health remains the same, what we recommend is to carry out a restoration of the iPhone.
Battery change on your own
Before entering fully into the whole process that you have to follow to be able to change the battery of your iPhone X, you have to know that our recommendation is that the battery change is always carried out in an Apple Store or in a center authorized by the same Apple to carry out these types of repairs or replacements. It is a process that requires specific material and specific knowledge, which if you do not have them, you can put the integrity of the device at risk. Below we will tell you the risks of the fact that you are the one in charge of changing the iPhone battery.
What risks does this process have?
As we told you, changing the battery of both the iPhone X and any iPhone is a process that requires first, a series of knowledge, and second, having a specific material that facilitates certain steps of the procedure. Therefore, before you get down to work, we invite you to reflect on whether it is really worth the risk of carrying out this battery replacement on your own.
In addition, the moment someone who does not work at Apple or who is not authorized by the Cupertino company itself opens the device, you will lose all the warranty that Apple can offer you for your device. That is, if something happens to the iPhone, you will not be able to go to Apple to repair it based on its warranty. Another point that is worth evaluating if it is really worth changing the battery of your iPhone X yourself.
Where to buy the battery
In case you are totally convinced that you can change the battery of your iPhone X, the first thing you have to do is buy the battery you are going to replace the one your device currently has. In this case you also have to bear in mind that in no case will you be able to purchase the same battery that Apple uses for its devices.
Therefore, taking into account that you will not be able to have an original battery, you can go to stores like Amazon where they offer different packages in which you will also have some basic tools that you will need to be able to replace the battery correctly.
Steps to change iPhone X battery manually
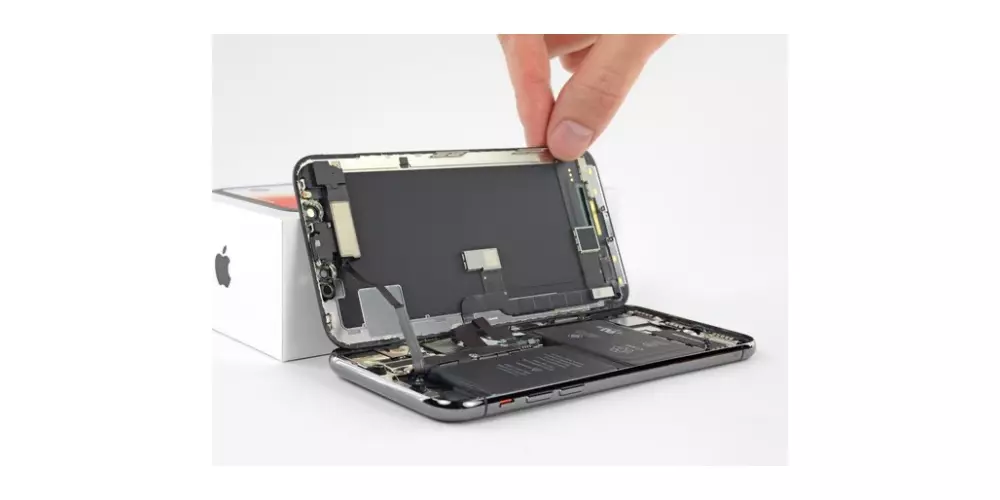
Once you have everything you need to be able to carry out the replacement of the battery, you just have to get down to work, although we once again insist that it is best to go to an Apple Store or an authorized center of Apple to carry out this process. However, once you have verified that you have everything you need to get to work, we remind you that to replace the battery of your iPhone X it is necessary to maintain full attention in the process and be very meticulous in each of The steps that we expose you below.
- Make sure your iPhone battery is below 25% charge.
- Turn off the device.
- Remove the two 6.9mm long pentalobe screws from the bottom of the iPhone frame.

- Heat the lower edge of the iPhone to soften the adhesive that holds the screen, which will make it easier to open later.
- Use two suction cups to adhere them to both the front and back of the iPhone and press firmly.
- Using the iSclack, slightly separate the screen from the back case of the phone and insert an opening pick into the free space. This process can also be done with a single suction cup.
- Slide the opening pick along the bottom left corner and toward the left edge of the iPhone, thereby cutting through the adhesive that holds the screen in place.
- Re-insert the pick into the left edge of the iPhone, and in this case, slide it towards the right edge to continue separating the adhesive.
- Slide the opening pick around the top corner of the screen and move the screen down in the direction of the Lightning port.
- Pull the small bump on the suction cup to remove the front panel.
- Open the iPhone by moving the screen up from the left side, also, lean the iPhone against something to keep the front of the iPhone up while you work with the device.
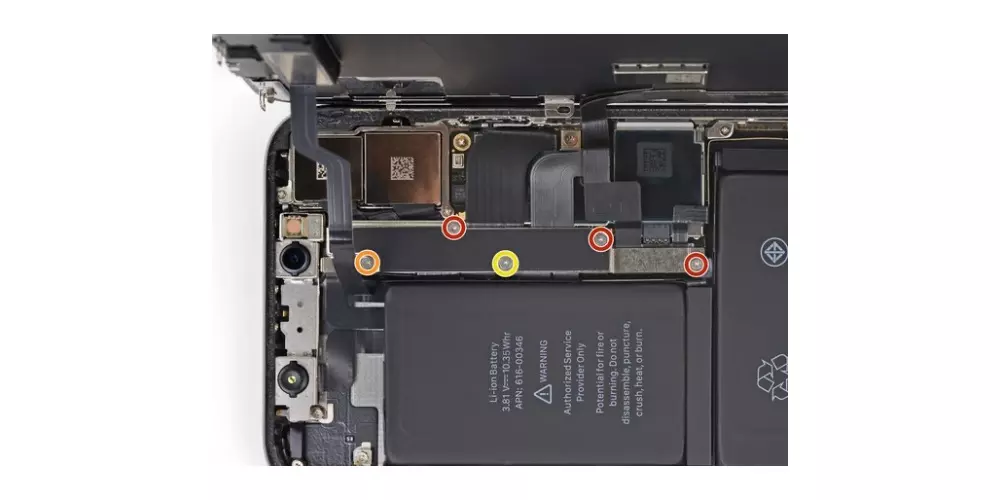
- Remove the five Y000 screws that secure the logic board connector bracket.
- Remove the bracket.
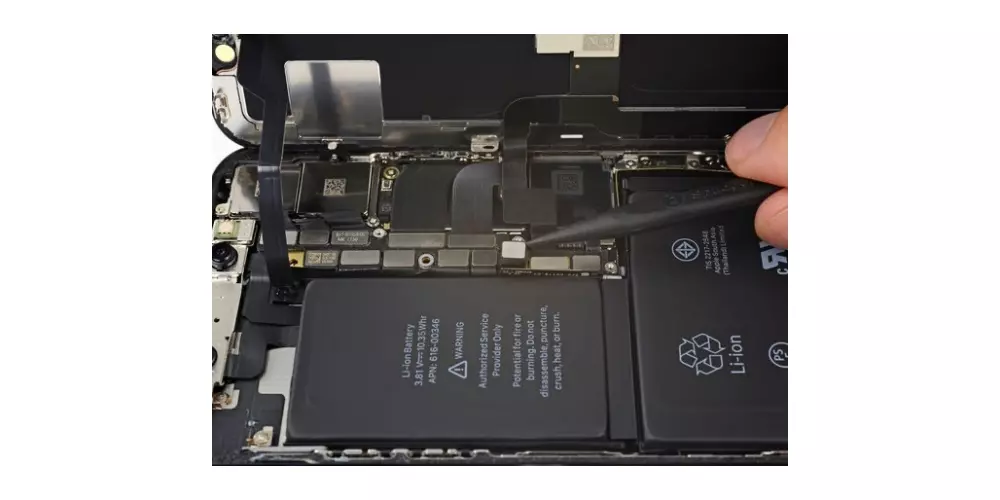
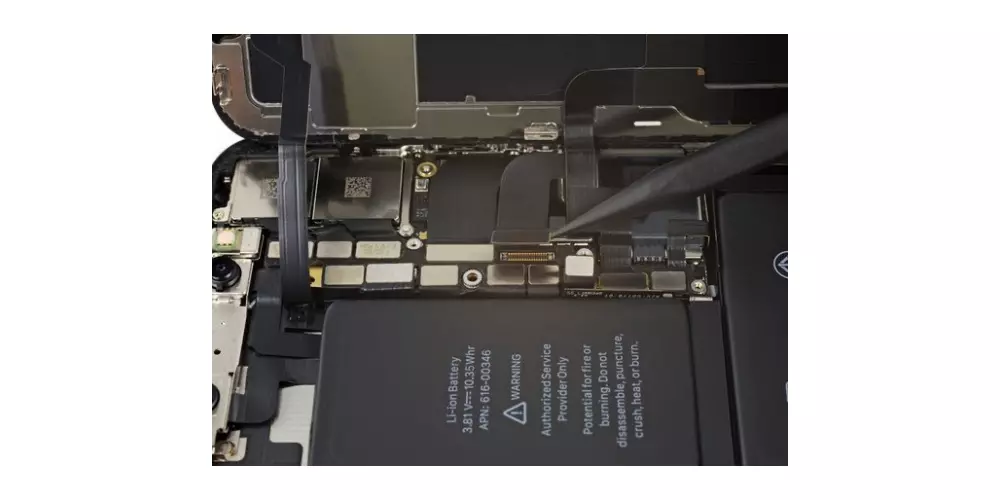
- Lift the battery connector off the logic board.
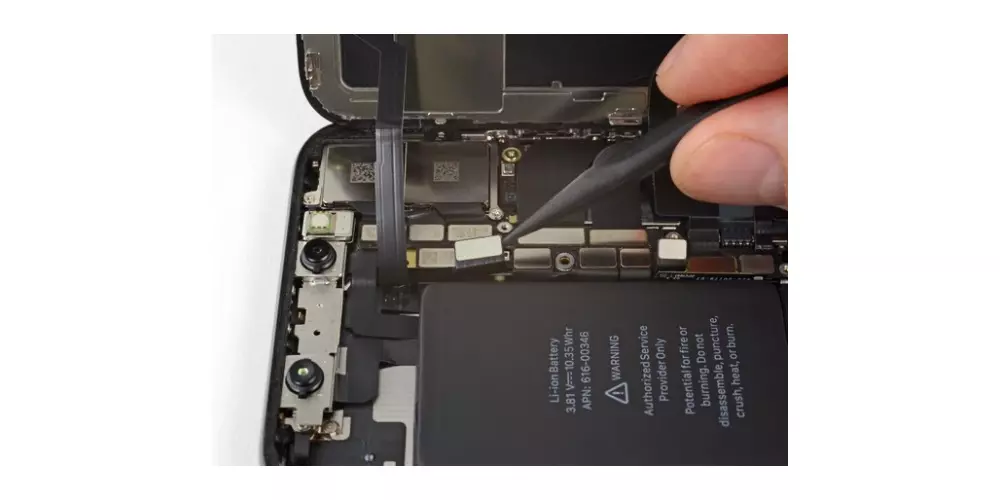
- Disconnect the front panel sensor assembly connector.
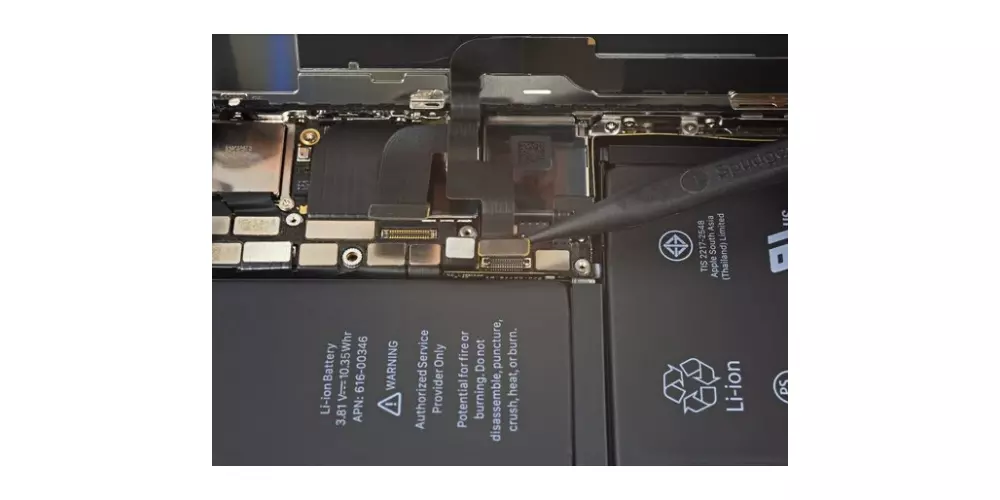
- Disconnect the OLED panel cable connector.
- Lift the scan cable connector out of its socket.
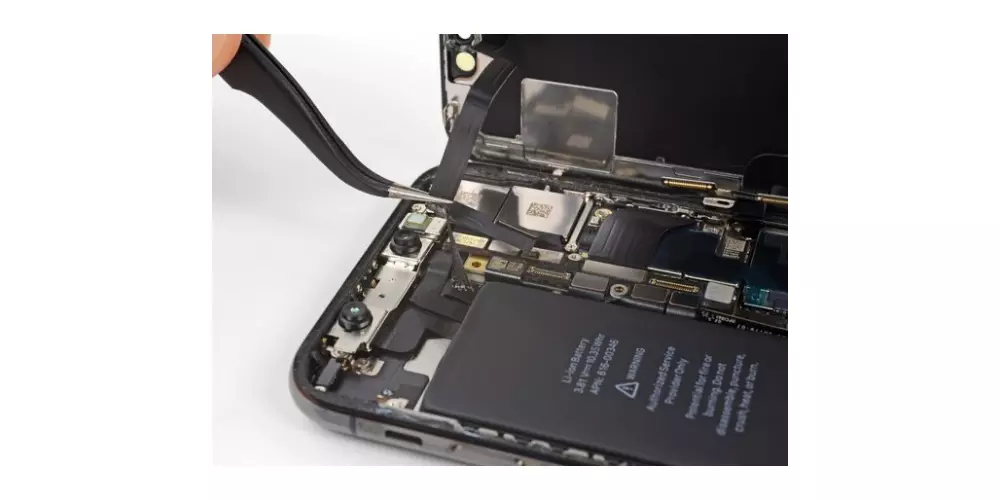
- Very carefully lift the front panel sensor assembly cable until the adhesive separates.
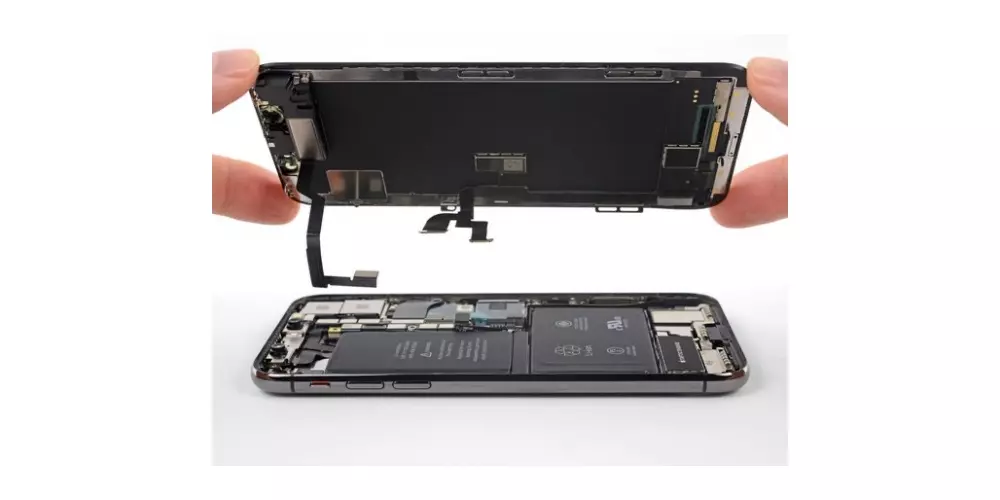
- Remove the display assembly.
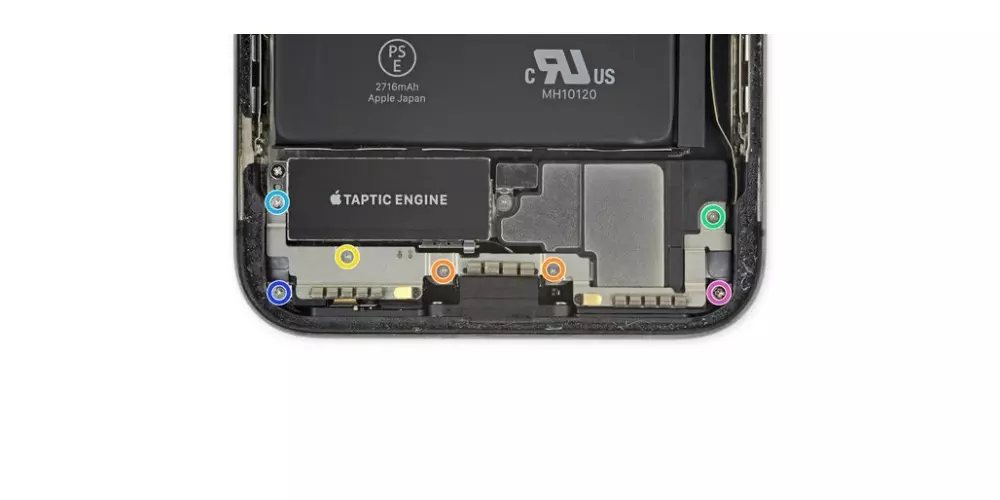
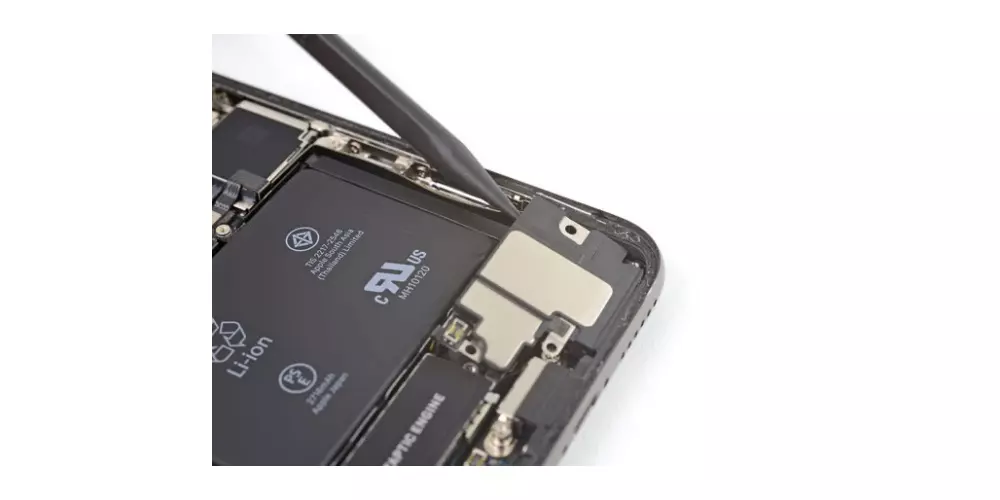
- Remove the seven screws that secure the bracket under the Tactical Engine and the speaker.
- Lift the bracket up from the edge closest to the battery. Do not try to remove it completely as it will still be connected through the small flex cable.
- While holding the mount out of the way, use the point of a spudger to pry off the flex cable underneath.
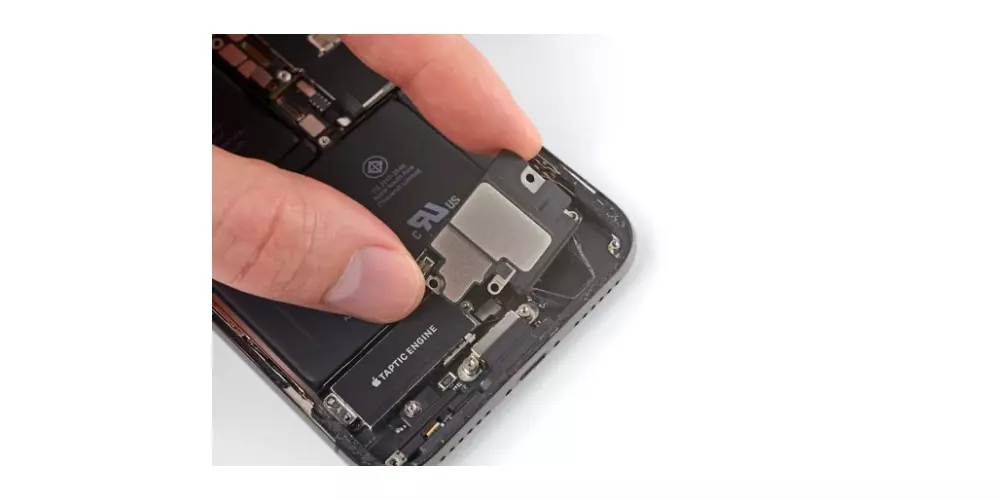
- Remove the bracket.
- Remove the 2.1mm YOOO screw that holds the speaker connector cover.
- Remove the cap from the speaker connector.
- Use the point of a spudger to pry off the speaker connector.
- Insert a spudger under the top edge of the speaker near the edge of the iPhone case. Gently pry up and lift the top edge of the speaker.
- Hold the speaker by its sides and move it from side to side, separating the adhesive that holds it from the bottom edge of the iPhone.
- Pull the speaker from the bottom edge of the iPhone until the adhesive gasket separates.
- Remove the speaker.
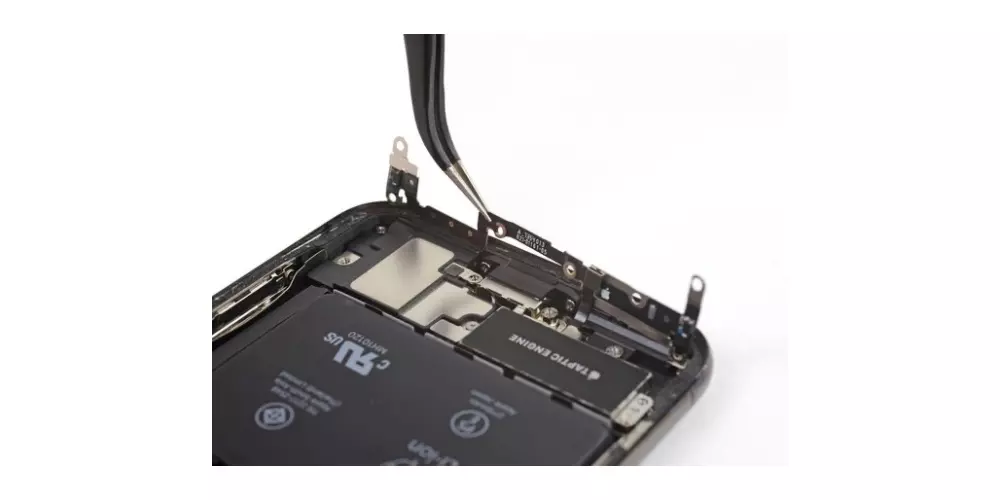
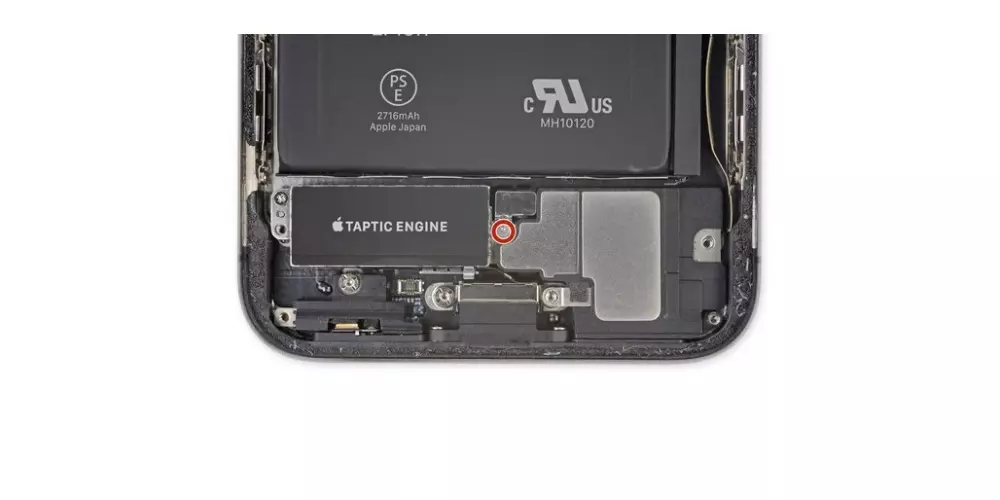
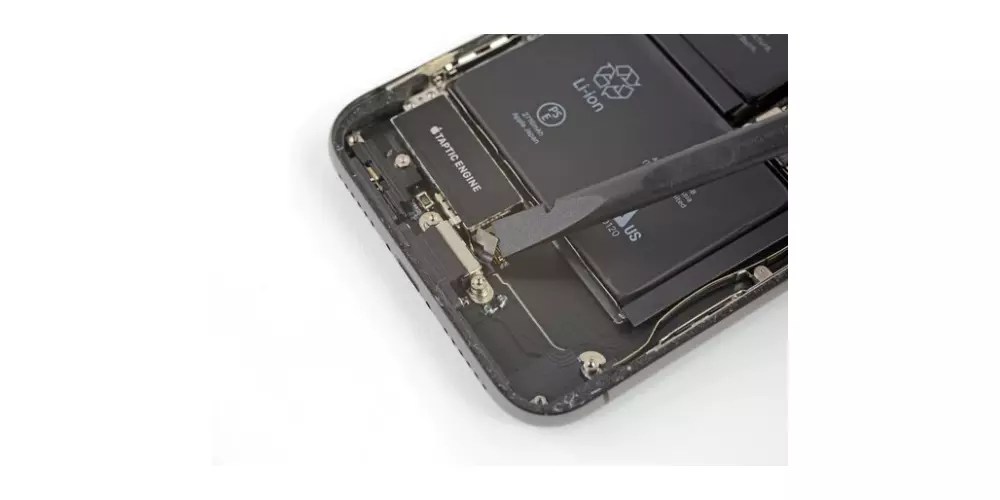
- Remove the 2.3mm Phillips screw that holds the Taptic Engine.
- Use a spudger to disconnect the flex cable from the Taptic Engine by lifting it straight out of its socket.
- Remove the Taptic Engine.
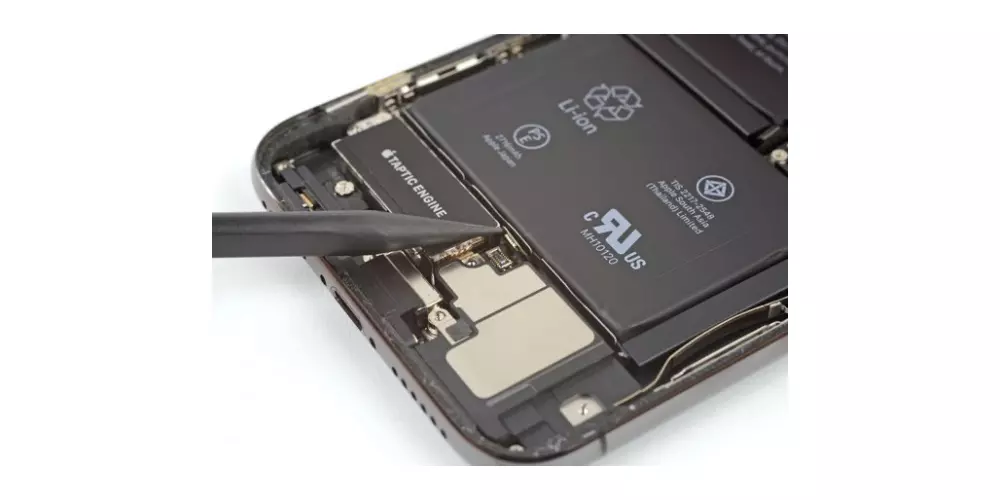
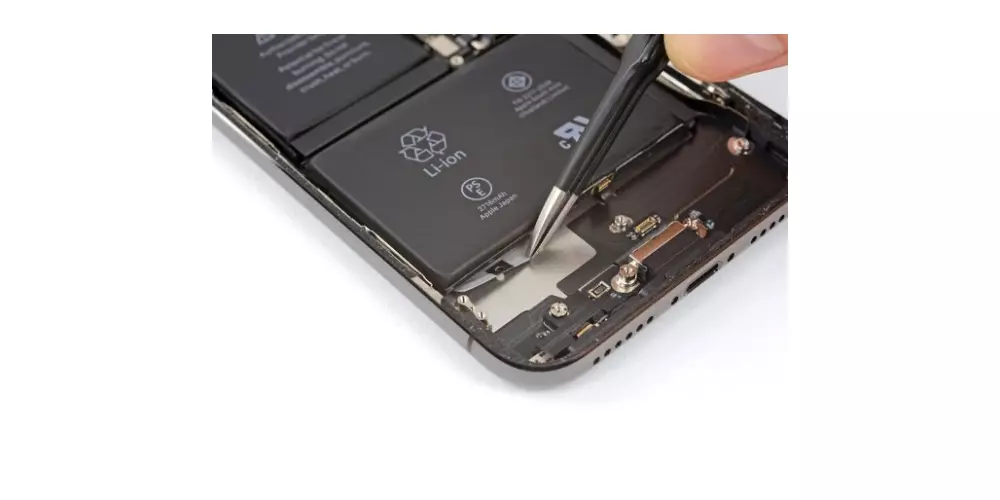
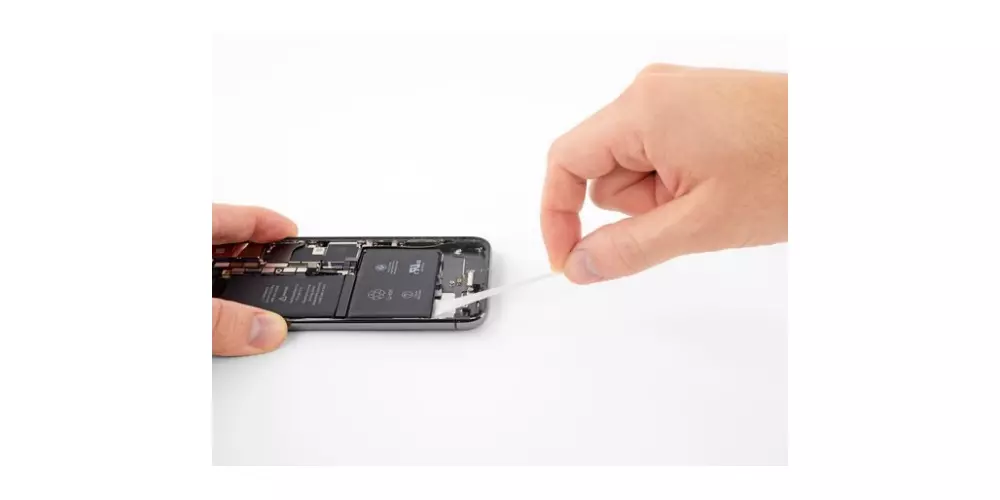
- Pull the first battery adhesive tab away from the bottom edge of the battery.
- Repeat the previous step to separate the two remaining adhesive tabs from the bottom edge of the battery.
- Pull on each tab to slowly stretch the adhesive underneath the battery. This special adhesive that stretches and releases, losing its glue and allowing the battery to be lifted with ease.
- Grab one of the external adhesive tabs on the battery and slowly pull away from the battery towards the bottom of the iPhone.
- Repeat the previous step to remove the strip on the opposite side, leaving the center strip for last.
- Remove the strip from the center, being careful not to snag it on the speaker flex cable.
- Peel and separate the tab from the final adhesive strip, at the top edge of the top battery cell.
- Pull and remove the final adhesive strip.
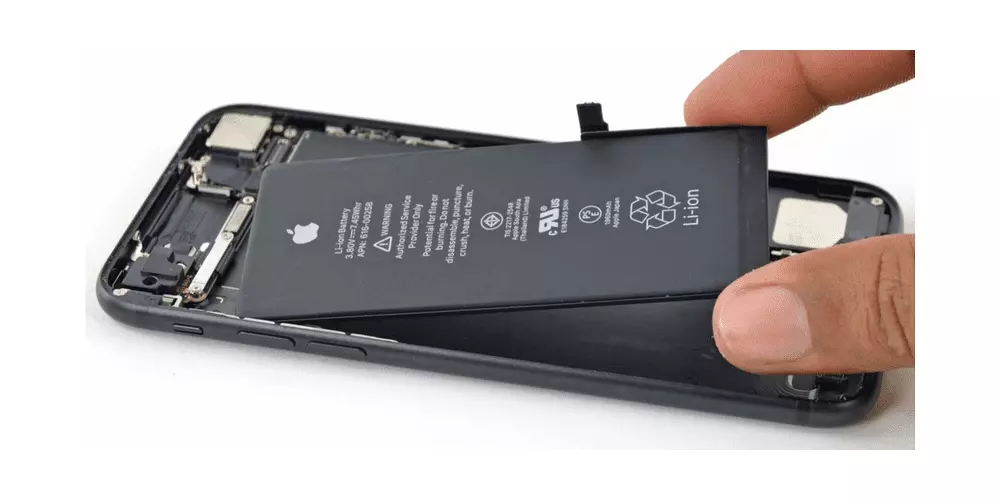
- Grab the battery from the bottom edge and remove it from the iPhone.
- Do all these steps in reverse with the new battery to complete the battery replacement process.