In addition, the bar is now permanently fixed to the bottom of the screen, since now, at least from the Settings menu, it does not allow it to be moved to the top or to any side
Pin the position of an app
If we want to anchor and pin any application to the taskbar at the bottom, we will have several methods to do so.
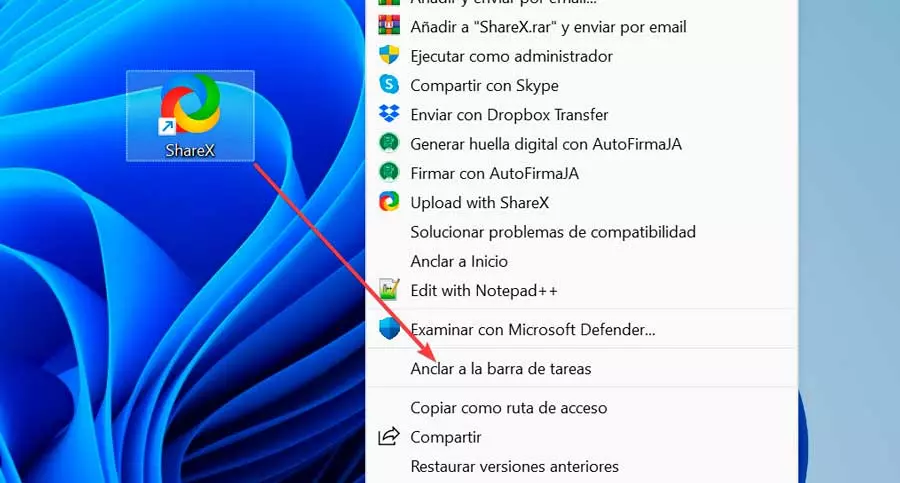
On the one hand, if the application is running, its icon will appear in the bar with a line below it, which will indicate that it is active. If we want its icon to remain permanently once we have closed the program, we can right-click on the icon. This will bring up a small menu where we will select “Pin to taskbar”.
In the event that an application is running, we can also pin it to the bar in the event that its icon is on the desktop. To do this, it will only be necessary to click on it with the right mouse button to bring up a context menu where we will click on Show more options or directly press the keyboard shortcut «Shift + F10». This will bring up an expanded menu where we will select the “Pin to taskbar” option.
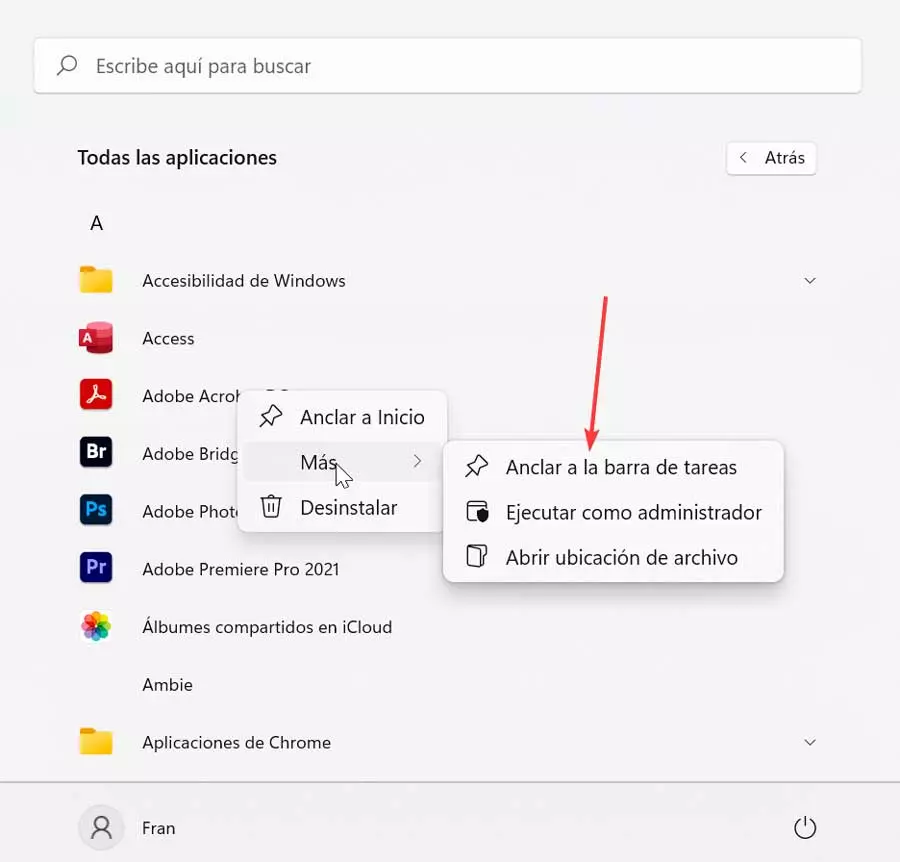
One last option would be to do click on the Start icon and click on the “All apps” button. Later we click with the right mouse button on the application that we want. Next, we select “More” and then the option to “Pin to the taskbar” will appear.
Delete icons
In general, most of the icons are easy to remove, although we must take into account that some require more effort, and others, such as the Start menu, are immovable. Others in changes cannot be deleted, but it can be hidden.
For removing an application from the bar is enough by right-clicking on its icon, to bring up a small drop-down menu where we must select the “Unpin from the taskbar” option.

Those icons that cannot be removed can be hidden for which we must click with the right mouse button on the taskbar. Then we select «Taskbar settings». Alternatively, we can access it by pressing “Windows + I” to enter the “Settings” menu and click on “Personalization and Taskbar”.
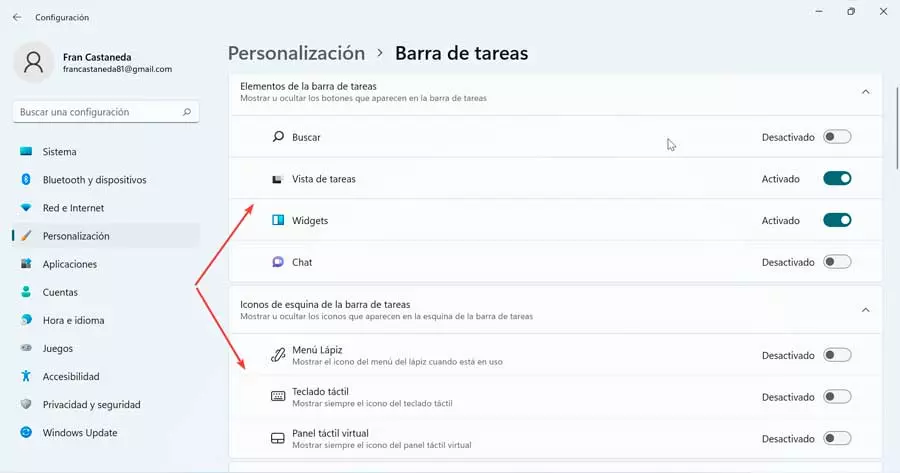
Once on the new screen we can deactivate any of the “Search”, “Preview”, “Widgets” or “Chat” icons, so that they are automatically hidden. We can also hide the icons that appear in the right corner bar such as “Pen Menu”, “Touch Keyboard” and “Virtual Touchpad”.
Customize the position of the bar
By default, the Windows 11 taskbar cannot be moved up, left or right, since Microsoft, contrary to what happened in Windows 10, does not easily allow this change. However, it is possible to make those changes through a registry tweak.
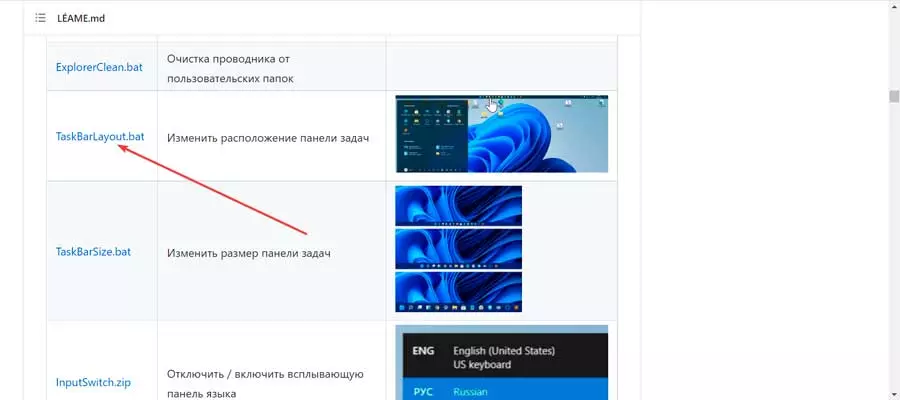
For this it will be necessary to download a script called TaskBarLayout.bat from this link to GitHub. Later we execute it, and it will ask us to select an election. To do this we use the number keys from 1 to 4 to move the bar to the left, right, up and down positions respectively. Of course, we must bear in mind that when we move it to the left or right, the icons on the bar will disappear.
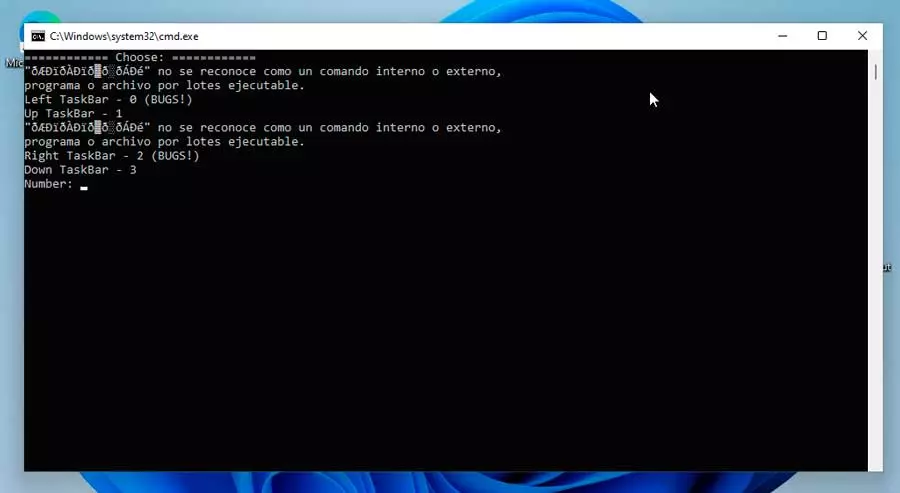
In this way, we can use this simple and effective command line tool to change the position of the bar in Windows 11. Of course, we must use this adjustment at the own risk of each user.
hide the bar
In addition, we can, as was the case in Windows 10, we will also be able to hide the taskbar so that it is not permanently visible, which allows us to take advantage of the entire front. To do this, within the “Alignment of the taskbar” section, we must click on the checkbox. “Auto-hide the taskbar”.
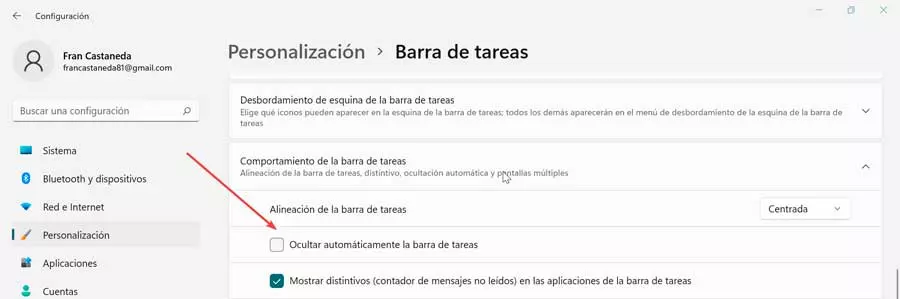
Once this is done, the bar will hide at the bottom of the screen, and you will have to move the cursor to make it appear again. Thus, we get it to only be displayed when we are really going to use some of its elements.
Taskbar corner overflow
Under this strange name we find the function that allows display icons on the right side of the screen, such as the time and date, battery status, volume level and Wi-Fi status, among others. The small pop-up menu when we click on the arrow pointing up, which is to the left of these icons, is called an overflow.

To do this, from the customization menu of the task bar, we display the section of “Taskbar corner overflow”. From this section we can indicate which icons can appear on the right side of the bar (Dropbox is the most common) by activating it in the menu. While those that are shown disabled will appear in the overflow menu.
Move icons left
If we have previously used Windows 10 or earlier versions, we will be used to finding the Start menu button on the bottom left of the screen. If we want to move the icons so that they appear again on the left side, we can do it from the Configuration section of the taskbar.
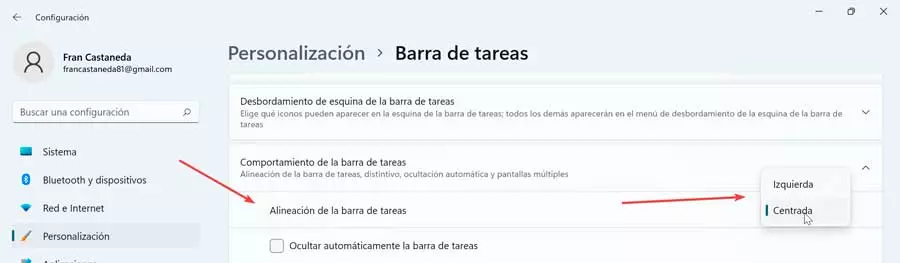
Here we must select the “Taskbar Behavior” section. This will display a small menu where we find the option to “Taskbar Alignment” and clicking the right button gives us the option to choose Left instead of center. When closing the window, we will see how the icons on the bar next to the Start menu have been moved to the left of the screen.
Change the size of the icons
Windows 11 does not offer in its configuration section the possibility of changing the default size of the icons that appear in the bar, so in order to do so, it will be necessary to make a simple adjustment in the Registry Editor. Similarly, we can choose to change the scale within the Settings menu.
From Registry Editor
Before we begin, we must know that changing the size of the icons also implies that the taskbar changes size in the same proportion, in order to accommodate larger or smaller icons.
To do this, we are going to press the keyboard shortcut “Windows + R” which will open the “Run” command. Here we write regedit and press Enter or the OK button. Once the Registry Editor appears, we navigate to the following address:
HKEY_CURRENT_USER / Software / Microsoft / Windows / CurrentVersion / Explorer /Advanced
Once here, on the right side we create a new value. We will do this by right-clicking on an empty spot, selecting New, and then clicking DWORD (32-bit) value and we name it TaskbarYes.
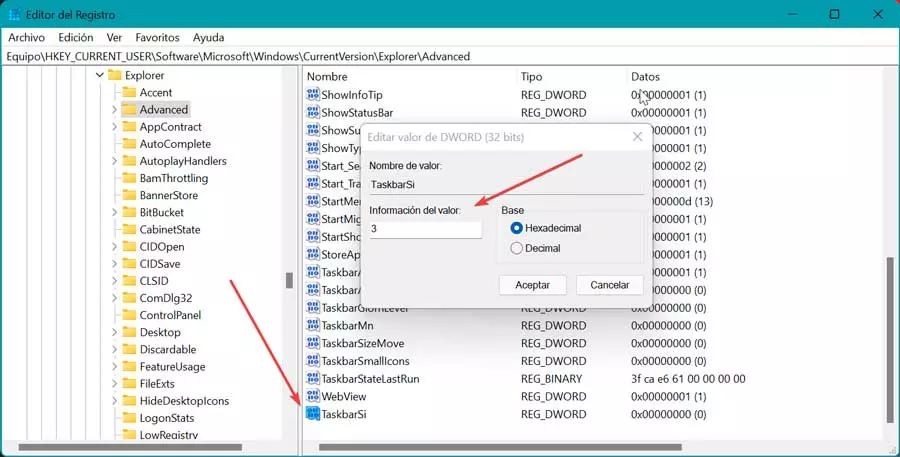
Now we double click on the TaskbarSi value and configure it with 0 if we want small icons, 1 for medium 2 and 3 for large icons, within its section of Value. It only remains to click OK to save the changes and restart the computer.
Use display scale
In this case we must know that, if we change the display scale from the “Settings” section, not only does the size of all the icons change (including those that are not in the bar), but so will the text ( in all parts), as well as other elements.
To do this we must click with the right mouse button on an empty place on the desktop. This will open a context menu where we will select the option to “Screen settings”. We can also access from «Configuration2, clicking on «System2 and «Display page».
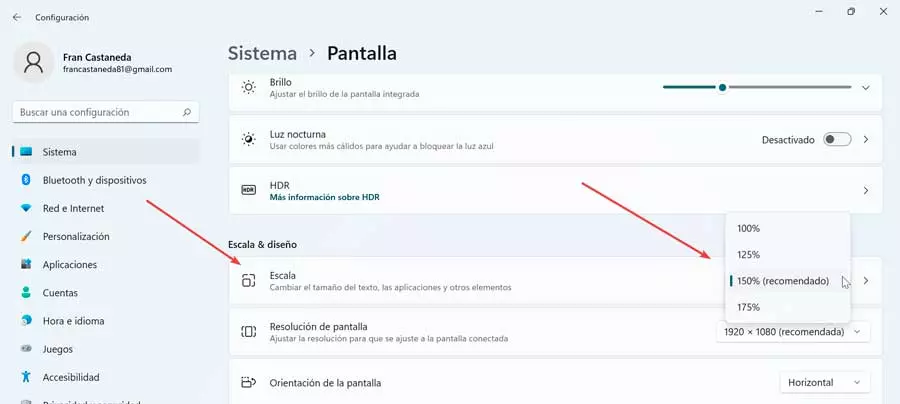
Now on the right side, we find the section of “Scale”. Here we select a scale by clicking on the drop-down box for it to apply. Its default value is 100% and it is recommended to use the one recommended by Windows 11.