Defragmenting an HDD unit is a basic maintenance that we should carry out with some frequency, since it will help us to prevent fragmentation problem that these types of units suffer, and that ends up having a noticeable impact on their performance.
Fragmentation occurs when a file, application, or other type of content is written to the storage drive, but It does not do it in a correlative way, instead, it is distributed in fragments that are randomly distributed throughout the unit. Being scattered in this way, when we want to access them, or run those applications, the storage unit has to search for those fragments, which generates a loss of performance and can increase access and load times.
When defragmenting an HDD, what we do is put order in those data that are scattered. Thus, when the unit has to access them, it will find them arranged consecutively, and this will produce a substantial improvement in performance, and a reduction in latency and access times.
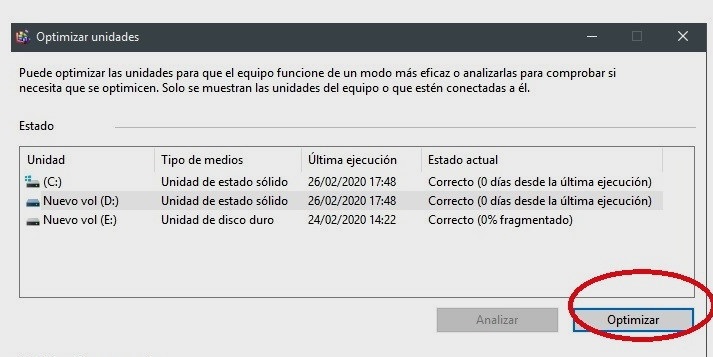
With SSD drives, the issue of fragmentation does not have the same impact, but we can also resort to Windows 10 and Windows 11 built-in tool to optimize them. This optimization process has no impact on its useful life, so we can use it as many times as we want without any problem.
To defragment an HDD drive in Windows 10 or Windows 11 we just have to press the Windows key and write “Defragment”. We enter the first result, and once there a list will appear with all the storage units that we have installed in our system. We select the one we want to optimize and voila, the process is automatic. We can also modify the configuration and establish specific optimization routines.