Sometimes it happens that when updating the BIOS of our motherboard something goes wrong and the firmware does not install correctly. At that point it seems like all is lost, but there is a way to revert back to the previous settings on some motherboards. This function is called flash back and we are going to tell you how to do it on the different motherboards of the different manufacturers for PC.
The BIOS of the motherboard is an important element in our PC, technically it is an operating system that starts before the one we are going to use and is responsible for starting up all the components and peripherals of the PC, as well as reporting the specifications of the same. So if this fails, it means that we cannot use it regularly. And yes, surprisingly enough, there are even Windows and Linux functions that aren’t really BIOS calls in disguise. That is why a bad update of it can be fatal.
How to recover the BIOS of your motherboard with the Flashback function?
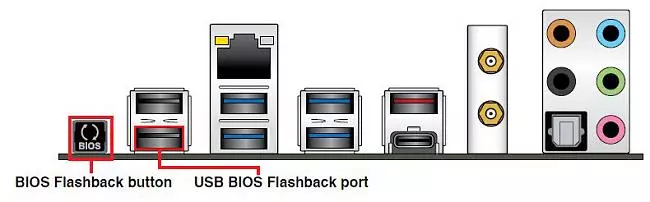
First of all we have to remember that not all motherboards have this functionwhich consists of connecting a Pendrive or USB key to a specific port and pressing a button, an automated process of updating or recovering the BIOS of the motherboard is activated.
So the first thing we will need is a USB stick, which must be more than 1 GB. Once you have it at your disposal, connect it to the PC and fsave it to FAT32. Do not add any extra files, since we will only use them to be able to recover the BIOS of our system. And where can we find it? Well, on the manufacturer’s website. Keep in mind that some have a firmware update for each motherboard they have launched on the market, while others have a more generalized driver. Once you have the file, which will be downloaded in compressed format, you must uncompress it on the root folder of the Pendrive.
From time to time you will see a Readme text file that will indicate a series of instructions, among them that you must rename the file that you have to copy to the Pendrive in a certain way. So do not ignore such information and read it carefully. If necessary, use a translator for it, since not following the instructions correctly can mean that the process of flashing the BIOS does not work well.
Recovering the BIOS
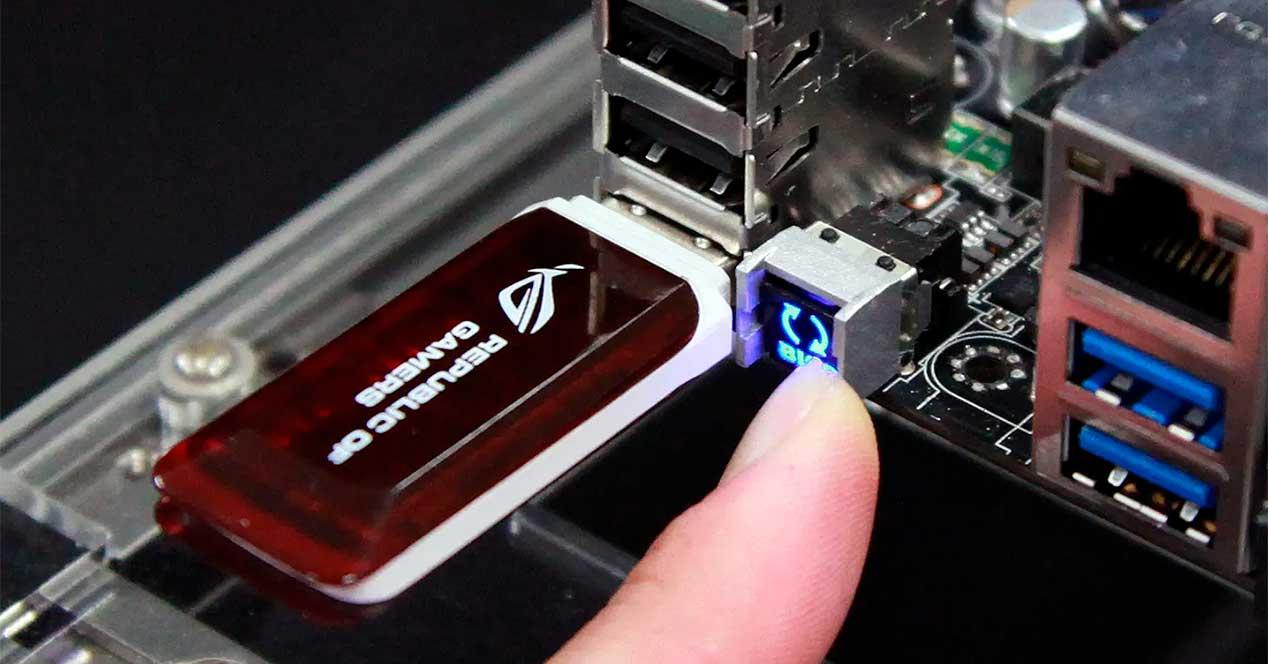
We have the final step left, connect the Pendrive or USB key that they have prepared on the USB port prepared for it. You will recognize it by the fact that it has a button or a push button next to it. Well, what you have to do is press it for three seconds until its LED light flashes several times, when it is finished it will stay on for the time of updating the BIOS and once it is finished it will turn off.
As a final detail, you do not need to have the peripherals connected to carry out this process and you do not need to manage anything on the screen. Only with the motherboard receiving power is enough.