However, most of us who do projects with the Raspberry Pi are not programming experts nor do we understand many of the commands that we enter in the terminal. We just follow tutorials and sometimes, we are afraid of doing a step wrong and destroying that system that has cost us so much to configure. can you make a backup of my card of the Raspberry Pi in a simple way? The answer is yes and everything you need to know you will be able to learn in this article.
Learn to make backups and experiment properly
The Raspberry Pi is one of the great wonders that the miniaturization of computing has given us. A development board that was born to bring computing to third world countries, but that has also made curious people from all over the planet get one to experiment and mess around.
The Raspberry Pi is one of the most versatile machines you can buy. You can turn it into a small Plex server, a NAS for your personal files, you can use it as a desktop computer and you can even configure it to make a Firewall on your network. The possibilities of the Raspberry Pi are absolutely endless, and most of the applications and systems that we can install are free and also have tutorials. The net is full of very detailed tutorials on how to configure these devices. The only thing you need to know to be able to experiment without fear is to make copies of your cards. Especially if you are going to use the same microSD cards and you don’t want to lose your data.
Why should you back up your system?
at the time of update our system, whatever it is, we may be afraid of making a mistake and that our invention will go to waste. Imagine that your NAS becomes unusable after an upgrade. Or that that Plex that you had so well organized, stops working from one day to the next.
However, it is not the only reason why you should have one. system backup of your Raspberry Pi. Your microSD card is not infinite, and could fail without warning, destroying with a stroke of the pen all the information inside it. It may also be the case that you lose the card accidentally.
Since predicting these phenomena is practically impossible, the only solution available to us is to do regular backups of our systems. In this way, no matter what happens, we will always have a recent backup of the content of our Raspberry Pi and we will not have to spend a good number of hours configuring a new installation.
How to make a backup of the MicroSD of your Raspberry Pi
Whether you’re using Windows or a Mac, you can make backup copies of your Raspberry Pi card relatively easily:
On Windows – Win32 Disk Imager
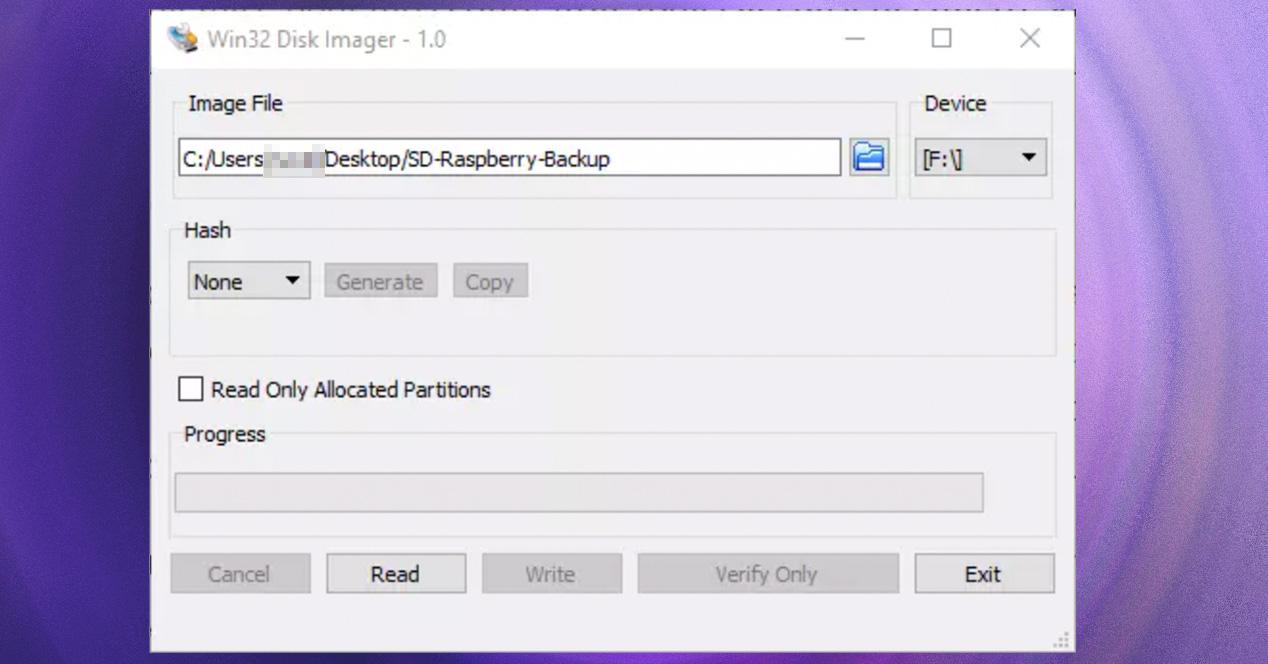
Surely if we have already been using a Raspberry Pi before we already have this tool downloaded, but, if for some reason we do not have it saved on our computer, the first thing we must do is download Win32 Disk Imager. This is a popular tool for writing system images to memory cards.
When we want to save an image to a microSD to use it in the Rapsberry Pi, what we have to do is choose the drive letter where we are going to save it, select the image and click on the «Write» to copy it. If what we want is to do the reverse process, that is, the backup of the microSD to save it on our computer, then what we have to do is select the drive letter, choose the name of the backup (and the path where we are going to save it on our computer) and click on the button «Read».
When it’s done, the microSD backup will be ready. Now we can disconnect the microSD from our computer, reconnect it to the Raspberry Pi and continue using it normally.
If for some reason our microSD fails, as we have the backup saved on our computer, all we have to do is connect the memory card to the computer and, from Win32 Disk Imager, write backup to it as if it were any other image, with the difference that it will already be fully configured and working.
On Mac – Terminal
If you’re interested in doing the copy on Mac, just type a few commands on the Mac. On some older systems you can extract the image via Disk Utility, but that method is no longer recommended because it’s so error-prone.
Therefore, follow these steps:
- Plug in the microSD card from your Raspberry Pi to your Mac using an adapter.
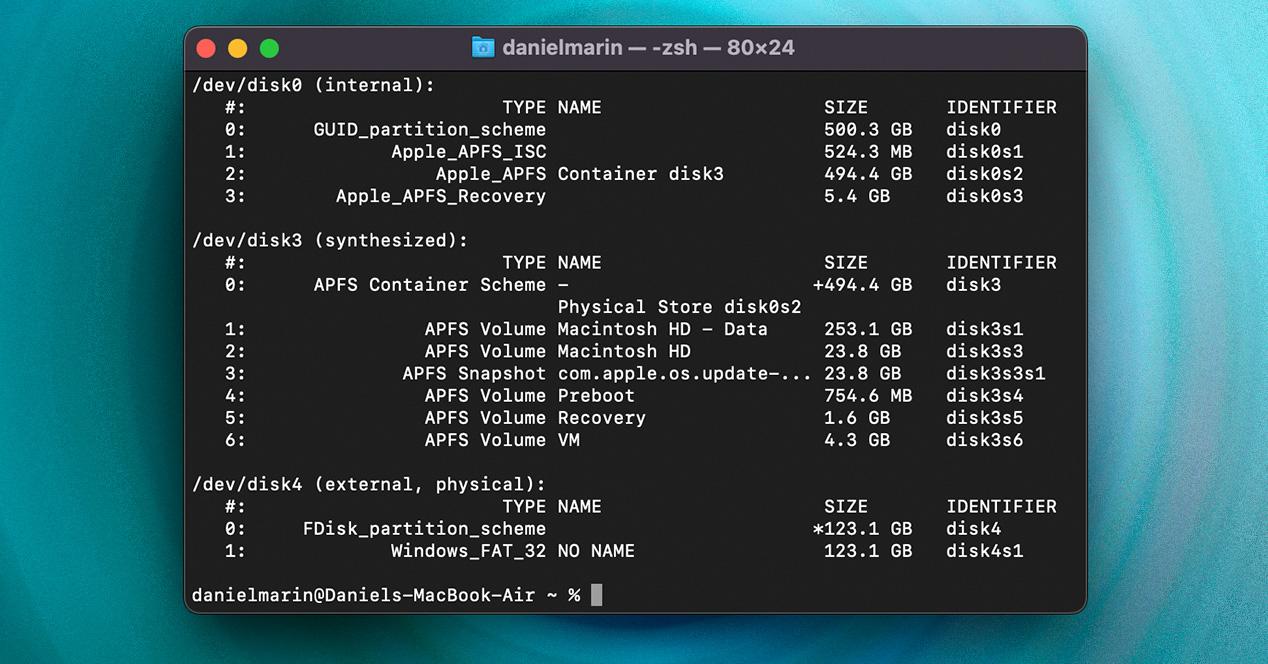
- go to Applications > Utilities > Terminal
- Write ‘diskutil list‘. Scan the list and locate the drive that references the volume of your microSD card. You can detect it both by its capacity and by its format. To follow this example, we will assume that our card is recognized by our Mac as /dev/disk2.
- Next, we will use the dd command to make a copy of the entire contents of the card in .dmg format.
- We will write the command sudo dd if=/dev/diskX of=~/PiSDCopy.dmg. You will have to replace the X with the number that identifies the SD card in your system, as we have taught in step 3.
- That command will create a file called PiSDCopy.dmg in the user directory (~). To rename the file or put it somewhere else, you can change ~/PiSDCopy.dmg to another path. You can also change the name of the file to whatever you prefer, as long as it ends with the DMG extension.
- For restore to a new cardwe will repeat the process: sudo dd if=~/PiSDcopy.dmg of=/dev/diskX
- Please note that everything on the card will be deleted. As in the previous case, we will have to replace the X with the number that identifies the microSD on our Mac (step 3).