Turn off notifications on Mac or configure them correctly, will allow us to avoid unnecessary distractions that will increase our productivity on a day-to-day basis, especially if we spend many hours in front of a Mac.
With iOS 15 and macOS Monterey Apple has shown that, at some point, both operating systems are doomed to converge (although Tim Cook says the opposite). An example is found in how the method to disable notifications on the iPhone is practically the same as the Mac.
The latest versions of iOS and macOS, includes a new functionality called Focus Modes. This functionality allows users to create different modes of use to customize the operation of their device in terms of notifications that are displayed on the screen and play some sound.
Although many users have not paid attention to this mode (most of them only use Do Not Disturb mode), has great potential and if we adapt it to our way of life we can completely rest from iPhone notifications in our free time.
In addition, it is also an excellent tool for help us focus when we are workingsince it allows us to prevent social network or messaging applications from sending us notifications during our working hours.
How to turn off notifications on Mac
Disabling all notifications on Mac is a long and tedious process, as Apple it does not offer us a single button to deactivate them. Instead, it invites us to use Do Not Disturb mode.
do not disturb mode, turn off any and all notifications that we receive on our device.
If our iPhone is managed by iOS 15 and the Mac with macOS Monterey, both devices synchronize Do Not Disturb mode operation and the rest of the modes of concentration that we have created.
By turning on Do Not Disturb mode, Apple allows us to set for how long we want it to be activated: one hour and until night. In this way, we will avoid forgetting to deactivate this mode and being cut off.
For activate Do Not Disturb mode, or any other focus mode that we have configured on our iPhone, we must perform the steps that I show you below:
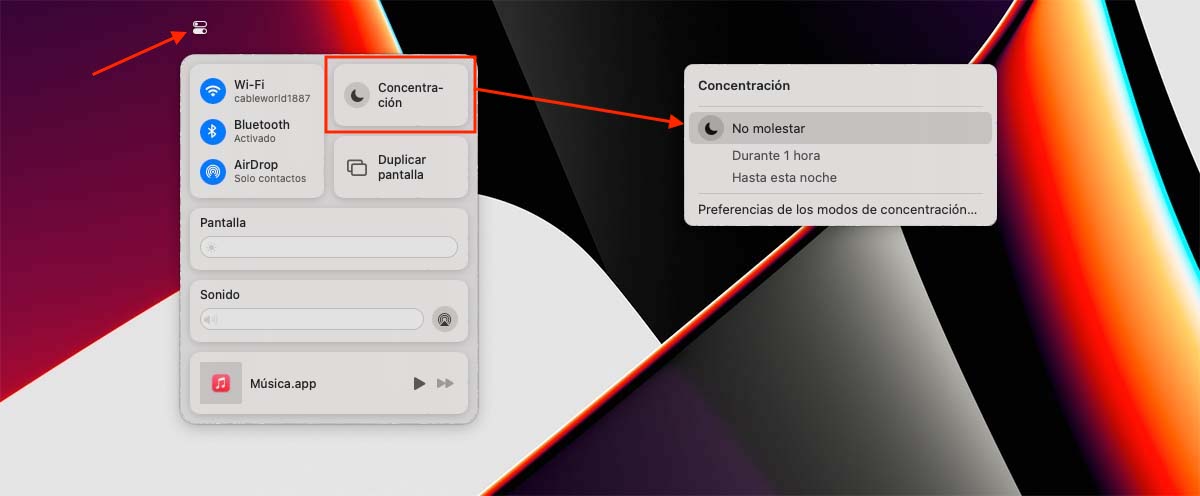
- First of all, we turn to the top menu bar and click on the two switches located just to the left of the date and time.
- Next, we click on the button Concentration and select the mode Do not disturb.
But if what you want is completely get rid of any and all macOS notificationswe must perform the following steps:
- Click on the toothed wheel located in the application dock that will give us access to System preferences.
- Next, we click on Notifications and concentration.
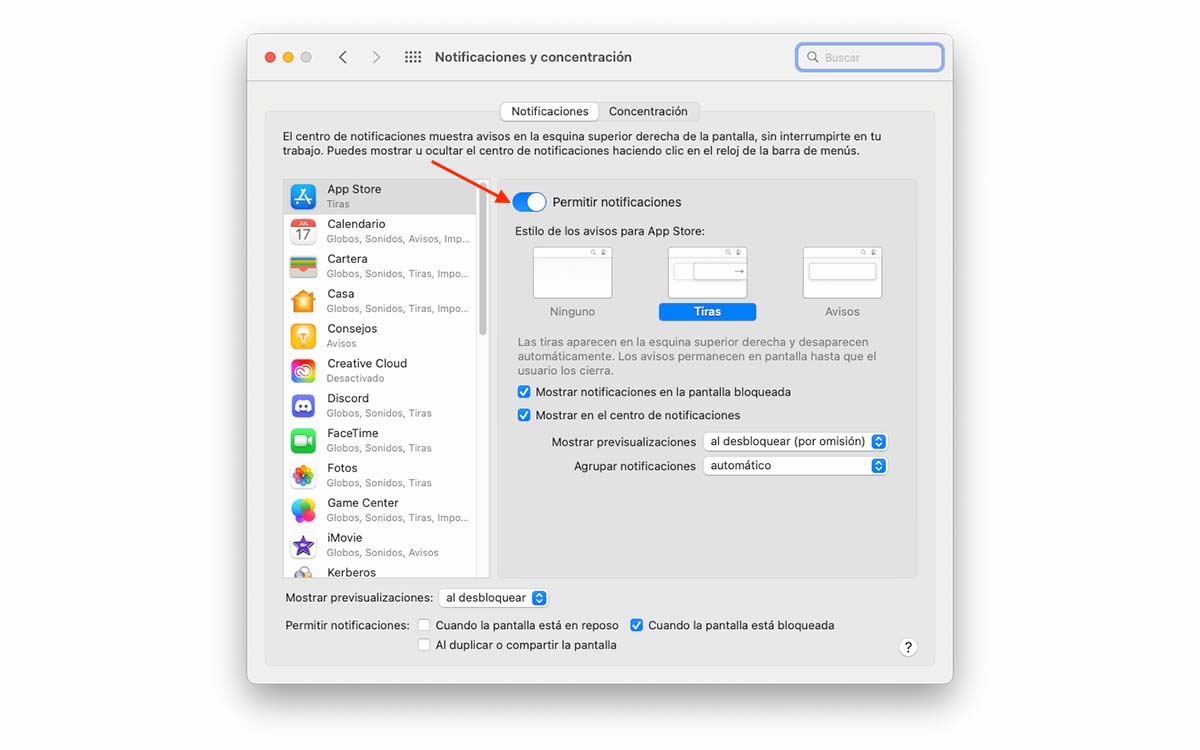
- In the left column, we select the applications one by one and in the right column, turn off the switch Allow notifications.
Apple does not offer us no method to disable all notifications at once. If any type of notification is a nuisance, all you can do is leave Do Not Disturb on permanently.
How to turn on notifications on Mac
If we haven’t set a time period for Do Not Disturb mode to turn off automatically, for turn it offwe must perform the following steps:
- We headed to the top menu bar and click on the two switches located just to the left of the date and time.
- Next, we click on the button Concentration and press the mode Do not disturb to disable it.
How to turn off notifications on Mac from an app
It is more than likely that we do not always want to deactivate each and every one of the applications that we have installed on our computer. Most likely we just want turn off notifications for a specific app or game.
For turn off notifications on mac from an appwe must perform the following steps.
- First, we access the notification center. To access the Notification Center, we must go to the top menu bar and click on the date and time.
- Next, all notifications will be shown that we have not read.
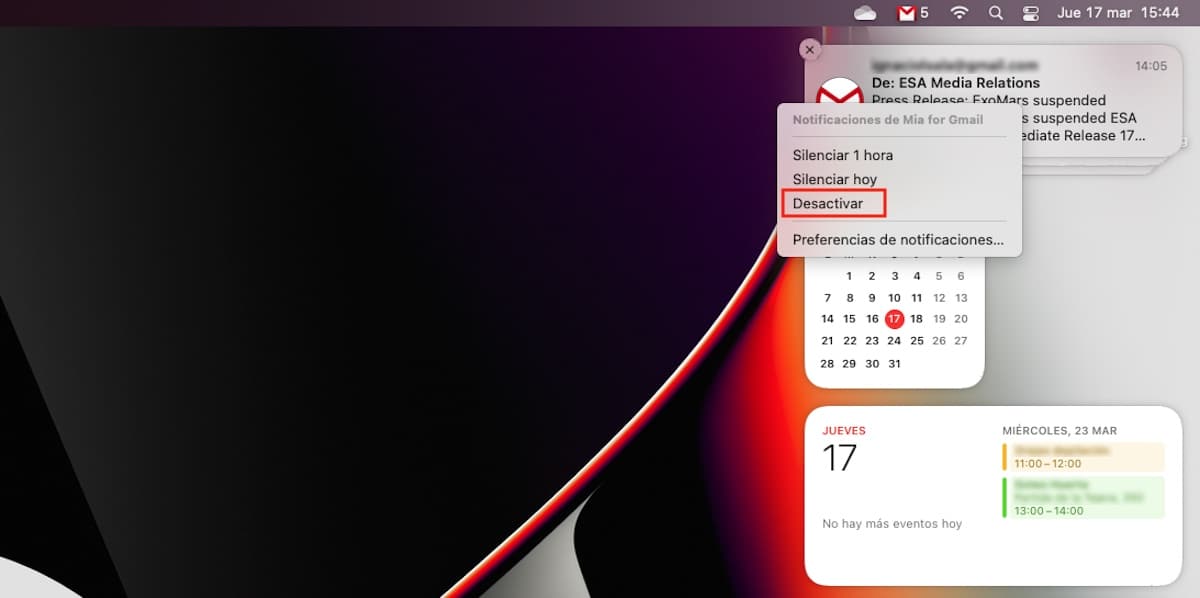
- If we do not want to receive notifications from a specific application again, place the mouse over the notification and press the right mouse button.
- Of the different options that are displayed, click on the option Deactivate.
From this moment, the application will no longer show any type of notification. If we change our mind and want the application to show notifications again in macOS, we must follow the steps that I show you in the next section.
How to activate notifications on Mac from an application
If after deactivating the notifications of an application, we have seen how really if we neededwe have changed our mind or want to return to enjoy themwe must access the macOS System Preferences and activate them by performing the steps that I show you below:
- First of all, click on the cogwheel located in the application dock that will give us access to System preferences.
- Next, we click on Notifications and concentration.
- In the left column, we select the application from which we want to retrieve notifications.
- Next, on the right side, we must turn on the Allow notifications switch.
How to temporarily silence notifications on a Mac
If we use a messaging application such as Slack, Discord, WhatsApp, Telegram or we do not stop receiving notifications about new messages or email threads, no need to disable notifications.
macOS, like iOS, allows us temporarily mute all notifications from an app. Once the time period has elapsed, the application will show us notifications again.
For temporarily mute notifications of an application we must perform the following steps:
- First, we access the notification center. To access the Notification Center, we must go to the top menu bar and click on the date and time.
- Then it will show tall notifications we have not read.
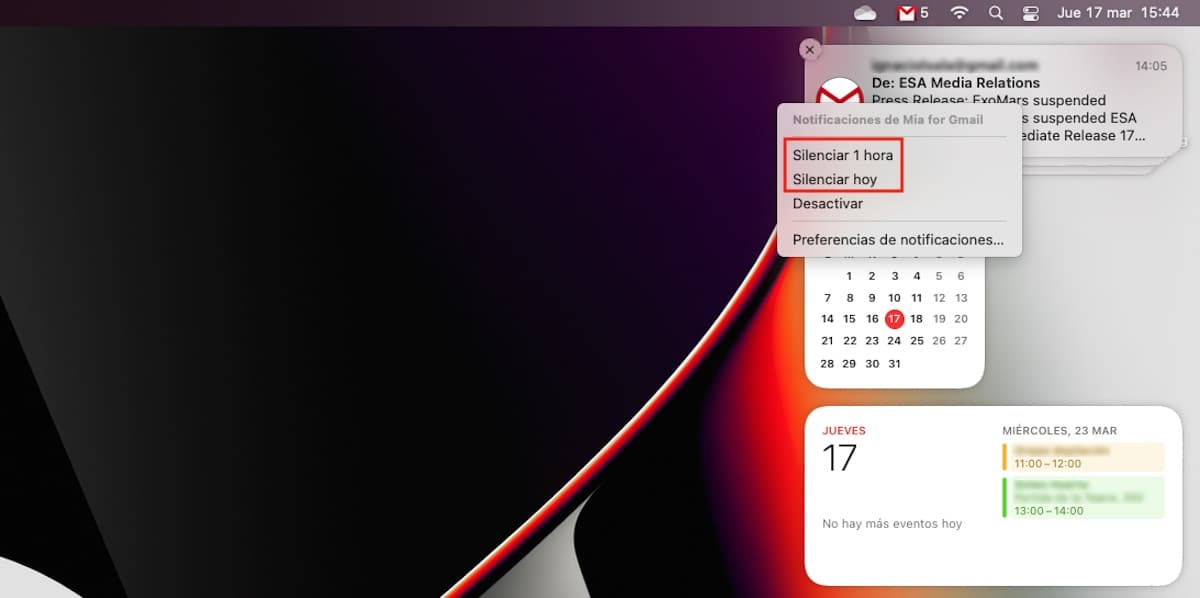
- If we do not want to receive notifications from a specific application again, we place the mouse over the notification and press the right mouse button.
- From the different options shown, we select:
- mute 1 hour
- silence today
It is advisable mute the app for a maximum of 1 hour to avoid missing other notifications. If, after that hour, the application is still an annoying focus of distractions, we can repeat the process again.