On the other hand, the manufacturer recommends not having other RGB management software active to avoid interference, such as Razer Synapse, CORSAIR iCUE, etc.
Beyond that, just make sure everything is wired up and in place, and if you have an RGB/A-RGB controller, make sure not only that everything is wired up right, but also that it’s on the proper RGB channels. . And precisely this, leads us to the next point of the article…
The importance of having an RGB hub like the one from be quiet!
When you have a lot of devices with RGB or A-RGB lighting, it’s quite easy for your motherboard to run out of connectors available to everyone; For this, there are RGB hubs like the one included in be quiet! in his box Pure Base 500FXan integrated controller that will allow you to not only control the lighting of up to 6 connected RGB devices, but also the fans, it’s a 2×1!
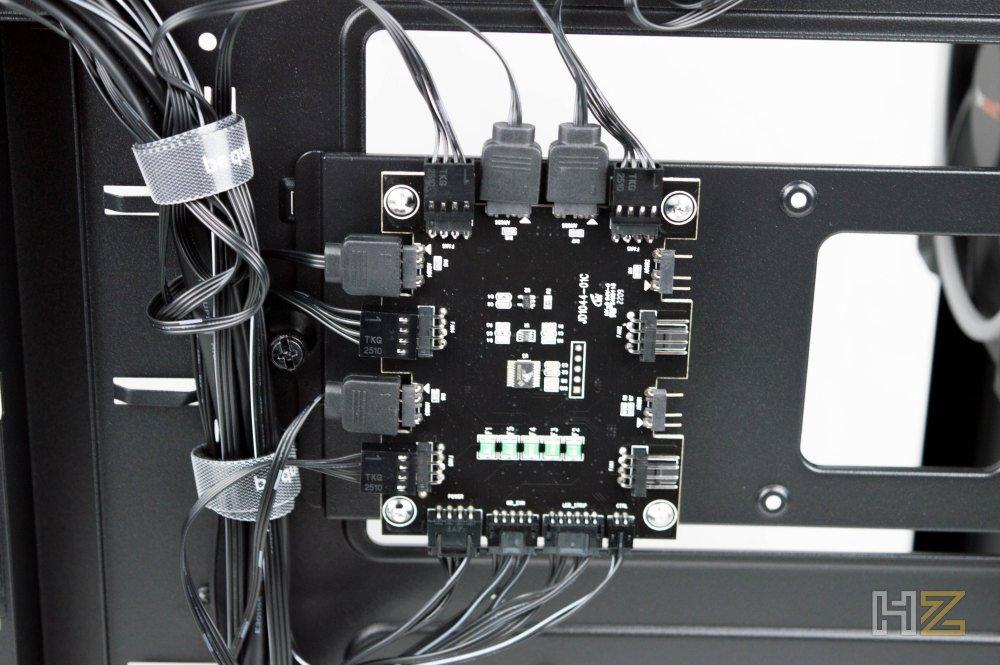
In this way, with a single controller you can connect up to six RGB / A-RGB devices using a single header on the motherboard. Note that there are other methods to achieve the same thing if you don’t have a be quiet! Pure Base 500FX; for example, with the pack of three fans be quiet! Light Wings An A-RGB hub is also included that will allow you to do the same, although it is true that in this case it is only used for lighting and not for fan operation.

This is without a doubt the best way to have multiple RGB devices connected to the same PC, and controlled from the same software as we are going to see below. In fact, let’s go with it, and we are going to take as we have said the example of the be quiet! with SignalRGB, a program that is designed to replace each and every one of the PC’s RGB control programs and to be able to have all the hardware unified in a single program.
How to use SignalRGB to sync lighting in be quiet!
After installing SignalRGB (you can download it for free from its website) on your computer, a small and brief tutorial will appear indicating all the parts of the program. The first thing we will have to do is “explain” to the software what we have connected to the equipment and in what way, so for this we must click on the “Devices” section under the “My Rig” section.
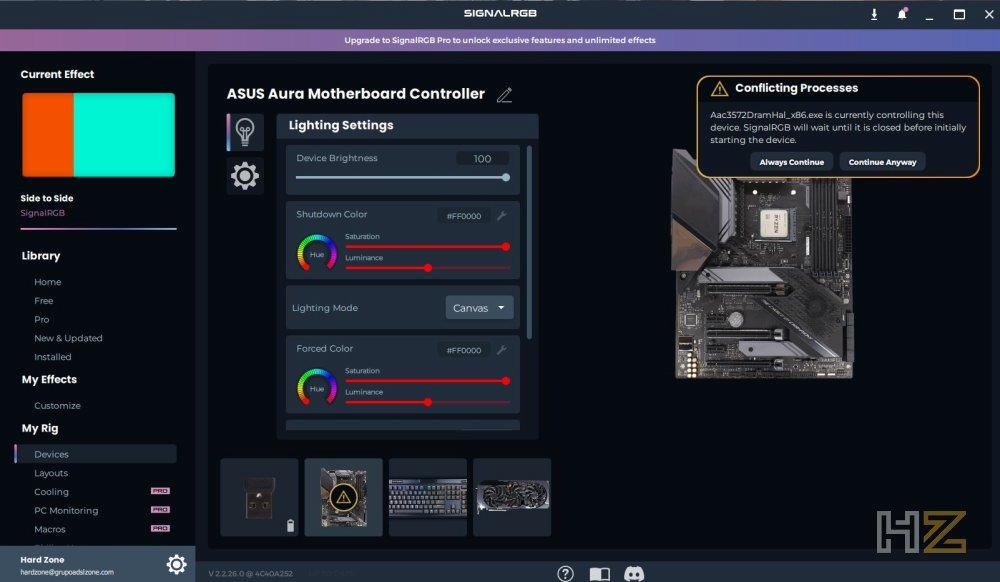
As you will see in the upper right corner, a warning appears saying that we have open processes that may interfere with the operation of the program. We can proceed to close the processes that SignalRGB tells us, or we can give it to continue (although at the risk of having problems because two programs try to control the same RBG devices).
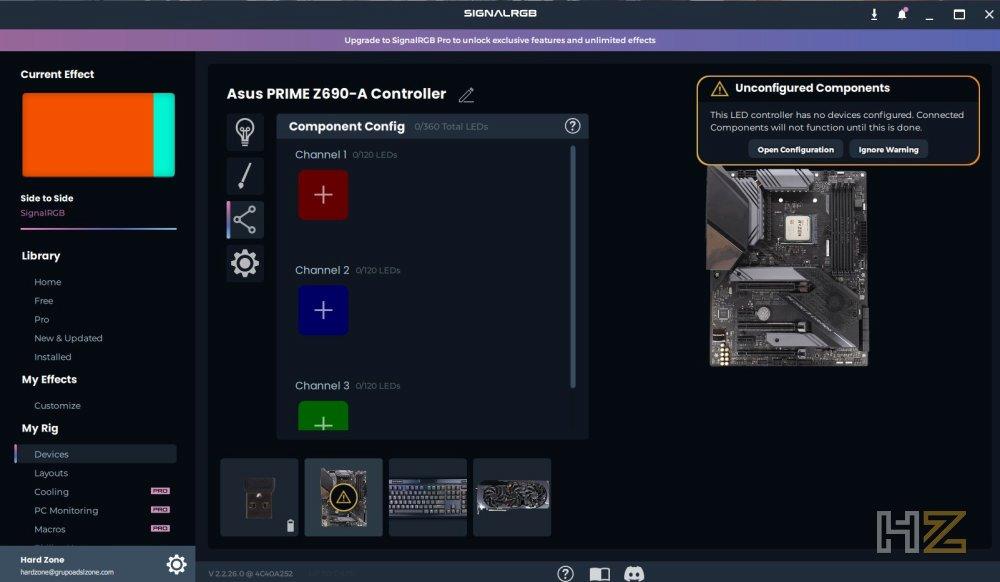
After solving that, or if you already had the rest of the programs closed, another warning will appear saying that we have unconfigured components, and this is what interests us the most. SignalRGB itself will detect the lighting channels, and make connected devices light up in certain colors so we can quickly identify them; in the example, channel 1 lights up red, channel 2 blue, and channel 3 green.
In our case, we have connected three be quiet! fans. Light Wings 140mm using the included A-RGB controller, which in turn is connected to lighting channel 1 on the motherboard. Therefore, you just have to click on the + icon of channel 1 and a drop-down will appear on the right with all the compatible devices. There is a search engine, since SignalRGB is compatible with a multitude of devices, so we will only have to write “be quiet” and the list will appear.
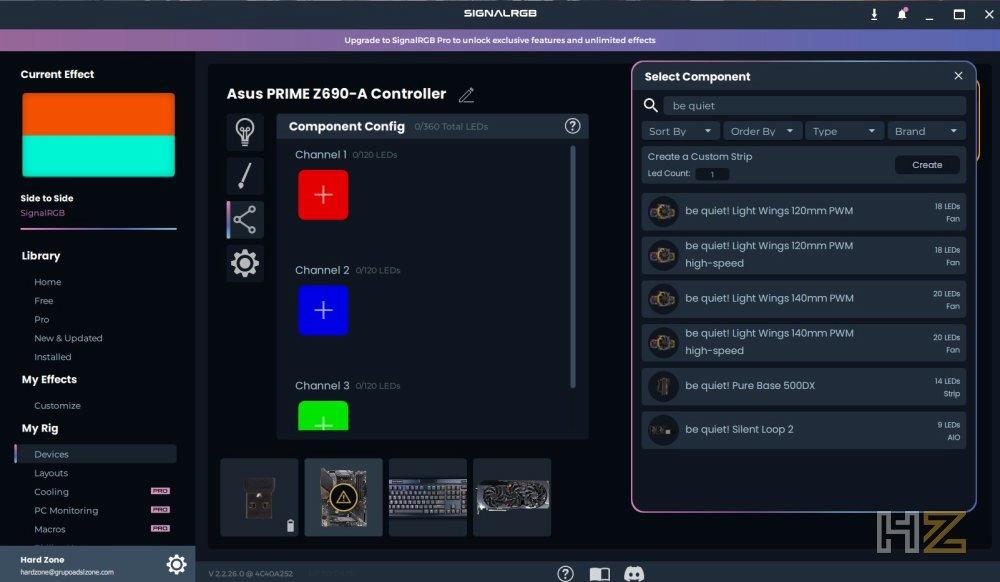
As we have mentioned before, we have 3 140mm Light Wings fans connected (it is important that we select the correct measurements, since as you can see in the screenshot, the 140mm ones have 20 LEDs compared to the 18 of the 120mm ones) , so we simply add them by clicking on them.
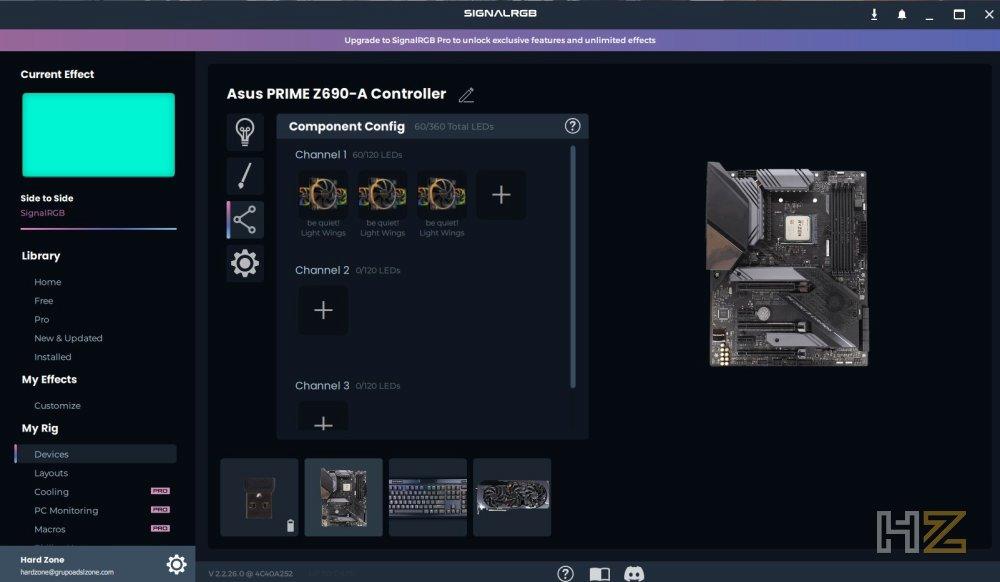
With this, we already have the three fans of be quiet! configured in SignalRGB, and as you can see no warning signal appears anymore. Therefore, what you have to do now is click on “Layouts” under the My Rig section (just below Devices) to “teach” SignalRGB again how the devices that we have physically configured are arranged.
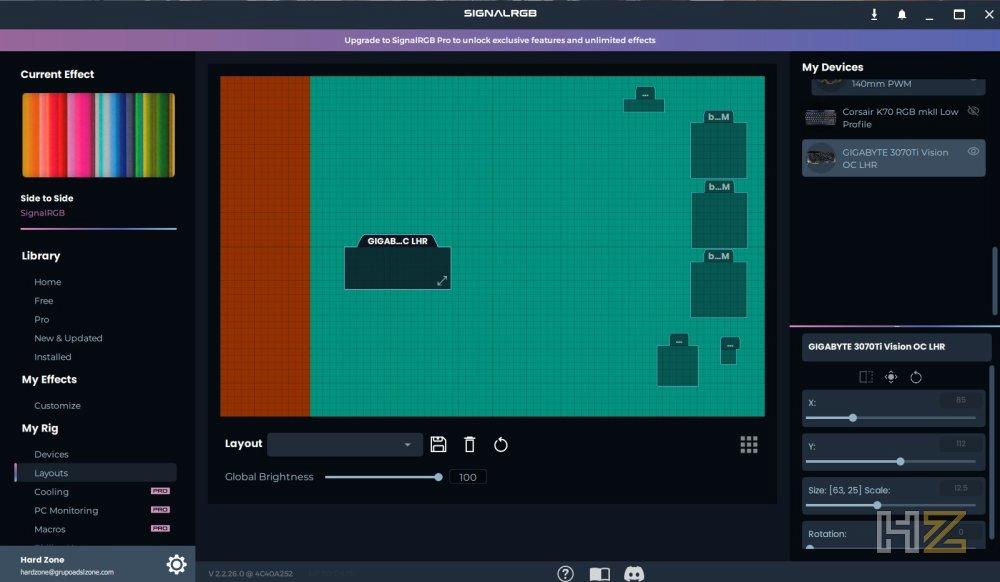
Here, all the compatible hardware will appear on the right, while in the lower right part we can configure its size, rotation and exact position. However, it is as simple as, in the central part, click and drag to place each device where it is physically located; If we imagine that the grid is the PC case, we have placed the fans to the very right, which would be the front (which is where they are installed).
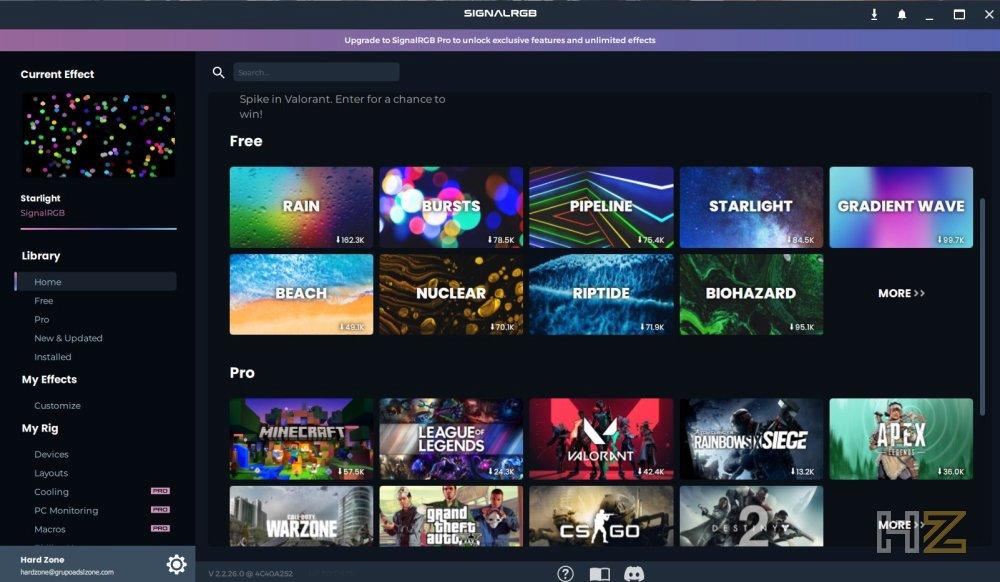
Once you have “placed” the RGB devices in the position you want, you can now move on to the next (and last) section, the effects section. Click on “Home” in the “Library” section on the left side and various automatic effects will be proposed to you (the free version gives us quite a few effects, while if you decide to buy the software and access the “Pro” part, you will have additional effects , especially interesting those dedicated to the different games).
Just select the effect you want and an arrow will appear to download it. When it’s downloaded (it takes just a second), make sure to click the Apply button (appears when you hover over the effect) to make the selected effect effective.
SignalRGB gives you a myriad of possible effects, but you can of course also set up your own to give your lighting ecosystem the look that suits you best. With the FX devices from be quiet! the possibilities are really vast, and since all your lighting hardware supports SignalRGB, you’ll have complete control over it.
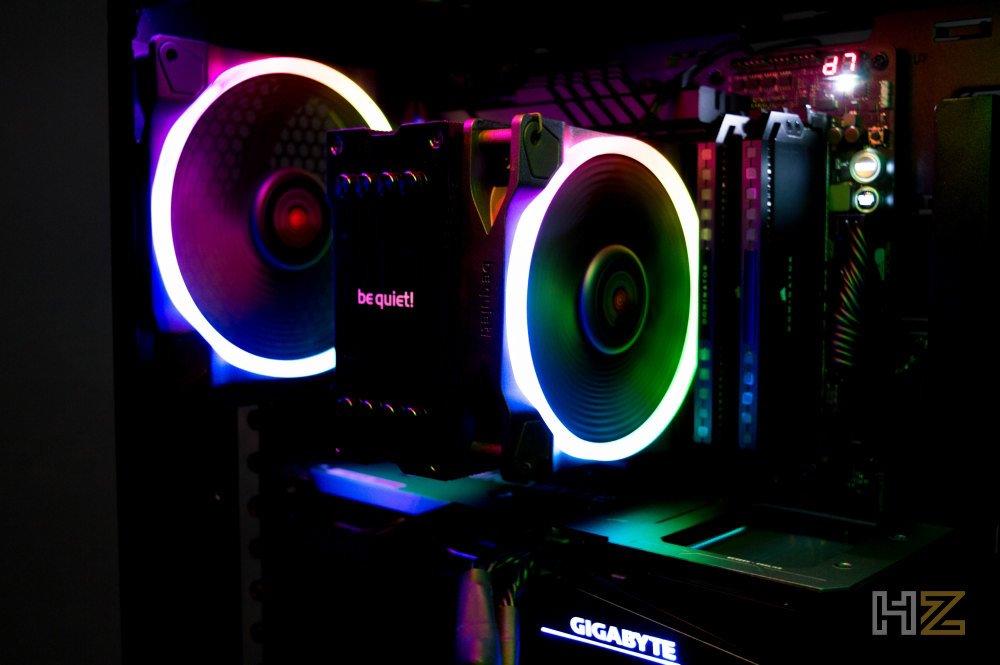
And how does the PC look with all the RGB synchronized?
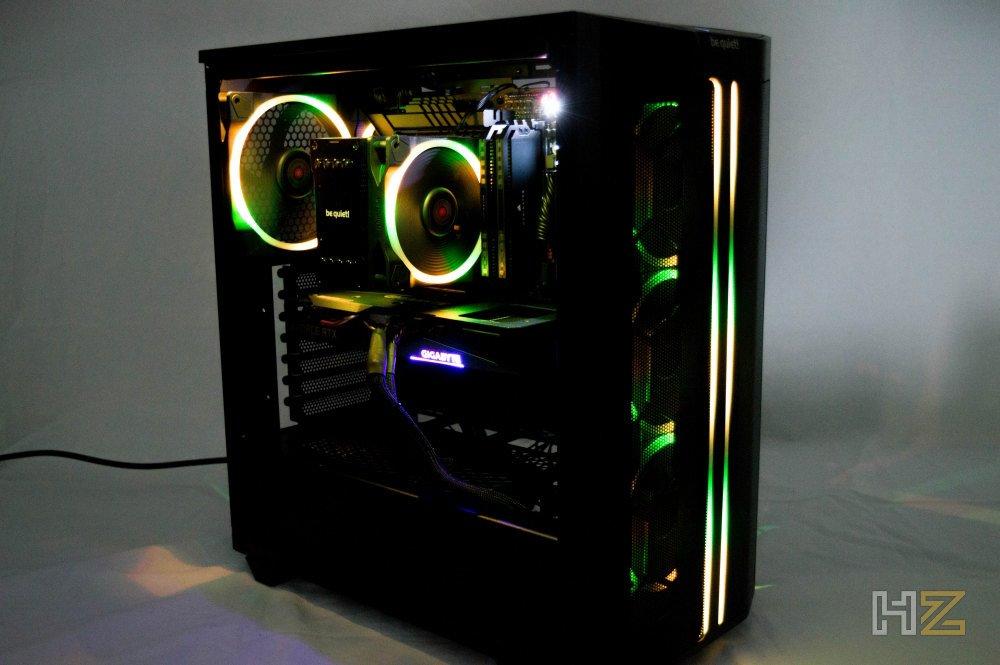
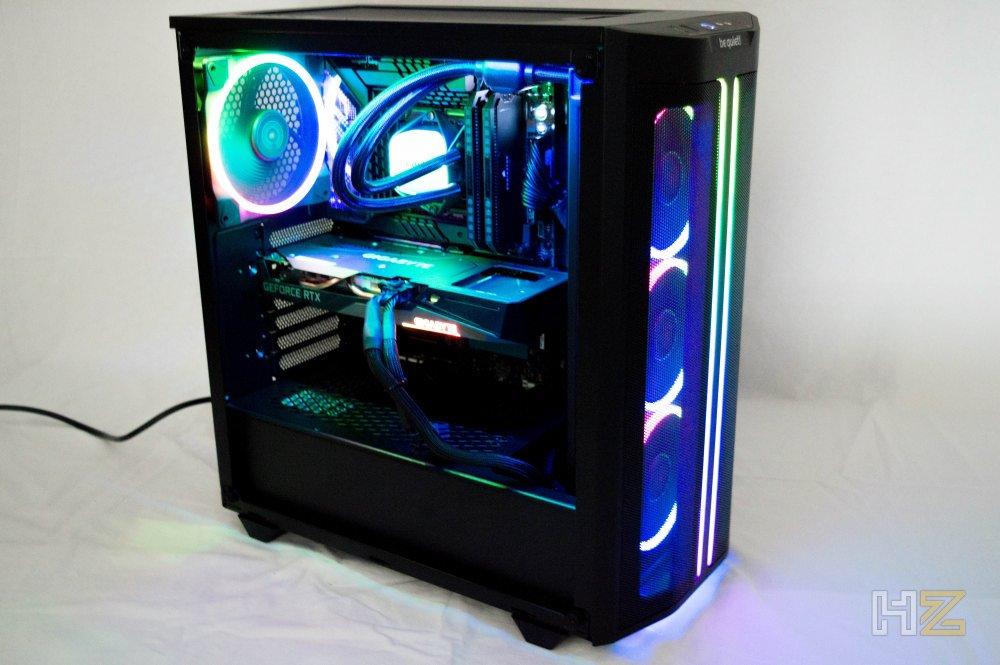
Everything will depend on the devices with RGB that you have, your preferences, and how you have configured everything with SignalRGB, but next we are going to show you how a be quiet box looks! Pure Base 500 FX with different products from be quiet! with RGB.
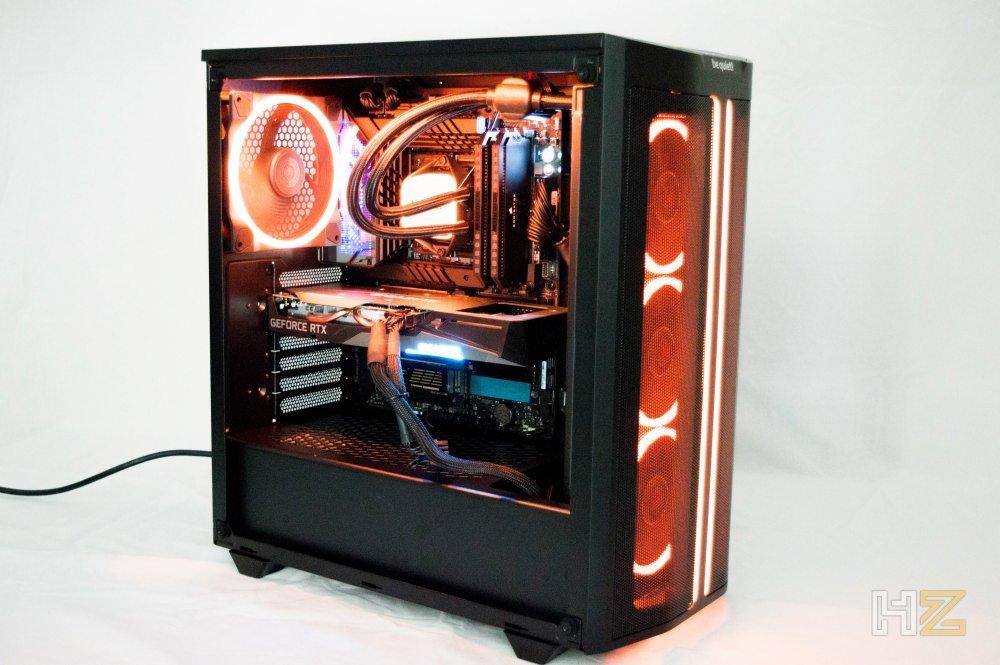
Of course, the effects and colors that you can select are almost unlimited, because remember that the RGB range has 16.8 million different colors and shades.
The in case of be quiet! devices, such as the Pure Loop 2 FXyou can also integrate the lighting of the CPU block into the SignalRGB configuration, as well as the two front LED bars that the Pure Base 500 FX has.
Finally, it should be noted that if you have products like be quiet! Pure Rock 2 FX (or if you simply install an RGB fan on any heatsink and connect it to the system), you will also be able to configure and synchronize its color with the rest of the system.
What do you think about how all the hardware lighting looks like using this system? Of course, you can also add your peripherals, such as keyboard and mouse, as well as RAM or graphics card if it is compatible and even if the motherboard has integrated RGB.