There is no single cause for which this error can appear, since the reasons can be various, from bad network adapters even incorrect server addresses. It can also happen that the servers are saturated, we do not have a good Internet connection or there is simply a problem with the router. Furthermore, it may also be due to a problem with our antivirus softwareyes
Fortunately, most of these problems can be solved without much effort, but since there is no single cause, we may have to try different ways until we find the one that can solve the problem.
Steps to solve it
Next, we are going to see different ways that we can solve the error “The DNS server is not responding”.
Restart the computer and the router
Sometimes the simplest solutions can also be the most effective, so before starting with somewhat more complex tasks, we are going to start with the most basic, such as restart our computer. If the problem persists, we proceed to reboot the router for which we must locate its power button and press to turn it off. We wait about five minutes for both the router and its network to shut down properly. Later we turn it on again and check if this ends the problem.
Change the DNS server
Another simple solution to solve this error is to manually change the DNS server. Through this action we will be able to get around the limitations and we can even obtain a better Internet browsing speed from our device. To do this we must change our DNS server to a known, fast and public DNS.
traditional method
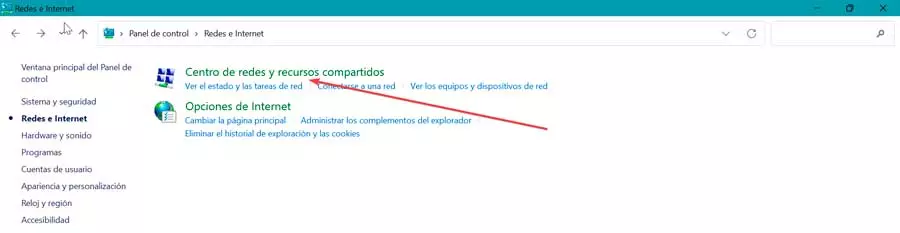
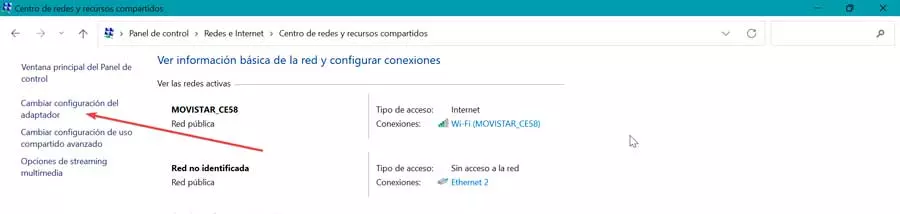
To start, press the keyboard shortcut “Windows + R” to open the run command. Here we write control and press Enter to open the Control Panel. Next, we make sure that the view mode is configured in Category and we click on the “Network and Internet” section and then on “Center network and sharing”.
On the next screen, in the side menu on the left, click on the link “Change adapter settings”.
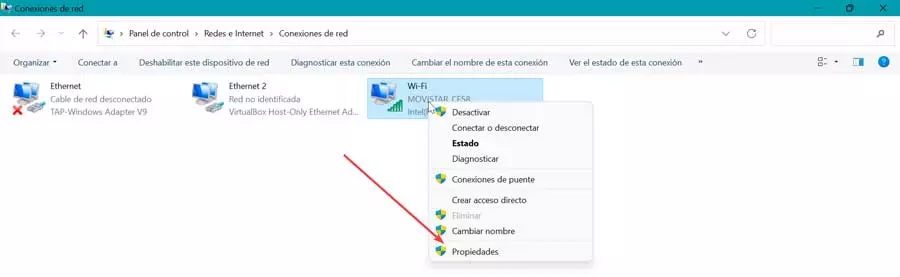
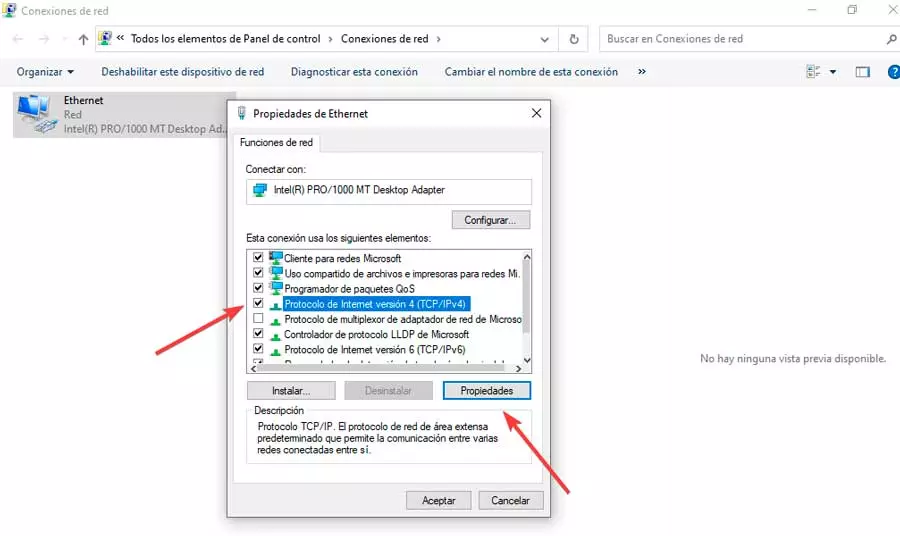
This opens a new window for us and we right-click on the connection we are currently using. This will open a context menu where we choose the option to “Properties”.
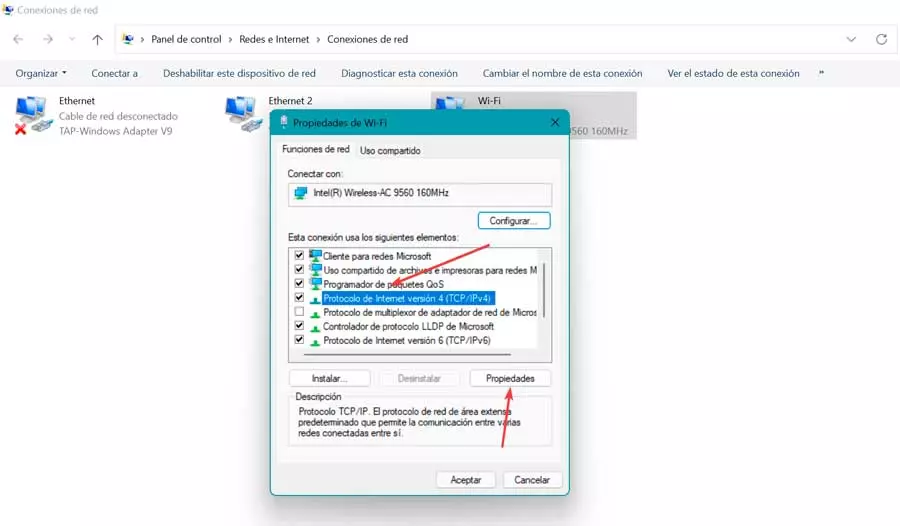
We scroll to the bottom and click on Internet Protocol version 4 (TCP/IPv4) and click the button “Properties”.
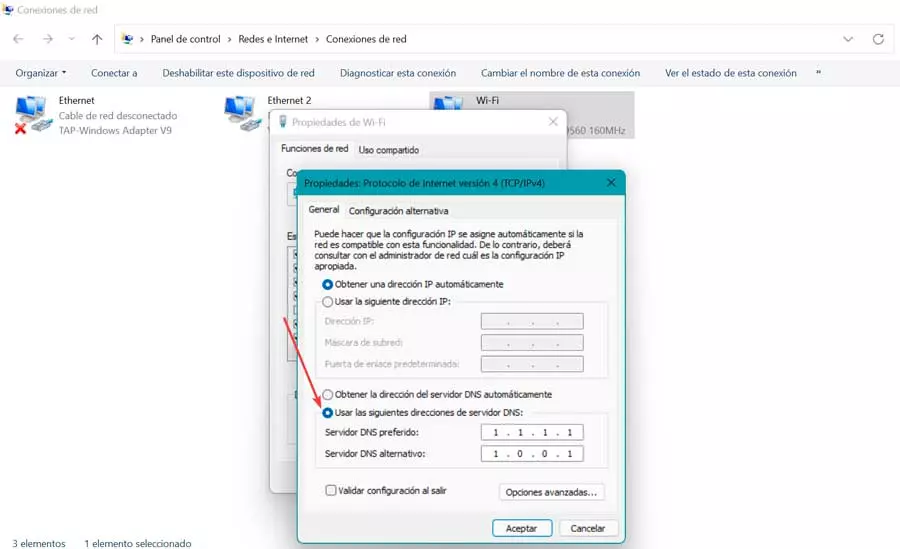
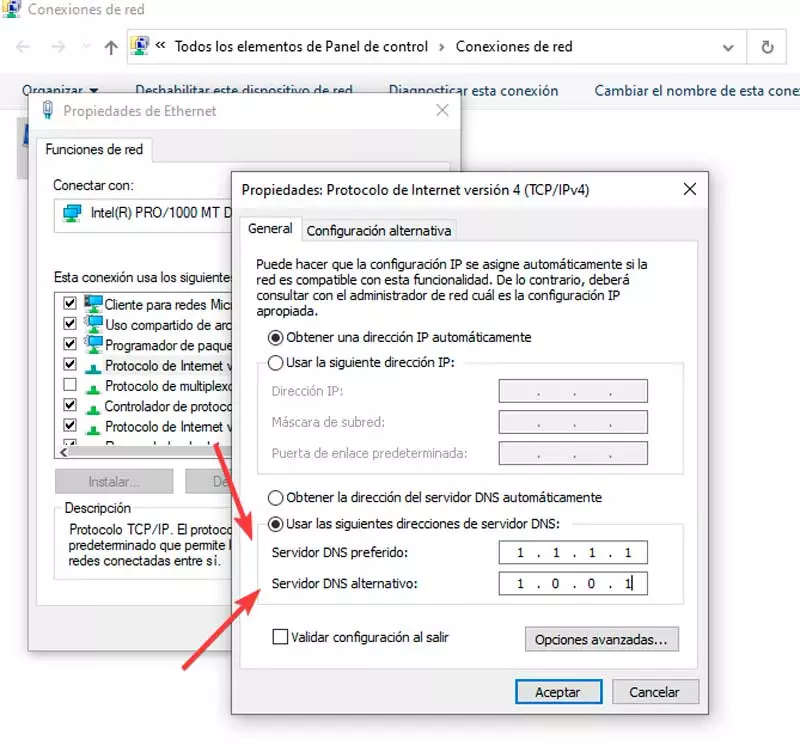
This will open a new window where we click on Use the following DNS server addresses, which we find at the bottom. Here we write 1.1.1.1 in the first row and then 1.0.0.1 in the second row. Finally, we click OK to save the changes made and check if the problems with the DNS server have been solved.
New method to change DNS in Windows 10
The alternative way that we have in Windows 10 is to access the System Configuration, for which we press the command Windows + I. Then we click on Network and Internet in the left column and in the Status section we select Change adapter options. This will bring up a Control Panel window, and we right-click on our network to select the Properties.
In the new pop-up window we select the Internet Protocol version 4 (TPC/IPv4) and click Properties.
Finally, under the General tab, check the Use the following DNS server addresses box. Within the option preferred DNS we write 1.1.1.1 and in Server alternate DNS we put 1.0.0.1. Finally, we click OK to save the changes.
And on Windows 11
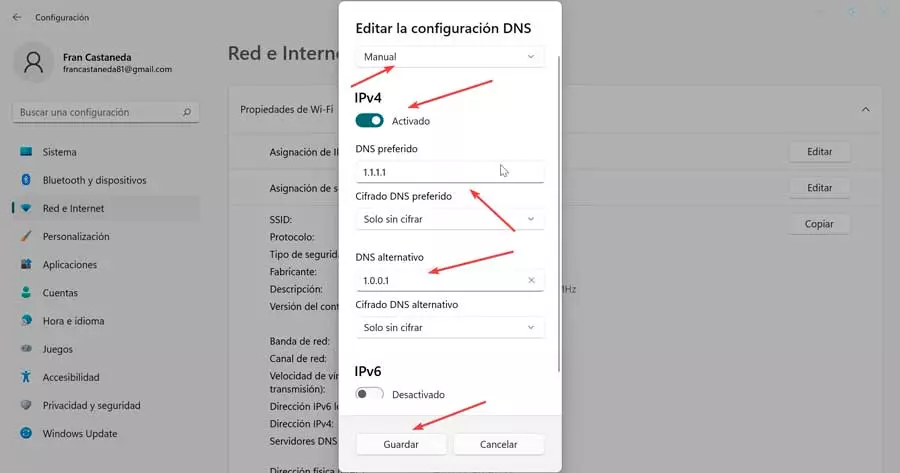
In Windows 11 it can be done in an alternative way, for which we must access the Configuration menu by pressing the keyboard shortcut Windows + I. Then we click on the section Network and Internet on the left and select the Ethernet or Wi-Fi connection to which we are connected. On the next screen we click on the Edit button in the section DNS server mappingwhich will cause a new screen to open.

Now, in the section Edit DNS Settings, we click on the drop-down menu and select Manual. Then we press the IPv4 button and change it to activated. In preferred DNS we put 1.1.1.1 and in alternative DNS 1.0.0.1. Finally, click on Save to save the changes made.
Update network drivers
In order for our Internet connection to function properly, it is important keep network drivers up to datesince, if they become obsolete, they can be the main cause of certain problems.
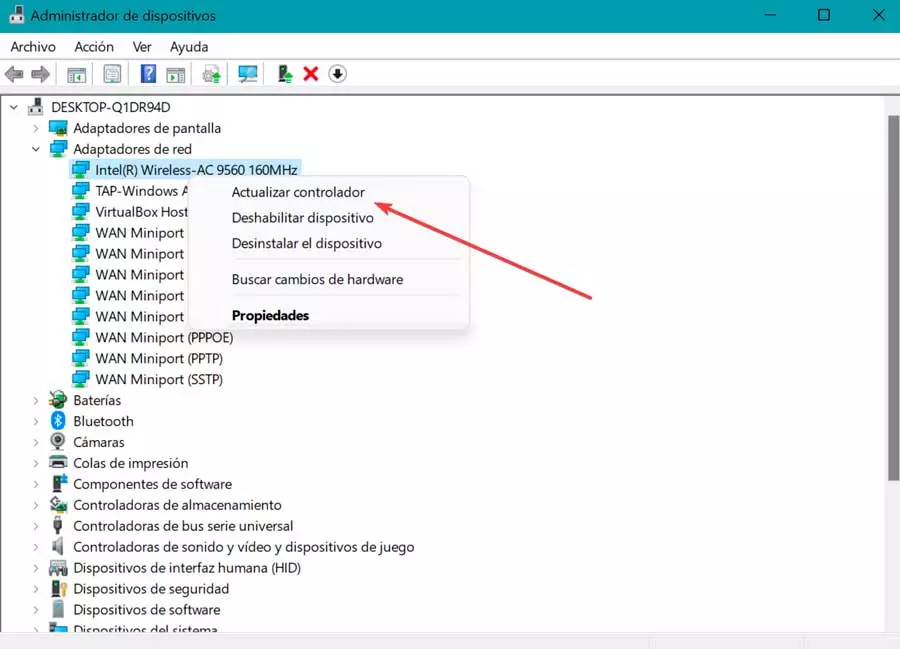
For this reason, we will press the “Windows + X” key combination and choose the Device Manager option from the context menu. Later we expand the “Network adapters” section and right-click on the adapter that we are currently using and click on “Update Driver”. We can let Windows search for a driver automatically or select it if it is already on our computer.
Once the installation of the new driver is complete, we restart the computer and check if the DNS server is already working correctly.
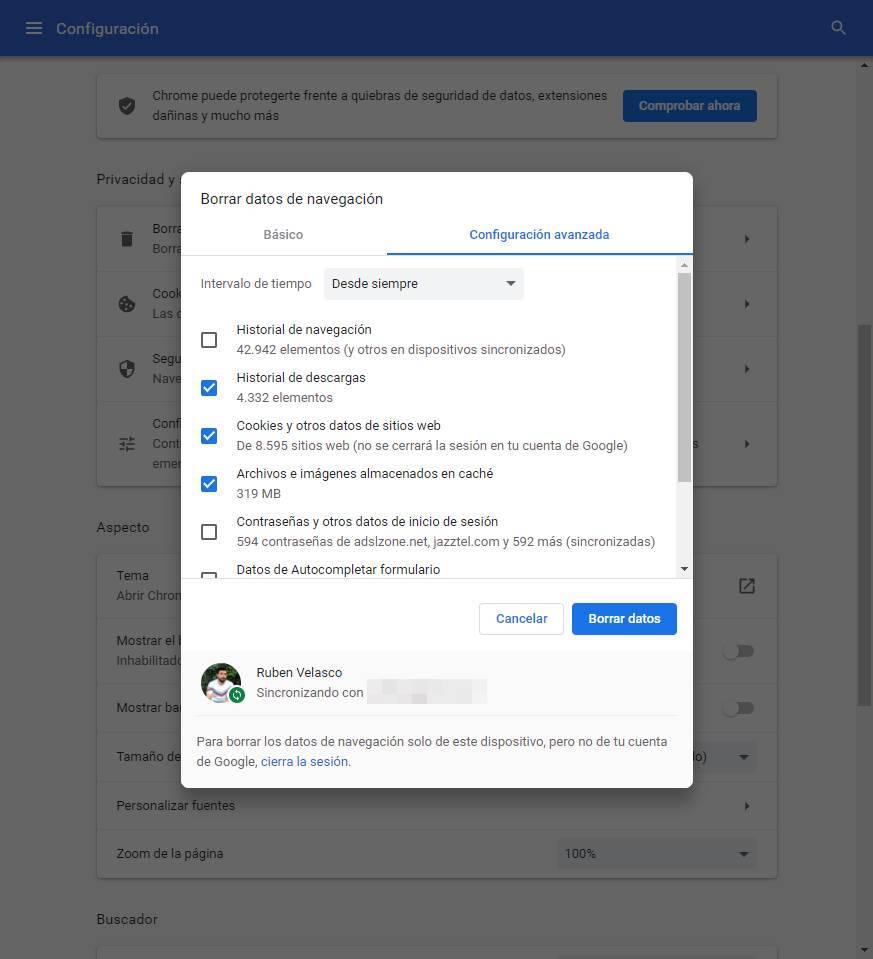
Flush DNS and clear its cache
In the event that our DNS is out of date, we can manually delete its cache in order to solve problems derived from this. We will carry this out through the Command Prompt tool and it will be necessary to use an administrator account to carry it out.
To do this we are going to write cmd in the search box of the Start menu and execute it with administrator rights. Once opened, type the following command and press Enter.
ipconfig /flushdns
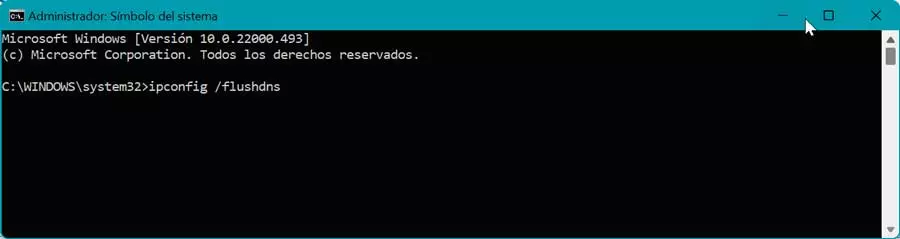
If the process has been carried out successfully, a confirmation message will appear in the Command Prompt.
Disable Internet Protocol version 6 (IPv6)
Internet Protocol version 6 (IPv6) is the latest version of the Internet protocol that identifies devices on the Internet and on a local network. However, it can also be the cause of the DNS server not responding problem, so we can try disabling it in case the previous actions have not solved the problem.
To do this, we return to the “Change adapter settings” section within the network options of the Control Panel. This opens a new window for us and we right-click on the connection we are currently using. Subsequently, a context menu will open where we choose the Properties option.
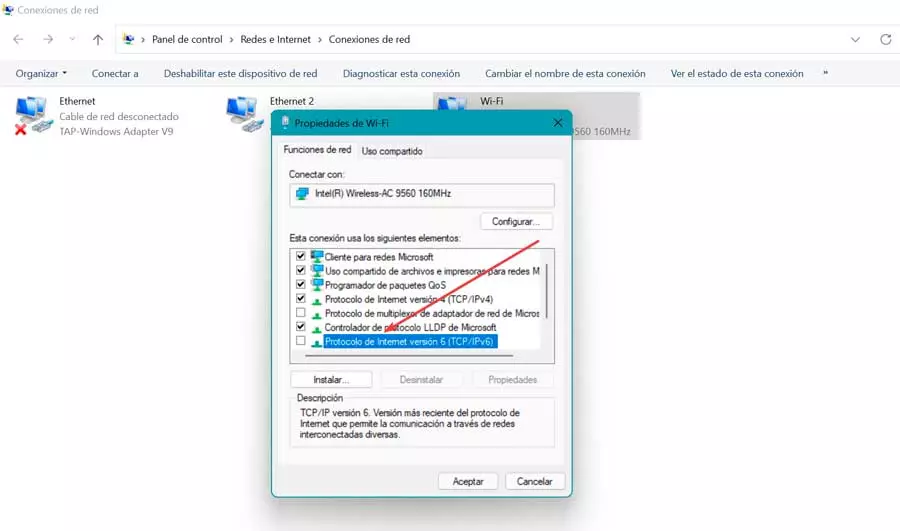
Next, we look for the option Internet Protocol version 6 (IPv6) and uncheck it. Finally, click OK to save the changes.
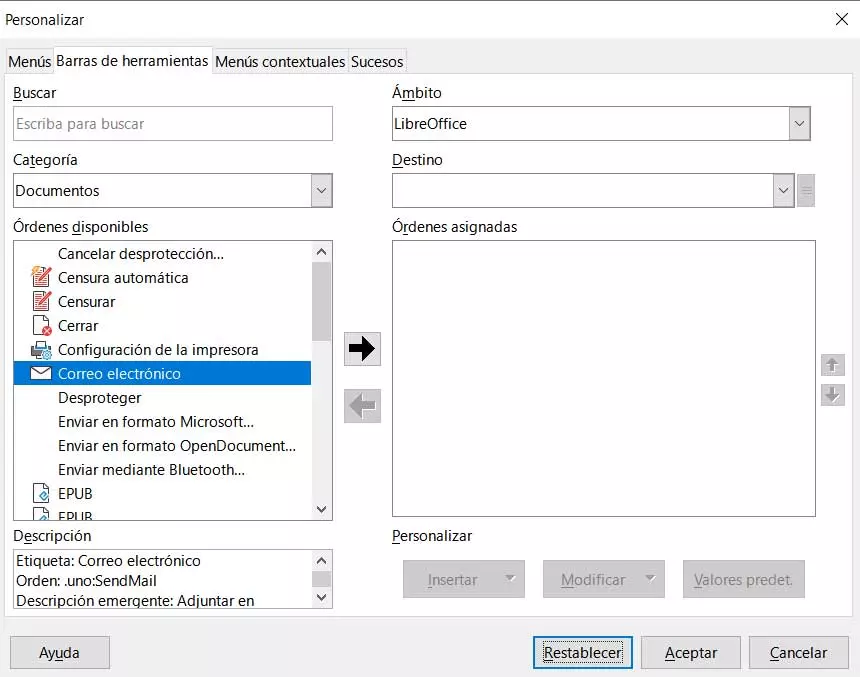
Disable antivirus firewall
Antivirus and firewall programs aim to protect our computer against viruses and malware. However, these tools can also block our Internet connection when they think the computer is infected, which is the reason why the “DNS server is not responding” error message appears.
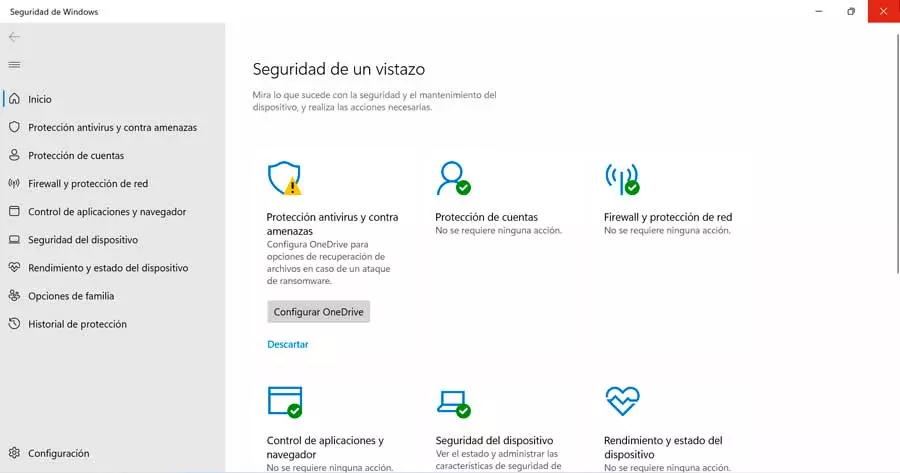
That is why it is convenient to temporarily disable our antivirus and firewall to check if they are the cause of the problem. If we use Microsoft Defender as an antivirus we must follow the following steps. We wrote windows security in the search box of the Start menu and we find the section of “Firewall and network protection”. Within this menu we will see three different sections depending on the network with a green icon and with a click on the drawing that accompanies the title. We access each of them and we deactivate.