- eMule Security / IP: 80.208.228.241 / Port: 8369
- GrupoTS Server / IP: 46.105.126.71 / Port: 4661
- !! Sharing-Devils No.1!! / IP: 91.208.184.143 / Port: 4232
- !! Sharing-Devils No.2!! / IP: 94.23.97.30 / Port: 4245
- La Cosa Nostra / IP: 94.23.97.30 / Port: 4242
A peculiarity that eMule services have is that prioritize users, so that those who upload a greater number of files will be the ones that are allowed to download the most. Once we have a list of servers to choose from, we will proceed to see how we can add them and keep them updated.
Add and remove servers
eMule is a program that has the ability to add, remove and update your servers. To do this, when we have them installed we can try them to perform any download. Manually through a few simple steps we can make a correct configuration of the servers so that we do not have network problems or when sharing and downloading files.
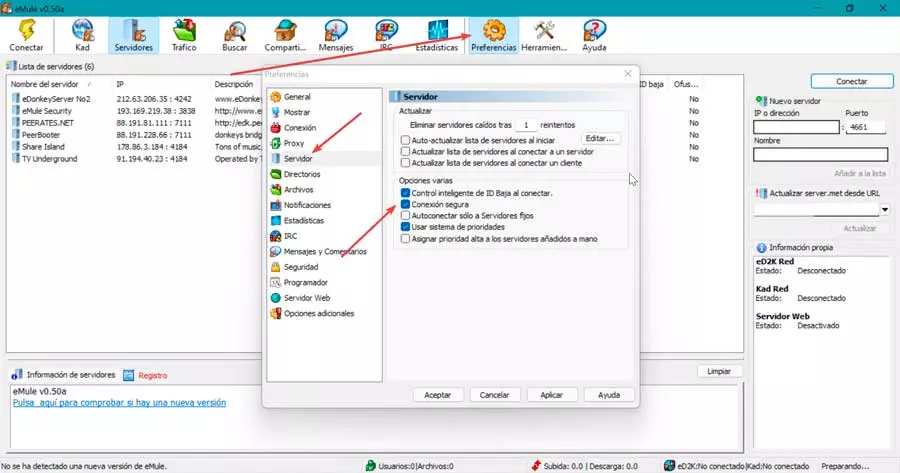
To add servers manually we must click on the button “Preferences” that we find in the upper right part of your toolbar. This will open a new window where we must click on “Server” in the left column and check the box “Secure connection”. Click on Apply and OK to save the changes.
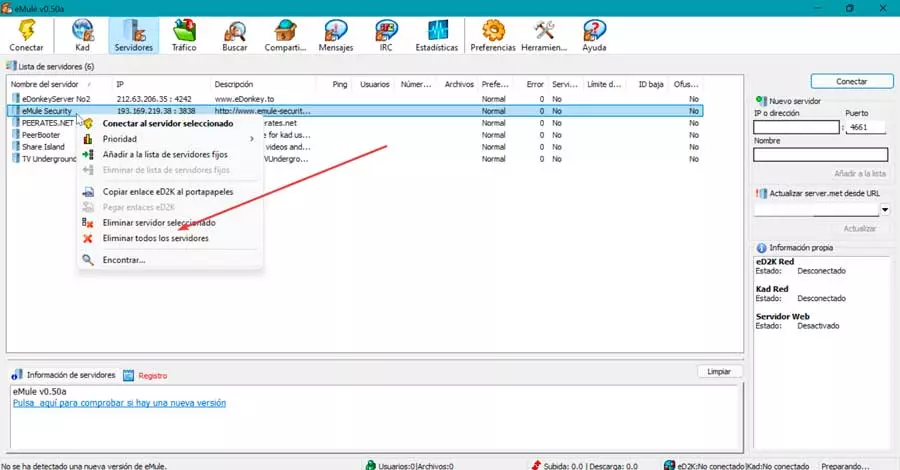
Now in the list of servers we are going to remove all servers that are included and that we will not need. To do this, we click with the right button, which will make a context menu appear where we will choose the option “Delete all servers”.
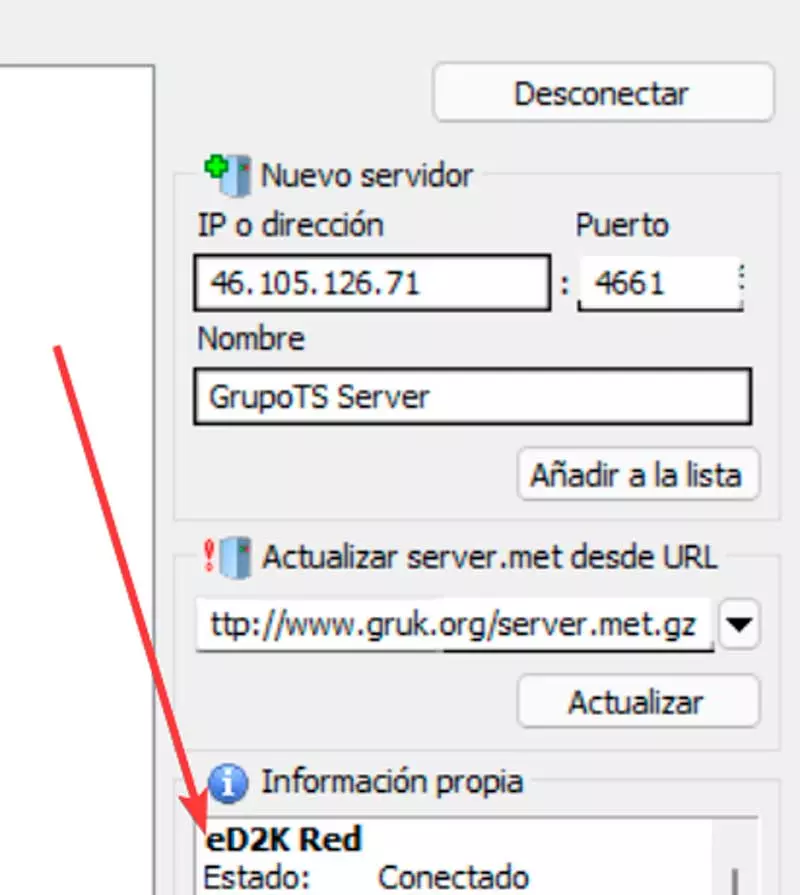
Later on the right side, we must enter the IP address, port and server name. In the “Activate server.met from URL” section we can add “http://www.gruk.org/server.met” or “http://edk.peerates.net/servers.met” and click the button “Add List”.
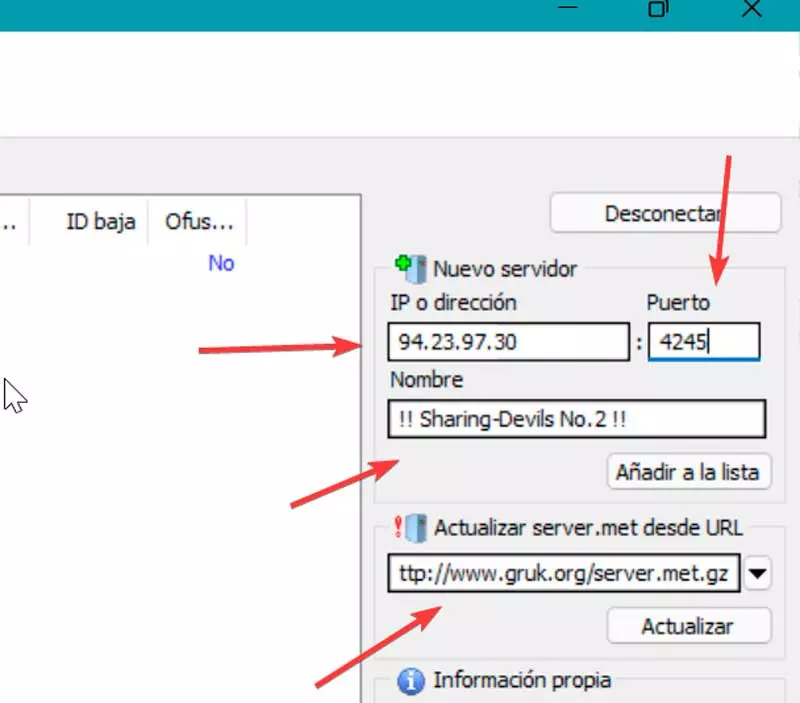
We must carry out this step with all the eMule servers that we want to have available, repeating the previous steps.
Update eMule servers
Once we have already eliminated the servers that do not interest us and we have added all the necessary ones, we have two ways to keep them updated. This is something that we can do manually by ourselves or automatically, the application taking care of doing it periodically, once we have made a few small configuration options.
automatically
As soon as we have added all the eMule servers we can make them update automatically. To do this we must follow the following steps.
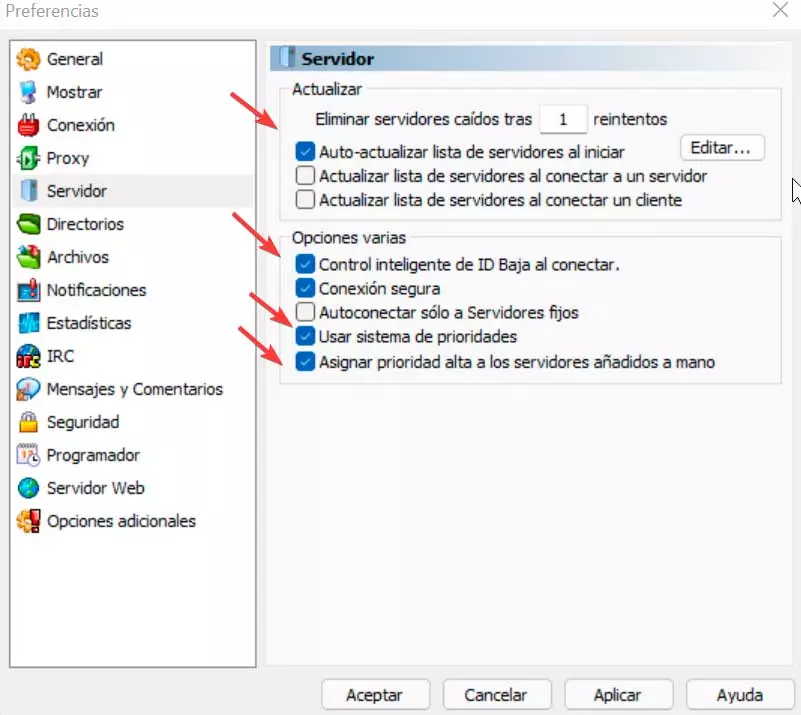
We click on the section “Preferences” and “Server”. Next, we mark the following options:
- Auto-update server list on startup.
- Low ID intelligent control when connecting.
- Use priority system.
- Assign high priority to manually added servers.
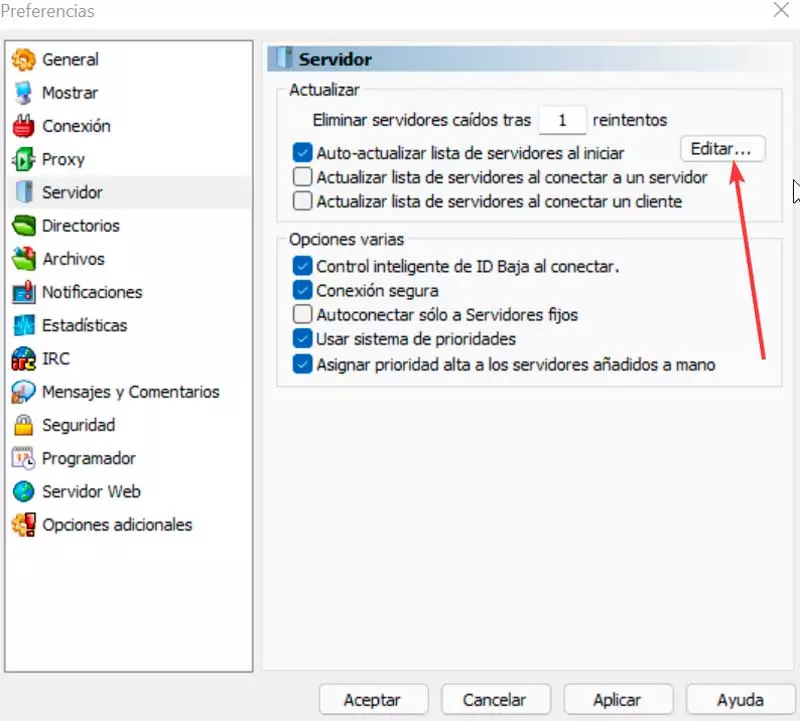
Next, click on the button “Edit” within the section «Auto-update server lists at startup».
This will open a sheet of Notepad where we must enter the following address
http://sites.google.com/site/ircemulespanish/descargas-2/server.met
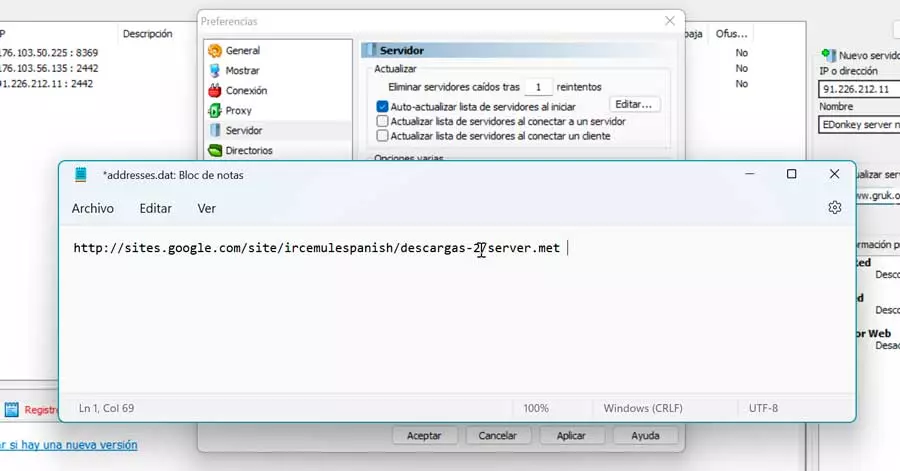
We save the changes and close the application. Then click on Apply and OK in the Preferences tab to exit.
Update manually
If we prefer to update eMule manually, the process is equally simple. To do this, from its main page, we go to the right of the server panel and just below the section “Update servet.met from URL” click on the button “To update”.

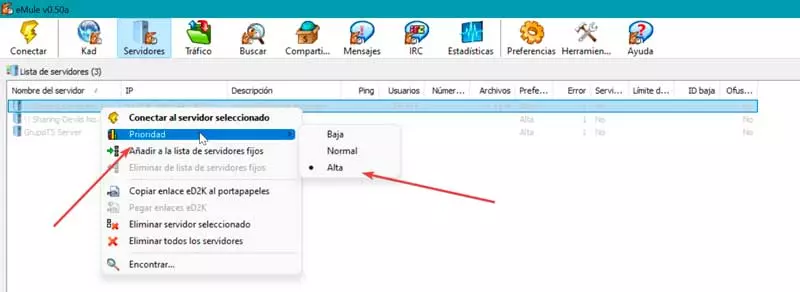
Subsequently, we click on one of the servers in the list with the right mouse button and within the context menu we go to the option of “Property” and we choose “High”.
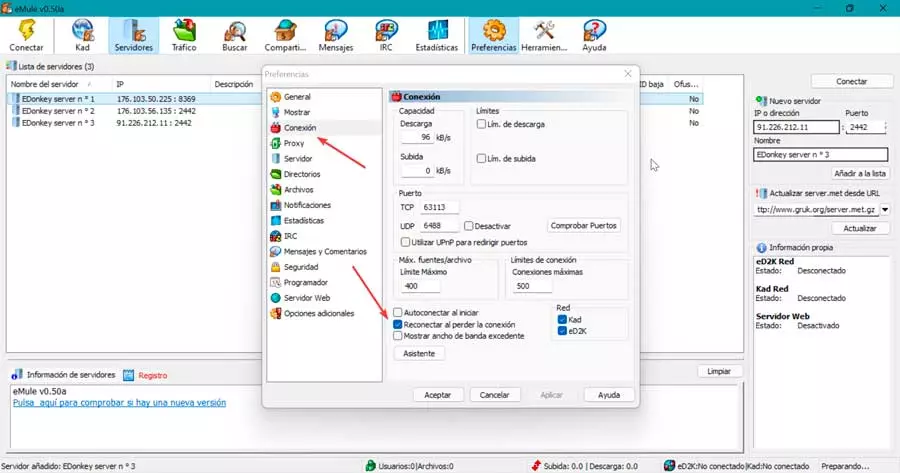
Finally, we click on the “Preferences” icon and select “Connection” and select the checkbox “Reconnect when connection is lost”which we find at the bottom of the screen.
Keep the download list up to date
In order to always have the best experience when using eMule, it is important to keep it updated on a regular basis. Along with this, it is also recommended to keep security filters active to keep the list of downloads updated.
From the main window of the program, click on the “Preferences” button and click on the option “Security”. Now on the right side, above, we mark the box of “Filter servers”. Later, in the Update from URL section, we introduce one of these two addresses:
http://emling.net23.net/ipfilter.zip http://sites.google.com/site/ircemulespanish/descargas-2/ipfilter.zip
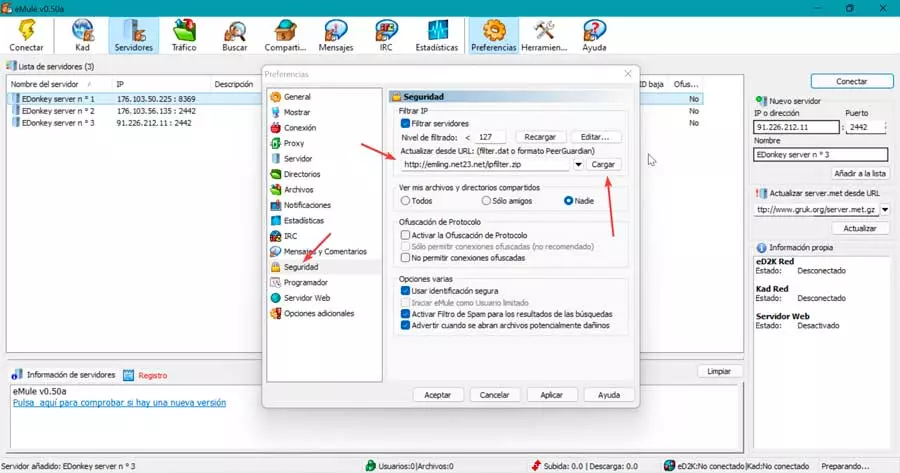
Once entered, click on the button “Charge”. Through these addresses, the program will take care of filtering the malicious servers so that they cannot pass viruses or malware to our computer.
Finally, click on Apply and OK to save the changes and close the Preferences window.
Problems connecting? check the ports
In the event that we have the updated list of servers and we have connection problems, it will surely be because we do not have the router ports open. To do this, we must first know what ports the program uses and then configure them. To do this we must click on the “Preferences” and “Connection” button. Here we write down the numbers that appear in TCP and UDP which are the ports used by eMule.

Later we must open our browser and put in the address 192.168.1.1 or 192.168.0.1 and press Enter to enter the configuration menu of our router. Possibly our provider asks us for a username and/or password. Once inside we must look for a section called port forwarding, virtual server or Share games and applications, where we must create a new rule or new virtual server. Here we must put the number one of the eMule ports (TCP or UDP) as the initial and final port, while in port type the TCP or UDP value. As destination IP our local IP address, as well as a name to the description.
It should be noted that each brand and model of router has an administration panel structured in a different way, so the names may vary. If we have carried out the steps correctly, we should not detect connection problems, beyond the fact that the servers are down.