Raspberry Pi and its lack of dissipation system
The first Raspberry Pi was designed to meet a basic requirement: to be a product that anyone can buy. That original idea of its creator, who wanted technical students to have access to a computer that would allow them to put into practice everything they were learning theoretically, has been respected generation after generation.
Of course, to get these affordable prices you have to make certain concessions and one of them is not include any cooling system. Something that is partly justified because it is a product with so many uses that it would not make sense to do so. Because if The Raspberry Pi Foundation opted for a passive or active ventilation system, surely there would be users who would need the opposite or would have alternative solutions that for the type of project to be carried out would be much more efficient for consumption, space, etc.
Therefore, the fact that it does not include dissipation beyond that of each component when expelling the heat it generates is not a problem. But if you are going to make intensive use of plate, for long periods of time or keeping it on 24 hours a day and 7 days a weekIt is better to have one of these systems to guarantee that you get the maximum performance at all times.
So here are some options that might interest you if you’ve started out on the Raspberry Pi and notice that you need some extra help to make the most of its potential. Although we will also give you some tips that, no matter how basic they may seem, sometimes you can go crazy if you do not take them into account.
Passive heatsinks for Raspberry Pi
The first option to improve heat dissipation in Raspberry Pi are the passive heatsink systems. These all they do is help the CPU, GPU or chip remnants such as memory chips, etc., to optimally release the heat that it generates through a larger surface area.
That is, as you have surely seen in many other devices today, a block of aluminum or copper allows heat to be transmitted from the chip to it. Thanks to this larger surface area, the concentrated heat is reduced and then it is released or released through radiation into the air. So they are a more effective solution as the size of the heatsink is larger.
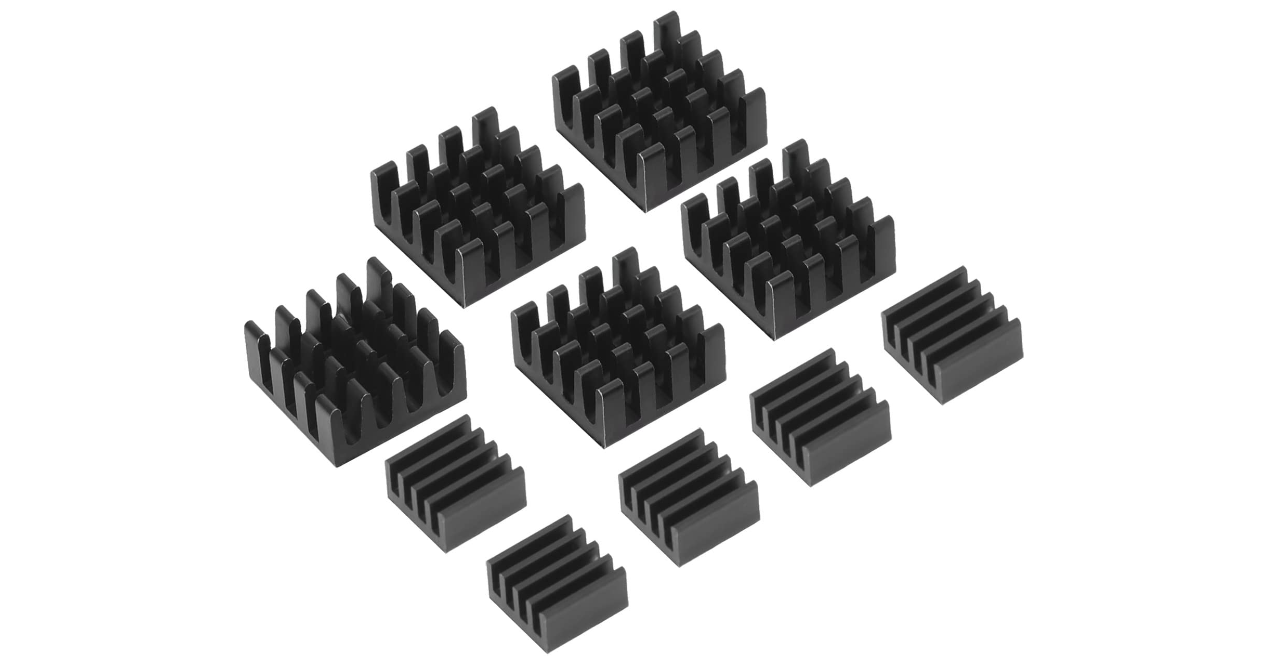
Low Profile Heatsinks for Raspberry Pi 4
This pack consisting of eight heatsinks for Raspberry Pi 4, although they could also be used in other models, offers blocks with a low profile that are ideal to use together with those cases that do not allow larger ones for a simple reason of space. In addition, they already include the thermoconductive adhesive itself, so that it is only necessary to remove the protective paper, place it on the chip and that’s it.
AptoFun copper heatsinks
These copper heatsinks are larger (22 x 8 x 5 mm) and despite not being made exclusively with the Raspberry Pi in mind, they can be used without problems. What’s more, there are users who only buy term adhesive and reuse heatsinks that they may have from graphics cards or other equipment that include them.
Aluminum heat sink housing
Finally, there are cases for the Raspberry Pi that are a great passive heatsink as a whole. In this case, the proposal that we share not only completely covers the Raspberry Pi 4, it also protects it and even a series of “columns” that reach the main SoC, the RAM memories and the USB controller, which are the elements that most heats up. Thus, together with some thermal stickers that are placed on them, the heat is released to the case and thanks to its large surface it is easier to dissipate compared to smaller models.
Fans for the Raspberry Pi
Passive dissipation has an obvious advantage: not having a fan there is no noise either. However, the hum of a fan like the ones usually used in active heatsinks for Raspberry Pi is compensated by a greater power at the time of reducing the heat in said component.
Therefore, when using a Raspberry Pi for much more demanding tasks or for long periods of time, it is advisable to opt for these solutions instead of the previous one or directly not use anything. Because the temperature both at rest and with the CPU load at 100% can be practically half that if nothing was used. In addition, there are so many models that you will surely find the one that best suits you. For us, three good options to refrigerate the Rasbperry Pi are:
Raspberry Pi 4 Case Fan
This is the official option, a fan that comes with its own heatsink to place on the motherboard’s processor. Thus, together with that casing, everything is perfectly positioned and an optimal air flow is provided for the design of the plate. Although there are many similar options and you could even adapt a similar fan that is also sold loose to your current case or place where you have the Raspberry Pi located.
GeekPi Ice Tower
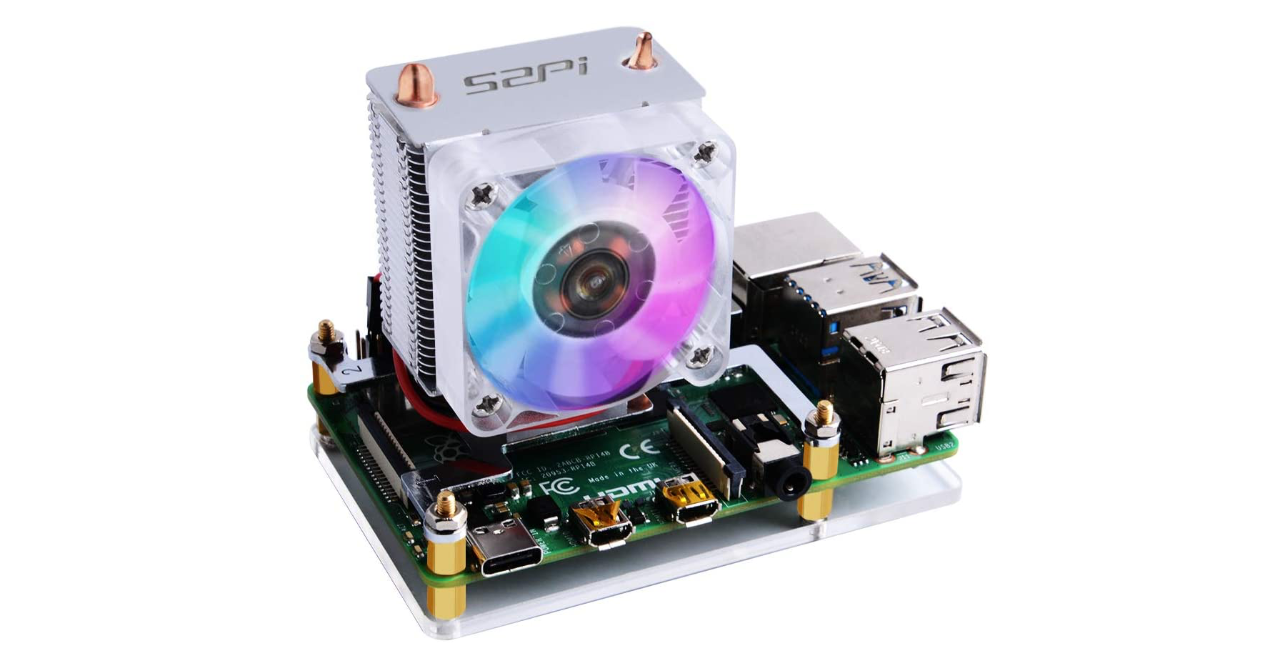
If you are looking for something with higher dissipation power for your Raspberry Pi, here you have this GeeekPi Ice Towe. This is a solution similar to the active heatsinks that you see in the vast majority of desktop PCs.
The set does not only offer greater dissipation power, but also much more generous dimensions so you will have to take this into account when using certain cases or how you want to take advantage of the Raspberry Pi.
GeeekPi Low Profile
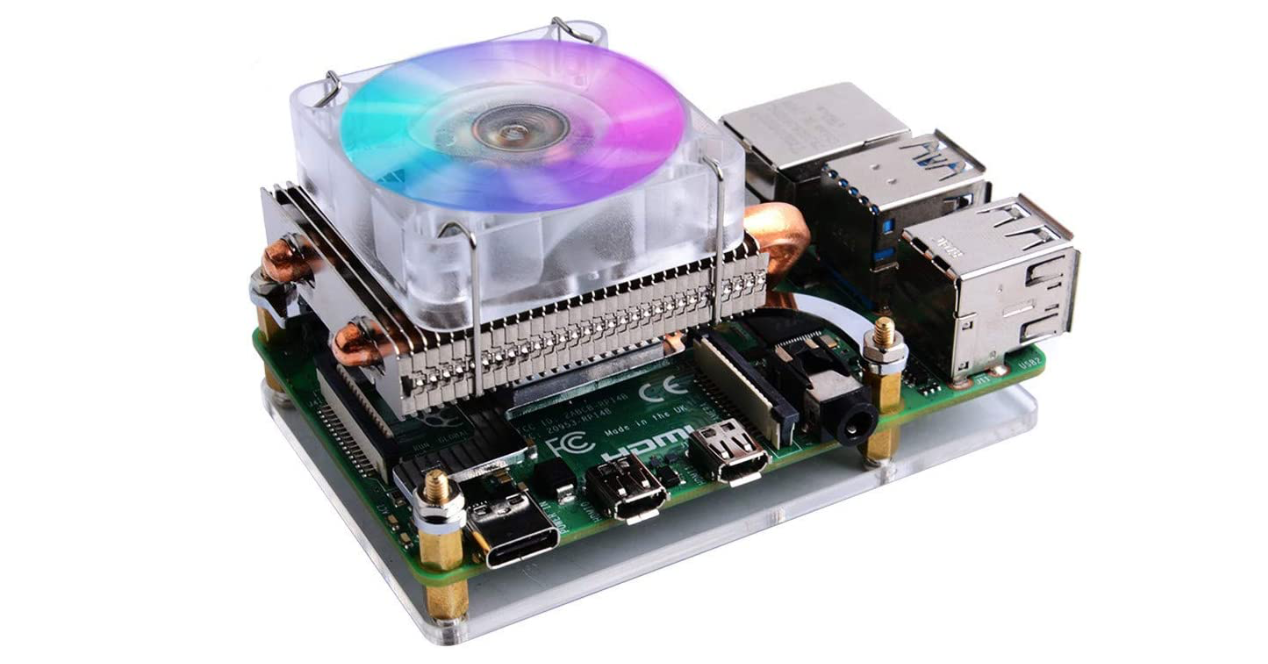
If you are looking for something with great dissipation power and a lower profile, the manufacturer himself GeeekPi It also has other options like this that you can see in the images. It is still a bulkier solution than passive ones, but in height it is smaller and that could facilitate the use of finished spaces or housings. In addition, if you have a little skill or 3D printer you could even create a mini PC as if it were a miniaturized tower that would be quite striking on your desk or wherever you want to place it. Although many tend to opt for this option when mounting their own NAS or server with Raspberry Pi.
Where never to put a Raspberry Pi
The very nature of the Raspberry Pi means that many users end up placing it or using it almost anywhere. For example, behind the television or next to other common devices of your day to day. And it is a completely valid option, but as it can happen on other occasions, some details must be taken into account:
- Do not place the Raspberry Pi next to any other heat source device, especially if you are going to use it without any type of cooling system
- Avoid closed places where air does not flow, because that will make the hot air that the Raspberry Pi gives off itself to end up even more concentrated
- If you are going to place it on a piece of furniture, make sure that the sun’s rays do not fall on the casing. It is obvious, but sometimes it is forgotten and you can go crazy until you find the real problem
So now you know, if you make 24/7 use of your Raspberry Pi or demand the maximum from it when you turn it on to run emulators, etc. You should invest a little and improve the dissipation of it. If the noise doesn’t bother you, the latter are the best, but if so, the full aluminum housings don’t look bad either.
All the links that you can see in this article are part of our agreement with the Amazon Affiliate Program and could bring us a small commission with your sales (without ever influencing the price you pay). Of course, the decision to publish them has been made freely under editorial criteria, without attending to suggestions or requests from the brands involved.