The announcement a year ago of Apple’s abandonment of x86 processors and NVIDIA’s interest in buying ARM Holdings have put ARM in the spotlight. But, did you know that you can build a PC based on an ARM CPU today? And what better than a laptop for it. To what extent is it possible to do so and what limitations are there?
The situation of ARM CPUs in PC
The first thing to keep in mind is that an ARM-based PC will not be able to use x86 programs due to the incompatibility of the binaries in which the programs are encoded. So you will not be able to use your classic Windows applications on a computer of this type, so it represents a disadvantage at first.
If we take a quick look at the CPU market with ISA ARM we will see that there are a greater number of manufacturers of the same. Which in theory makes the costs much lower when it comes to getting new CPUs based on this ISA. All this because there is no duopoly of prices agreed between two manufacturers such as Intel and AMD with x86. At the same time we cannot forget that we cannot buy separate ARM CPUs to mount in the socket of a motherboard, due to the nature of the PostPC market where the hardware is sold fully integrated.
So the options when it comes to mounting a laptop or any other ARM-based PC are really scarce and are based on pre-built PCs from various manufacturers that have adopted this type of processors. Therefore, today it is almost impossible to build a PC with an ARM CPU and most of them are pre-built by various manufacturers, which leads us to the fact that, contrary to what happens in PCs, we cannot assemble a PC ourselves using one. ARM CPU as if we do it with an x86.
Can I mount a laptop with an ARM CPU?
Well, yes, so you can and for this you only need to acquire a Single Board Computer with that architecture, with Raspberry Pi being the most used of all for this. Well, it is actually the only option available and that is why we have focused this tutorial on turning a Raspberry Pi into a laptop.
What advantages does it have? Well, first of all, a Raspberry Pi is very cheap and therefore you can have a laptop for general tasks that will be powerful enough. At the end of the day we have the example of the Raspberry Pi 400 itself, which is sold as a complete computer. It must also be taken into account that there is an ecosystem around this Single Board Computer that has grown a lot in recent years due to its popularity.
And given the low consumption of the Raspberry Pi, it is not for nothing that there are models of retro portable consoles based on the popular SBC, it can be used without problems as a laptop. Not with the power of a gaming PC, but it can be a perfect complement to study, do office work and even surf the internet. With the advantage of doing it anywhere.
The best kits to turn your Raspberry Pi into a laptop
In the market you can find several kits that allow you to transform your Raspberry Pi into a laptop, it must be remembered that these kits do not include the SBC and many of them are focused on the educational market, so they will ask you to be a time fresh out of the box to assemble them. So they are not for people with little patience and that is why we have chosen two kits in which you can install a Raspberry Pi easily and without complications.
Pi-Top 3, kit to have your laptop based on ARM
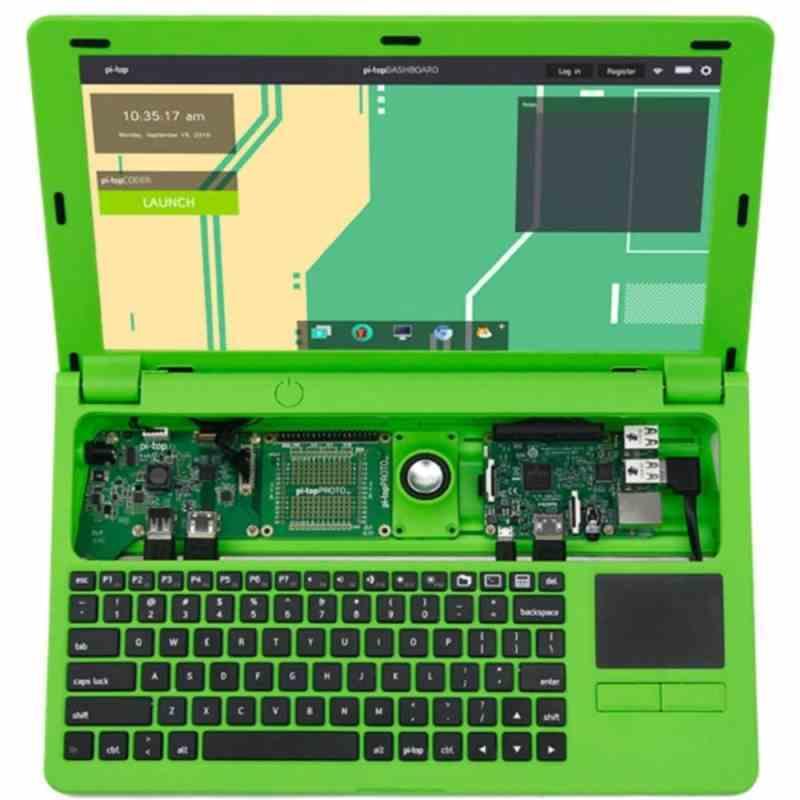
The first kit that we are going to discuss is the Pi Top 3, it is a complete laptop case, which includes all the necessary elements to turn the popular SBC into a fully functional laptop, including the screen. And in a much easier way than other kits that we will see in this article. Its only limitation? The fact that it is designed to be used with the less powerful Raspberry Pi 3+ instead of the fourth generation, thus resulting in much lower performance.
The kit comes with a 14-inch screen at Full HD resolution, and a laptop keyboard that can be slid towards us to be able to interact with the components that we have installed inside. And like any good laptop, it comes with a lithium polymer battery that will give you continuous use between 8 and 10 hours with a full charge time of 90 minutes.
Its installation is extremely simple and is an ideal way to have an ARM laptop without breaking our heads too much.
CrowPi2, kit focused on education, but perfect as a low cost laptop
The second kit that we bring you to assemble your ARM-based laptop is the CrowPi2, like the Pi-Top 3 it is a kit designed to install the Raspberry Pi but this time compatible with Raspberry Pi 4B. Its size is a little smaller, since its screen despite being Full HD is 11.6 inches. However, it is much thicker and takes us back a decade when it comes to laptop design, but we will see the reason for its thickness a little later.
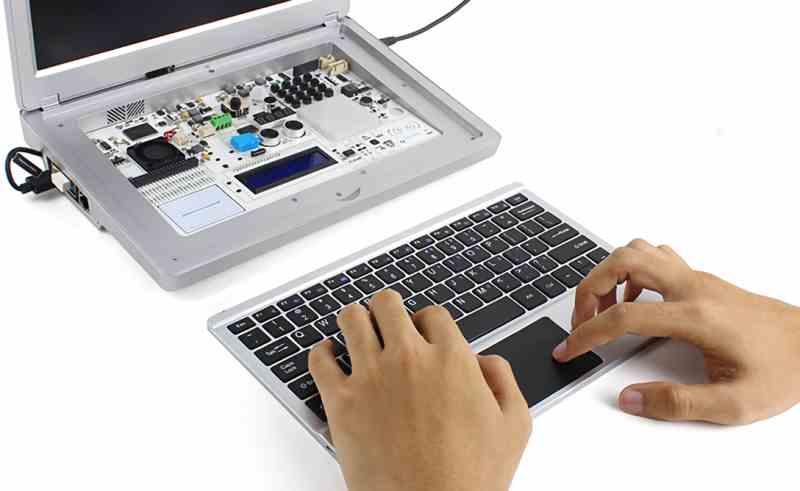
Other differences from the Pi-Top 3? The fact of including a 2 mega-pixel camera, having built-in speakers and having a minijack for both a microphone and headphones. As for its keyboard, this is not movable, but it is totally wireless so you will need to charge it, luckily you can use the one of the Raspberry Pi itself to charge the keyboard and the trackpad that it has integrated.
If we lift the keyboard we find what an Electronic Workshop is and that is that this laptop is really designed for the educational market and to carry out the classic projects for which a Raspberry Pi is used, which does not mean that we cannot use it as a more general purpose portable kit. But it is an extra particularity that will be valued by fans of the STEM world.

