In the popular Adobe tool, we have different transition effects available and a wide variety of ways to modify them to suit our video. Therefore, today we are going to talk about the transition effectshow to insert them into our videos and how to incorporate them so that they become an important tool to use in our projects.
To be able to add effects and transitions to our videos, the first thing we need is to have Adobe Premiere installed on our PC. If we do not have it, we must pay a subscription of 24.19 euros per month to be able to use it. If we want to test it previously, we can download a 7-day trial version with all its available functions.
Transition Basics
A transition is an animated effect that facilitates, or emphasizes, the passage from one clip to the next or we can also use them to style the beginning or end of a clip. A transition can contain a subtle effect such as a fade, or an emphatic effect such as passing one. They are usually placed in a cut between two clips, creating a double-sided transition. However, you can also apply a transition right at the beginning or end of a clip, creating a single-sided transition, such as a fade to black.
When a transition changes from one clip to the next, it will overlap the frames of both clips. Overlapping frames can be pre-cut from existing clips or frames repeated on either side of the cut. It is important to know that when a clip is trimmed, frames are not dropped, but the resulting entry and exit points are responsible for forming a window over the original clip. This is why, when using a transition, it takes care of using the clipped frames to create the transition effect or, if the clips do not have clipped frames, then it takes care of repeating the frames.
Add transitions in Premiere
The first thing we need to do is open Adobe Premiere and create a new project. To do this, click on the “File” tab and then on “New” and “Project” or use the keyboard shortcut “Ctrl + Alt + N”. Once added we drag the video file to the timeline.
Finding and adding transitions is a very easy process, since we can find all transition options within the panel effects, which you can access from the top options bar. A panel will then appear on the right.

Next, we click on the video transitions that we find on the right side and unfold it. This will bring up different folders with “Wipe”, “Swipe”, “Peel Page”, “Dissolve”, “Iris”, “3D Motion”, “Immersive Video” and “Zoom” effects. From here, we can select any of these types of transitions that we would like to use in our project.
To do this, just click to select it and hold down on the transition, then drag it to the beginning or end of the clip you’d like to use it on. We can also place it between two clips to make the transition between the end of one clip and the beginning of another.
How to edit them
We may not need the transition to last as long or not be as noticeable, so Premiere allows us to easily edit it from its dashboard. effects controlswhich is located in the upper right when we are working in the tab of effects.
Next, in the timeline, we select the transition we’ve added to our clip, which will cause a change to occur in the panel effects controlswhere we can see squares labeled A Y B. and a mini timeline.
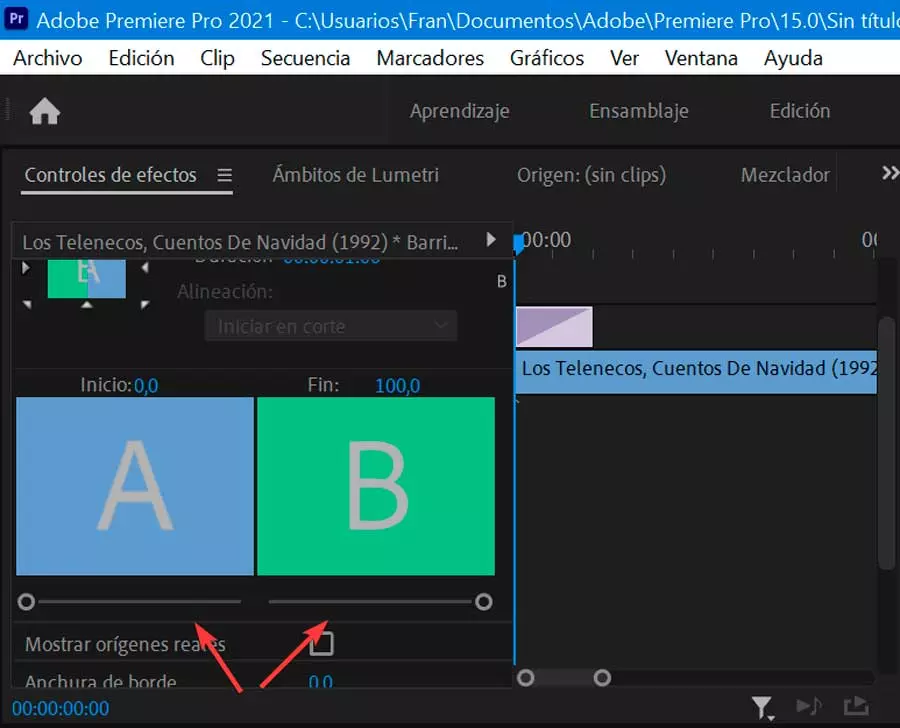
Here we can change where the transition starts by going to the bar below square A. We click and drag the little circle to change the value of Start. This will cause the transition to start closer to or further from the beginning of the second clip. To change the end point of the transition, we use the bar below square B.
It is also possible to change the duration of the transition as a whole with the value of Duration. If we hover over this value, we can click and drag left or right to change it. This will make the entire transition longer for both clips.
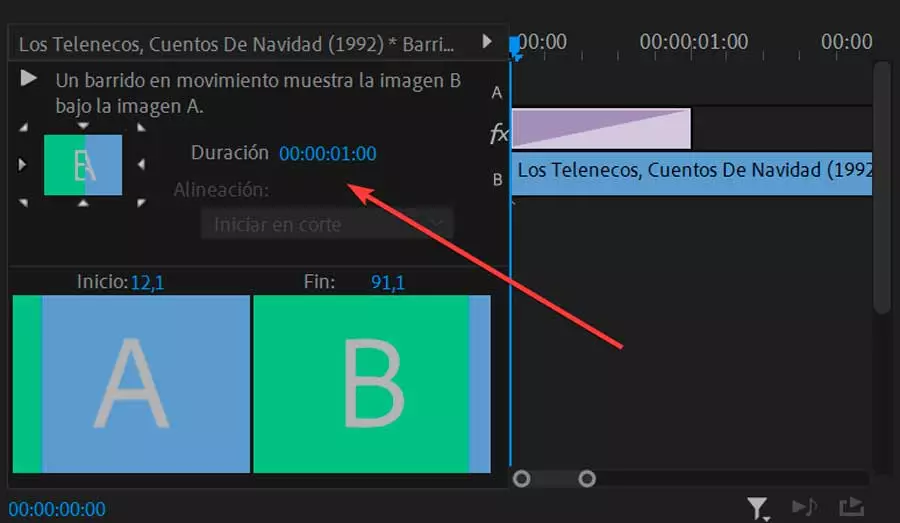
Also, we can quickly align the transition to start where the clips cut off. To do this, click on the drop-down menu Alignment and select where you want the transition to start or end.
By using these effect controls, you can make our transition look smooth and fit perfectly into our project, taking place in real time, so we can see how they affect our video while we’re editing it.
Delete a transition
In the event that the transition that we have added we do not like how it looks in our clip, we can easily eliminate it. We just need to make sure we really want to delete it before doing so, as any edits you’ve made to it will be lost.
There are two different ways to remove a transition:
- We simply have to find the transition in the timeline and select it. Then press the “Delete” key on our keyboard.
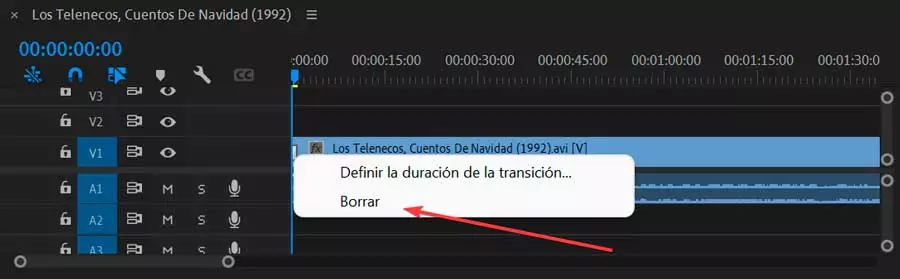
- We select the transition in the timeline to later click on it with the right mouse button. This will bring up a context menu where we select “Delete” to remove the transition.
In this way we can try adding and removing different transitions until we find the one that really satisfies us.
Websites to download transitions for Premiere
Although Premiere has a good number of transitions included, it is possible that these are too many seen and known to us. In case we want to give it a more personal and different appearance, we can use transitions that we can download from the Internet.
mix it
We are talking about a website where we can get free stock videos, free stock music and free Premiere Pro templates. We can up our video creation game by exploring their library of free video templates for Premiere Pro. download and use your templates motion graphics free on your next video editing project without registering or paying for them.
Here we will find mogrts, projects, lower thirds and transitions to add to your YouTube videos, slideshows or music videos. In addition to being able to make unlimited downloads of Premiere Pro video templates and effects, they are fully editable.
Envato Elements
If the free templates with Premiere transition effects are not able to meet our needs, we can go for the premium templates that are available on Envato Elements, a site where you can download unlimited resources by subscription.
this website includes templates transitions and other professionally designed animated graphics, such as logo animations, intros, and titles. Elements also offers stock photos, music, video clips, and fonts to help you develop your own style, plus in-depth courses to boost your creative skills.
If we want to test its content, we can access a 7-day trial version, as well as have access to unlimited downloads of more than 59 million creative resources from 14.50 euros per month.