Index
Nfortec Nekkar: technical characteristics
| Nfortec Nekkar | |
|---|---|
| Format | Half tower |
| Motherboards | ATX, MicroATX, Mini-ITX |
| Front side connections | 2 x USB 3.0 1 x 3.5mm Headphone Jack 1 x 3.5 mm jack for microphone Power button Reset button |
| Power supply | ATX (230mm) |
| Graphics card size | Up to 340 mm |
| CPU heatsink size | Up to 170mm |
| Fans | Rear: 1 x 120mm included / 1 x 140mm Front: 3 x 120mm included / 2 x 140mm Top: 2 x 120mm / 2 x 140mm not included |
| PCI slots | 7 horizontal |
| Radiators | Rear: 120mm Front: up to 360 mm Top: up to 280 mm |
| Storage | Bottom compartment: 2 x 3.5 “or 2 x 2.5” Rear panel: 2 x 2.5 “ |
| Expansion slots | 7 |
| Others | Front, top and source dust filters |
| Material | SPCC steel and tempered glass |
| Colour | White |
| Dimensions | 483 (h) x 220 (w) x 415 (l) mm |
| Weight | 5.95 kg |
| Price | 89.90 euros |
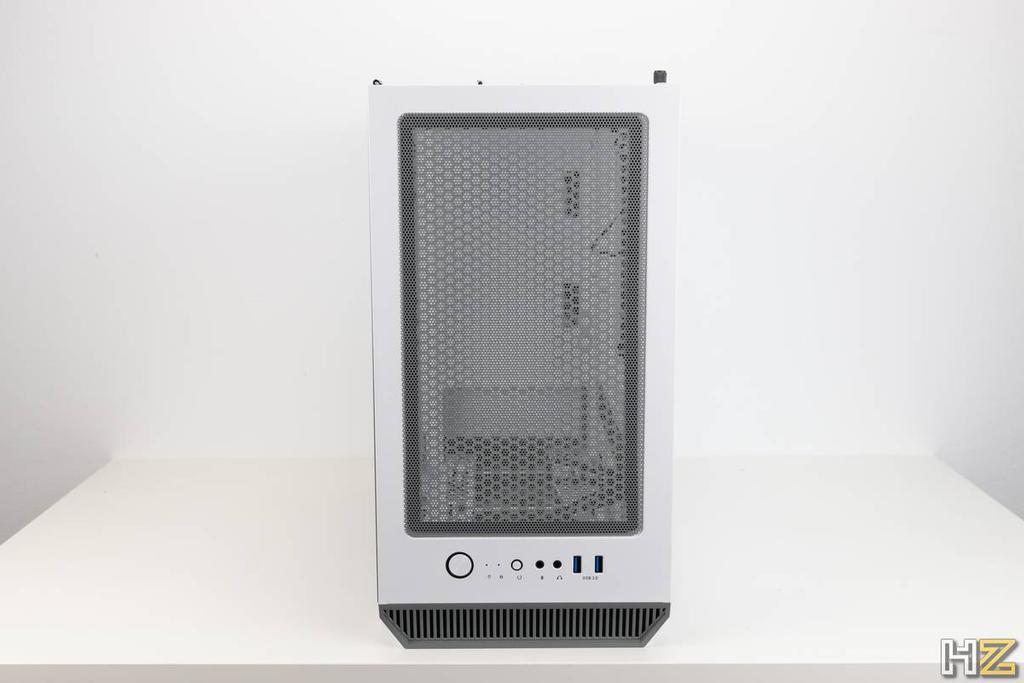
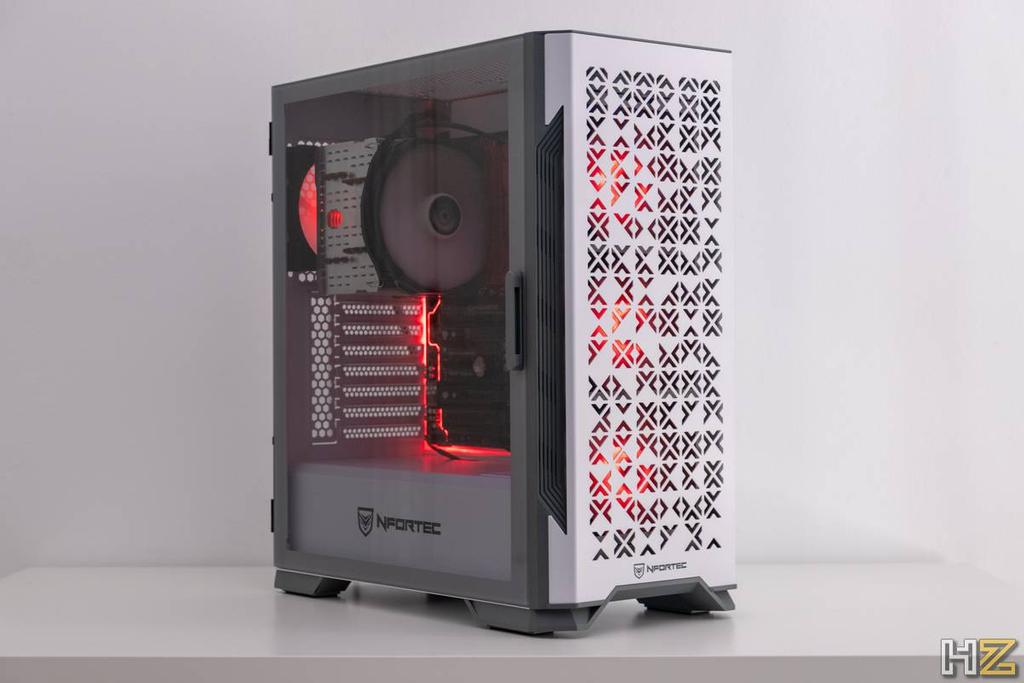
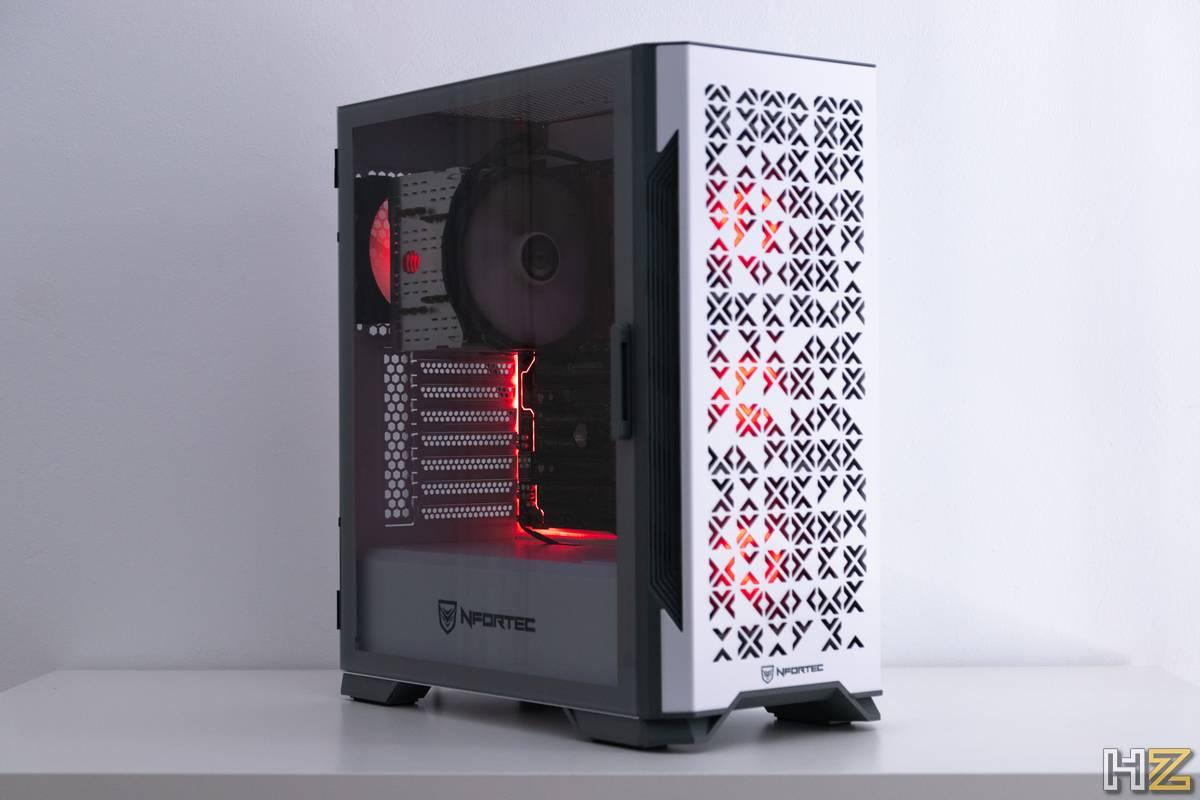
The Nfortec Nekkar is a box that accepts up to ATX boards. It includes four fans, three placed in the front, and one in the rear, connected to a single controller with PWM with a system that also allows controlling the RGB lighting that they incorporate, and where we can install up to a total of six 120 mm fans. . It has a tempered glass pane with a hinge opening that allows you to see the entire interior without problem. It also has dust filters all over the place to keep the inside of our box as clean as possible.

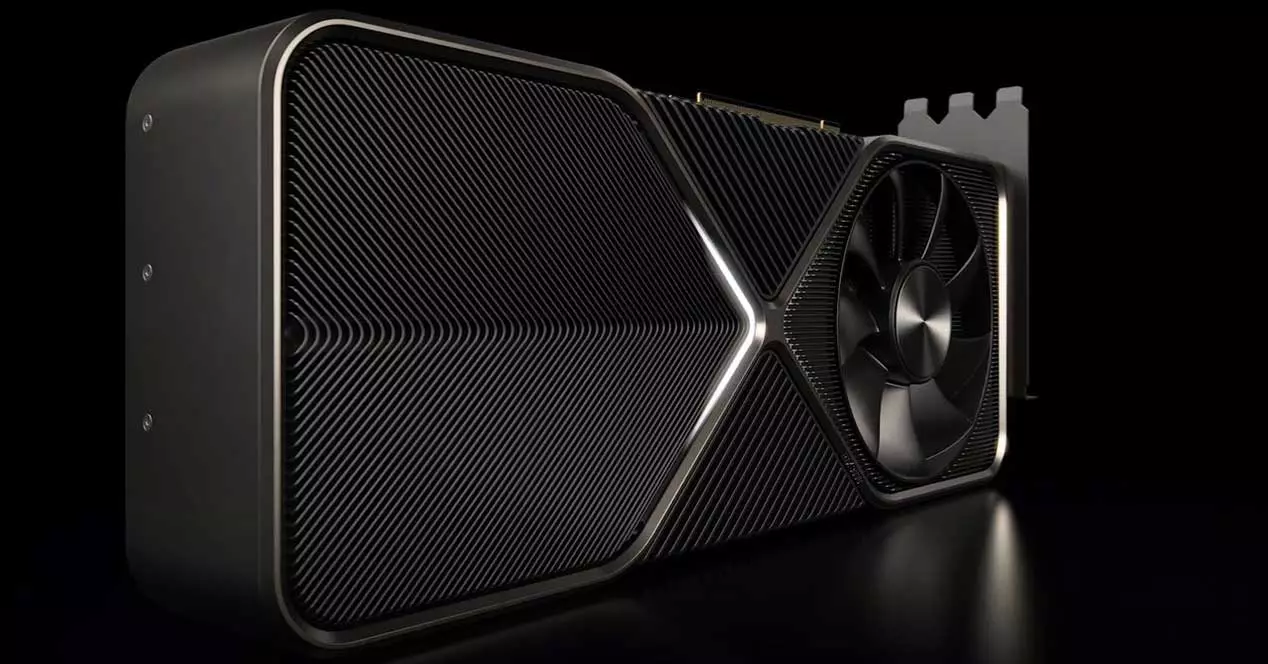
At the storage level, it is possible to place up to four drives, two 2.5-inch and two 3.5-inch, or up to 4 2.5-inch. It accepts graphics cards up to 340mm in length, and CPU coolers up to 170mm, so we won’t have big space problems with most current components.
Unboxing and external analysis
The chassis is not very bulky, and you can see that in the box, which is quite compact. When we open it, we are shown instructions on how to remove it. It comes protected with two plastic bases from the top to the bottom, as well as a plastic that covers it completely. We also have protective plastic on the glass on both sides.
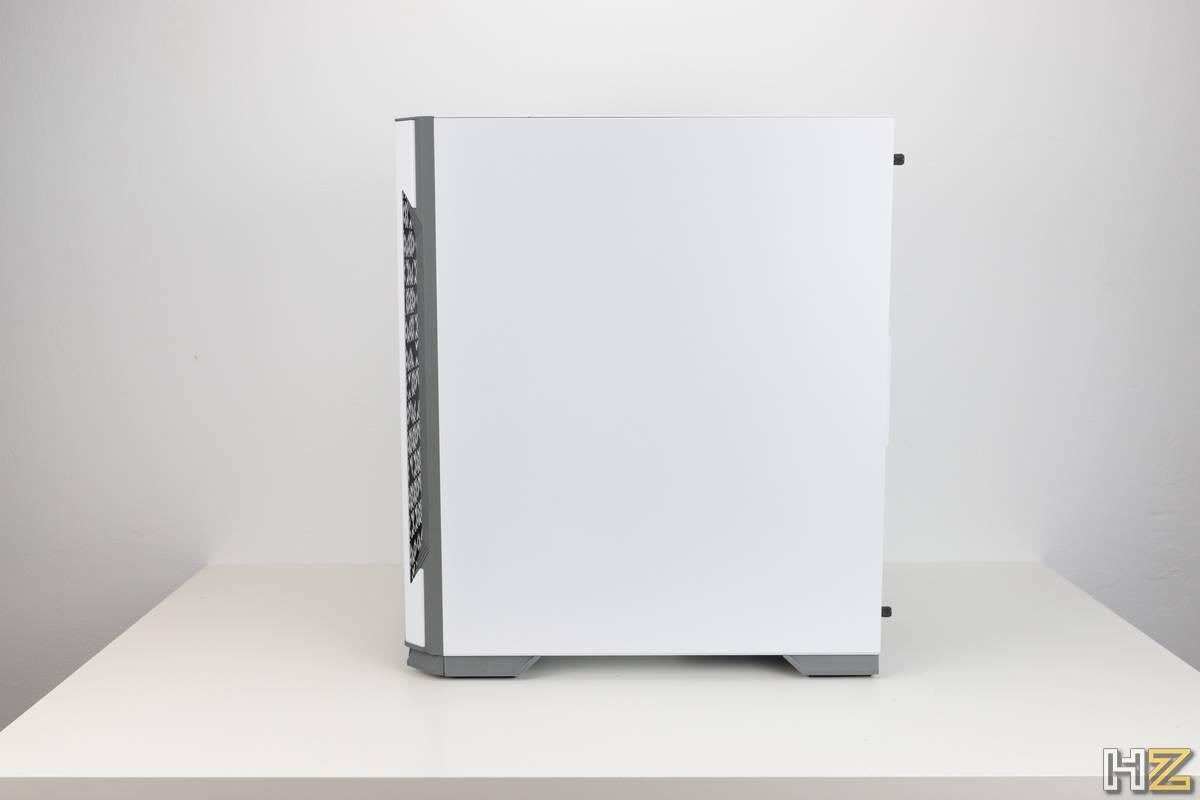
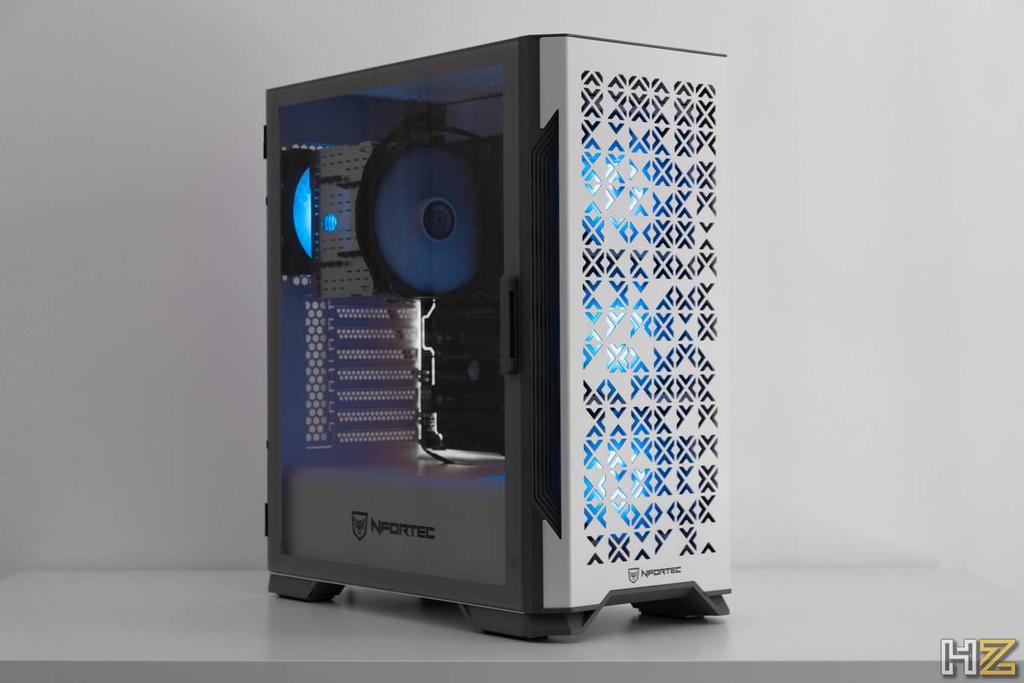
Once the plastics are removed, we can already admire the box, which has a really beautiful design, and the white color looks great. This model is also available in black with a silver front, an also excellent combination, although the silver and white of the analyzed model is probably even more attractive.

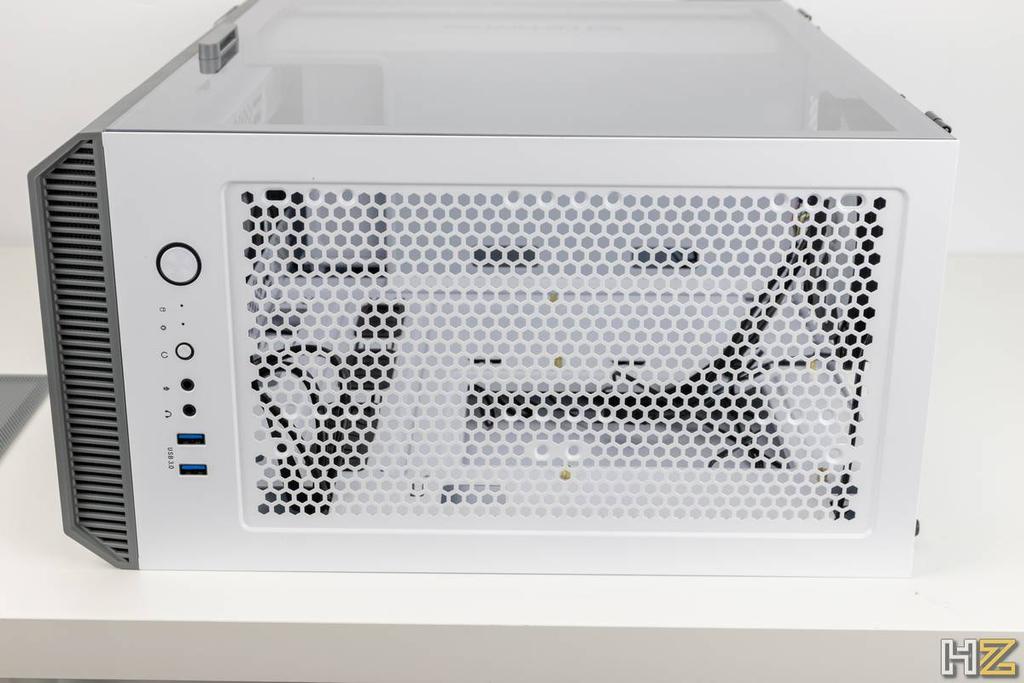
If we remove the metal front mesh, we find the dust filter that protects the front fans, further increasing the air flow inside. However, the mesh already lets a sufficient amount of air pass through the front and sides; especially with three fans blowing air non-stop inwards.
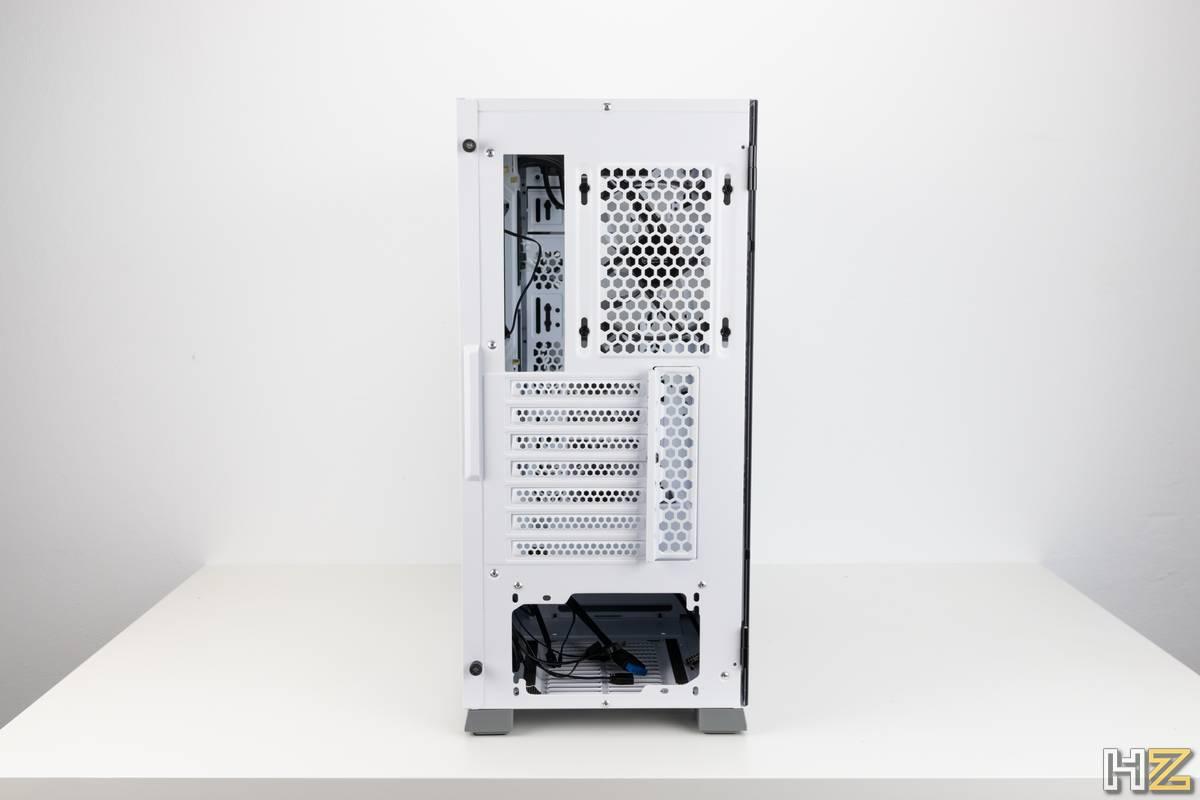
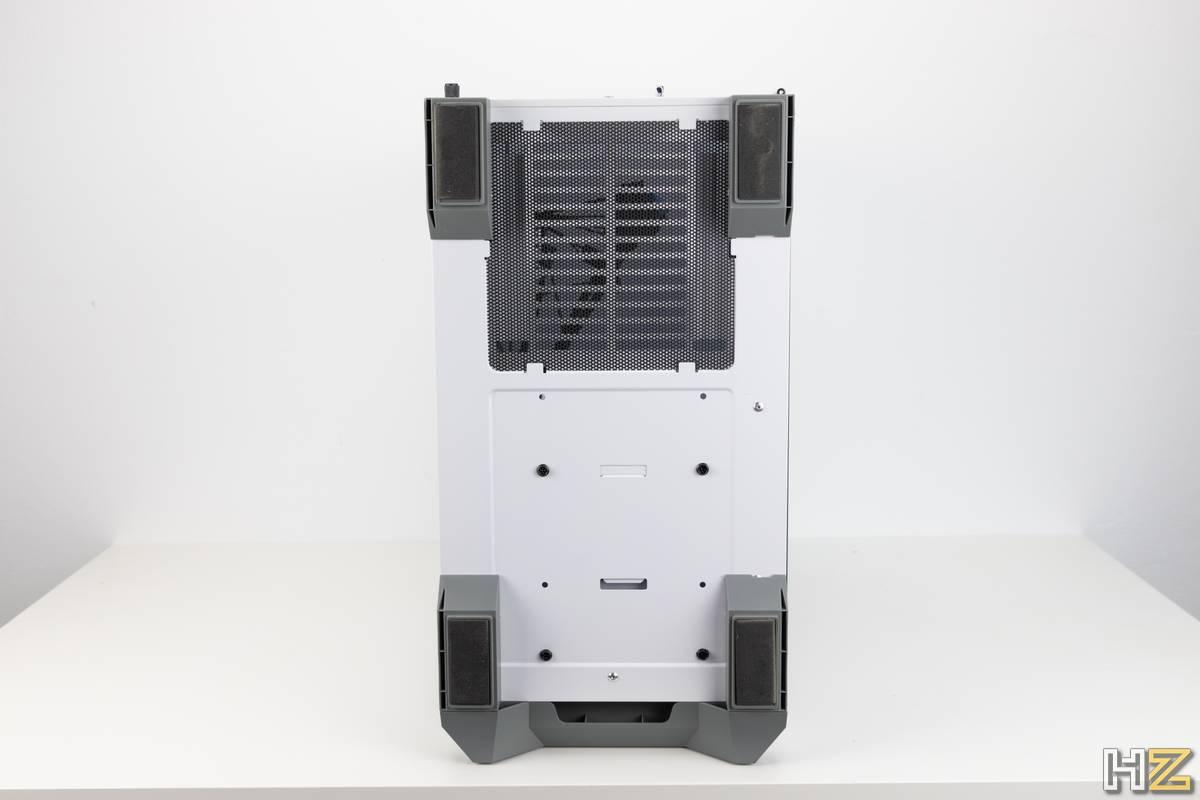
The right side has a panel hooked with two screws, so it is easier to make sure that everything stays in place and does not open if we have mismanaged the cables as it happens in some similar boxes that also have a hinge. in this part.
The back has 7 horizontal slots and a double vertical one in case we want to put the graphics card there with a riser. We also have the bottom hole for the source, the hole for the IO, and the 120mm fan. From this perspective we can see the asymmetry of the two panels, where one has the two screws, and the other opens with the hinge. If you have a little OCD, it may make you uncomfortable.
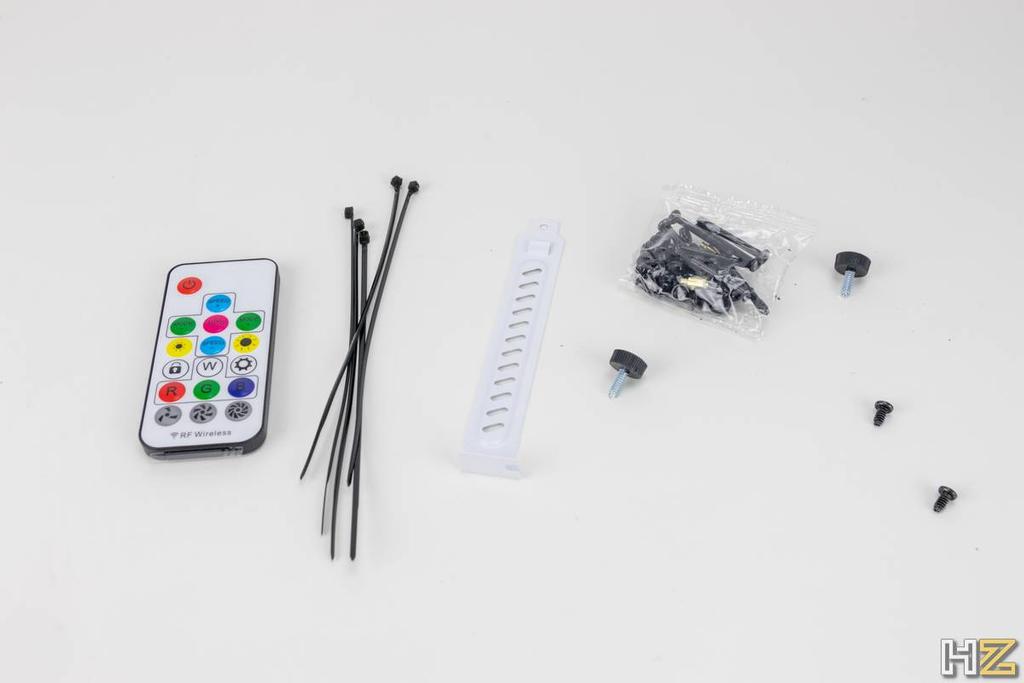
In the upper part we have a magnetized dust filter that covers the entire surface of the upper part. We also have the buttons and connectivity, with the power button, two status LEDs, a reset button, two microphone and headphone jacks, and two USB 3.0 ports. It is appreciated that there are no 3.0 ports, but perhaps it would not have hurt to have a USB C. The reset button can also be connected to change the RGB lighting of the fans, but for that it is more convenient to use the control that it includes.
At the bottom we have a dust filter for the power supply. The feet are made of foam that allows us to move the tower smoothly on the table if we need to move it for any reason. We also see the screws of the storage bay, which we can put closer or further from the source if we have space for it. It will also be necessary to move it if we want to put a 360 mm radiator on the front.
Internal analisis
And it is that, when we open the hinge, our eyes go to the area of the fans. The box, being somewhat narrow so as not to have wasted space, requires that, if you are going to install a 360 mm radiator on the front, you have to move the bays to put them near the power supply, where it is essential that you already have the cables connected and they are flexible if we want to move it.
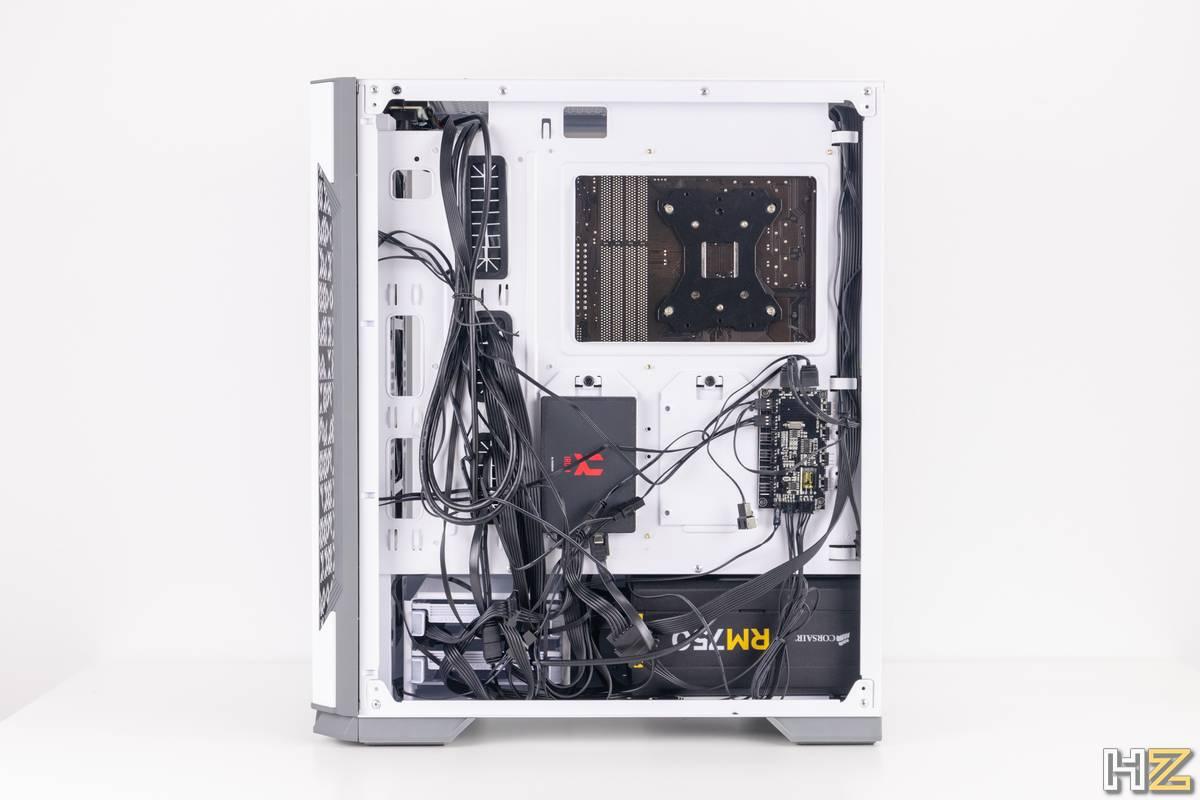
The opening of the glass panel is perfectly fluid, and we can remove the panel by sliding it upwards so that it does not bother us to work on the case if we are going to mount the PC with it lying down, which is always the most recommended. The interior is quite roomy for a compact box, and we have room to run all the cables without a problem. Perhaps the front I / O cables could be a bit more hidden, and should be pushed to the right if we are going to mount a 240 or 280 radiator on top, as the fans can crash.
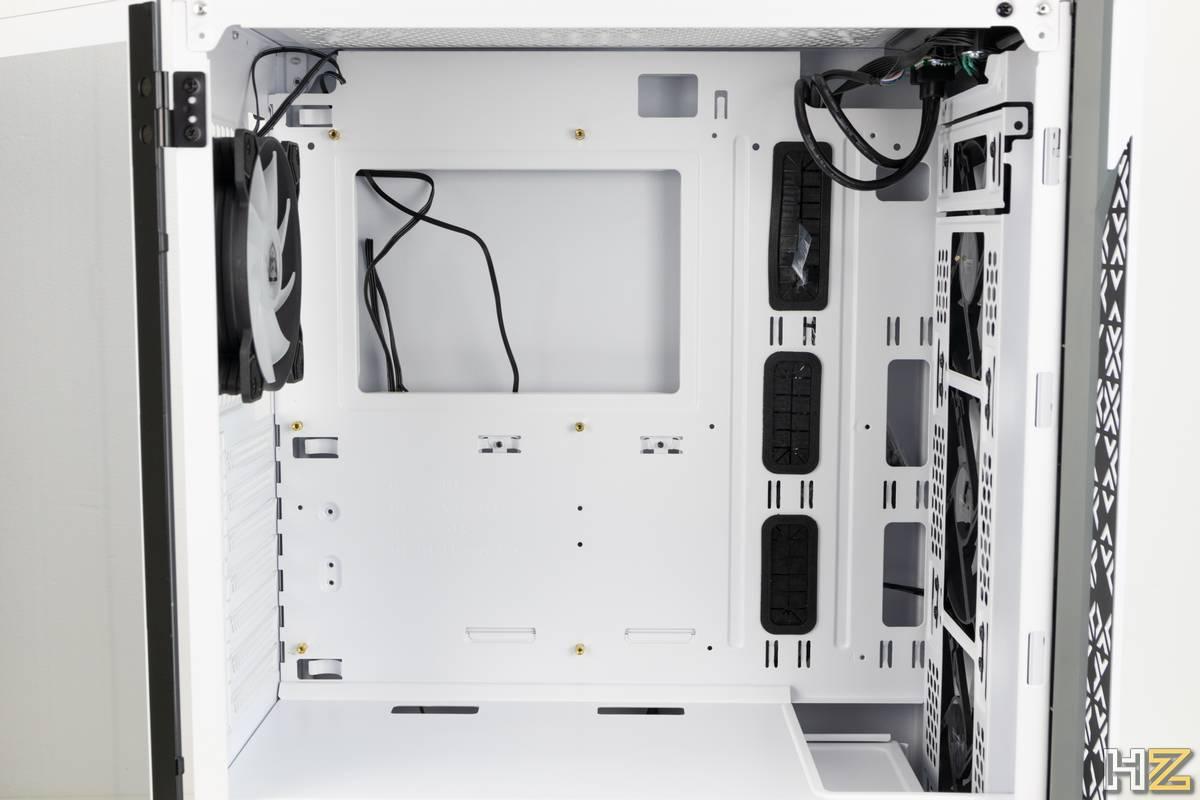
However, we also have good things on the inside that are not in other cases, such as an excellent passage area in the upper left for the CPU connector on the board and the fan cables. In general, as we will see later, with the computer mounted you can hardly see the cables, and they do not bother at all, so we can make a fairly clean computer.
If we turn the box over to see the area to hide the cables, we find enough space to hide them, as well as several areas for passage and to attach cable ties. We also found the controller for the fans, which is ideal and I wish more boxes included them. It has six connectors with 4 pins for fans, as well as another six connectors for RGB LEDs. The controller connects to the power supply via a SATA connector. In turn, we have a 4-pin connector for the fans that is connected to the board and that determines the speed at which they rotate, and allows us to comfortably regulate it from the computer. We also have a female RGB LED connector to connect it to the board and control the lighting from there or synchronize it with other components of the computer with AURA.
To see it more clearly, we leave you an image of the manual. The box does not include a manual, but a QR code to access it. We leave you here the link.
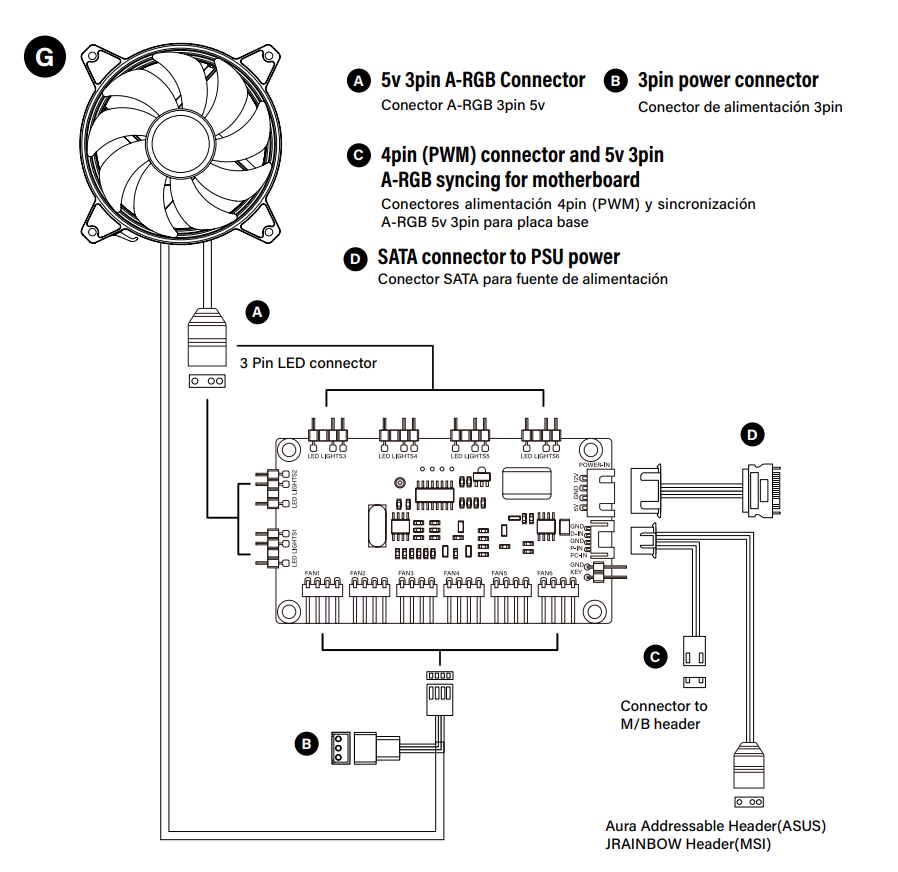
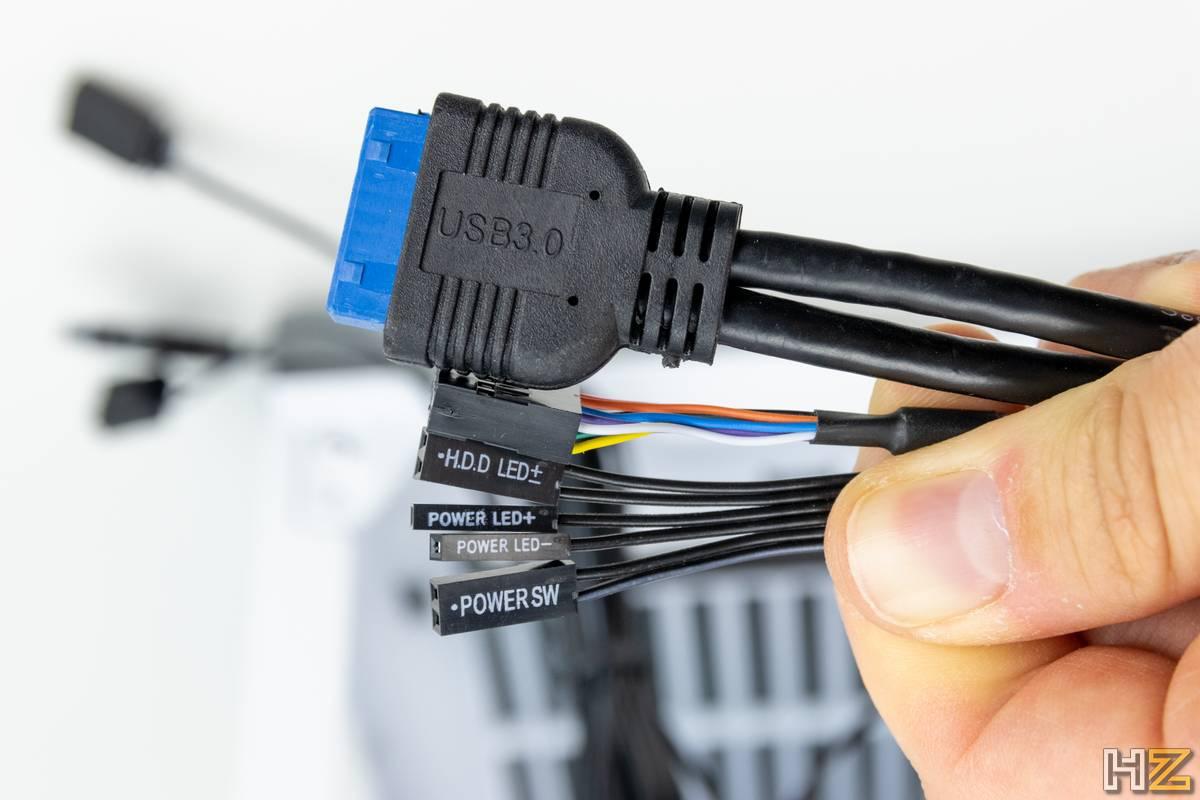
As for the rest of the internal connectors, we have a USB 3.0 connector for the two front ports, one for the HD Audio, a connector for the lighting of the hard disk, another for the lighting if the computer is on, and the connector for the power button itself. switched on. We also have a reset button that is connected to the fan controller, but this can be connected to the board to use it as a reset button, much more useful than changing the lighting, since we can do that comfortably with the remote.
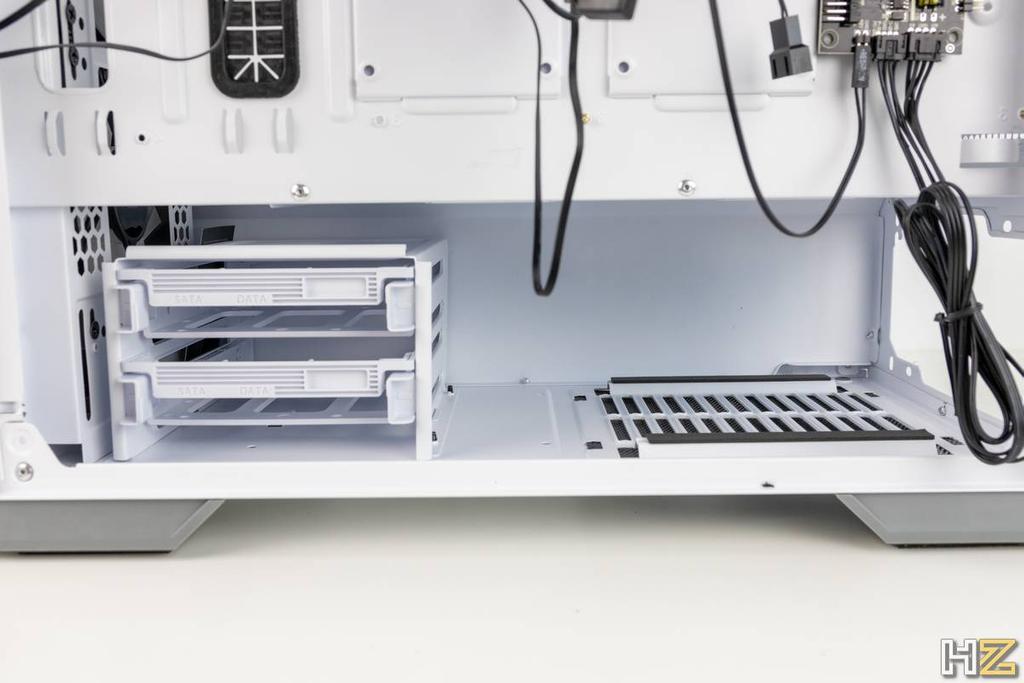
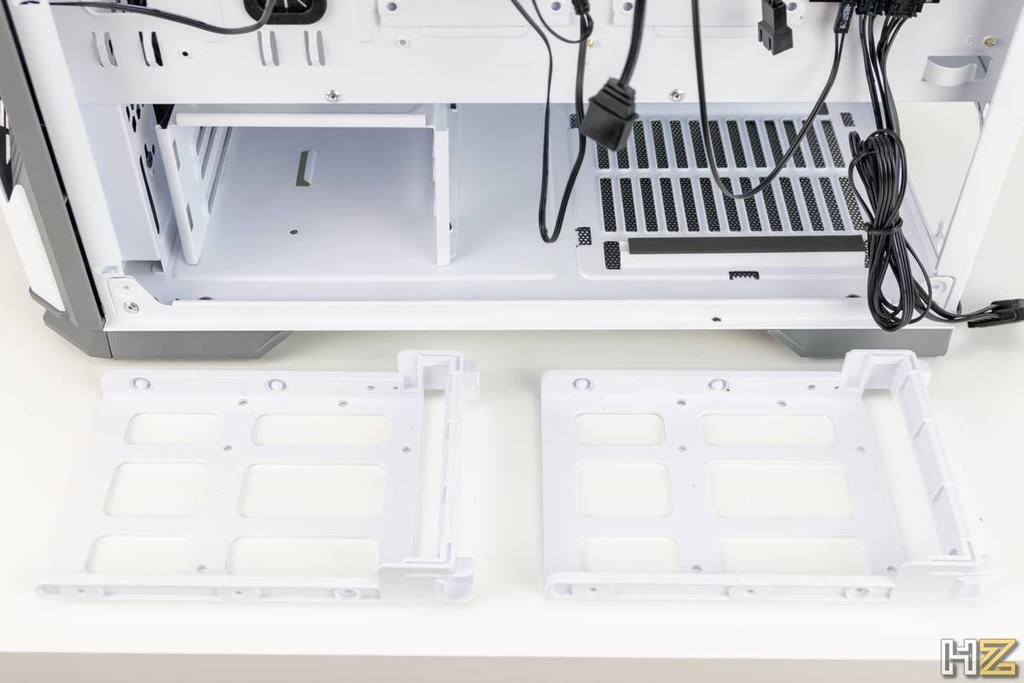
If we go to the storage bays, we have two bays where we can place two hard drives or two SSD units. We can move the bay a little to the right, but it is too close to the source, so if you are going to buy this box with 360mm cooling, it is advisable to buy a small source.
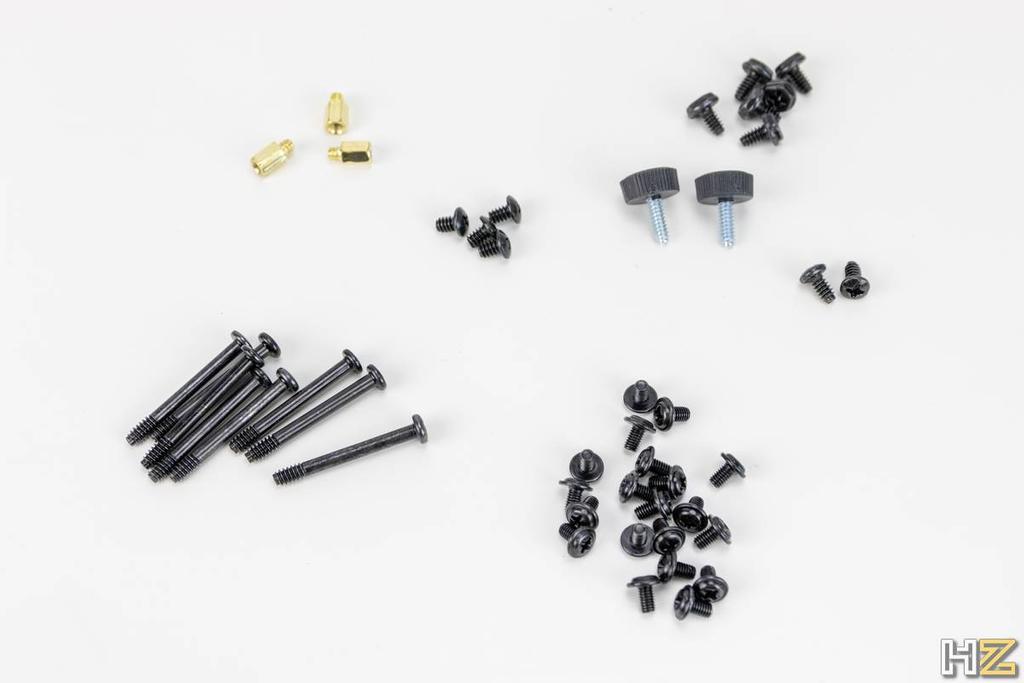
At the back we also find a small bag attached with the screws and accessories. In the box come:
- 6 screws for power supply
- 2 motherboard holders
- 20 screws for motherboard and SSD
- 6 hard drive screws
- 2 screws for fixing the hard disk
- 5 flanges
- 8 screws for fans
- 1 additional PCI board
Assembly and testing
The assembly in the box is really simple and comfortable. Everything fits without a problem, and in the back we have plenty of space and ways to manage the cables. One of the best parts is the option of being able to pass the connector from the CPU to the source through two side guides, so that the part of the motherboard is much cleaner. Also, connectors are barely visible poking out of the front of the board.
The space below to pass the fan connectors or the case buttons is more than enough for them to fit. When placing a second SSD next to the fan controller we may have some discomfort, but it is possible to detach the controller a bit to place the SSD without problems, and then adapt the controller.
The fans are quite silent, and having excellent cooling, we will not have airflow problems inside. The RGB lighting of the fans is in the center of the fans, which have translucent blades, so that they show the color. In the following images you can see some of the color modes, where we can leave fixed colors, others that rotate, or an RGB mode. We can also adjust the brightness level and the speed of the effect.
Although the glass panel is perfect, with its magnetic opening, the right side is more similar to what we can find in cheaper boxes, and forces the panel to be closed with the box lying down. That’s not a big problem, since once you mount it you won’t look in there too often.
Conclution
The Nfortec Nekkar is an excellent box if you want to have a clean modern aesthetic, with a clear view inside the box. It includes dust filters everywhere and four fans, which is the most basic that can be required of a box today within the mid-high range, and it also does it with a fan controller and RGB lighting so as not to have to buy it separately.
The only problem we can have is with the 360 mm radiators and the use of hard drives, since the case, in exchange for being so compact, leaves little space at the bottom. If that doesn’t bother you because you use a smaller radiator or heatsink, the Nekkar is an ideal box for you.
For this reason, the Nfortec Nekkar takes our gold medal, and our recommendation for its performance.


You can buy it in the following links, with a PVP of 89.95 euros, available in gray and white colors.