Something as common as copying or moving files that we can do naturally with our file explorer, was a real bombshell in the early nineties with File Manager, a tool capable of managing files from a graphical interface, making us forget about MS-DOS.
File Manager, the tool to Manage files in Windows 3.0
File Manager was an application to manage files that was used by Microsoft from 1990 to 1999. This means that it has been used in an original way since Windows 3.0. This tool began to perform tasks that until then could only be carried out through the MS-DOS command line interface, such as copying, cutting, deleting and moving, as well as other activities related to files.
This classic file manager has a design that can remind us of what has later become the current Windows File Explorer. It has two columns where we can see in the form of a tree all the folders and files that are hosted on our computer. In the upper part we could access and change the unit, change the view of the files or perform different operations with the files.
Download Classic Windows File Manager
Now Windows File Manager has come back to life, so it is possible re-download and use the classic Windows manager on our current PC. It runs as a native x86 and x64 desktop application on all supported versions of Windows, including Windows 10. The source code is available for download from GitHub. From here, the WinFile source has been used from Windows NT4 so that, through minimal changes and its compilation with Visual Studio, it can be run on any current Windows computer. It also allows actions such as Ctrl + X (copy) and Control + V (paste) to be adapted to the current operation in order to move the location file.
We can download it for free from the Microsoft Store by clicking on the link below. It will only be necessary to log in with our Microsoft account for it to be downloaded and installed automatically.


Developer: Microsoft Corporation
How is it to use File Manager in Windows 10
Once Windows is in charge of downloading and installing the application, all you have to do is press the Start button to start running it. The interface of the new File Manager will appear immediately and it is basically the same that we saw in the early nineties run on Windows 3.0. We will be able to carry out all the tasks of yesteryear such as ordering files with the toolbar buttons, managing drives and directories in various sub-windows, as well as formatting the disk. All this being compatible with more modern utilities such as compatibility with 64-bit Windows, keyboard shortcuts and long file names.
Classic interface completely in English
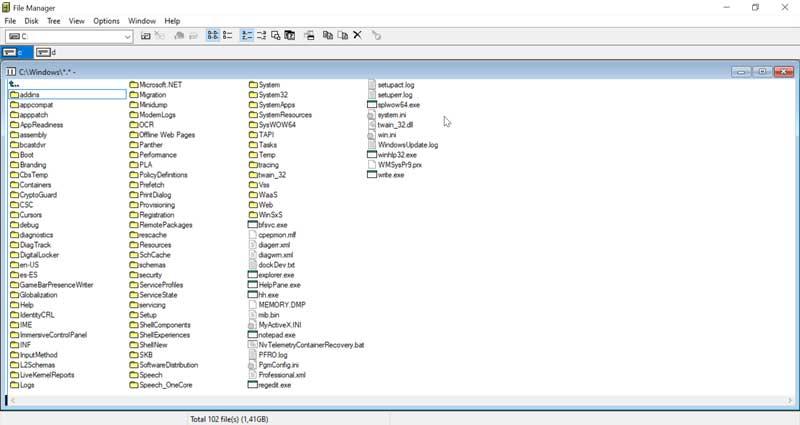
The entire application interface is entirely in English, with no way to choose Spanish as the language, although all the functions are more or less easy to understand. At the top we find the toolbar in the form of tabs with the options “File”, “Disk”, “Tree”, “View”, “Options”, “Window” and “Help”. Just below we have the possibility to choose between the different hard drives that we have.
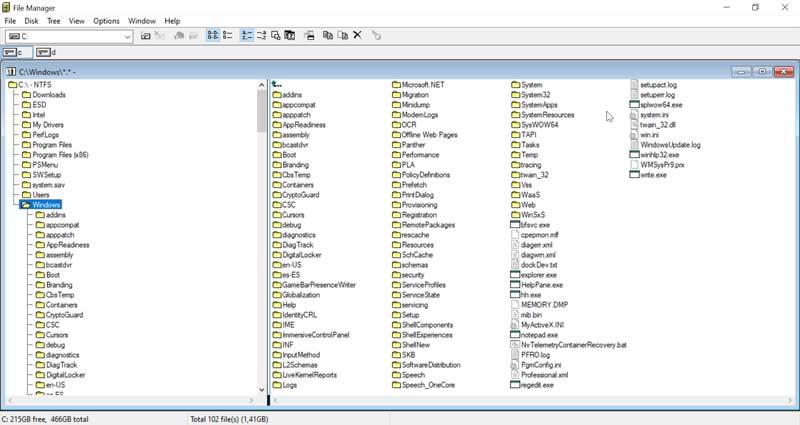
In the window on the left it shows us a tree-shaped list of the folders that make up the hard disk and that we can unfold to select the different subfolders. All the content within a folder can be viewed in the right column. How could it be otherwise, each folder is represented by an icon in yellow, while each file is in the form of a white document.
Use the tabs at the top to execute actions
If we click on the «File» tab, it will display the entire set of options that we can perform from it, such as opening, editing, moving, copying, copying to the clipboard, cutting to the clipboard, pasting, deleting, compressing, decompressing , create directories, etc. Each of these functions has a corresponding keyboard shortcut with which the application is compatible.
In the “Disk” tab we can perform some operations related to our hard disk such as copying disk, labeling disk, formatting, connecting and disconnecting to a network drive and selecting disk. If we go to the View tab, it will allow us to change the view of the directories, being able to choose between tree and directory view, only tree or only directory. We can also sort the content by name, type, size, date and forwarding date.
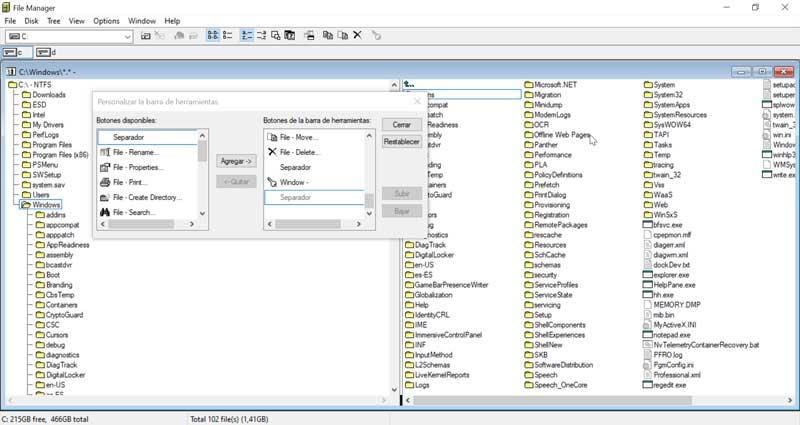
Add and remove items from the toolbar
If we go to the Options section, we will find the possibility of customize taskbar by clicking on «Customize Toolbar». If we click on it, a new window appears (curiously, this one if it appears in Spanish). In it we can see the buttons available on the left side and the toolbar buttons on the right side. In this way, if we select a button on the left side and click on the “Add” button, they will automatically be added to the toolbar. Likewise, we can eliminate any button that does not interest us, selecting it in the right column and clicking on the “Remove” button. If at any time we want to leave the configuration that appears by default, it is only necessary to click on the “Reset” button.
How to uninstall Windows File Manager
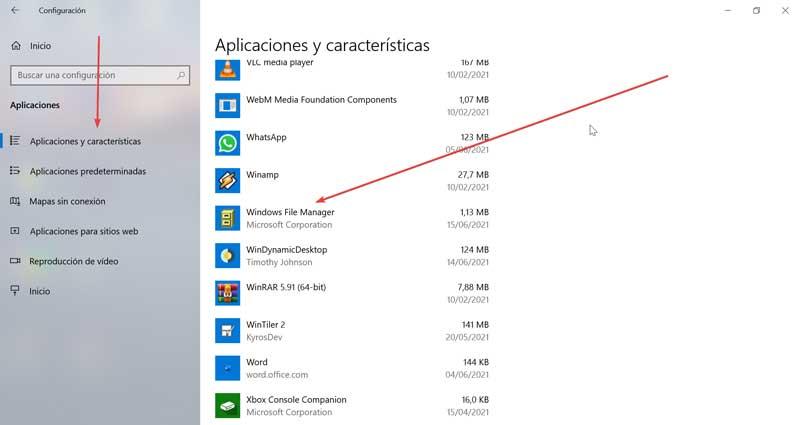
In the event that Windows File Manager is something more anecdotal than useful for us, we can always have the possibility to uninstall the application. For this we must access the “Configuration” menu. We can access the Settings menu, using the keyboard shortcut “Windows + I”. Once the «Settings» window appears, click on the «Applications» tab.
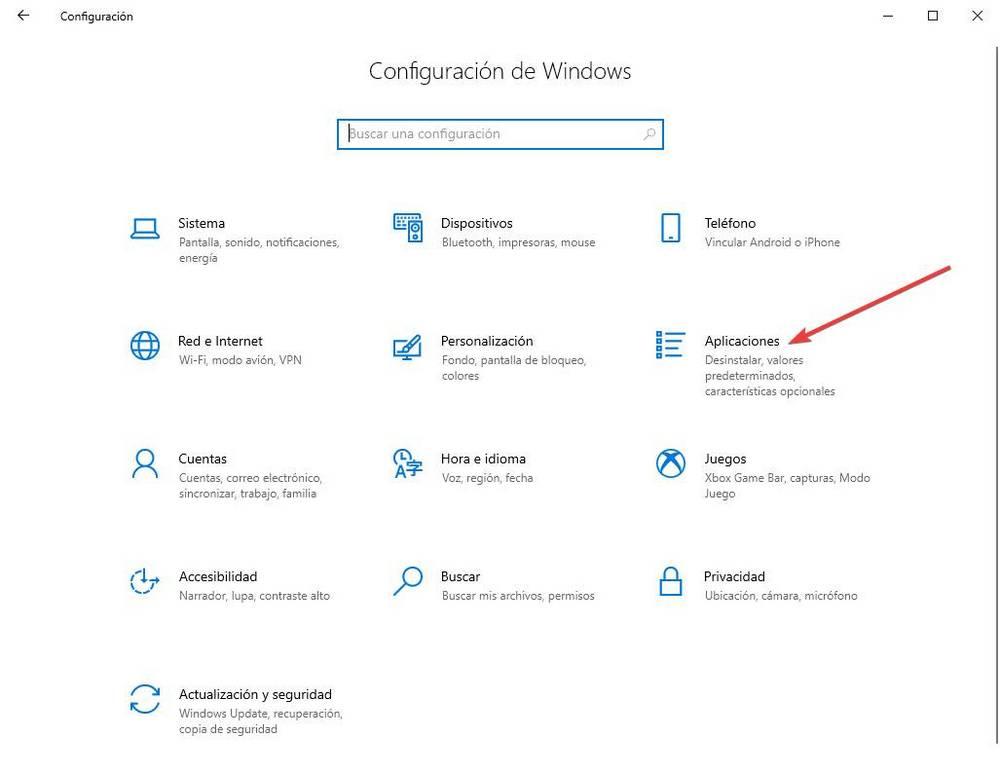
Once inside the Applications menu, in the right column click on the “Applications and features” tab. Now on the right side of the screen we must scroll to the bottom. Here we must locate the application “Windows File Manager” and click on it. Finally, we click on the “Uninstall” button to completely remove it from our hard drive.