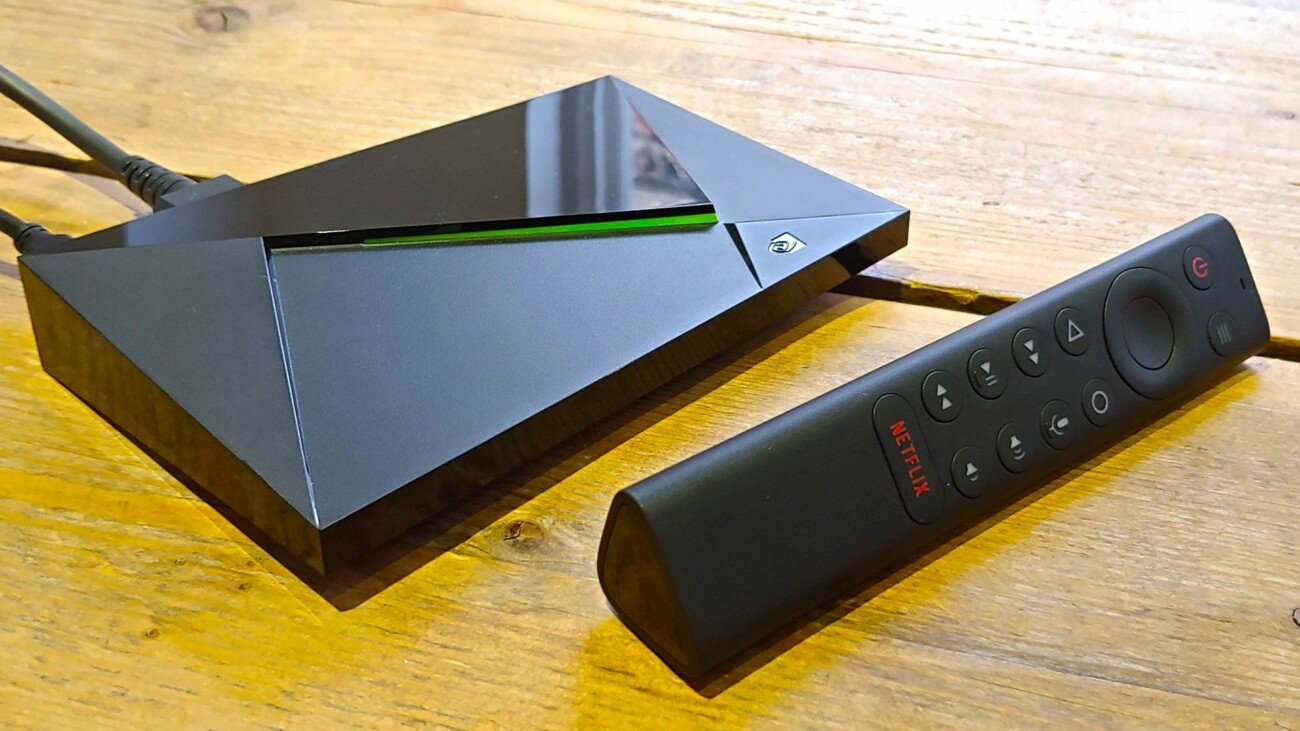
Nvidia Shield TV: How to downgrade back to version 8.2.3. If you are one of those who have suffered with the Multiple problems caused by the move to Android 11 on the Nvidia Shield TV with its firmware 9.0, yesterday we brought you one of the possible solutions: apply the hotfix that has released the brand itself that fixes numerous bugs…but there are many others that remain unsolved. How can we fix it? Going back to the previous version of the firmware, 8.2.3 with this tutorial.
The truth is that we found numerous bugs in firmware 9.0, even after applying the hotfix, such as the deinterlacer is completely broken (essential to enjoy TV broadcasts, IPTV, etc.), reseampling to PCM does not work well (for tvheadend or similar programs), it gives errors when changing Hz in Kodi and multiple other problems.
How to downgrade the Nvidia SHIELD TV: necessary material
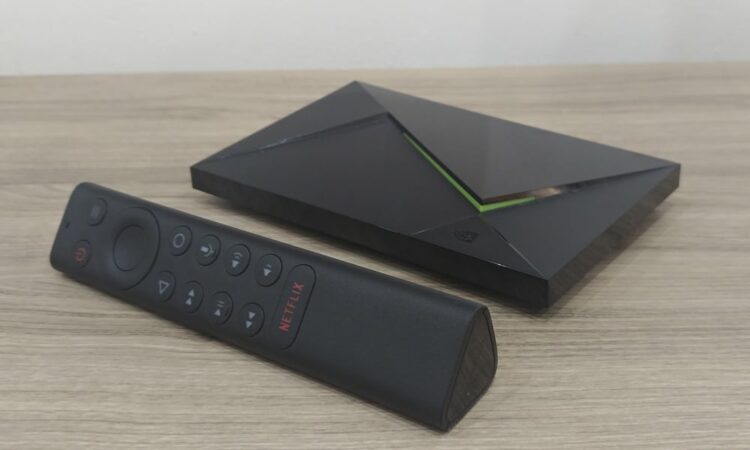
The first comments that this tutorial is focused on the Shield TV Pro of 2019, not being applicable to the normal 2019 version (the one with the shape of a tube). It can also be applied to the 2017 and 2015 versions as long as we download the image for them (only the 2019 version comes in the pack that we attach). To apply the downgrade, we will only need:
Don’t worry, we know that the most complicated thing and the thing that will throw many people back is the virtual machine. Nothing simpler, you can install it following these simple steps in Windows 10. The reason is that in Windows 10, the fastboot drivers for the Shield TV do not work since version W10 1709, from a year and a half ago, so we need to switch to Linux.
Rebooting to Fastboot mode
The first thing we have to do is know that there are two ways to control the Nvidia: when it is in normal mode (with its interface and as we see everything) that would be the ADB mode and then a second way that we don’t see, which is to do installations or downgrades like today’s, which is the fastboot mode. What we have to do is go from the first to the second mode.
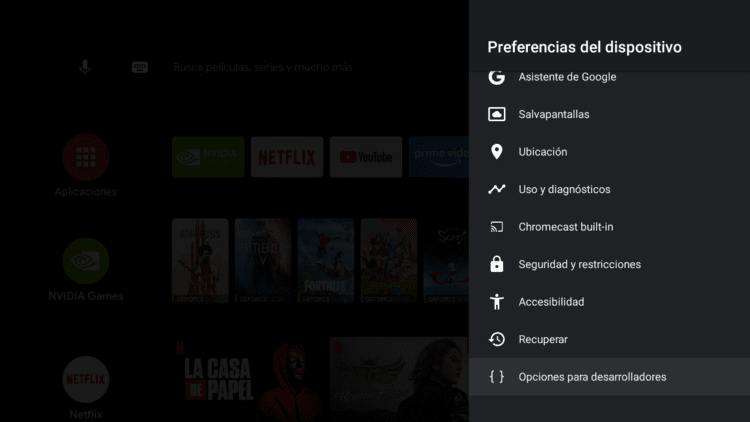
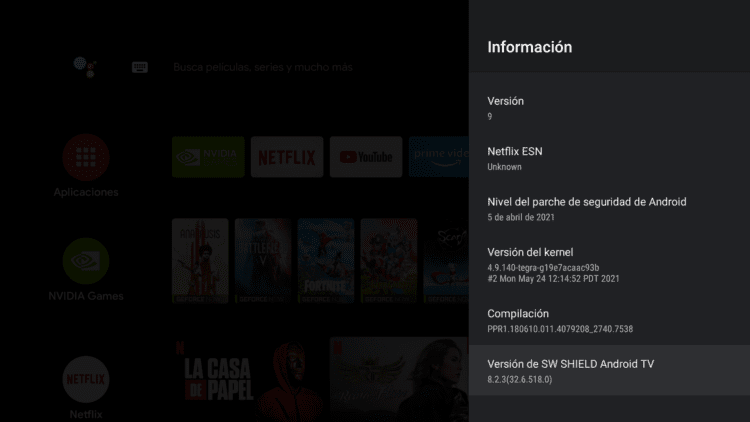
To go to fastboot mode, in our Nvidia we will first go to Settings -> Information -> Compilation and we will press 6 or 7 times on this option until it tells us that we are already developers. When finished, we will go back (to Device Preferences) and we will see that some new options called developer options:
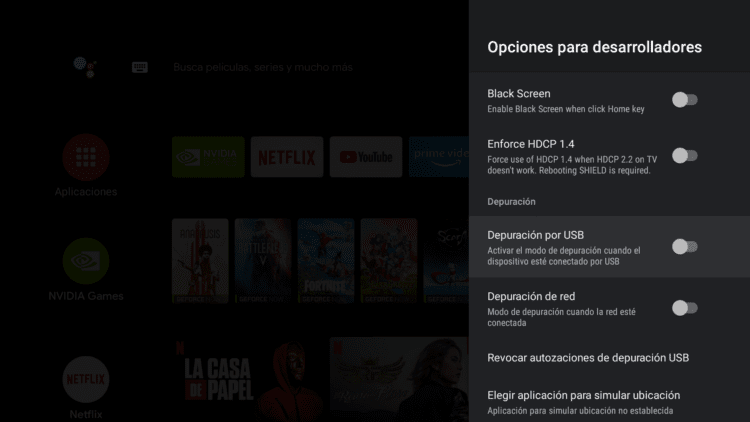
Once inside, we will look for the option of USB debugging and we will activate it:
When activating it, you will be able to see how it warns us that debugging is going to be activated in the USB port farthest from the HDMI, so we will click OK and we will have everything almost ready:

Well, at this point (and not before or after), is when we fire up our Ubuntu virtual machine. Next We will connect the USB keyboard to the port closest to the HDMI and the male-male USB cable to the furthest Nvidia USB of the HDMI port. A point important thing is that we will have to restart the Shield TV (or you can turn it off completely by removing the power cord and putting it back on).
Once done, you will see in the VMWare virtual machine, down in the bar, a series of icons, we will have to give the USB where it says «NVIDIA Tegra Device» and make sure it is checked. If it appears to us as shaded, we will do click on it -> Connect. It should be highlighted in a blacker color and named NVIDIA Tegra Device, like so:
 Perfect, now we will drag the zip file that we downloaded to any folder (we have used the Downloads or Downloads) and we will click on the file -> extract here:
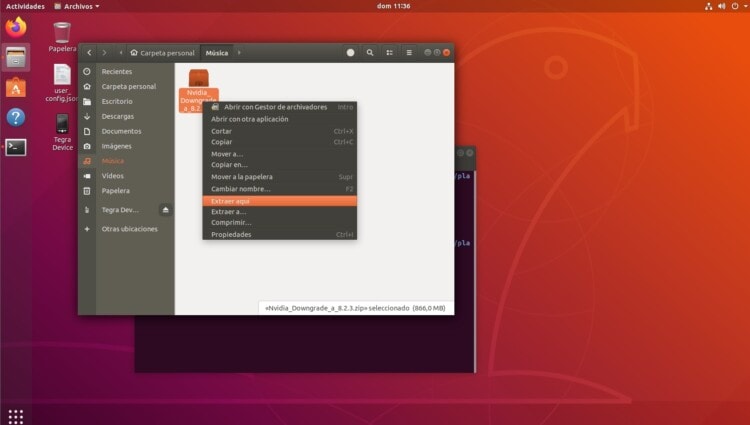
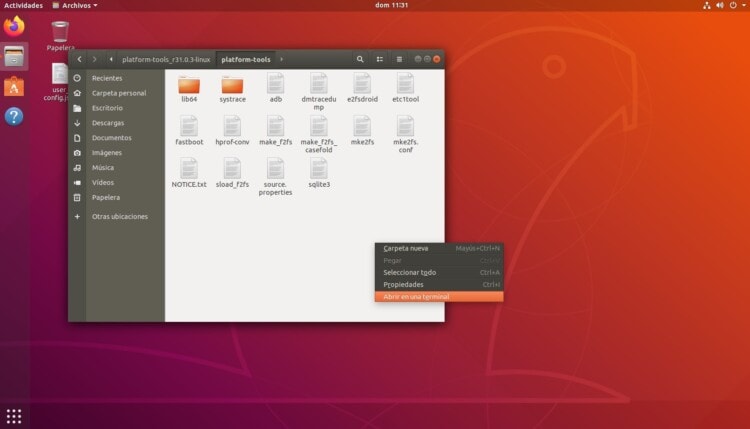
Once done, we will enter the folder platform-tools, we will right click on the blank space and click on Open in a terminal:
Already in the terminal, first of all we will write the following, just in case: sudo apt-get install fastboot (It will then ask us for the password of our Ubuntu, we write it and press enter, although we do not see anything being written).
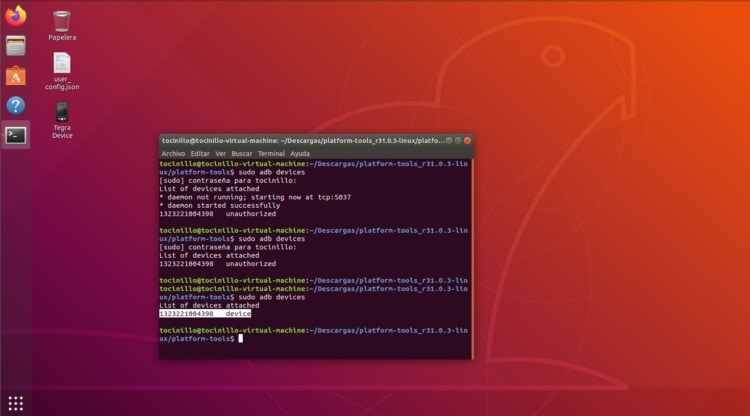
When it has finished installing, we will write the following command (it will then ask us for the password of our Ubuntu, we write it and press enter, although we do not see anything being written), sudo adb devices:

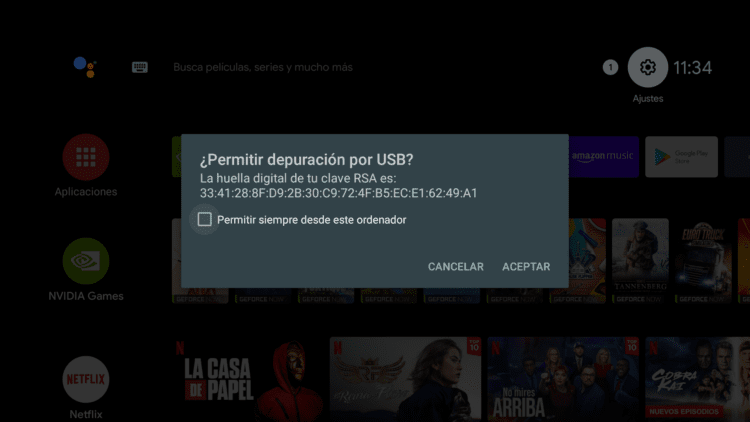
By doing so, the ADB system that we mentioned before will start to work and it will notify us here in the terminal, in addition to the fact that a warning will appear on the Nvidia Shield TV that there is a connection attempt, which logically we will mark the option not to return to ask and we will accept:
Great, now we put the same command back in the terminal sudo adb devices , we should see how a device like attached, instead of unauthorized as he put us before:
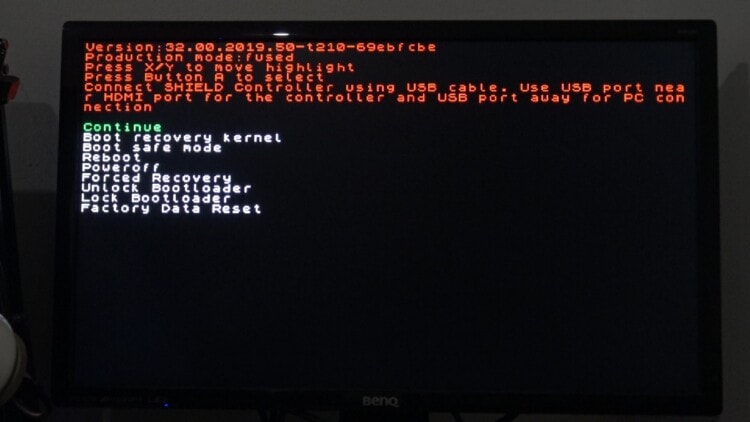
Great, we’ve almost done the hard part. Make sure, again, that you have a USB keyboard plugged into the other USB port on the Nvidia. In the Ubuntu terminal we will now put this command: adb reboot bootloader You will see how Nvidia disconnects and restarts itself until a strange menu appears. Congratulations, we are in fastboot mode:
If we look at the same icon on the virtual machine’s taskbar, now you will see how it comes out as Nvidia Fastboot. Perfect, in the terminal we will put this command: sudo fastboot devices , if everything goes well, it should return that there is a device connected as fastboot, that means everything is going perfectly:

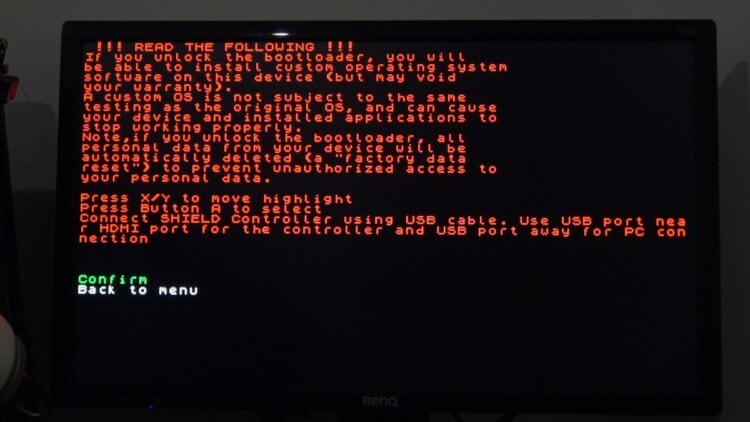
Great, in the terminal we will put the command fastboot oem unlock , you will see how in the Shield a warning appears to us if we are sure, with the keyboard we will press intro where it says Confirm and ready:
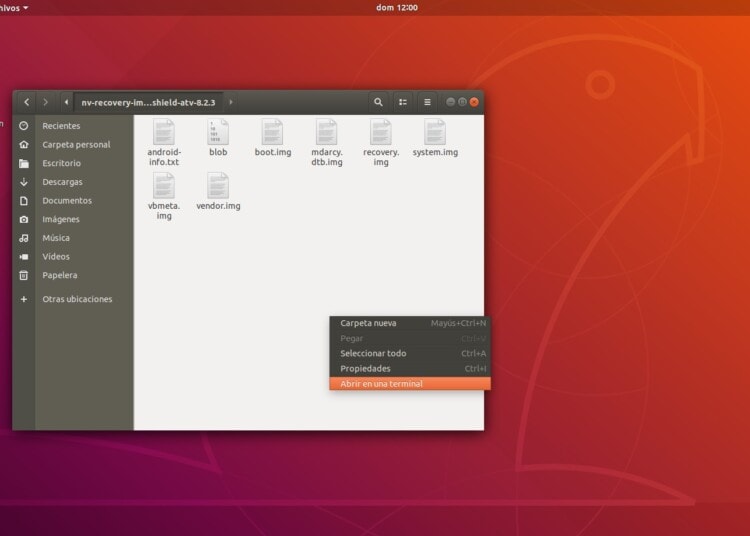
Now with the bootloader open, which is what we have done in the previous step, we will close the terminal in Ubuntu and go to the folder nv-recovery-image-shield-2019-pro-atv-8.2.3 once inside it, we will click on the blank space with the right click -> Open in a terminal:
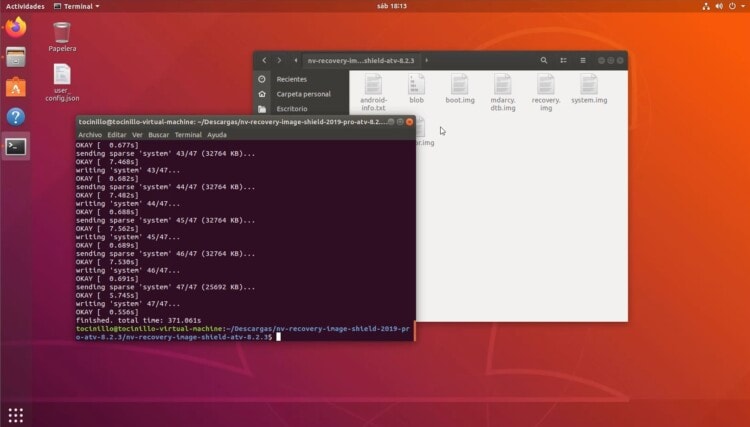
And already in the terminal, we will be putting the following commands (one by one). After each command, we will press enter (it will surely ask us for the password of our Ubuntu) and wait for it to finish. The commands are the following:
- fastboot flash staging blob
- fastboot flash boot boot.img
- fastboot flash recovery recovery.img
- fastboot flash system system.img
- fastboot flash vendor vendor.img
- fastboot flash dtb mdarcy.dtb.img
- fastboot flash vbmeta vbmeta.img
Some of them can take up to 10 minutes, do not worry that after finishing each one, it will notify you and return us to the terminal to enter the next one:
When we finish entering the aforementioned commands, we will put the latter: fastboot oem lock , which will make the Shield ask us again if we are sure. With the keyboard we will press enter where it says Confirm and ready:
When finished, we will put to finish the last command: fastboot reboot which will cause the Shield to restart and that’s it, We will have already downgraded! We can now disconnect everything, follow the steps of the wizard and we will arrive at the Shield TV interface with firmware 8.2.3:
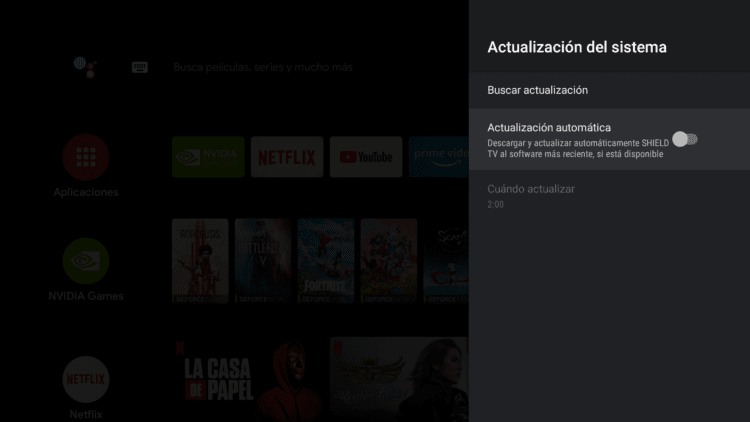
We should remove automatic updates, for this we will go to Settings -> Device Preferences > Information -> System update and uncheck the option Automatic update:
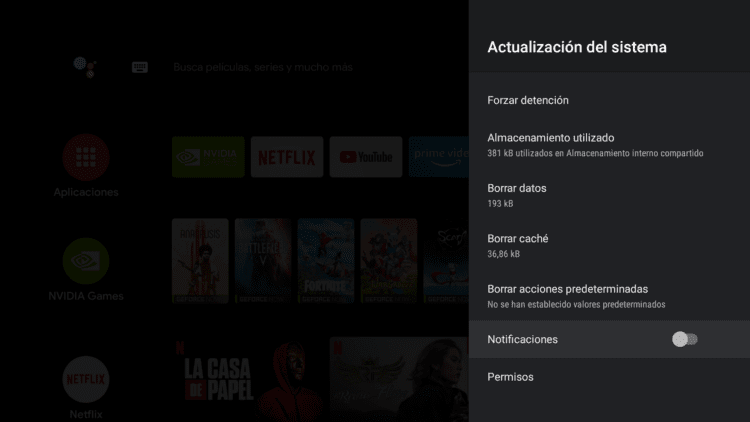
We will also go to Settings -> Apps -> See all apps -> Show system apps -> System update and there we will click on force stop and uncheck the option Notifications. This way we will make sure that the Shield TV is never updated again without our permission and thus avoid these unpleasant scares: