No software is exempt from problems no matter how good it is and Photoshop is not going to be an exception. That is why sometimes we can find the error “Not a PNG file”, preventing uploading certain files to our workspace.
Why won’t Photoshop open PNG files?
The appearance of this error message can cause us serious damage when it comes to working, and we probably do not know why it happens to us. There really is no single cause why it can happen, since the reasons can be varied. Some of the most common are the following:
- The software is outdatedNote: Using an outdated version of Photoshop can be a cause of the “Not a PNG file” error, so we need to update it.
- wrong file type: It is also possible that the file type is not correct and we are trying to open a PNG file that is actually a JPG.
- Preferences are not removed: Another possible cause is that the error appears because the preferences of the program are not deleted when we close the software for the last time.
- Use the graphics processor: sometimes this functionality can create problems, especially if we use a less powerful computer.
- Incorrect compression: in case the compression of the file has not been completed correctly, it can cause an error when loading it in Photoshop.
The truth is that regardless of the cause that has caused it, it can be a disorder when it comes to working correctly, causing us more than one headache, so the important thing is to find the right way to solve it in the most efficient way. fast possible.
Solve the problem
Next, we are going to see different ways that we can use to end this annoying problem that prevents Photoshop from opening this type of file correctly.
Update Photoshop
This editor is constantly updated by Adobe as they usually offer good support and respond quickly to general problems with the program. In this way, with the update it not only incorporates new functions and offers better compatibility, but also takes advantage of fix any errors that may arise when using it. That is why we should always try to have it updated to the latest version available that can help us fix this type of problem.
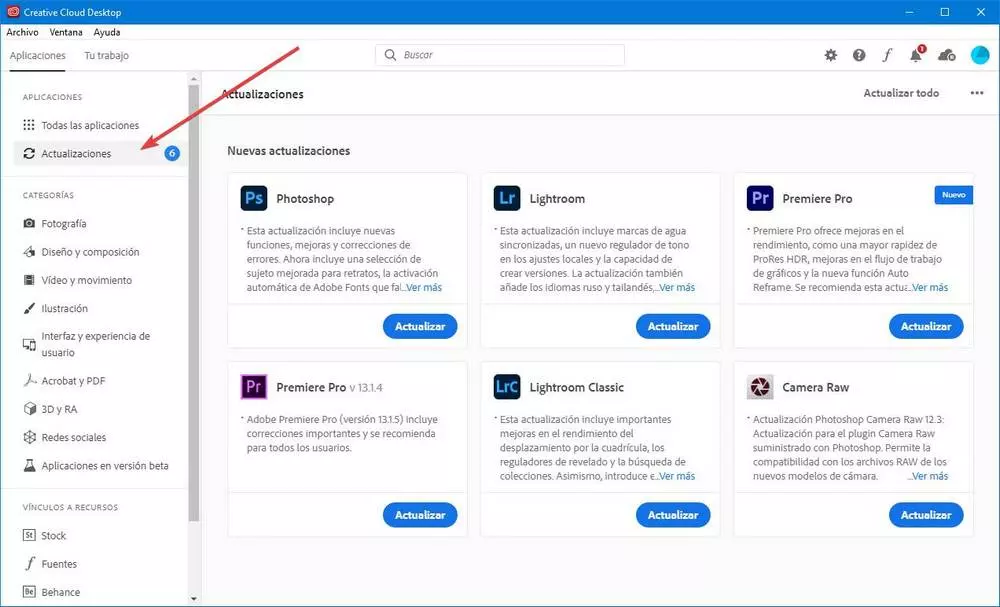
To proceed with the update, simply start the program and click on the “Help” tab. Later we click on “Updates” to access the Adobe Creative Cloud application, from where we can proceed to download it.
Alternatively, we can close the application and directly open the Creative Cloud application that we will surely have installed. From here in the sidebar, click on the “All applications” section and check if there is a new update. If so, click on “Update”. Once finished, we check that the problem has been resolved satisfactorily.
Re-save the image as a PNG
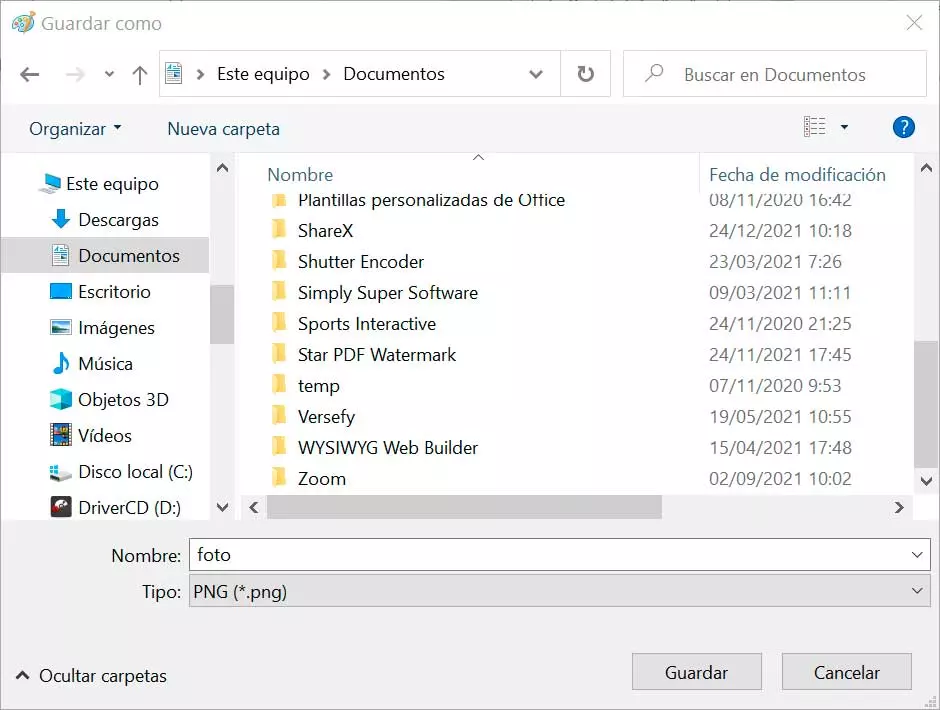
This problem can occur because the file we are trying to open is located damaged or corrupt, so a simple way to solve it is to open it with Paint. To start it, just type its name in the Start menu search box and select it. Next, we open the damaged image and save it as a new PNG file using the “Save As” option. This way, Paint will save it as a new file, running any errors it might contain.
Once finished we try to open the image again with Photoshop to verify if the problem is solved.
Change the file extension
There are times when we can download a file that contains a PNG extension when the extension is actually incorrect, such as, for example, that it really is a JPG file. This can cause an error to appear when loading the image over the Photoshop workspace.
This is something that we can easily check, simply by opening the image with Notepad. If when opening it we see that the file begins with «I already” this indicates that the image is actually a JPG file. In case it shows “‰PNG«, then yes we will be before a PNG image.
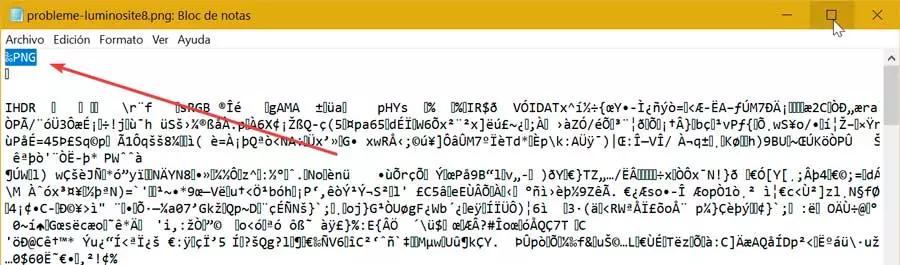
In the event that we are really facing a JPG file, we must change its format. To do this, press the “Windows + E” key combination to access File Explorer. Then we click on the “View” tab and make sure that the “File name extensions” box is checked. Finally, we change the file extension of the PNG image to JPG by renaming it.
Disable graphics processor
The graphics processor is a tool that Photoshop includes to obtain performance improvements in current computers, allowing the program to run more smoothly. However, it is not perfect and keeping it enabled can cause some problems, especially on older computers that can cause these types of errors.
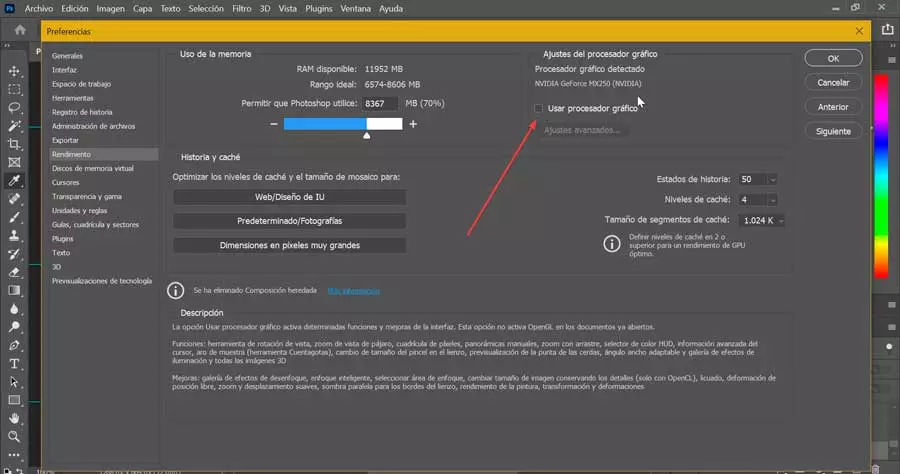
In this case we can try to disable it to see if it solves the annoying error. This is something that we must do by opening the application and clicking on the Edit tab that we find in the toolbar. Next we click on “Performance” which will open a new window. Here, we must uncheck the “Use graphics processor” box and click “OK”.
Now we only have to restart the application and drag and drop the problematic image on the program’s interface to verify if the problem has been resolved. Later, we can re-enable this feature again in case we need to perform tasks that require it.
Reset preferences
We may also choose to reset program preferences. By using this operation we can correct different problems that occur in the Adobe editing program randomly. To do this, simply start the application and click on the Edit tab. Then we select the “Preferences” option and click on the “General” section. Here, we must click on the button “Reset preferences on exit”.

Once this is done we close Photoshop and restart the computer. Later we reopen the editor and try to access the image that was giving us problems to check if the error has definitely been resolved.