What can you do with iMovie?
As we have mentioned before, iMovie is the video editor that Apple makes available to all its users, yes, to all, since everyone who buys a device from the Cupertino company has the possibility of use this application completely free of charge. It is a video editor that has enough tools to be able to create authentic works of art, that is, without being too complex, seeking that users who have basic needs and all those who want to learn how to edit videos have a tool that perfectly suits your needs.
Therefore, the options you have to be able to adapt the image of your video to your liking are shorter than in programs like Final Cut Pro, which is Apple’s own professional video editor. At the end of the day, we repeat again, iMovie is a tool designed for a new audience and / or with basic needs. However, you have different very interesting options and with which you can play on different occasions to create very attractive videos. The options we are talking about are the following.
- Adjust.
- Trim to fill.
- Ken burns
- Flip to the left.
- Flip right.
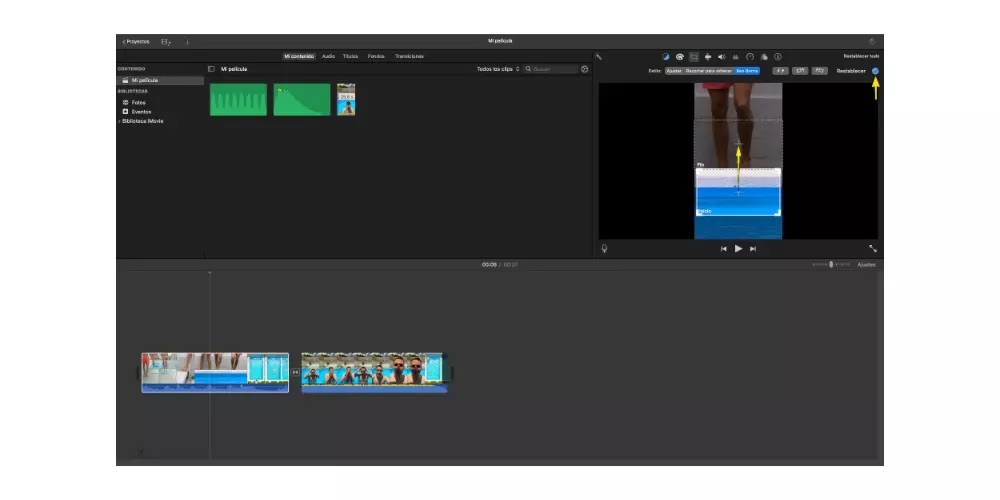
We will explain each and every one of these options to you in detail below, but first we want to tell you what is the way you have to access all these options, which as you will be able to verify is really easy and intuitive, two characteristics that are undoubtedly the hallmark of this application. If you want to access these functions, you just have to follow the following steps.
- Choose on the timeline the clip on which you want to make the modification.
- Stand in the toolbar on the right side of the screen.
- click on the crop icon, the third from the left.

- Select option you want to carry out.
- When you have the result you were looking for, click on the tic located on the right side of the screen.

Adjust the image
The first option that iMovie has is to adjust the image in such a way that see the whole clip in the video. This on some occasions and depending on how you have recorded the clip you can make black stripes on the sides. For example, if you record the clip in vertical format, you will be able to see how on the sides of the video you have two black stripes.
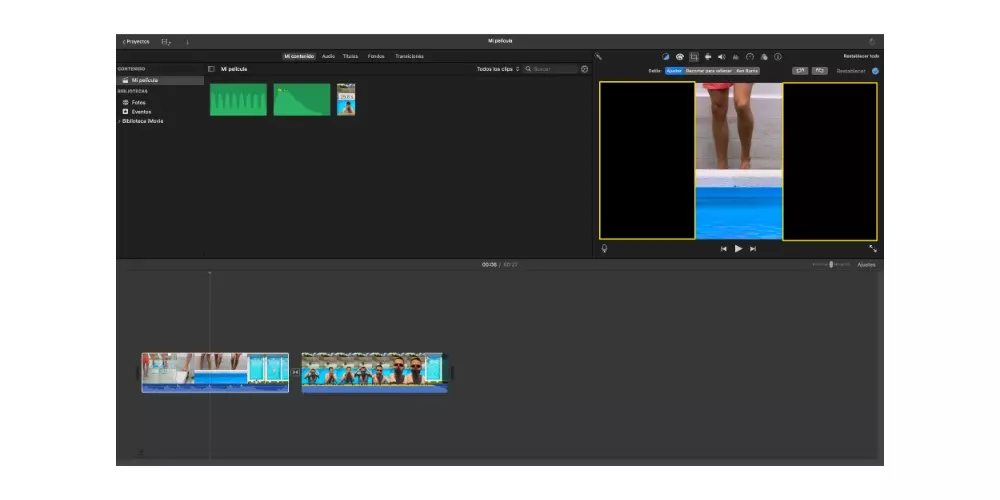
This is the option that by default is applied whenever you include a clip within the timeline. Nevertheless, there are ways through which you can make those stripes disappear, but we’ll talk about them later in this post. In short, this option will allow you to not have any part of the video you have recorded that disappears because it adapts to the dimensions of the video.
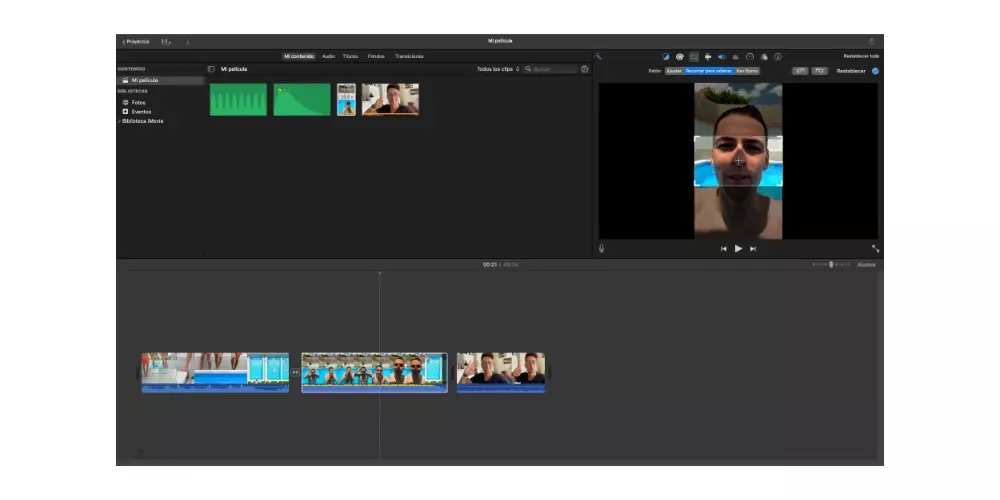
Crop to fill
As we mentioned before, this option is one of the most successful if you don’t want black stripes to appear on the sides of your video. As its name suggests, “Crop to fill”, what it does is crop the image to fit the dimensions of the video and so the black stripes that we were talking about a few lines above do not appear at any time.
Depending on the format in which you have recorded the clip, you will have to choose a smaller or larger part of it so that it adapts. If the clip you are using is in vertical format, you will have to give up a considerable part of the video so that it adapts to the horizontal format, however, if the clip is recorded horizontally, you will only have to use this function if you want to trim the video. picture.
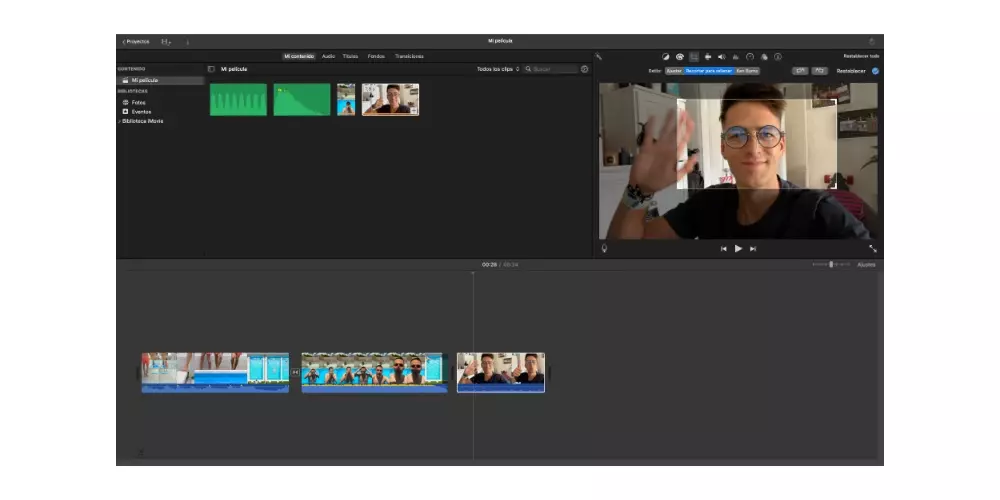
Use the Ken Burns effect
One of the most interesting functions that iMovie has to be able to generate a sensation of movement within the same clip without it being recorded in motion is the Ken Burns effect. With this alternative you have the possibility of moving within the same clip, that is, you have to bear in mind that you will have to give up different parts of the image at times.
The Ken Burns effect consists of passing during the duration of the clip from a point A to a point B, generating the feeling that the video has actually been recorded in motion. To do this in iMovie you just have to select which part of the clip you want to be the beginning of it and which is the end part. Once this is done you will be able to see how during the time the clip lasts the image goes from the starting point to the ending point generating that sensation of movement so attractive.

Flip the picture
We come to the last of the alternatives that iMovie has to be able to modify the image of the video and it is the option to flip the clip. This consists of rotate the whole video that you have recorded to the right or to the left depending on your needs. This is another of the ways you have to eliminate the black stripes that appear if you have recorded your video in vertical format.
Really this is a very useful option for all users who want to create videos in portrait format with iMovie as it is the only way you can make vertically recorded clips not appear with black stripes on the sides. However, if you want to make a vertical video, what we recommend is that once you have edited all the video, turn all the clips to the left or right, export the project, open it in QuickTime and then flip it again to the left, then you will have your video vertically.

Tips for cropping an image from a video
To finish this post we want to give you a series of tips that you have to take into account whenever you want to trim a video, either with iMovie or with any other program. If you want to obtain an attractive result and for your video to be seen with sufficient quality, you have to take into account the resolution that you have used or are going to use to record said clip.
Our recommendation is that you always try to use the maximum resolution provided by your mobile device or camera. Ideally, the clip you are going to trim is recorded in 4K, in this way it will not be possible to appreciate later, and after cropping, that you have zoomed in on the image. If you do this process after having recorded at a lower resolution, it will surely be seen with a worse quality, therefore you have to take it into account.
Another tip that you usually have to keep in mind when recording is that the image is as stabilized as possible. Again, when cropping the image and zooming it in, the movements of the image will be much more evident and if the image is not well stabilized the result will not be pleasant to the viewer.