We can also try clean your cache. This is nothing more than a collection of data that Kodi previously accessed and saved. In case this memory is full it can mean slow access to your most important files. In order to delete it, we must use add-ons such as Indigo or Ares Wizard since Kodi does not have its own tool for this
Likewise, it is possible to speed it up by means of a hardware upgrade of our PC. Although the application is optimized to be used on all types of devices, the experience cannot be the same. Nothing replaces a powerful processor, a larger amount of RAM or installation on an SSD instead of an HDD.
Optimize your performance
One of the problems that we can find when using this software is its performance problems and high consumption of resources, especially palpable in old or less powerful computers.
One of the actions that we can carry out in this case is to limit the use of plugins or add-ons, since, despite the fact that they provide the program with greater functionalities, if we abuse them they can weigh down its performance. It is also convenient prevent playback of 4K content. These videos require more processing and CPU resources, so they can be played with cuts and lag, preventing us from enjoying a good experience.
It is also recommended do without the skins from third parties with which to customize the player. It is true that its appearance is not to the liking of many users, so through it we seek to customize the appearance of the program. This also brings with it a greater number of resources, so it is most recommended in cases of performance problems that we keep the one that comes by default.
Last but not least, it is convenient always keep it updated. We must not forget that it is an open source project, so its developers do not stop improving the software and with it everything related to its optimization and performance.
How to improve video playback
Next, we are going to see some adjustments that we can make within the media center to improve and optimize your video player.
Custom advance time
While playing video with Kodi we may need make big jumps in the timeline, both to move forward and backward in its content. To do this, all you have to do is use the numeric keyboard of your computer and click on the up and down arrows, which will allow you to move forward or backward, respectively. These jumps in time, by default, are made in ten minute increments.
This amount of time can be both insufficient and excessive, so the program itself offers us the possibility that we can modify it to our liking from its own interface.
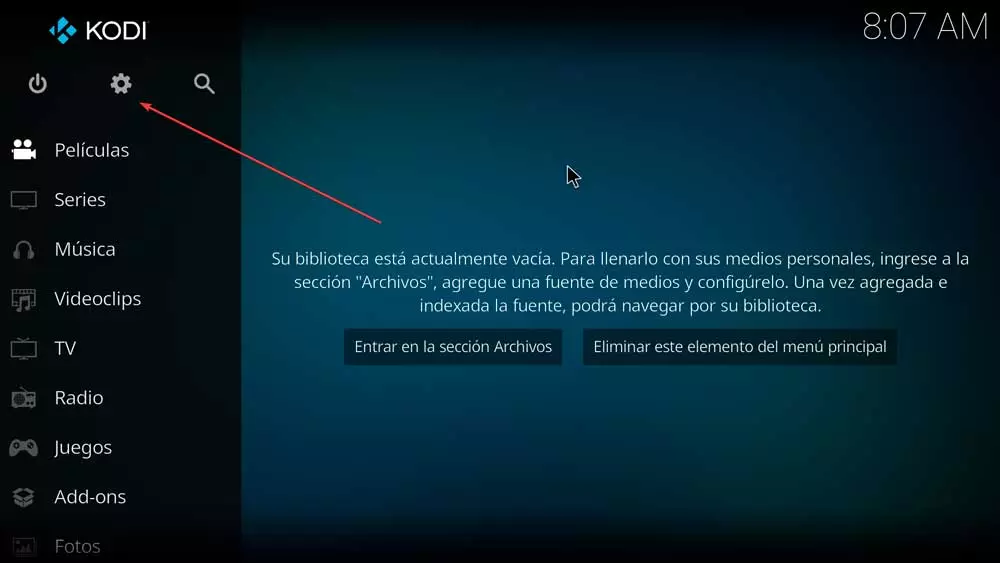
To do this, it will be necessary to click on the “Configuration” button located in the upper left part and that we will recognize by having the shape of a gear.
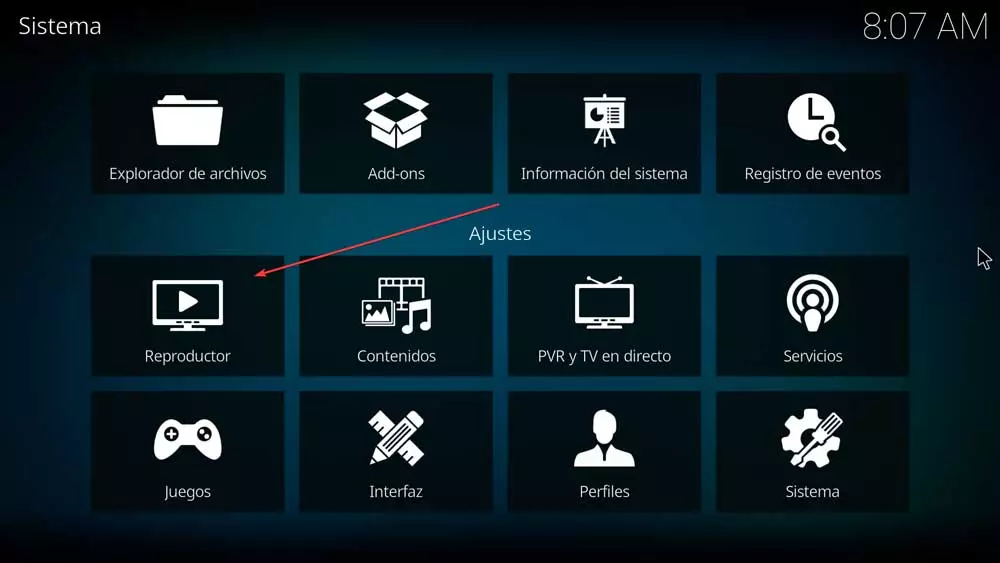
In the new screen that appears, we must click on the “Player” section.
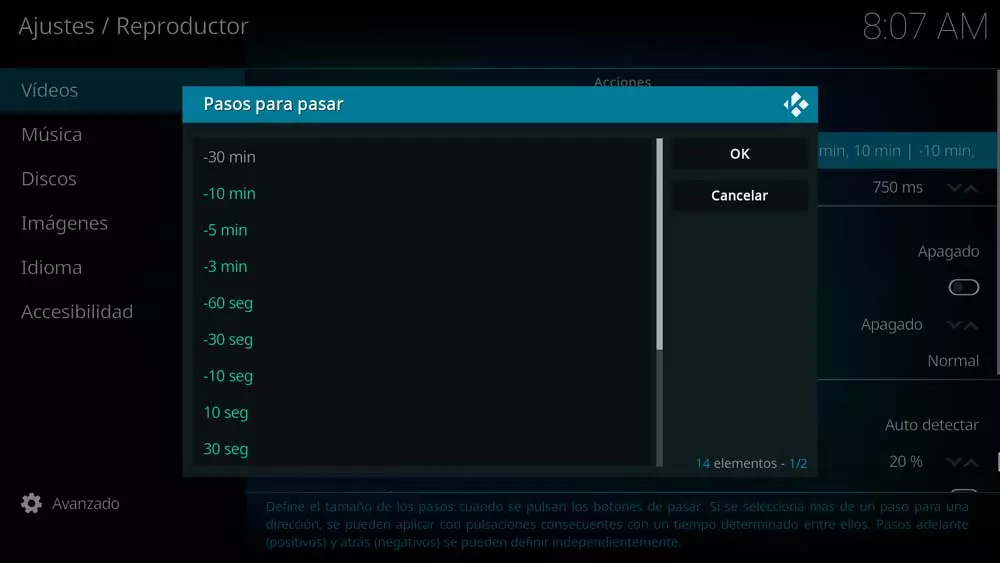
This will show us a new screen with different options in the left column. Among them, the one that interests us now is the “Videos” section. Here, within the “Actions” section that we find on the right side, we find the option to “Steps to Pass”, on which we will click.
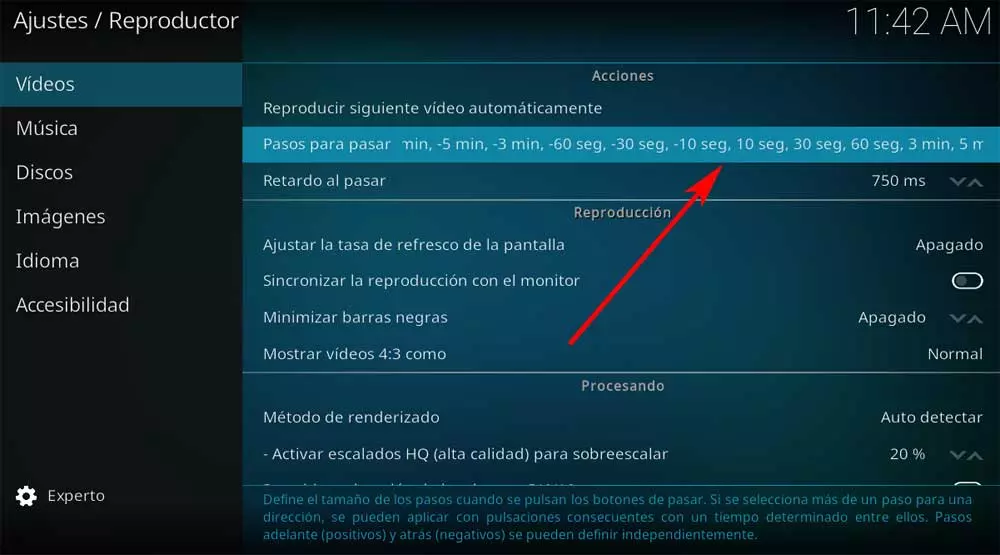
Now a new pop-up window opens, from which we can set and customize the steps when the pass buttons are pressed. Here we find intervals of -30 min, -10 min, -5 min, -3 min, – 60 sec, -30 sec, -10 sec, 10 sec, 30 sec, 3 min, 5 min, 10 min and 30 min. The negative signs are for going back and the positive signs are for going forward, which can be defined independently. If we select more than one step for a direction, it can be applied with consequent keystrokes with a certain time between them.
Set subtitles
On many occasions the use of subtitles can be very important when playing videos. Whether for topics related to the study of languages or simply to understand their content in case they are in another language, the truth is that it is an interesting option to allow us to understand the content that we are seeing.
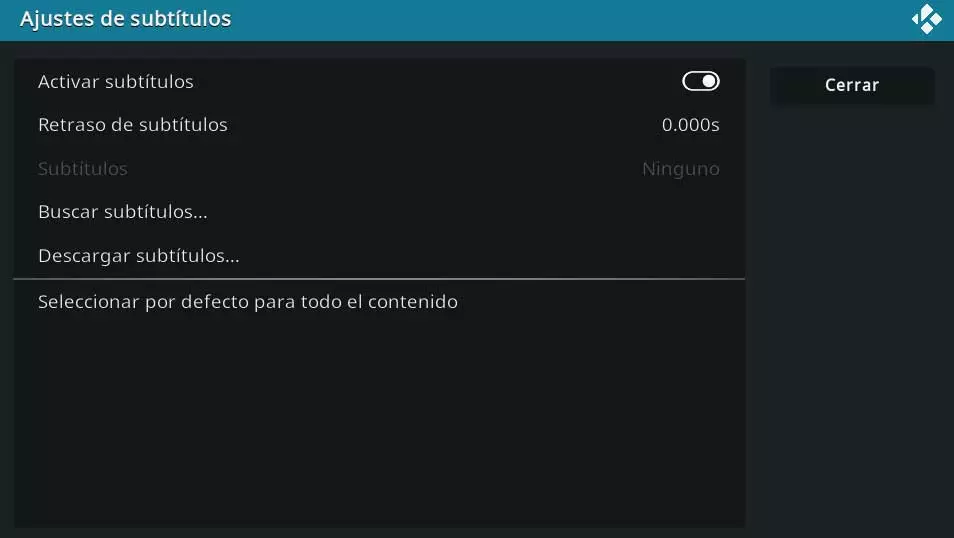
The best time to make these adjustments is at the very moment we start playback, in order to be able to adapt the texts to the image that we have on the screen. To do this, all you have to do is start playing a video and then click on the dialog box that we find in the lower right corner of the player so that the subtitle window appears.
In the new pop-up window, click on the “Activate subtitles” button in case it is already incorporated. Also, as happens with moving the video forward or backward, it is possible to specify its delay, in case it is not configured correctly. If the video does not incorporate any subtitle, we will have the possibility to search and download it directly from the Internet.
Add bookmarks to video
There are times when we cannot finish the complete playback of a video, so it stays halfway until the next time we can resume it. This can be a hassle if we have to start at the beginning and go forward until we remember where we left off.
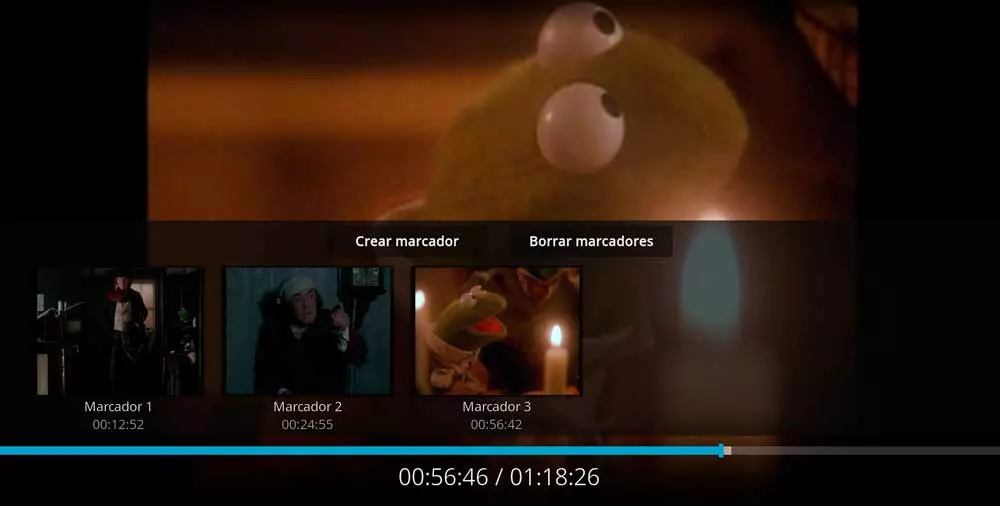
To avoid this, Kodi allows us to add bookmarks that will allow us point out certain scenes, both to remember where we had left off, and to remember those that we are interested in seeing again later.
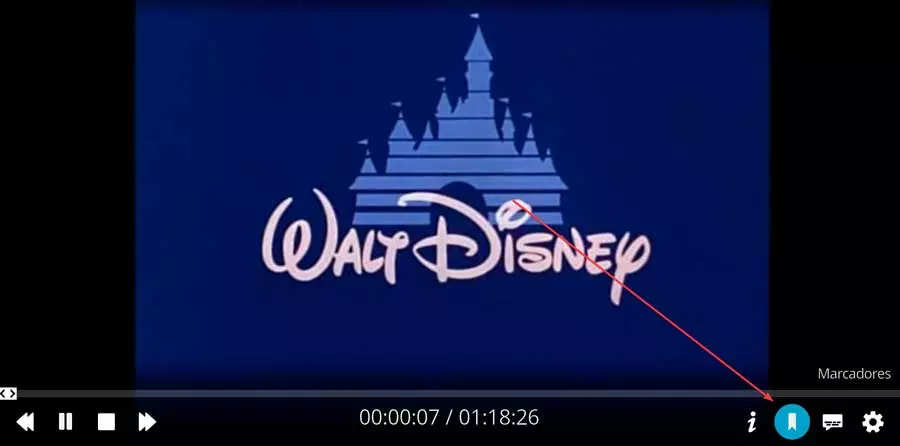
This is something that we can do by clicking on the “Bookmarks” button that we find in the lower right during video playback. This will allow us to create the markup in each scene that we need. We can also delete any of them later or use it as a direct access to resume at any time.
Eliminate the JUDDER effect
One of the problems we have with the playback of certain HD video content is the presence of certain jerks or lag, popularly known as the JUDDER effect. This causes a certain annoying sensation with sudden changes of camera that prevent its correct visualization. Usually this issue is due to FPS lag. This occurs especially due to the difference in FPS in which the content was recorded and the Hertz that our screen shows.
In order to fix it, we can make a simple adjustment in Kodi. To do this, click on the “Settings” button, represented by a gear-shaped icon. Later we click on the “Player” button, and within the “Playback” section, we are going to “Adjust screen refresh rate” automatically when you start viewing by selecting.
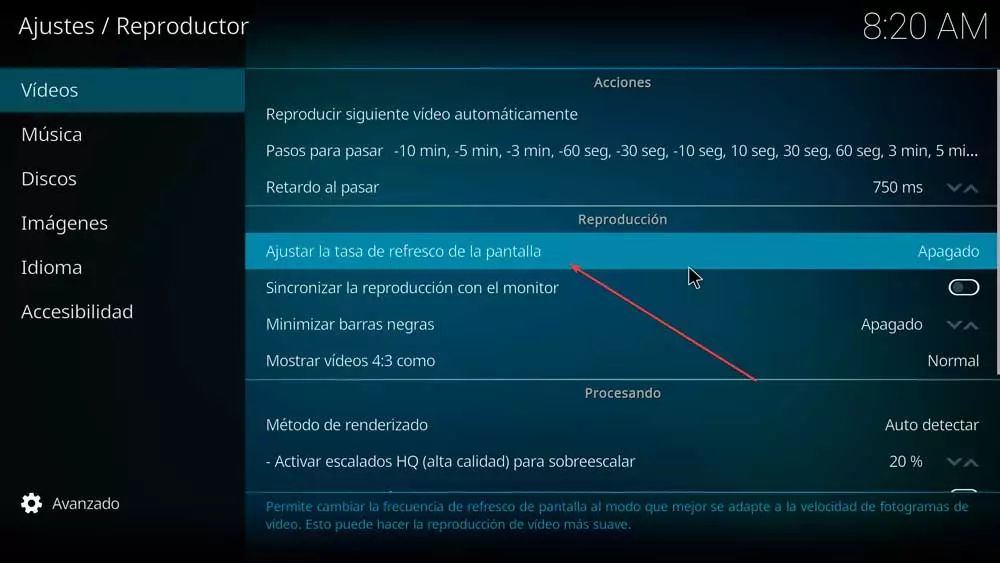
Click on it and in the new window select the option “When starting / stopping”.
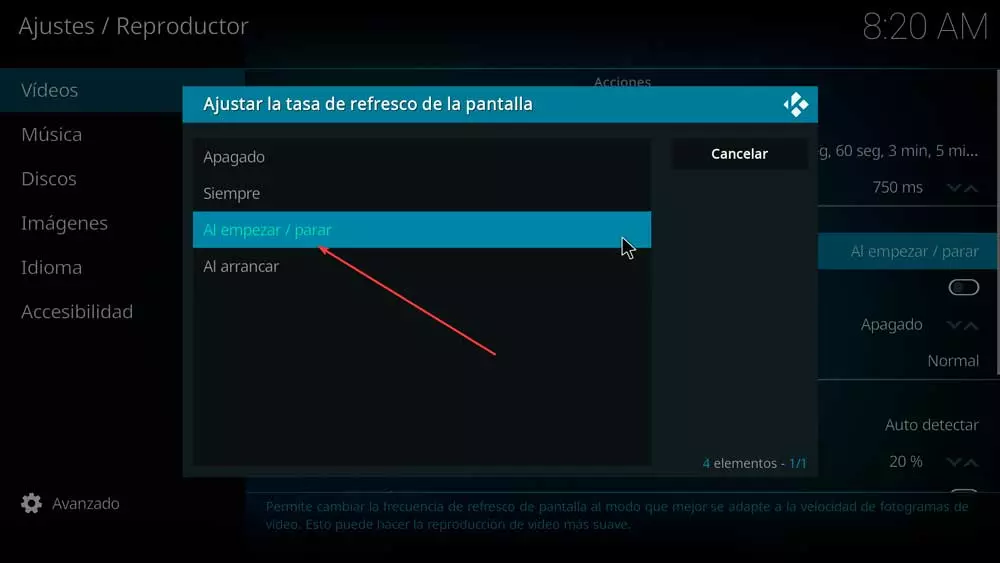
Once configured, we can play the content again to check that it is now playing correctly.
Extensions to improve its use
To improve the use of this fantastic multimedia player we can also make use of extensions that add functionalities that can be very useful to us.
Ares-Wizard
It is a Toolbox with which to get a better experience in the use of Kodi. With it we can clean the cache, delete packages and temporary files for smoother playback. It also allows you to back up and delete thumbnail images. In this way, it makes the adjustments from the program itself to adapt its operation in a more optimized way to the computer from which we are running it.
Indigo
It is one of the maintenance tools of most used Kodi. With it we can delete thumbnails, packages, lock logs, clear the cache, delete plugins. It also allows you to force plugins to update, install custom keymaps and other actions to improve the performance of the application and make it run smoother and more fluidly.
Clean your Kodi
It is a fundamental complement that will help us to clean all unnecessary files from Kodi. In this way, it provides the program with greater fluidity and better performance. It has functions to clean cache and ROM, delete images, remove temporary files, remove packages and dependencies. Its use can be essential if we have a performance problem with the application, since it has everything necessary to optimize it and make the most of it.