It is quite probable that many of you have an account in the Google mail manager, gmail, for years. We must bear in mind that here the storage space for our messages and their attachments is limited, so we must be careful not to exceed it.
Both on a personal and more professional level, we use our Gmail email account to send and receive all kinds of content. Users from all over the world have been using the same account for a good number of years, since it first saw the light of day back in 2004, and they hope to continue using it for much longer. However, as we mentioned before, it is important to know that the space available for use our personal account of mail is limited.
At first and for free we have a total of 15 gigabytes, which refer to all the content that we use with our Google account, not just in the mail. Perhaps at first, when we originally created this account, we thought that we were never going to use up all that space on the firm’s servers. But over the years we have seen how it has been reduced. So much so that on certain occasions we can find ourselves faced with the problem that we no longer have anything free.
We always have the possibility to do a cleanup by deleting messages or pay the search giant to offer us more space on your servers. Without a doubt, both solutions are not to the taste of almost anyone.
Keep using Gmail, even if you don’t have space left
That is precisely why we are going to talk about a useful trick below to be able to continue using our Gmail account, even if we do not have space, and for free. This is something we will achieve by creating a second Google account. Likewise, we will have to carry out several configurations in them to achieve the objective we are looking for. This is what we will tell you in detail below.
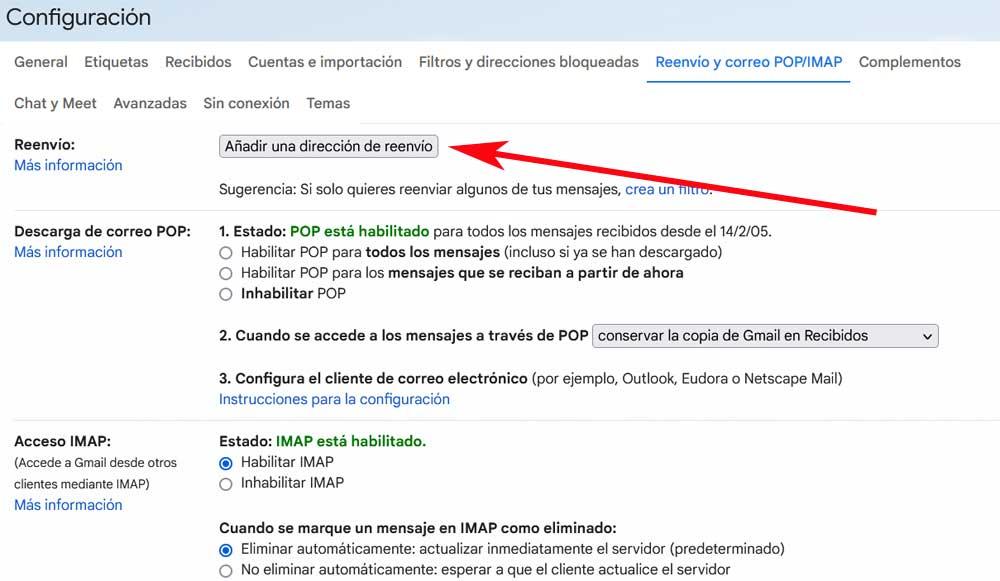
The first thing we are going to do is create the second Google account, something that we can do completely free of charge. We achieve this through this official website of Google itself. Next, we access the configuration of the original gmail account through the gear-shaped icon and click on See all settings. Here we are in the tab that says Forwarding and POP/IMAP mail.
Now click on Add a forwarding address where we type the address of the new account created before. We will receive an email at this second email address to confirm the process. From that moment on, the emails we receive in the original account will be automatically forwarded to the new one. In this way we avoid space problems and we can continue using Gmail on a regular basis.
But that’s not all we’re going to configure here. Now we are going to access the configuration window of the new account, just like we did before with the original. In this case we are in the Accounts and import tab.
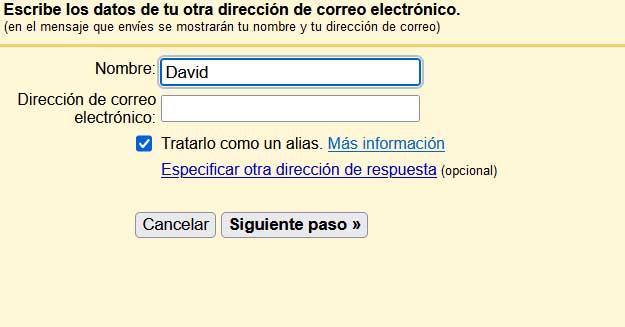
In this window, in the Send as section, click on Add another email address. We no longer have to type the original account. With this we achieve that, when sending messages from here, the recipients will see the original account as if it had been sent from it. And everything is ready, we will no longer have space problems.