Enable Preview Pane
In File Explorer, we can enable a Preview Pane that is displayed on the right side of the window. As its name suggests, we can use it to preview the content of certain types of files. For example, if we select an image file in the File Explorer, a preview of it appears; if we select a text file, we can preview its content.
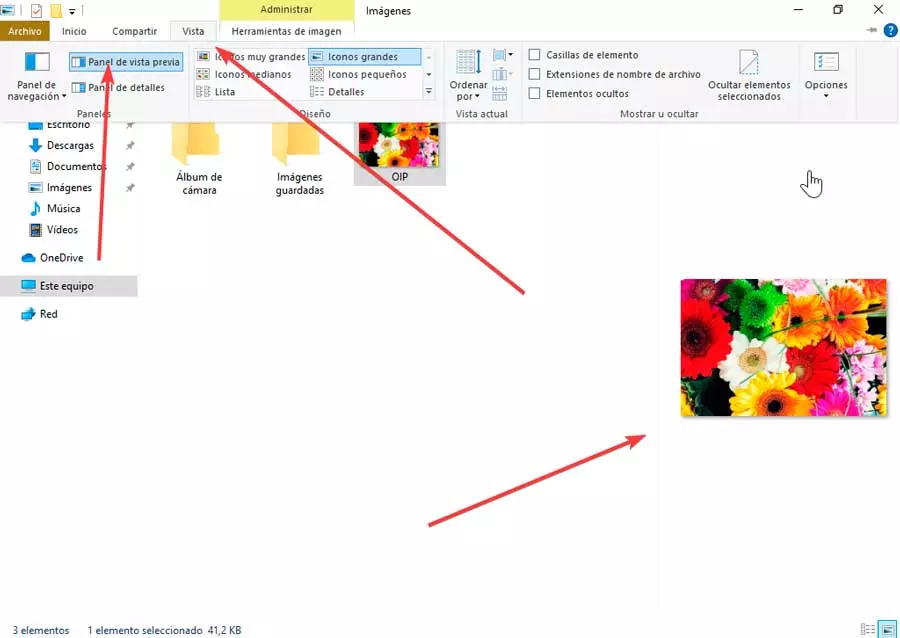
If we want to see a preview of any file from the Windows 10 File Explorer, we must click on the menu option “View” which we find at the top. Within the section of «Panels»we mark the panel option “Preview”.
This will automatically make it possible for us to see a new panel on the right side of the Windows 10 Explorer window that allows us to see a preview of the file that we have selected. We can select multiple files one by one and preview each one whether it is text, images or videos. Similarly, we can also choose to display this panel more quickly using the keyboard shortcut “Alt + P”.
To be able to deactivate it, simply perform the previous steps again and uncheck the Preview Panel option or press the keyboard shortcut “Alt + P” again.
Enable Details Panel
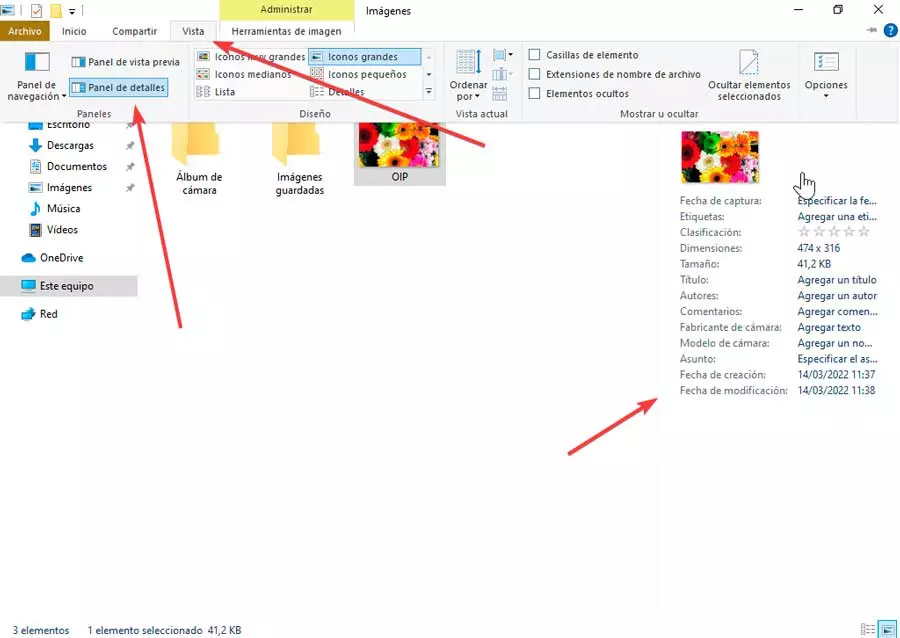
In File Explorer, you can enable a Details Panel that is displayed on the right side of the File Explorer window. As the name implies, we can use the Details Panel to find more information about each file, such as its size, the date it was created, and the date it was last modified. The data fields displayed in this panel vary from file to file. For some files, like images, we will be able to see a lot of data; while for other files, such as PDF files, we will see less data.
As with the preview, we can show it by opening the File Explorer, then clicking on the “View» and then in “Panel”. Here, we check the option of “Details pane”. We can also do it with the key combination «Alt + Shift + P».
When we no longer need it and want to deactivate it, simply follow the steps above and uncheck the Preview Panel option, or alternatively, press the keyboard shortcut “Alt + Shift + P” again.
On Windows 11
In Microsoft’s new operating system, showing or hiding the Preview Pane or Details Pane has a process similar to that of Windows 10, although due to its redesign, it changes the steps a bit, although they are still simple.
Activate Preview Pane
The Preview Pane in Windows 11 File Explorer allows us to see the preview of the content of the selected file without having to open it. It is important that both the Preview Panel and the Details Panel are mutually exclusive, so when we enable one, the other will be hidden.
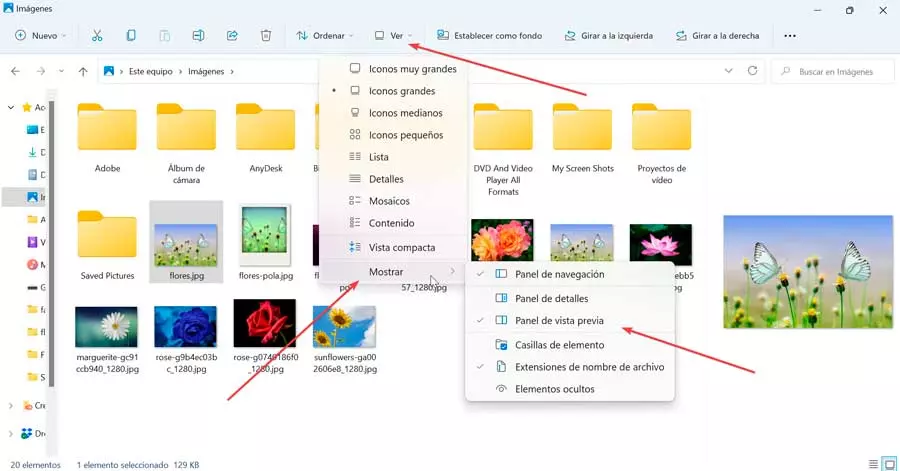
We can show or hide the Preview Pane in Windows 11 File Explorer by using the command bar. To do this, once the browser is open, click on the “Watch”. This will display a list, where we must go to the bottom and select the option “Show”. This will display a side menu to the right where we select the “Preview Pane”. Similarly, we can also choose to display this panel more quickly using the keyboard shortcut “Alt + P”. Now, whenever we select a file, we should see the preview of the file in the Preview Pane of File Explorer.
In order to deactivate it, we simply have to perform the previous steps again and uncheck the Preview Panel option or press the keyboard shortcut Alt + P again.
Enable Details Panel
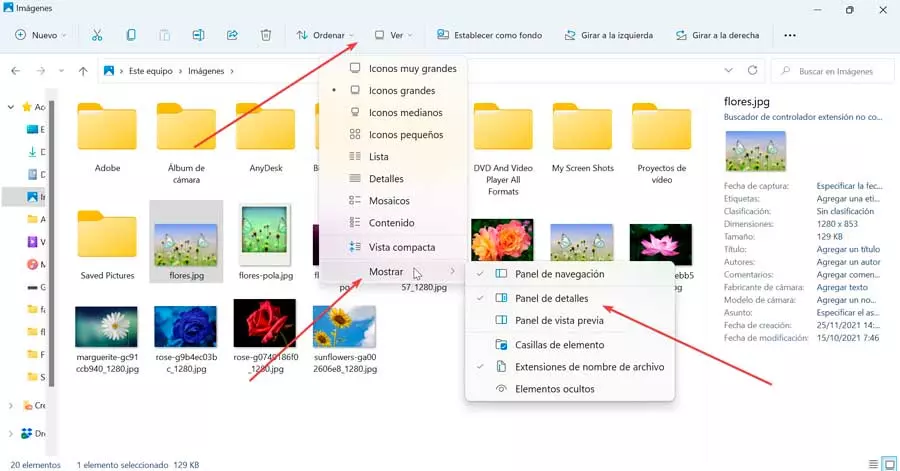
The Windows 11 Explorer Details Panel also allows us to know all kinds of information about files such as their size, the date it was created, and the date it was last modified. To activate it, just click on the tab “Watch” which will display a menu. Here we click on the section “Show” which is at the bottom. This will open a side menu to the right where we must click on “Details pane”. We also have a keyboard shortcut such as “Alt + Shift + P”.
Whenever we want to deactivate it, simply follow the steps mentioned above and uncheck the Preview Panel option, or alternatively, press the keyboard shortcut “Alt + Shift + P” again.
Fix if Preview Panel not working
In case the File Explorer Preview Pane is not working as it should, we can choose to try one of the following options in order to fix it.
Enable show preview handlers
From the Options section, we must have the Show preview controllers in the preview panel setting enabled for it to work correctly. To do this, from Windows 10 we open the Vista tab and click on Options, while in Windows 11 we click on the three points that are in the upper right, and in the list that is displayed we click on “Options”.
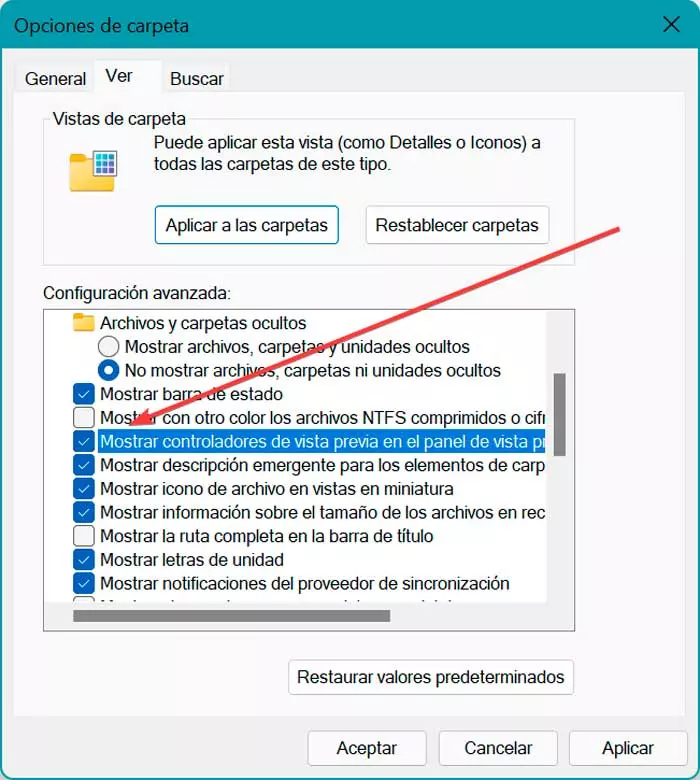
This will open the folder options, where we will click on the folder tab. “Watch”. In the Advanced Settings section, check the box “Show preview handlers in the preview pane” and click Apply to save the changes and OK.
Disable Always Show Icons Settings
Within the Folder Options, we find the setting to Always show icons, never thumbnails. If this option is enabled, the Preview Panel will not show anything. It will be necessary to disable it so that it can display its content.
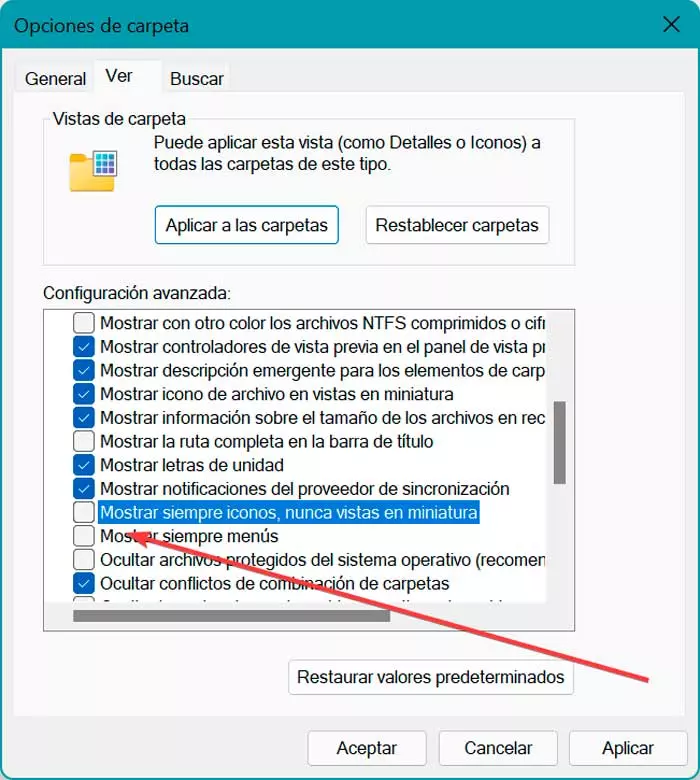
To do this, it will be necessary to re-access the “Options” folder and click on the tab “Watch”. Here, we must uncheck the box of “Always show icons, never thumbnails”. We click Apply to save the changes and restart the File Explorer to check that it works correctly.
Change File Explorer startup mode
Opening File Explorer from This PC instead of Quick Access can help us fix problems with the Preview Pane. Again we must return to the File Explorer Options window using the Start menu search box and typing “file explorer options” and select it.

Once the Folder Options window is open, within the tab of “General”at the top we click the drop-down box next to “Open File Explorer in” and select the option “This team”. We click Apply to save the changes and restart Explorer.