Unlike desktop PCs, updating the hardware of a laptop usually involves having to disassemble several of its components to access what you want to change, but in most modern computers this is no longer the case and you can change the RAM or the SSD from the device without having to completely disassemble it. Also, this does not normally override the device warranty, although it is recommended that you consult the manufacturer’s website for its warranty conditions before anything else to avoid disappointments, since most cancel the warranty for a bad manipulation (that is, if something breaks due to mishandling).
Updating your laptop hardware is easy with this method
Before launching to update your laptop’s hardware, the first thing you should do (in addition to checking the warranty issue) is to make sure that your laptop supports changes to its hardware. In this regard, there are some laptops that come with the soldered RAM, for example, and in that case unfortunately it cannot be expanded. In addition to this, you should also make sure that the hardware you buy is compatible with your laptop (you can usually see it in the technical specifications of the product).
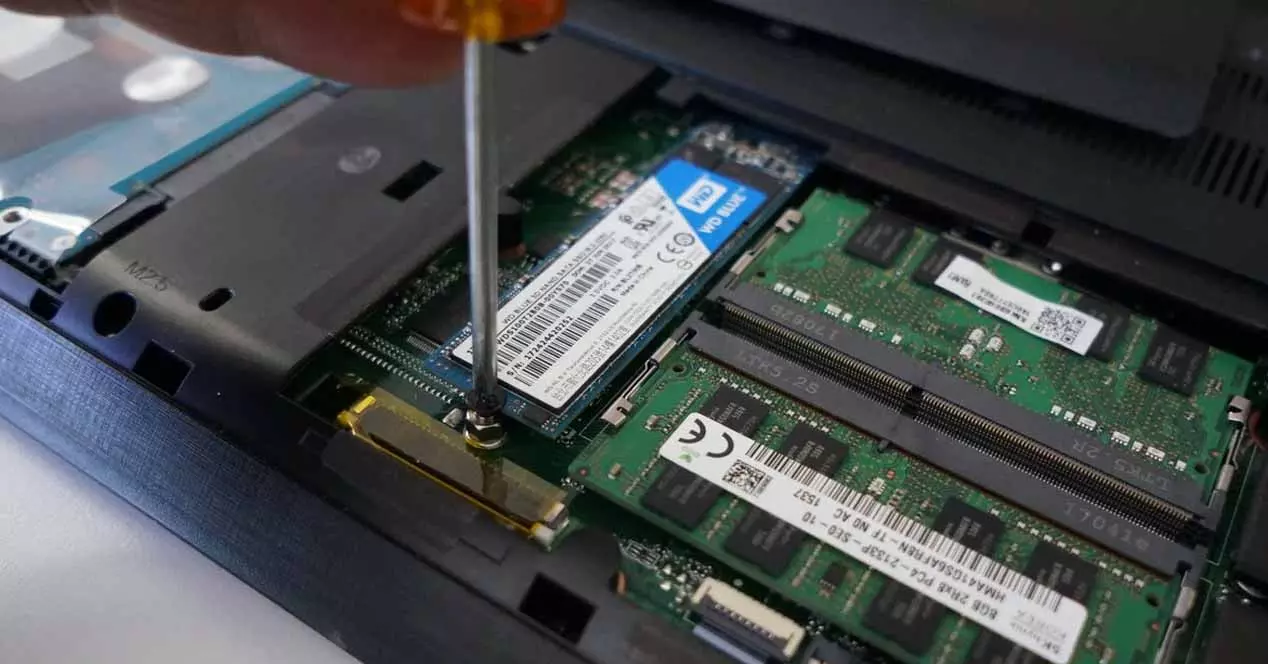
However, in most cases the RAM and the SSD are upgradeable and also easily. If you look at the image that we have put above, at the bottom of the laptop there is a small plastic cover that we can remove only by removing two screws, which are also usually marked on the plastic itself so that you can easily identify them, after which Finds the RAM, in this case in SO-DIMM format.
Precautions when changing RAM
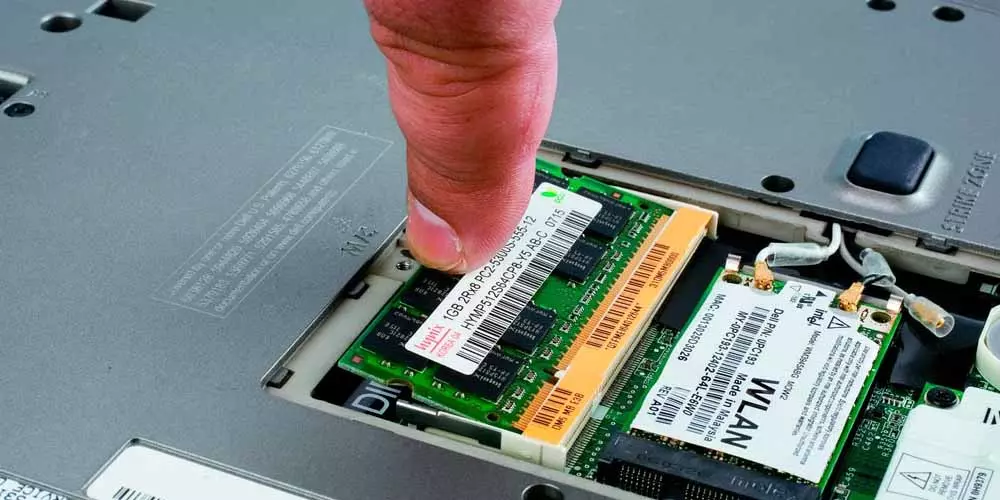
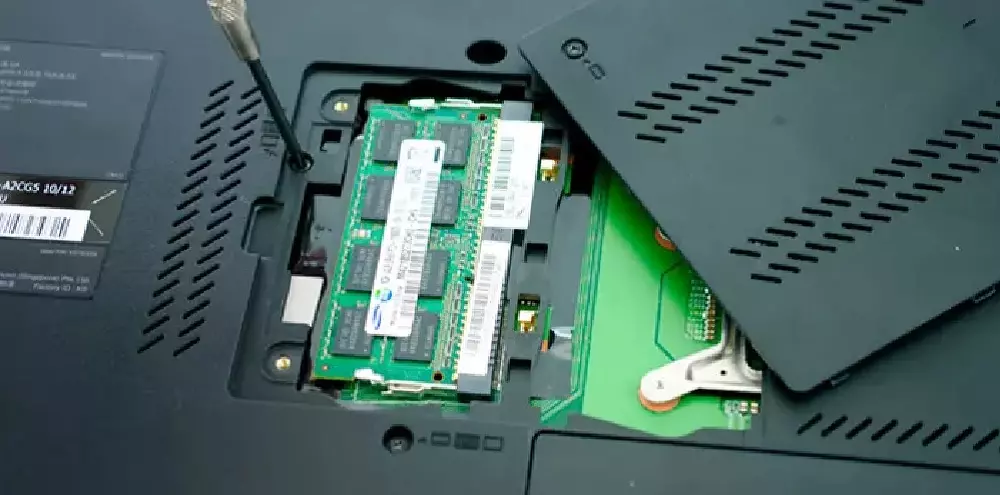
So, if to update the hardware of your laptop the first thing you are going to do is change the RAM memory, the first step is to locate this cover that we are talking about and remove the screws to access the RAM that you already have installed at the factory. . Removing it is very simple: you will see that it has two metal tabs on the sides, and you simply have to pull them out and the memory module will pop up with a spring; then pull it out, diagonally (respecting the position in which it was after lifting the eyelashes) and you will have already removed it.
Now, to install the new RAM modules that you have bought (it is understood that if you are expanding the RAM they will be of greater capacity and even higher speed) the process is equally simple: place the module in the correct position across the socket, diagonally, and then simply press down with one finger: doing so will cause the module to be “caught” by the tabs, and you will hear a slight “click” sound as you do so, indicating that everything has gone well.
Once this is done, simply screw the plastic cap back on and you’re done. The only precaution you should take when changing the RAM is to remove the old module carefully as we have told you, and do not apply too much pressure when installing the new one, it should enter quite smoothly.
What if you want to change the SSD?

All modern laptops already come with an SSD, since traditional mechanical hard drives have already been almost completely discarded in this segment. However, it is possible that you want to install an SSD in an old laptop, or that the SSD that your laptop brings from the factory is of low capacity and you have decided to change it for a new one, so let’s see what precautions you should take.
Here you can find two variants: that the SSD or hard disk comes in 2.5 inch format or that comes in M.2 format. As a general rule, as with RAM you will find the storage unit behind a plastic cap that you can remove with a couple of screws; In the case of 2.5-inch drives, they usually come in a case with extra screws that you will also have to remove, and then remove the drive by sliding it in the opposite direction to where its SATA connector is.
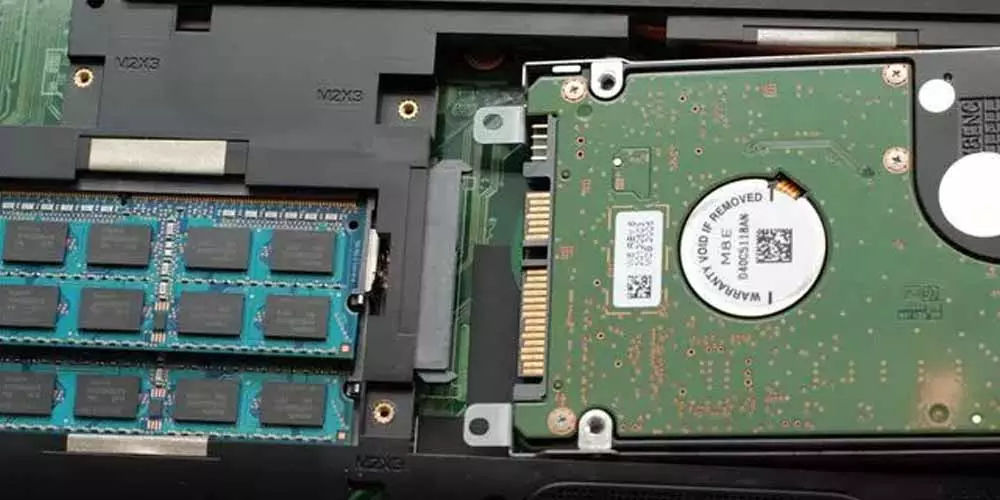
Once this is done, you will only have to remove the old hard disk or SSD from the case, put the new one, slide it back diagonally and carefully to connect its SATA connection, and screw everything back on.
If the SSD that your laptop brought comes in M.2 format the process is even simpler. Access the unit by removing the cover or cover, and you will see that the unit only has a single screw that secures it to the laptop’s motherboard; remove that screw and slide the SSD away from the connector (to where the screw was) to remove it. Then, installing the new SSD is the same but in the reverse process: first insert the SSD diagonally into the connector, then make a slight pressure with your finger and put the screw that you removed before, with that it will be installed.
The precautions in this process are equally simple: be especially careful when removing the old unit, do it diagonally and be careful not to force the connector. When connecting the new unit, also be very careful especially in the connector, slide the unit gently and without using too much force.