Not everyone has one printing machinelet alone a scanner in his house. And unfortunately, there are times when they send us a document that we must return signed, something that would normally require us to print it, sign it, and then scan it in order to send it back. However, if you don’t have a printer, scanner, digitizing tablet or none of the three, don’t worry, because you can still easily sign documents on your PC and we will teach you how.
Even though we live in the digital age, signed documents are still necessary, and if it’s impossible for you to physically go wherever you need to go to sign a document, don’t worry because anyone with a Windows PC can do it. The only thing you will need to have installed, yes, is Adobe Acrobat Readerbut it is a free tool that anyone can access (there are more methods, of course, but we are going to explain how to do it this way, since it is the most widely used PDF reader there is).
Prepare your signature and save it on the PC
We all have a unique signature, so for most it is quite difficult to create your signature reliably, for example, using the mouse in Paint. For this reason, the ideal is that if you do not have a scanner, that you sign (if possible with a black pen) on a blank sheet and, with good lighting but without reflections, take a photo of the signature with the mobile. Then transfer the image to the computer and crop it so that only the signature is visible on a white background, without too many margins.

Ideally, once you have this, it would be to edit the image in Photoshop to remove the white background thanks to the “magic eraser” tool and thus save it as an image with transparency in PNG format, but let’s keep it simple and save it in JPG format. The important thing here is that you have your signature saved in an image on the PC, since it will be the one that we are going to use later to sign whatever documents it is.
How to sign a document with Acrobat Reader
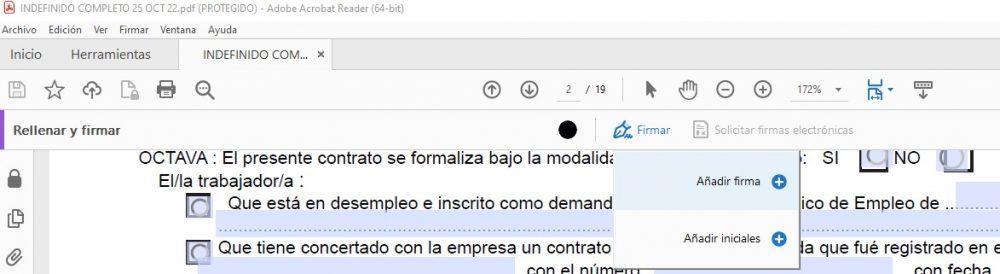
The first step is to open the document you want to sign, which will usually be in PDF format, with Adobe Acrobat Reader. Then, you will see that in the upper area there is a menu called Sign, so click on it and then on the “Fill and sign” option. A toolbar will appear below (above the PDF content), find the “Sign” button and select the “Add Signature” option.
Now Acrobat Reader itself will give you the possibility to write your name in a font that seems manual, although that is not very “personal” to say. You can also draw your signature with the mouse, but the interesting thing is the third option, inserting an image, which is precisely the intention.
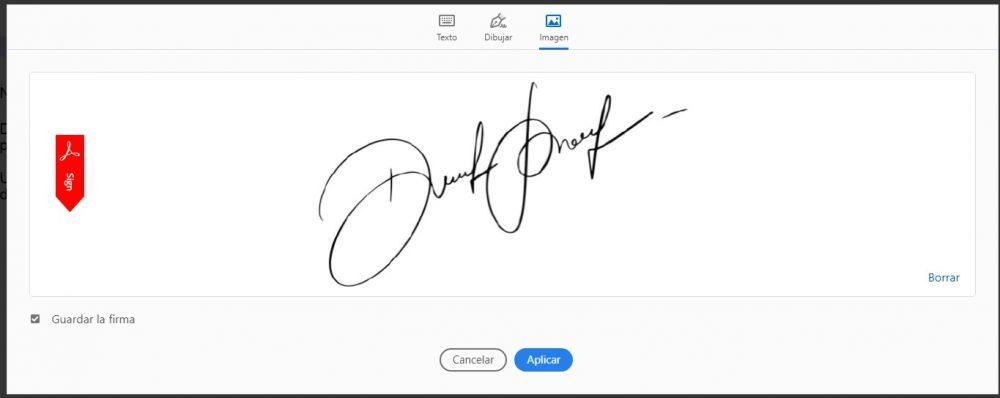
Once this is done, you can click Apply, but make sure to leave the option on the bottom left checked, Save the signature, to skip this step the following times and that you already have your signature ready to insert it.
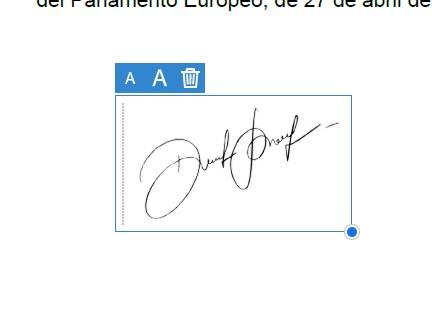
When you click Apply, you can directly move the signature with the mouse to place it exactly in the position you want.
And it’s done, now you just have to hit the File menu and Save to save the PDF with your signature inserted, as easy as that. With the file already signed, you can send it by email and, as you will see, you did not have to use a printer or scanner for it.