Wi-Fi, a fundamental technology today
As we say, it is a reality that we have more and more computers connected to the network. If we think about how we navigated a few years ago, the normal thing was through a computer connected by cable to the router. Little by little this has been changing and the number of available devices that allow us to surf the Internet has skyrocketed.
Much of the blame is on the rise of Wi-Fi networks and, of course, quality improvement. Now we have more speed wirelessly, more stability and the ability to connect more and more computers. Nothing to do with a few years ago, when the signal was much more limited and the routers did not have as much capacity.
All this means that in our homes we have countless devices with the capacity to connect to the network wirelessly. We can mention many equipment such as televisions, video players, printers, smart bulbs … Now, this also requires some configuration and not making mistakes. Hence, sometimes you have to configure some parameters so that everything works better.
Windows 10 is currently the most widely used operating system on desktop computers. It offers a wide range of possibilities, also in terms of wireless networks. Let’s see how we could create a new Wi-Fi profile in Windows.
Steps to create a new Wi-Fi profile
To create a new Wi-Fi profile in Windows, you simply have to follow a series of steps that we are going to mention. In a matter of minutes we will have it ready to use on our computer. Of course, we will have two options for this: use the Setting or use the Control Panel. In both cases the processes are very simple.
Windows Settings
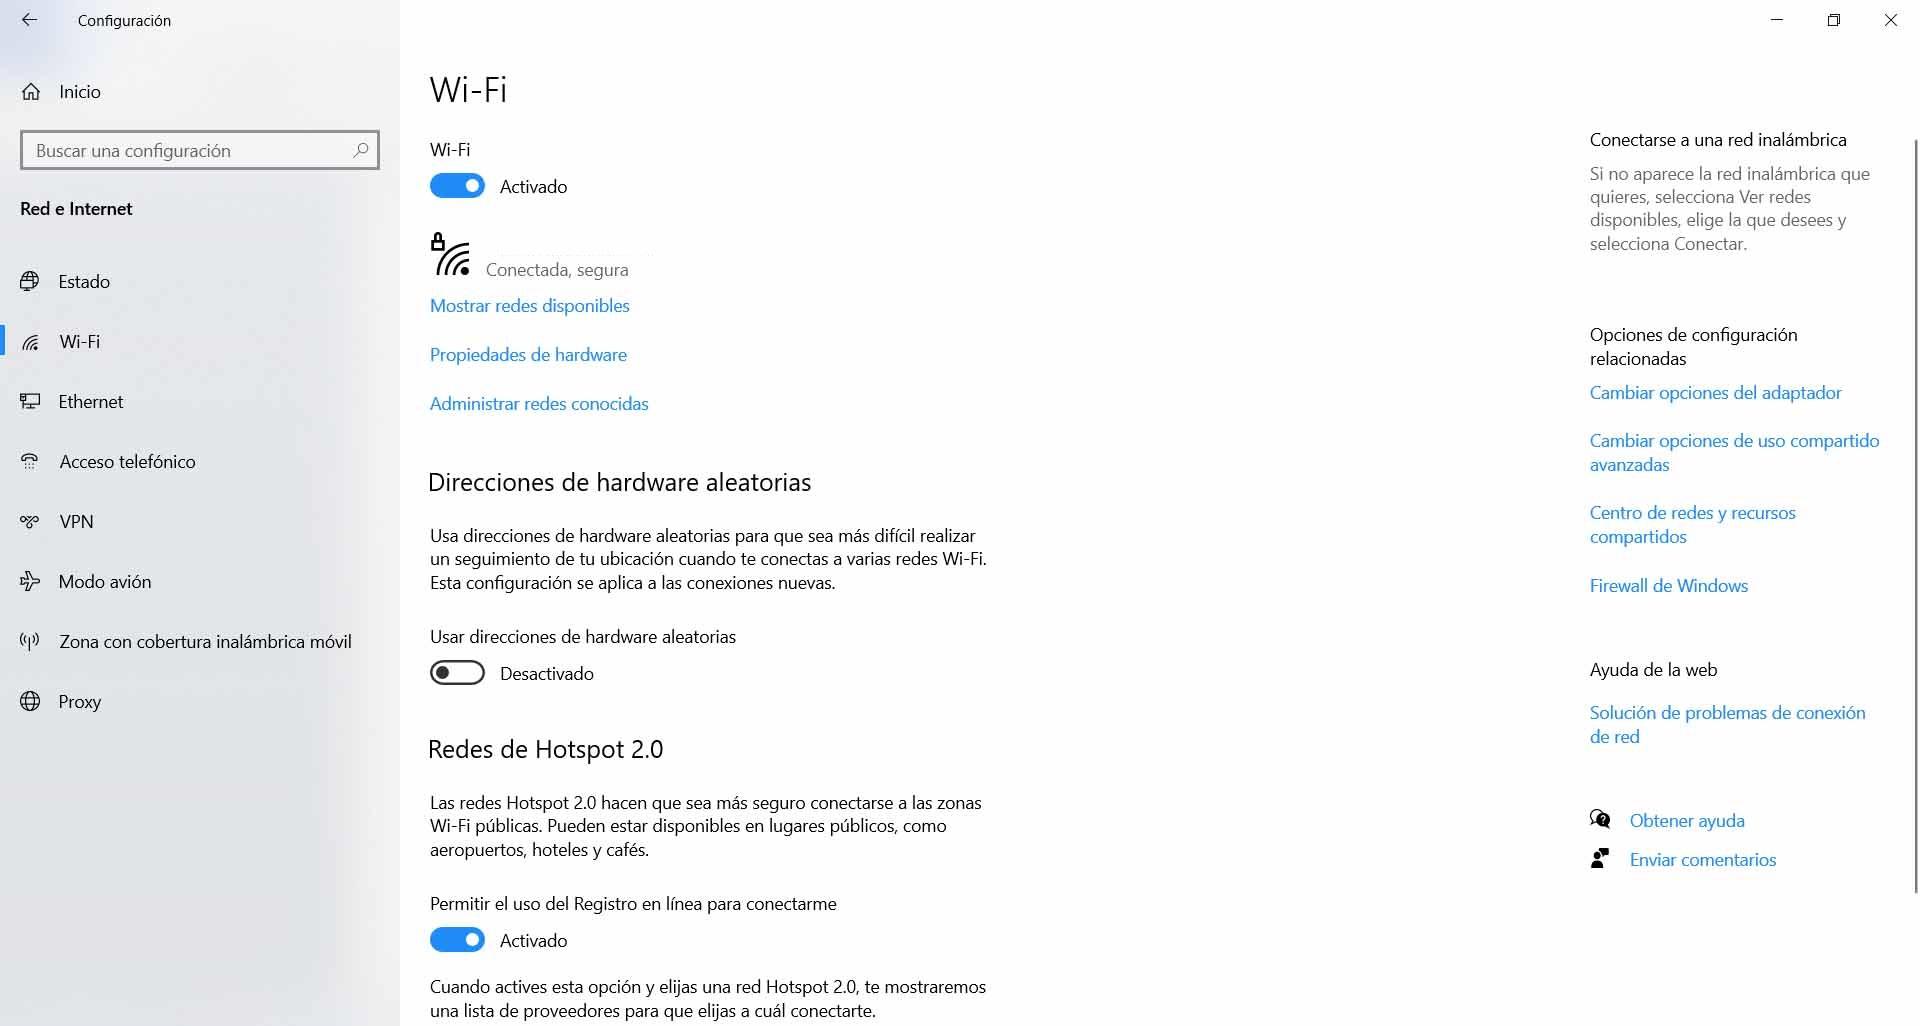
The first option we have to create a new Wi-Fi profile in Windows 10 is through Settings. For this we have to go to Start, then we click on Setting and we are going to Network and Internet.
Once we are in Network and Internet we have to click on the Wi-Fi option, which appears in the list on the left. It is the second option that appears to us. Now you have to click on Manage known networks, which appears in the center of the screen.
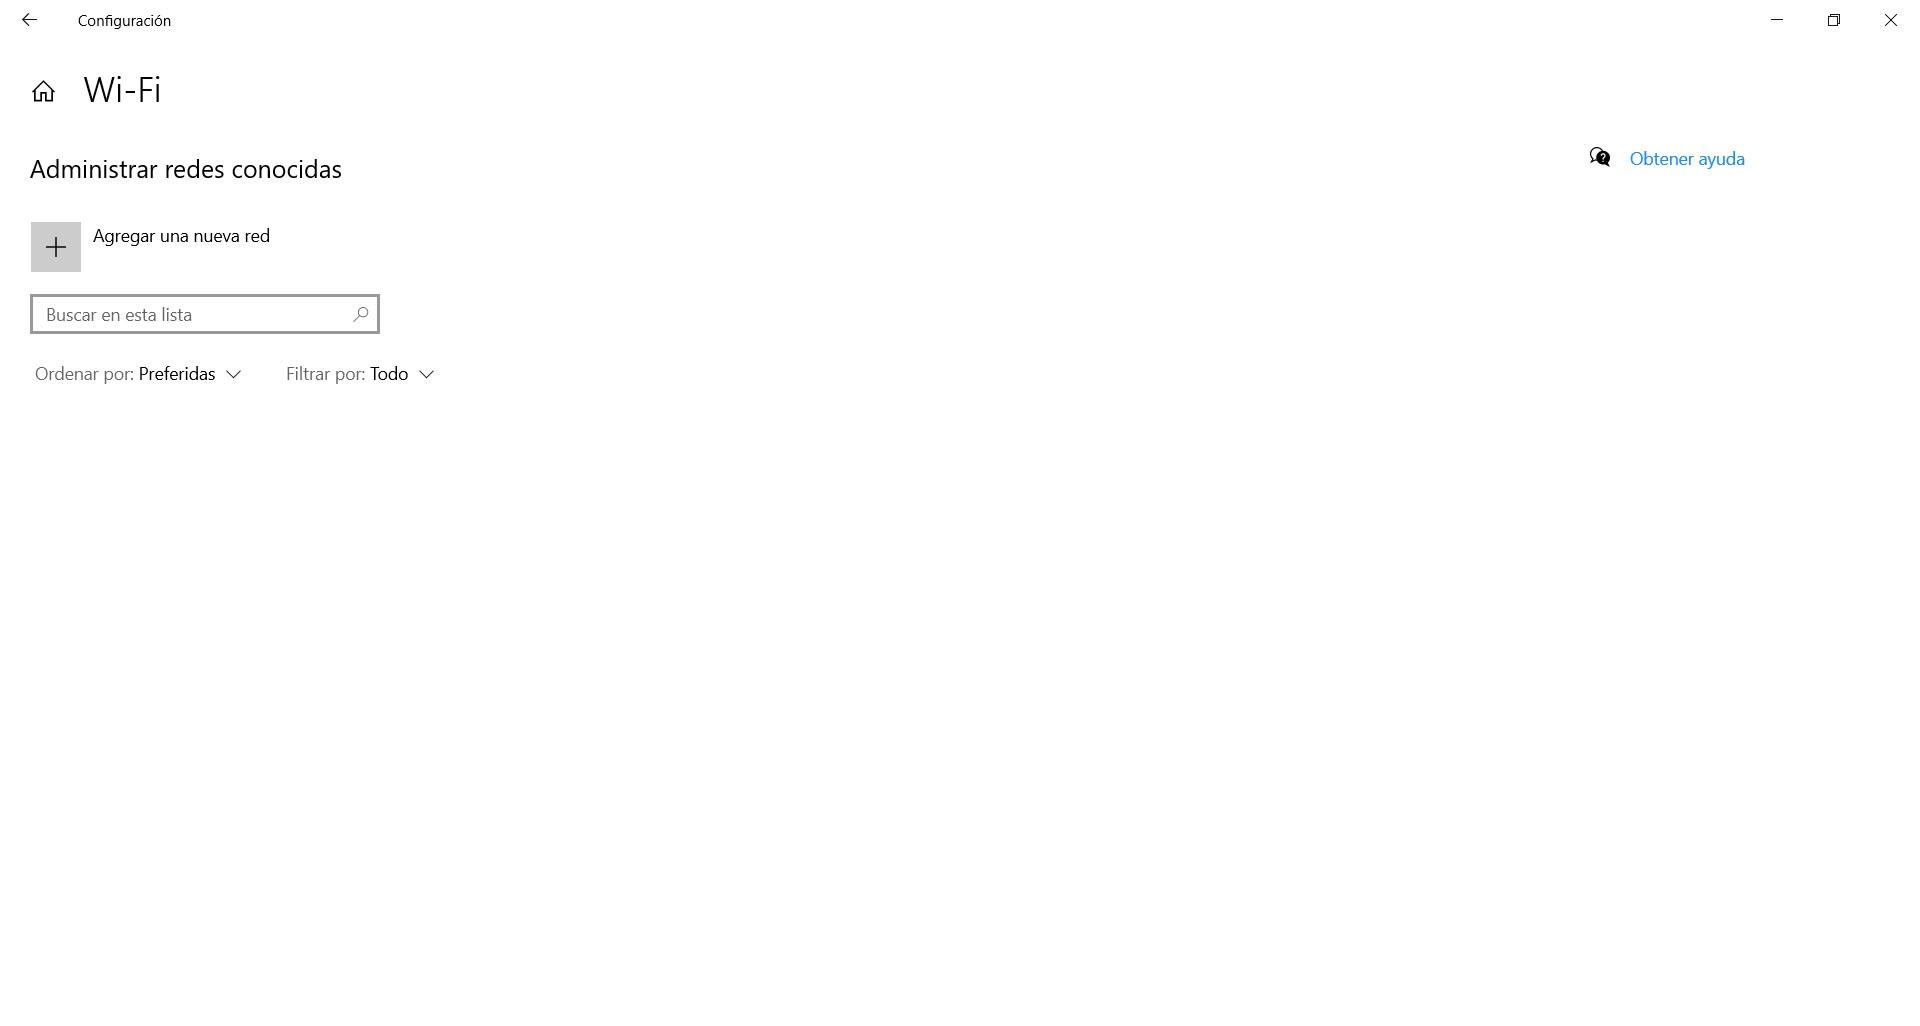
A list will appear with the different networks to which we have connected, in case we have already connected the equipment to one. Otherwise, if we have not connected to any wireless network, the list will appear empty. But what matters to us to create a new Wi-Fi profile in Windows 10 is to click on Add a new network.
A new window will automatically appear to fill in the necessary data. You have to put the network name, the encryption type (or even mark the Open option), put the key and then select if we want it to connect automatically and even connect even though the network is not broadcasting.
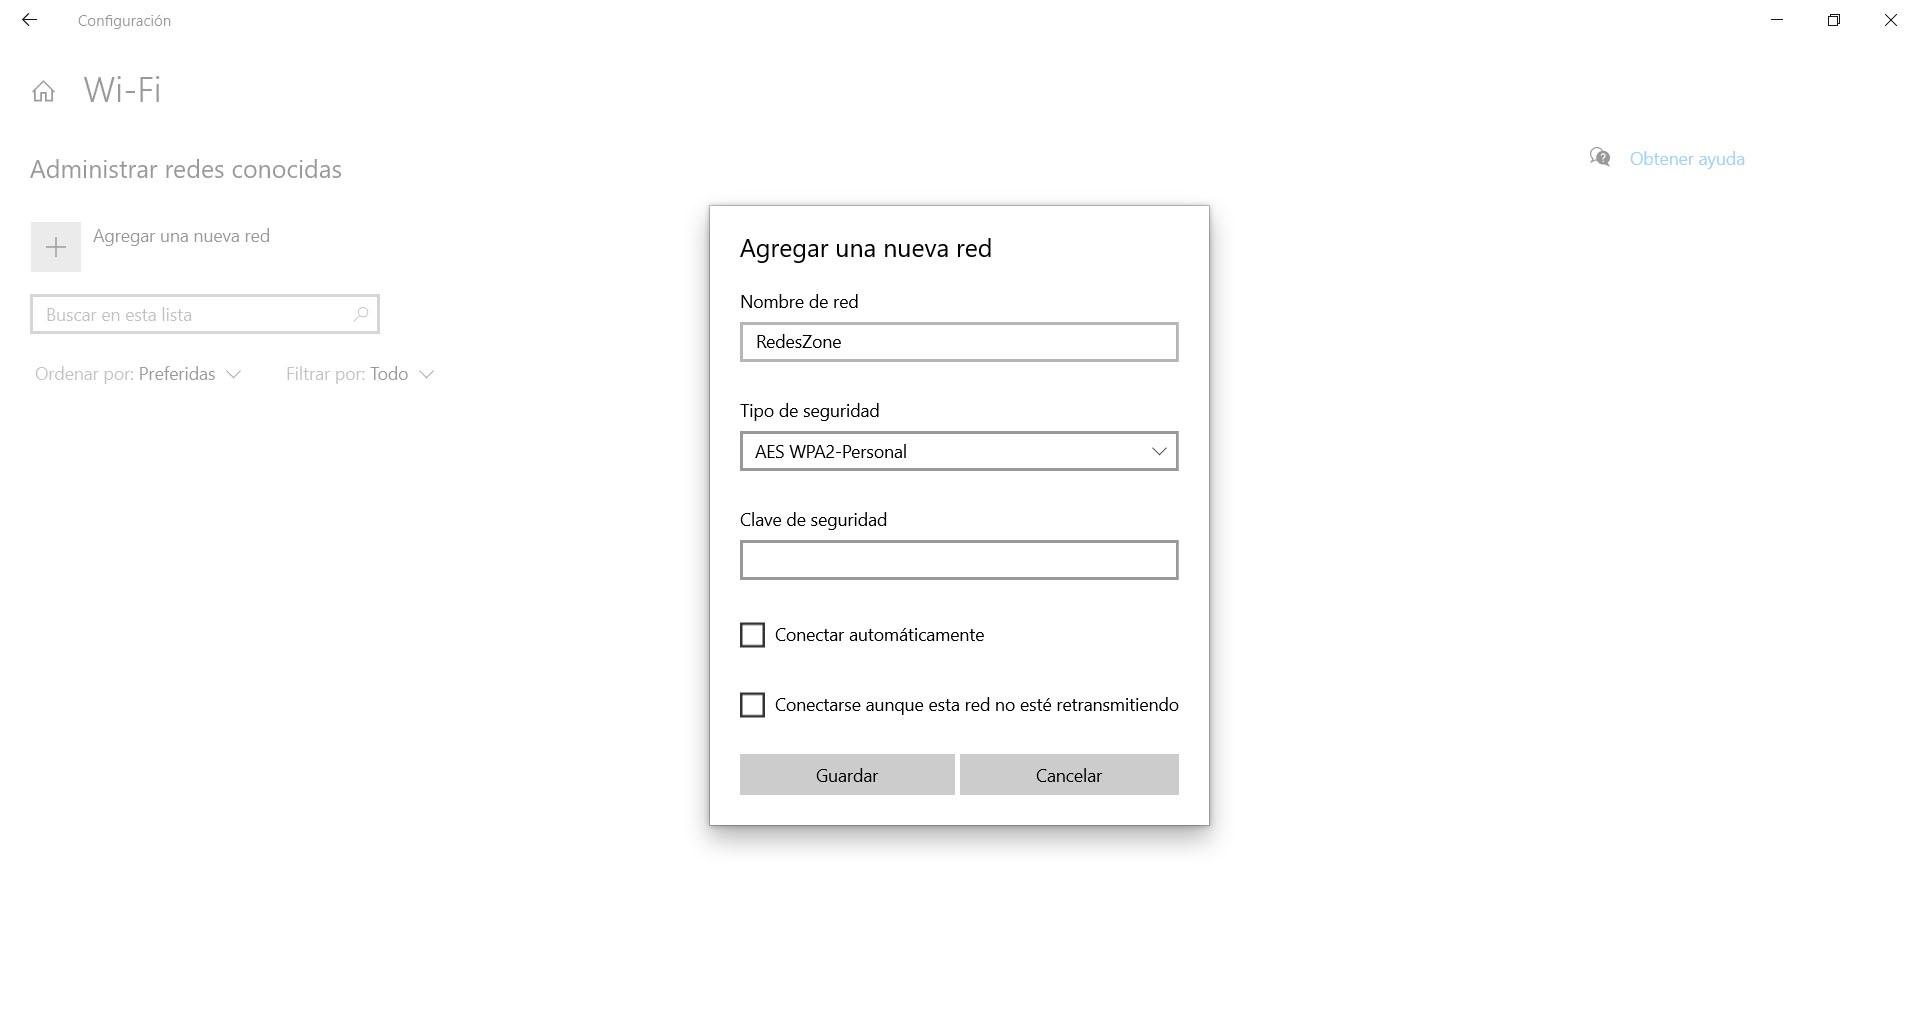
Once we have completed all the necessary steps, we simply have to save the process. Keep in mind that we cannot get confused in the name or password, since otherwise the connection would not work.
In case we are interested remove some networkWe simply have to click on the corresponding name and we click Stop remembering. It will automatically no longer be available in the list of Wi-Fi networks that we have saved. It may be that at a given moment we are no longer interested in remembering one in particular.
Control Panel
Another alternative we have to create a new Wi-Fi profile in Windows 10 is via Control Panel. The objective is the same, in addition to the fact that the process is very similar. The only difference is the way to get there.
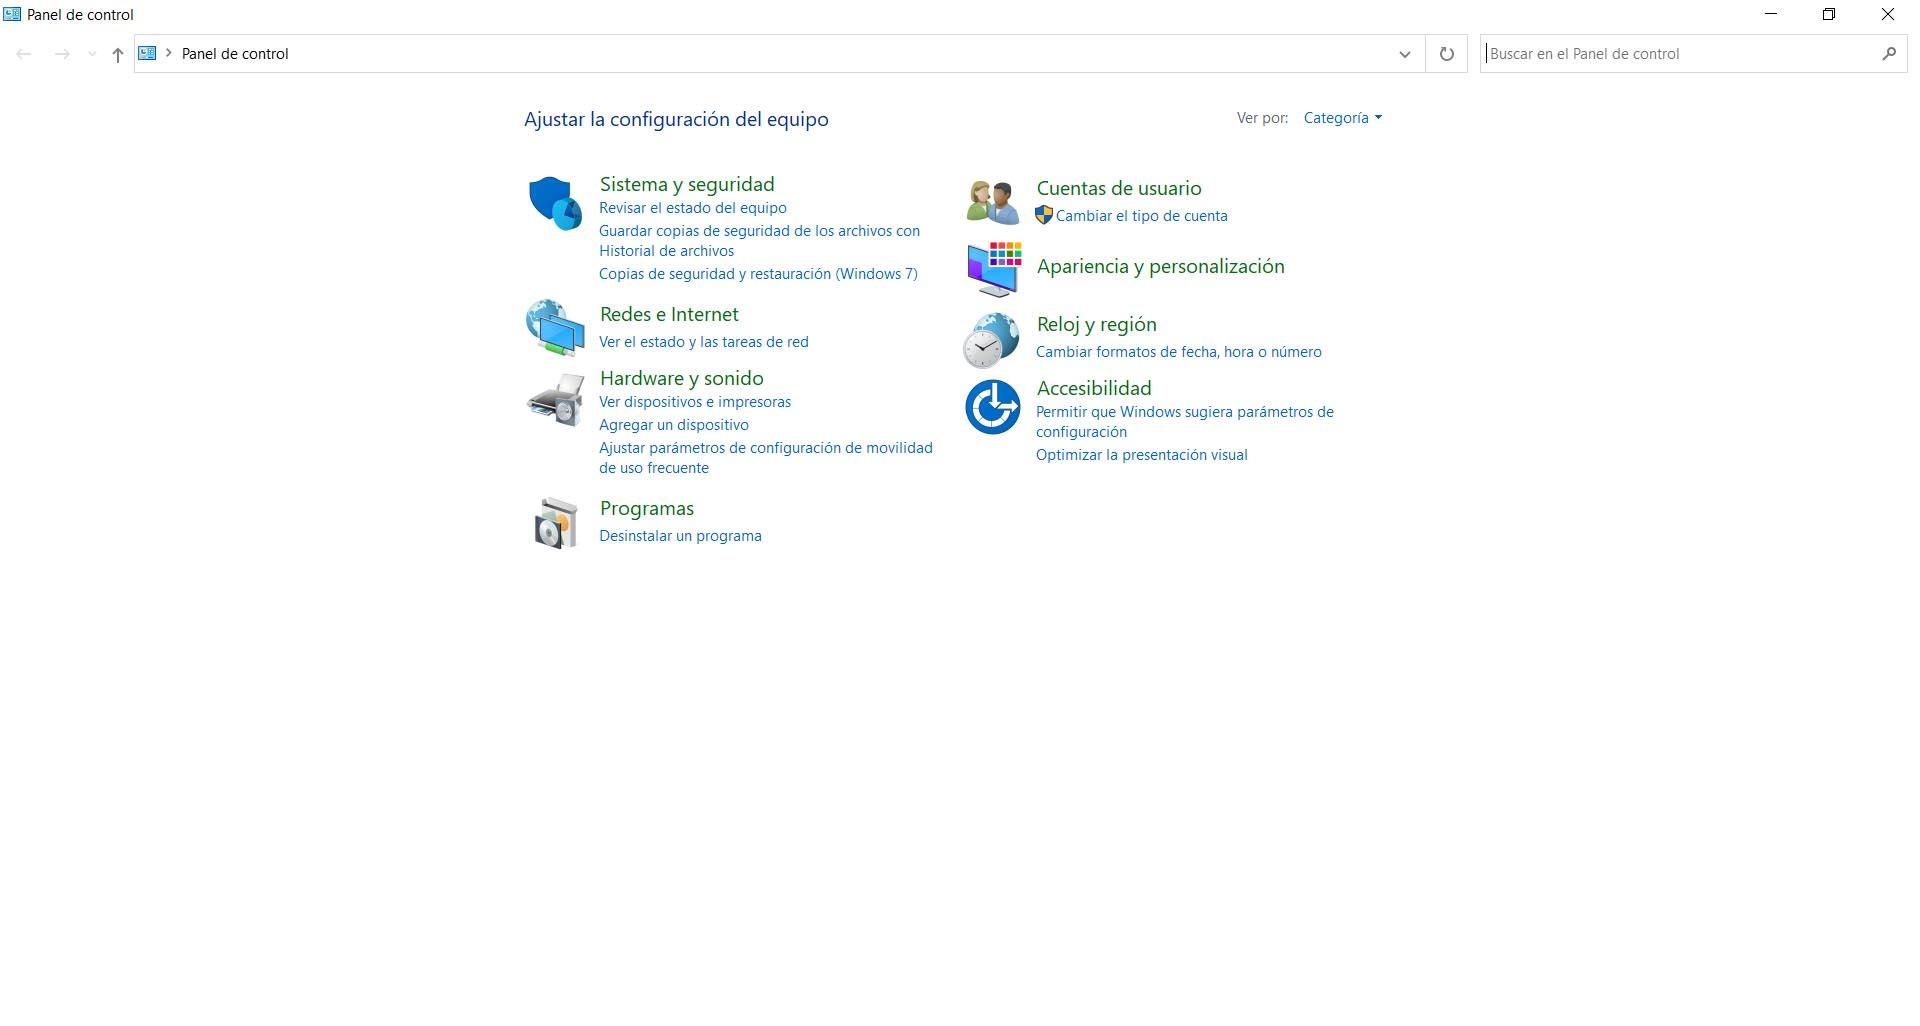
Once again we go to Start and write Control Panel and access. Once here we will see different categories and you have to click on Network and Internet, which appears the second option in the left column, as we see in the image.
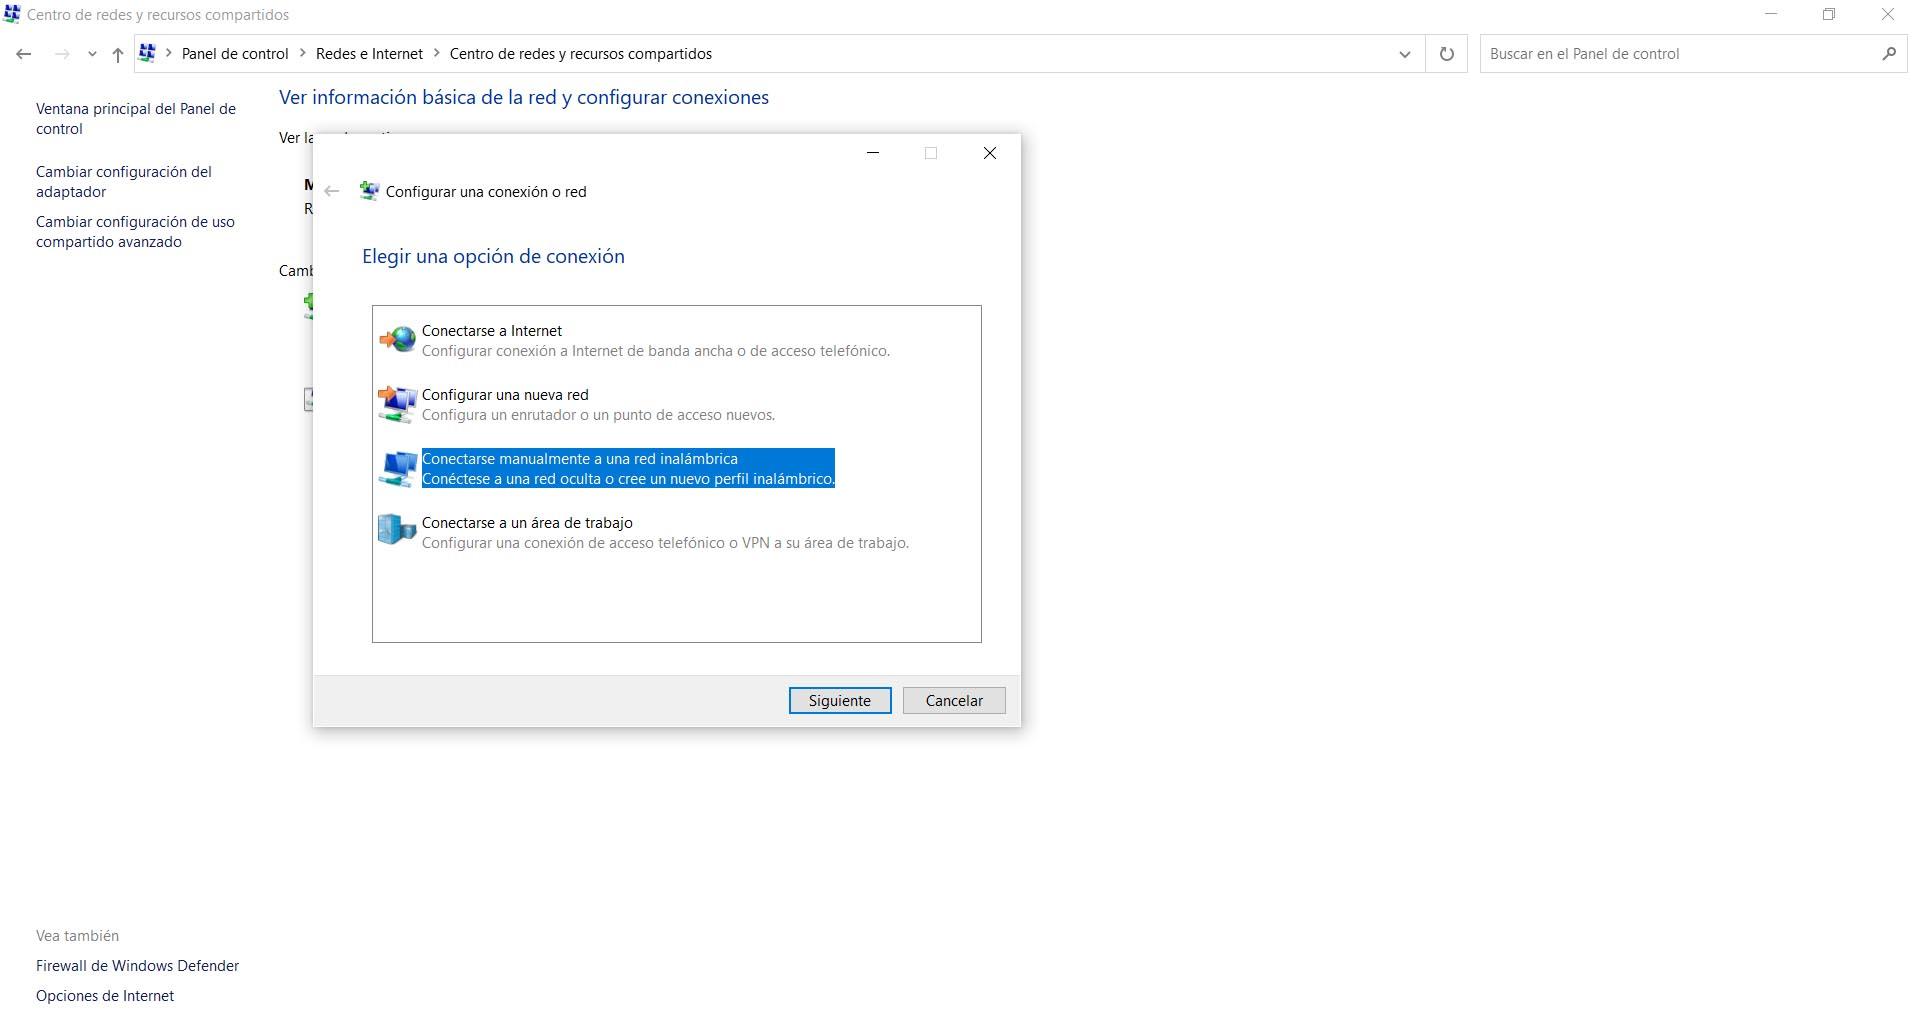
When we are within the Network and the Internet, we must give Center network and sharing, which is the first option that we will see above. Once this is done we click on Set up a new connection or network, which appears in the center of the screen. Several options will appear, as we can see in the image, and the one that interests us in our case is the third: Manually connect to a wireless network.
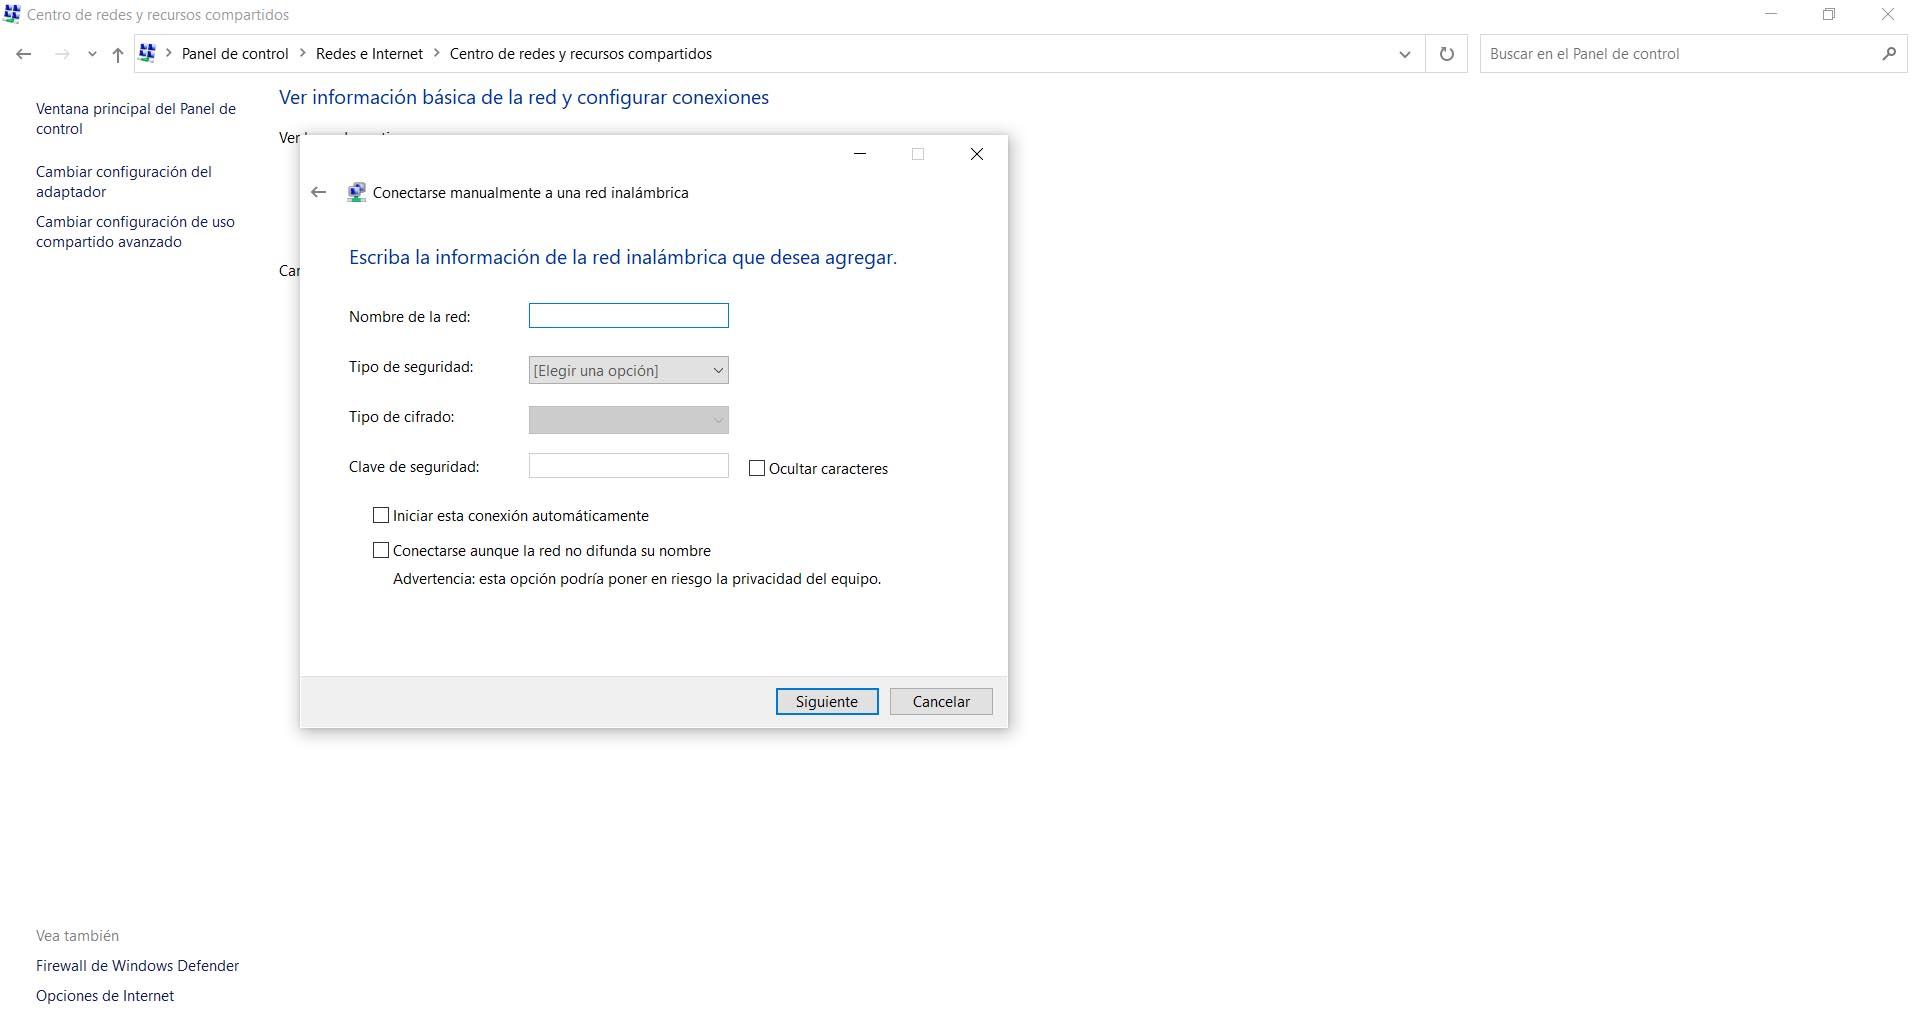
We will arrive at a new window in which it asks us for a series of data. We will have to put the name of the network that we are going to create, the password, type of encryption and mark or not that it connects automatically. Basically it is to follow the steps we saw in the previous case, when the option to create a new Wi-Fi profile from Settings.
Once we have filled in everything, we simply have to click Next and save. From that moment on we will have created a new Wi-Fi profile in Windows 10 through the Control Panel. As we can see, it is very simple and intuitive and in a short time we will have it ready. Likewise, in the event that at any time we want to delete any of the networks that already exist or the one that we have created a new one, we can do it in a simple way.
In short, by following these steps we can create a new Wi-Fi profile in Windows 10. We have seen that we have the option to create it through Settings and also from the Control Panel. In both cases the process is very simple and fast. You just have to carry out a series of steps without installing any additional software.