- have installed the latest version of DNC-100the first compatible version is 1.2.0, so in later versions we will also have compatibility.
- The hardware version of the DGS-1210 switches must be the fxthat is, if you have version F1, F2 or F3 you can enjoy this new function.
- have installed the firmware version 6.30.016 or higher on the DGS-1210 switches that we want to put into centralized management.
Once we have the latest version of the DNC-100 and the latest firmware on the switches, we can start adding the different devices to the centralized management of the manufacturer D-Link. These versions are available at official website of the DNC-100 and also in the section support of DGS-1210 switches.
How to add DGS-1210 switches to Nuclias Connect
In order to add the DGS-1210 switches, the first thing we have to do is make sure that our switch has the FX hardware version, such as versions F1, F2 or the latest F3. Once we have made sure of this part, we proceed to update the firmware and incorporate it into Nuclias Connect.
Firmware upgrade on switches
To update the firmware of the switches, we have to go to the section of «Tools / Firmware Upgrade«. We choose the Image ID that we want to update, select the firmware version downloaded from the official website (.hex extension), and proceed with the firmware update by clicking on accept. Once we have the firmware updated to the latest version, we proceed to load the new firmware for the next reboot of the switch, we apply changes and proceed to reboot the equipment in «Rebooy System».
Once we are already in the new firmware, we update again with the firmware version ending in .con extension, to be able to easily update with the following firmware versions, otherwise, we will not be able to update the next versions that come out.
Update of the DNC-100 in our team
When we have the switches updated to the latest version, we need to make sure that we have the latest version 1.2.0 of DNC-100, that is, the Nuclias Connect software. In the official website of the DNC-100 You can download the version for Windows operating systems, and also the version for Docker, in case you use Linux-based operating systems or a NAS server that has Docker compatibility, such as QNAP, Synology or ASUSTOR among many other manufacturers.
In the section of “System / About» you will be able to see the version that you currently have installed and configured, it is absolutely necessary that you have the latest version that already includes support for switches and WiFi access points, otherwise, you will not be able to add the different devices. The most normal thing is that you already have the latest version of the software installed on your PC, but we indicate it here because it is critical to have this latest version 1.2.0 or higher if you want to have centralized management of the switches.
Setup Wizard
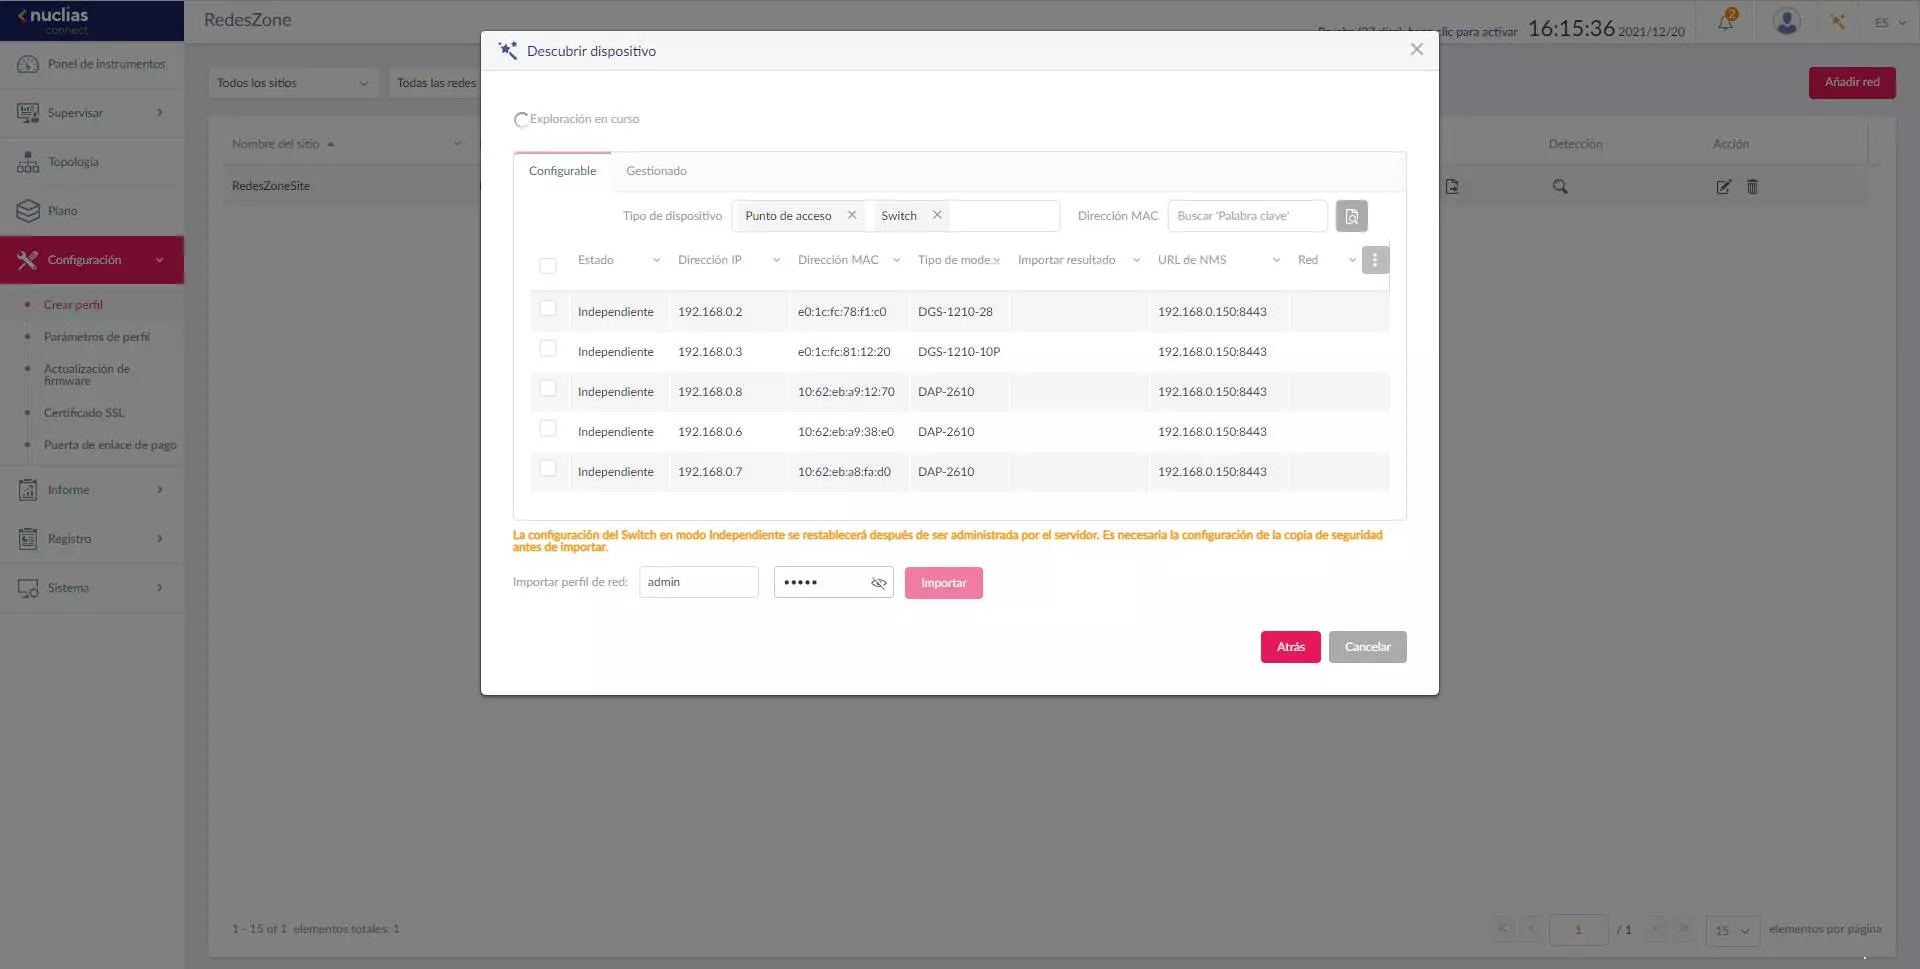
The Nuclias Connect configuration wizard is exactly the same as always, but now the basic configuration of the profile for the switch is additionally incorporated. If we click on “Detection” within our network profile, we can see that it is capable of scanning the entire wired and wireless network, showing us the different models of switches with their corresponding private IP address, MAC address, the exact model of the equipment , and if the equipment has been correctly connected to the Nuclias Connect controller.
Below we will have to indicate the access password to the different equipment, we could add the WiFi access points first and then the switches, or vice versa, and not do everything simultaneously,
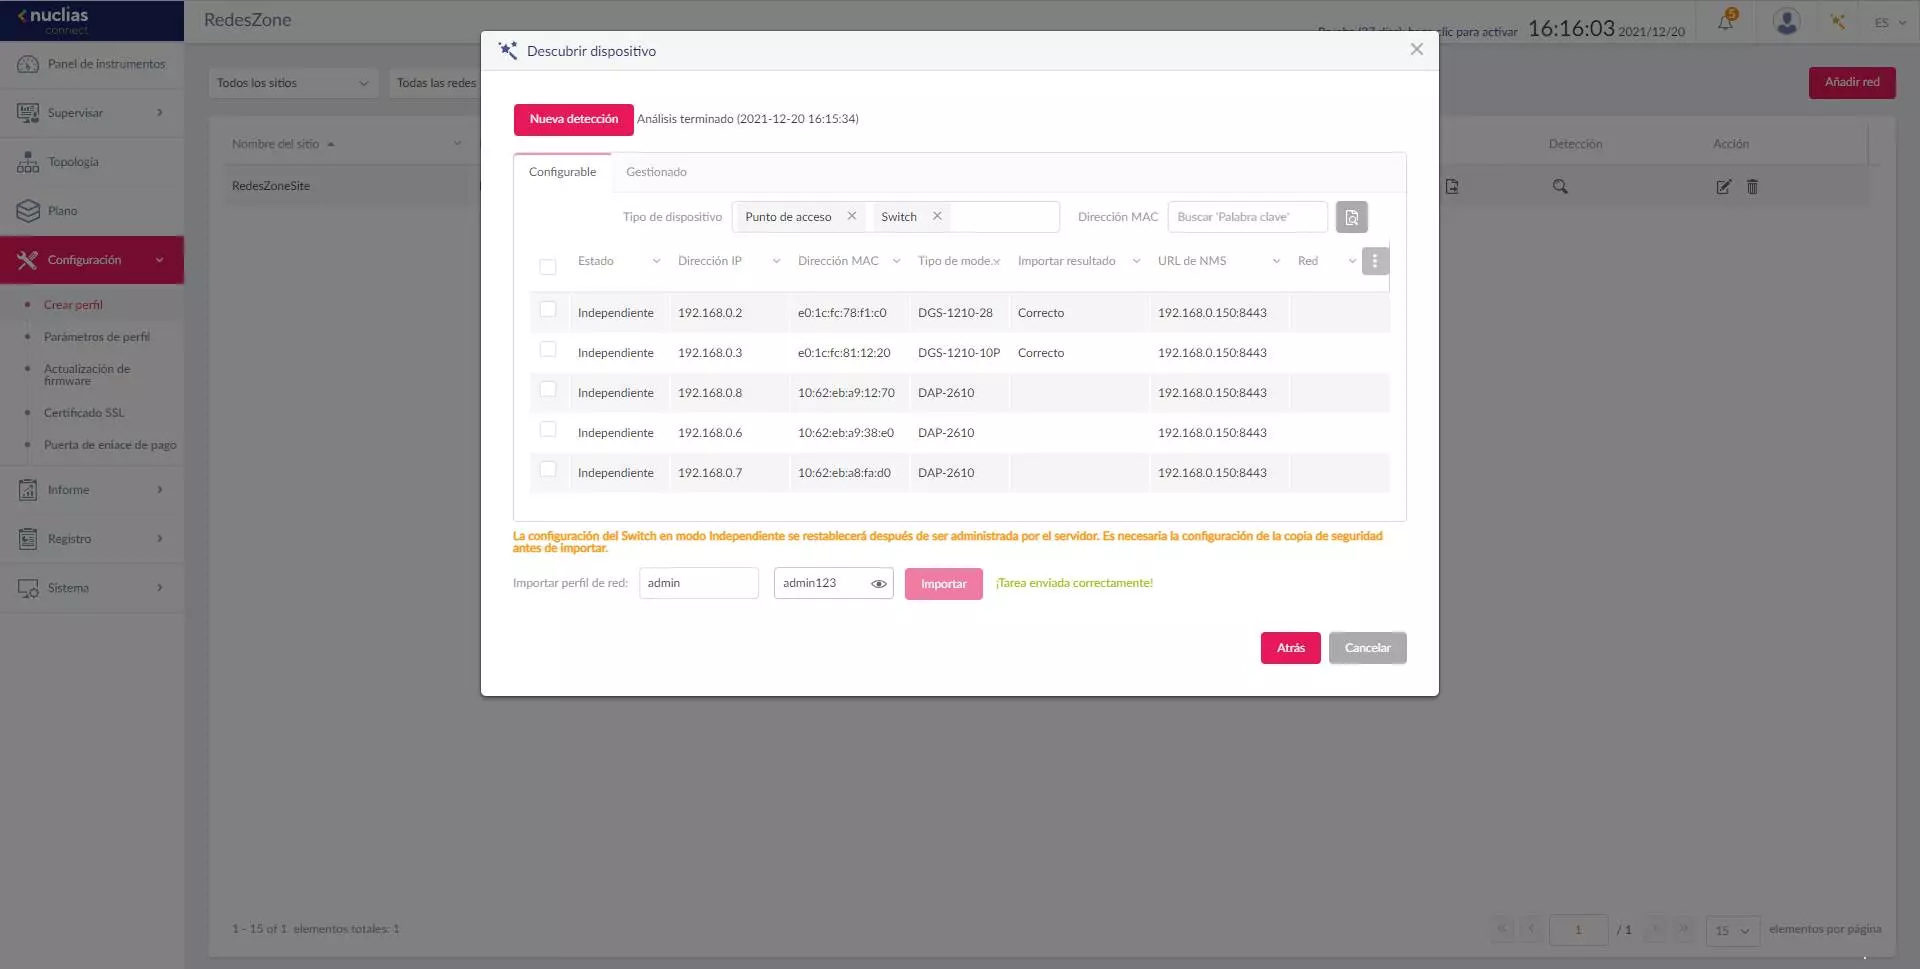
If we add all the devices (switches and APs), we will only see the “Correct” in the switches, because as soon as the switches receive this order, they proceed to restart, including the PoE of the WiFi access points, therefore, no This correct message will appear, but we can go to the Nuclias Connect main menu and check how they are connecting little by little. After a minute or so, we can see that all three Wi-Fi access points and switches have connected successfully and without any problems.
Once all the devices are added, we are going to show you all the configuration options that we have available.
Available configuration options
The configurations available for the switches are as complete as if the standalone mode were available by accessing its firmware via the web. We are going to have a large number of VLANs configurations, IGMP Snooping, ACL access control lists, DHCP Snooping and protocols such as Spanning-Tree protocol among others. Next, we are going to show you all the display options and also the configuration of the equipment.
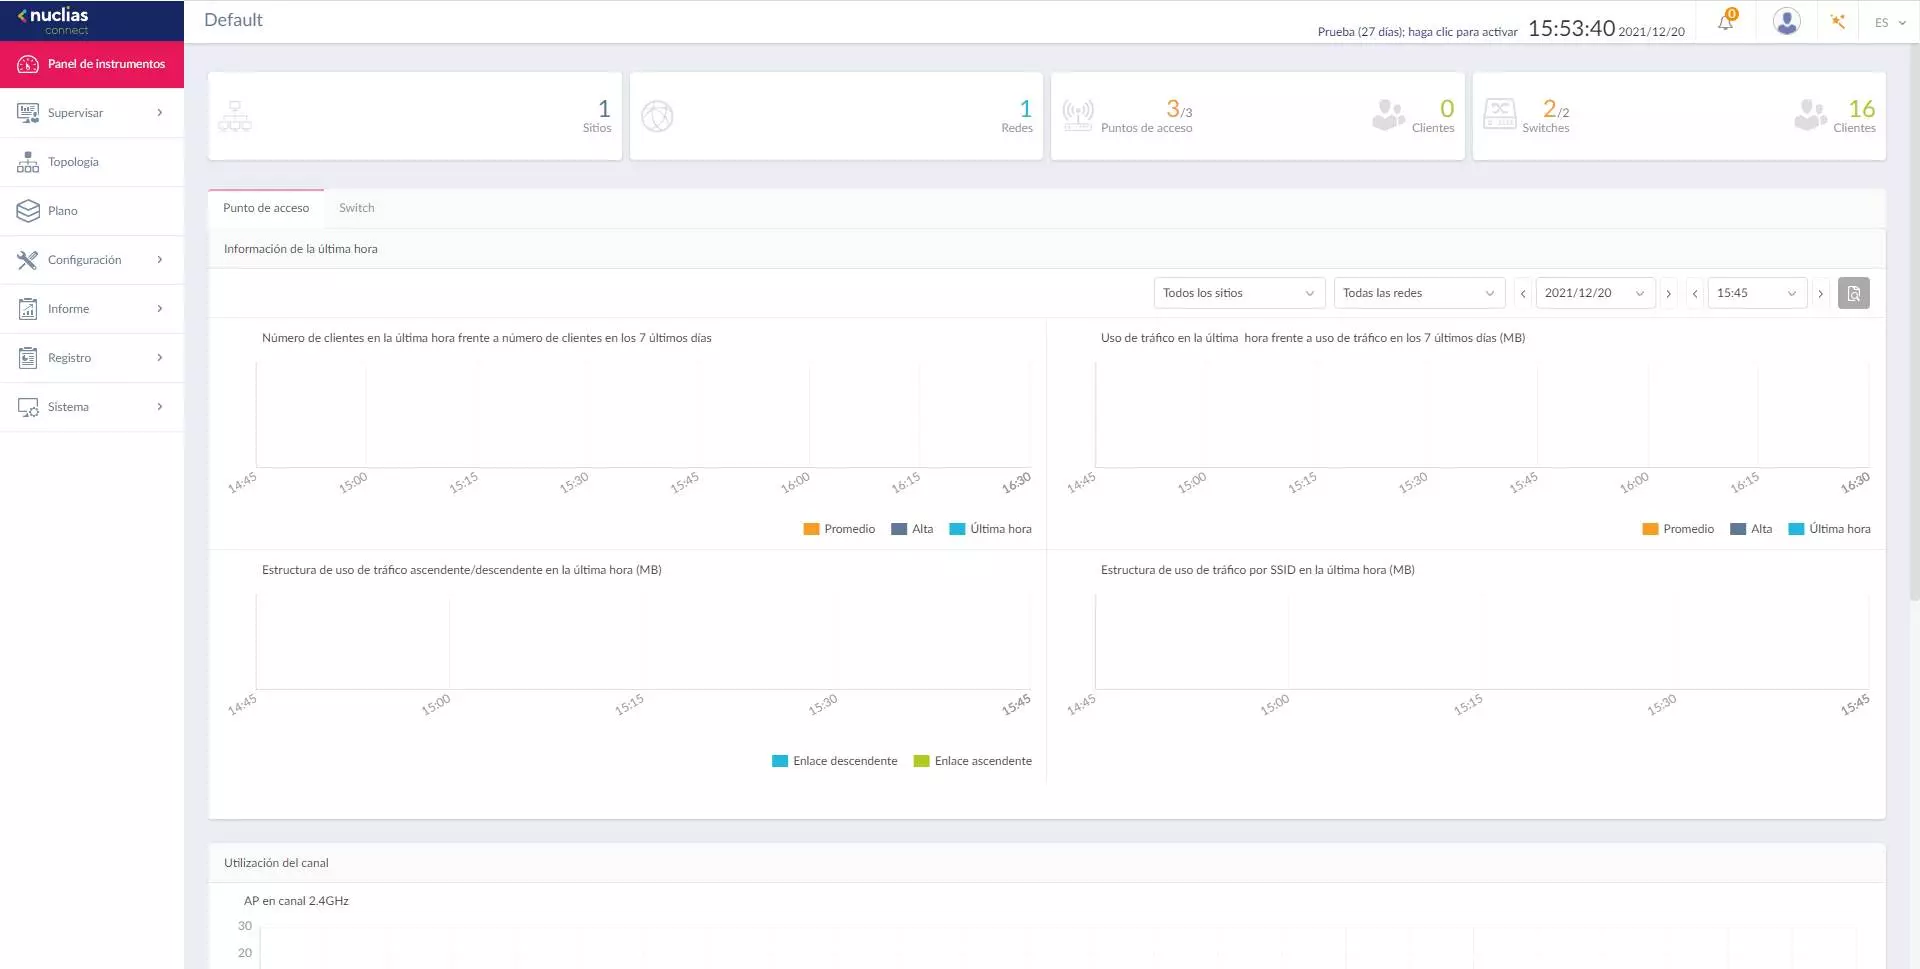
Monitor – APs and switches
In the “Monitor” section we will now have two well-differentiated parts, on the one hand we have the WiFi access points and on the other we have the switches. In the access points section we will have the same configuration options as always, nothing has changed here.
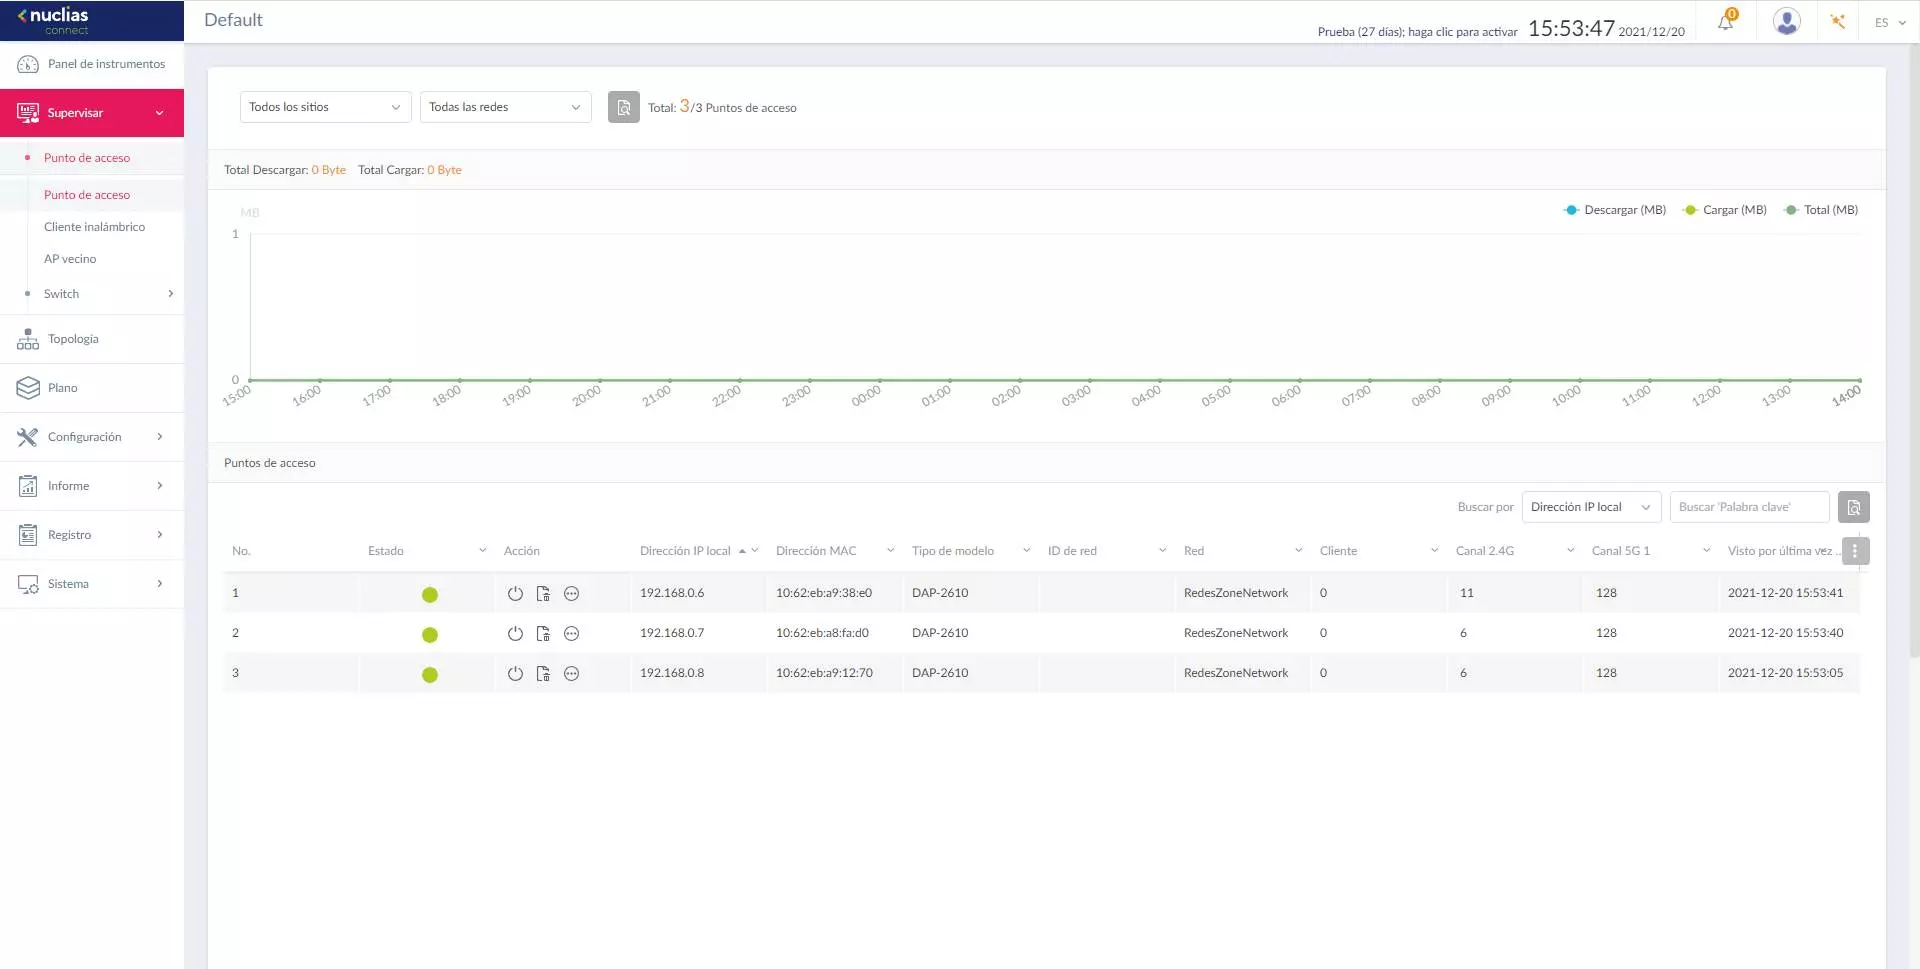
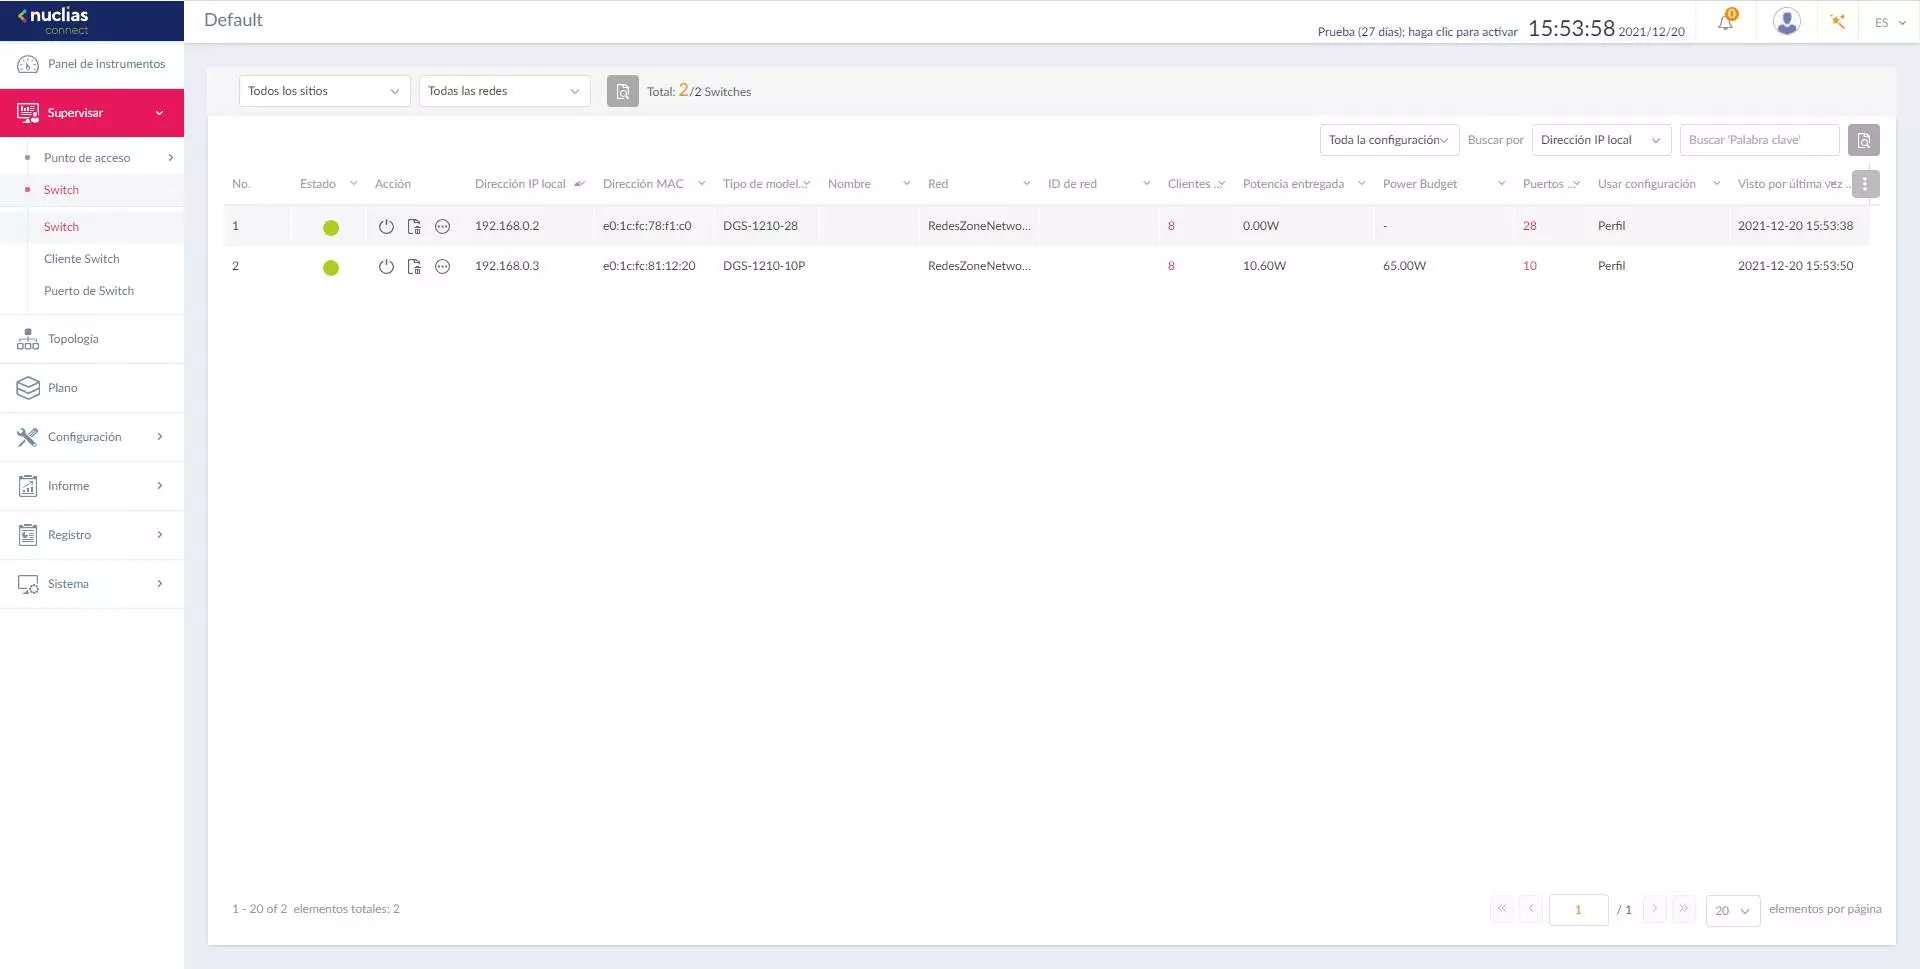
In the “Switch” section we can see a list of all the switches, restart them, remove them from management and enter the specific display of the status of that equipment in question. We can also configure a switch name that will be reflected in the rest of the available configuration. Here we can also see the network to which it belongs, the connected clients, delivered and maximum PoE power, number of ports, and the configuration profile that we are using in the equipment.
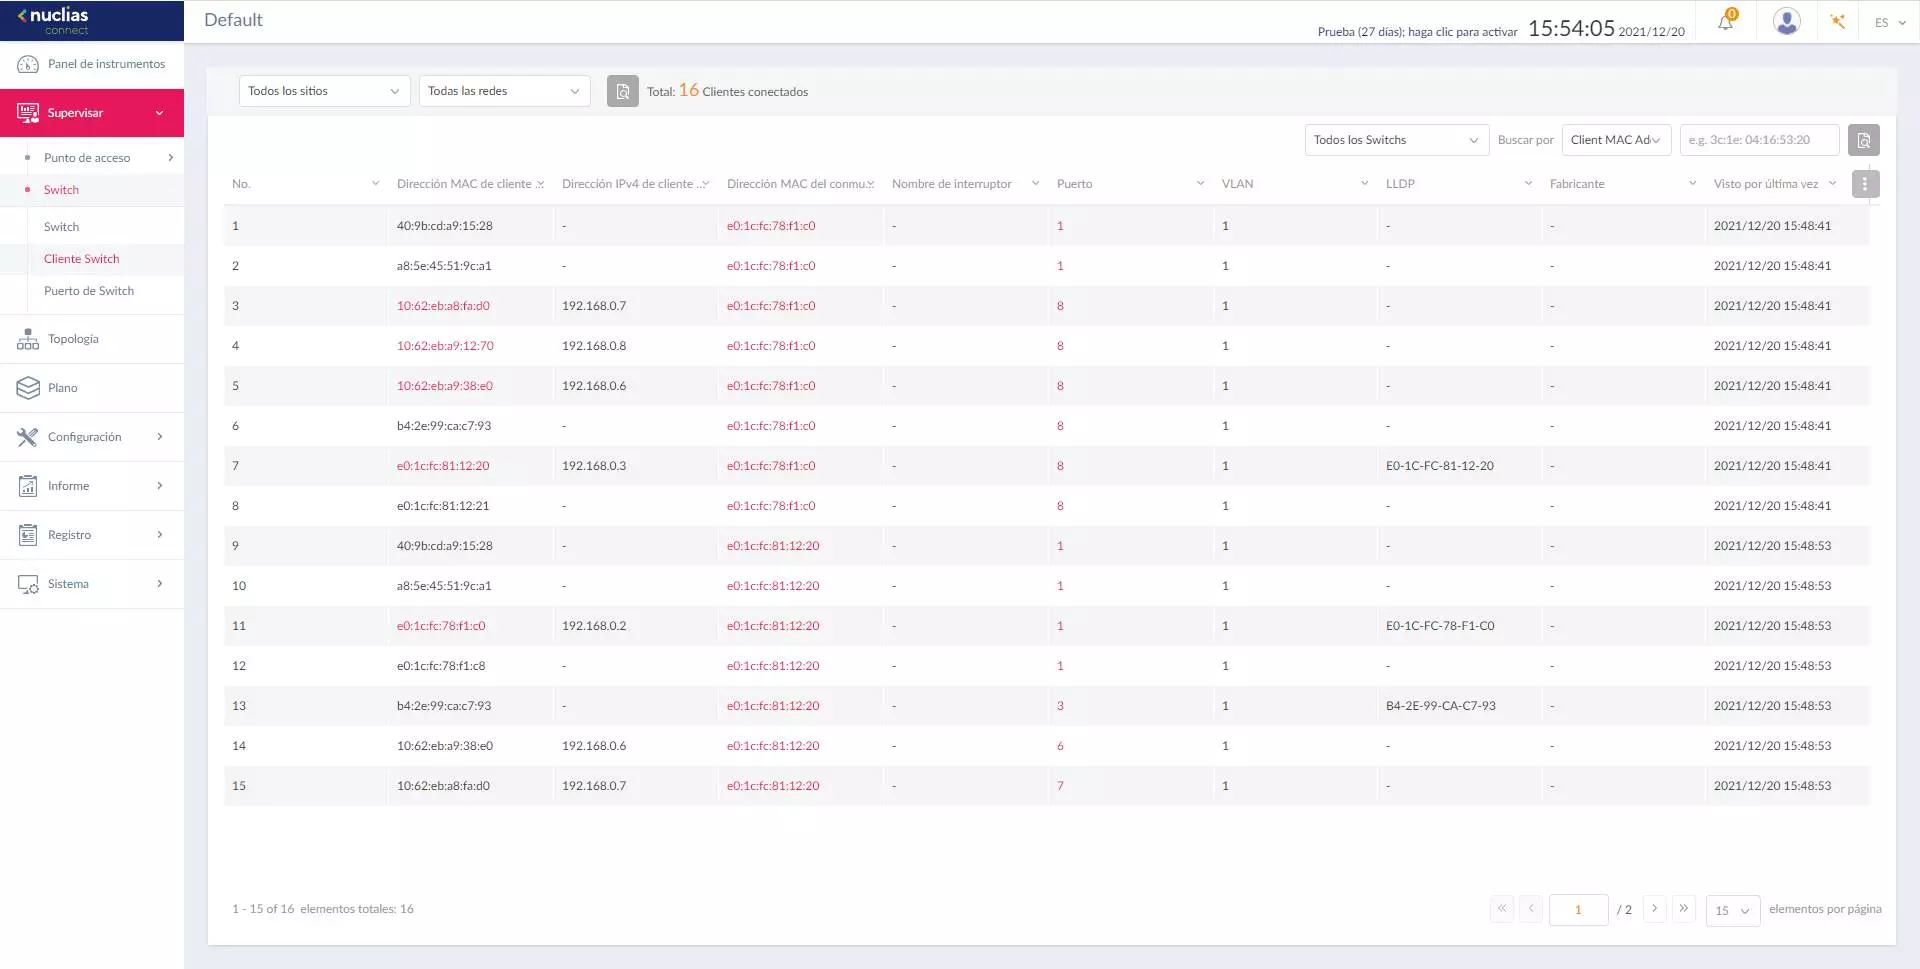
In the “Client switch” section we can see the different MAC addresses of all the clients that are connected to the wired and wireless network. The computers in red are those that are registered as APs or switches within Nuclias Connect. The devices that are not of this color are other devices or show us information from the other switches.
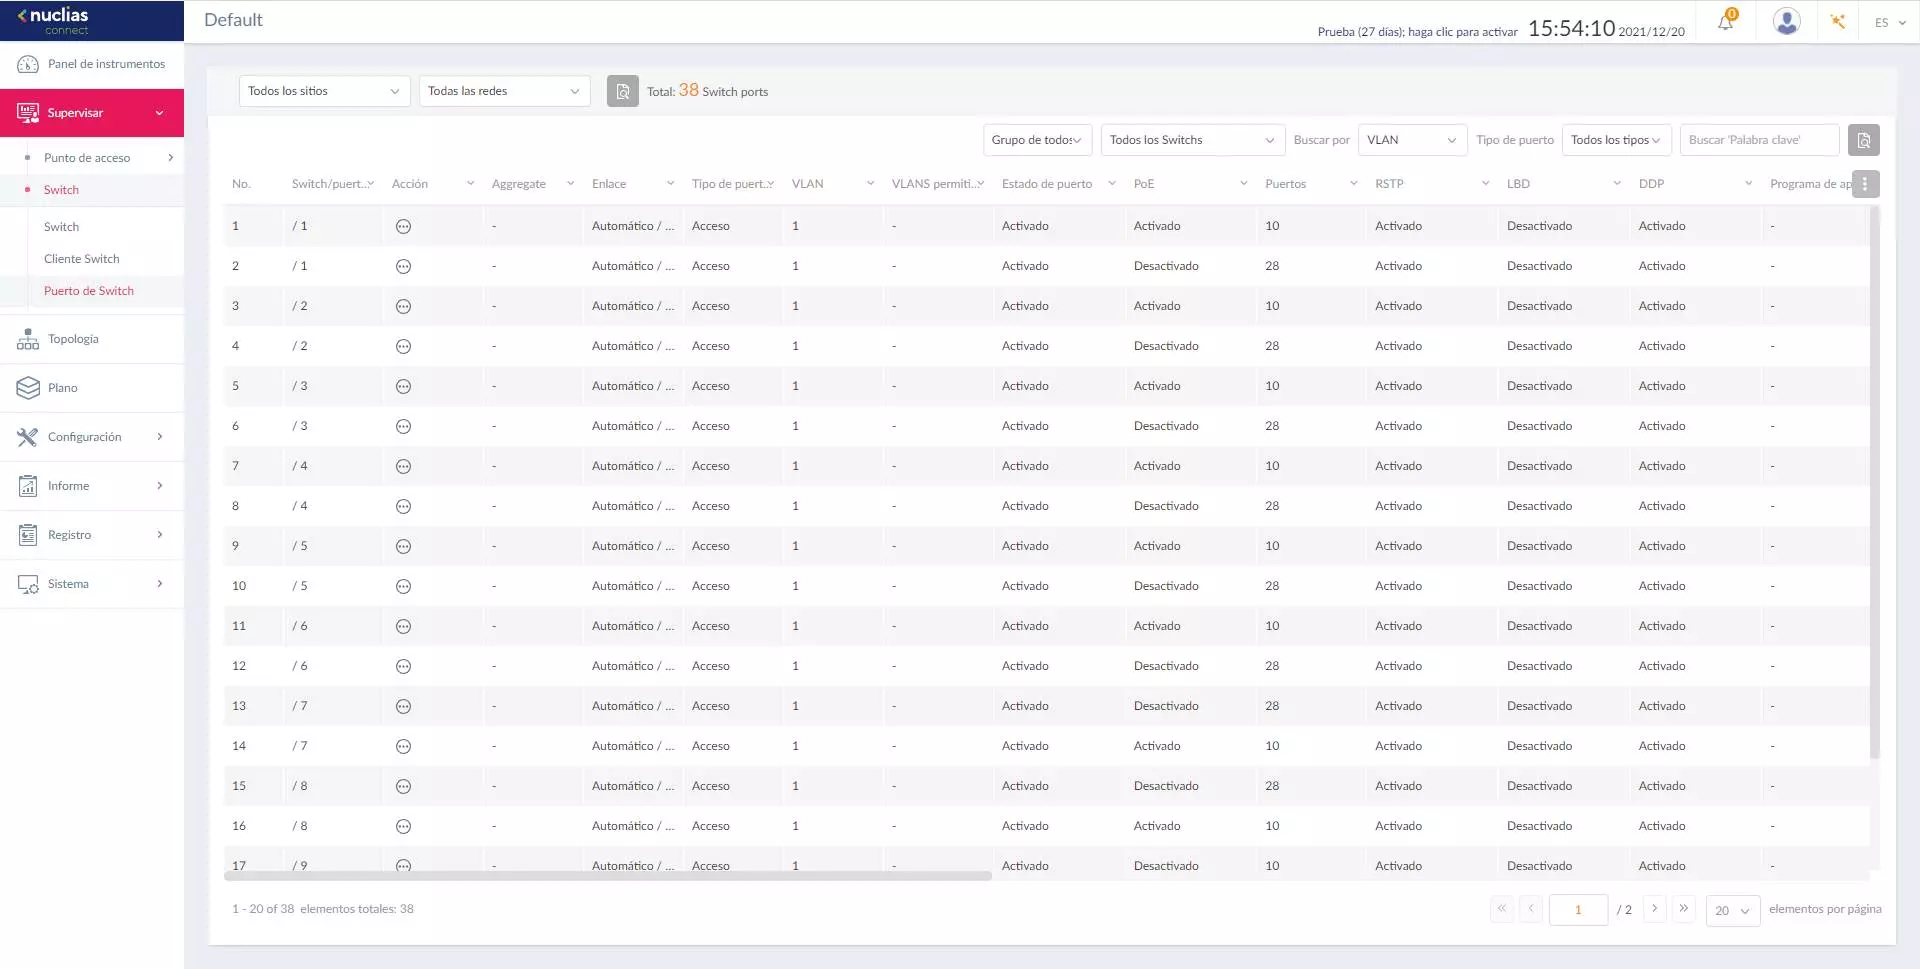
In the “Switch port” section we can see the different switches registered and it will show us the current configuration of the ports. It is recommended to give the switches a suitable identifier name, so that all the ports appear in this menu in a very intuitive way.
As you have seen, we have a large number of display options available. Now we are going to go to the “Settings” section where we will show you all the available options.
Setting
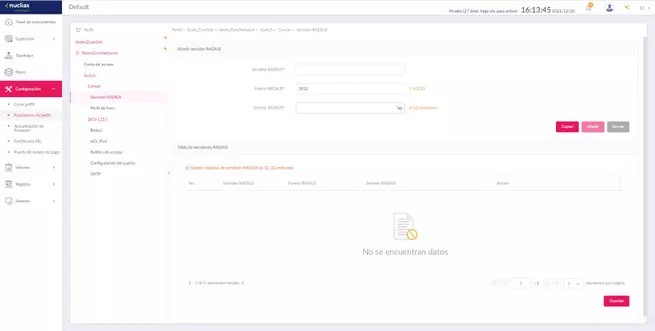
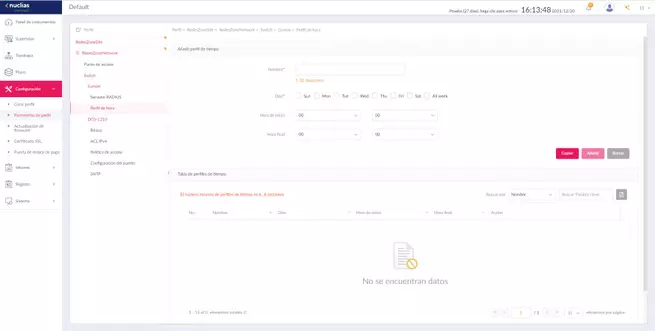
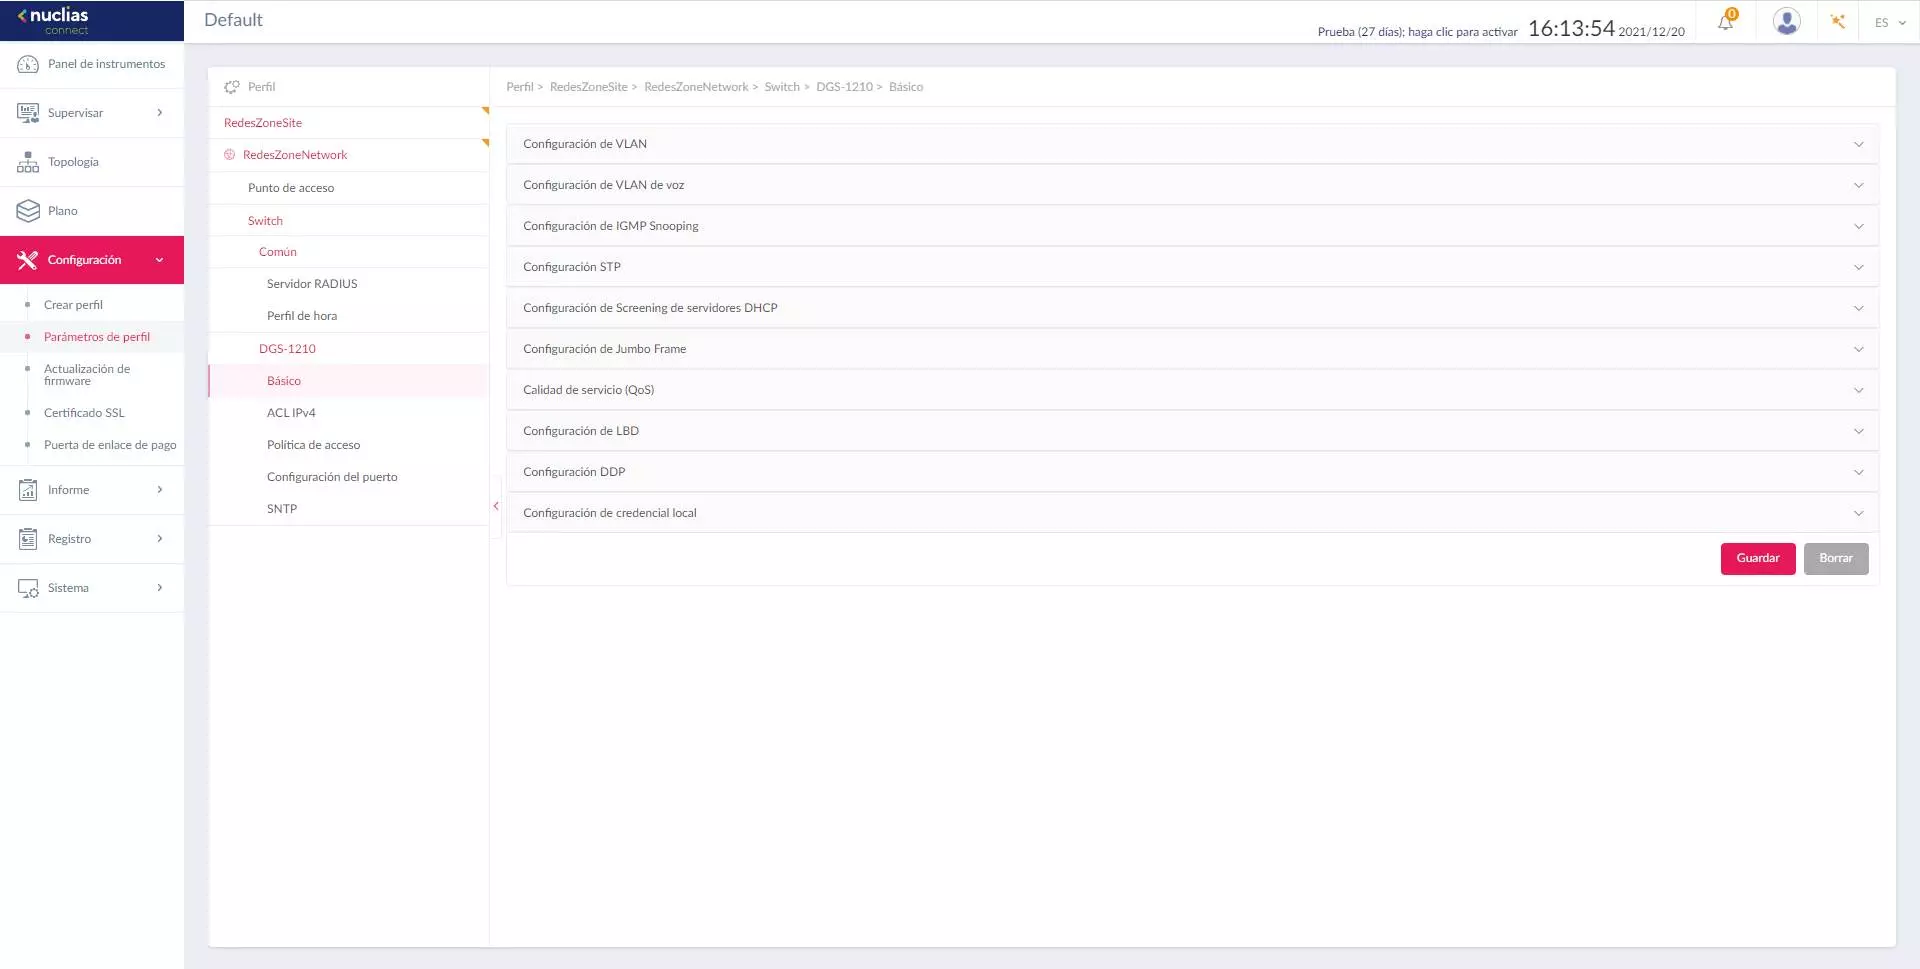
In the “Profile Parameters” section is where we will be able to make all the switch configurations. We will have the possibility of adding an external RADIUS server for 802.1X authentication, we will also have the possibility of configuring the time profile to later use it if necessary, this will allow us to turn the ports on and off based on a time configuration.
In the DGS-1210 section is where we can configure the main protocols of this switch:
- Configure VLANs and Voice VLANs
- Configure IGMP Snooping
- Activate STP or RSTP to avoid loops at the link layer level
- Configure DHCP Screening.
- Configure Jumbo Frames
- QoS quality of service
- Configure LBD
- Configure PDD
- Setting up local credentials
In each menu we will have the same usual settings that we find in the D-Link switches.
In the IPv4 ACL section we can configure the different rules to deny or allow traffic, we can also define different network access policies and even configure each and every one of the ports in detail. If we want to configure the switches differently, we will have to create different profiles and then add them to each switch that we have.
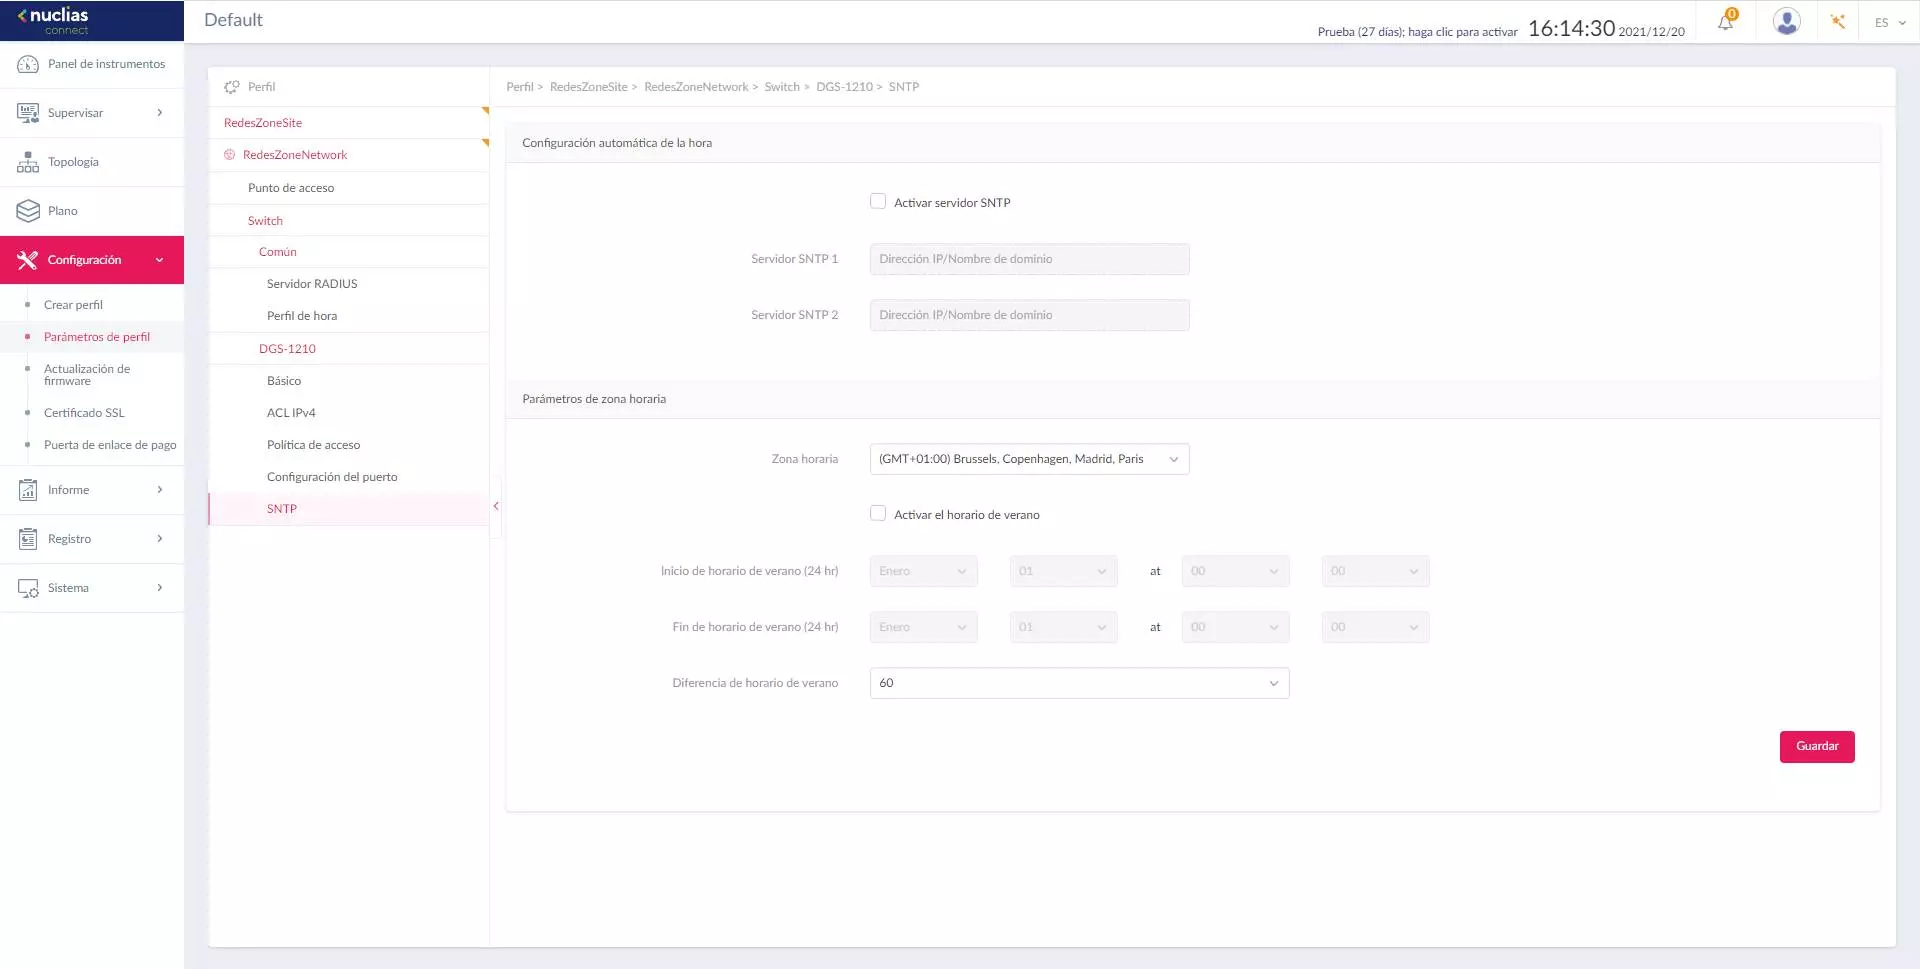
Finally, we can configure the SNTP server and the time configuration that we want.
As you have seen, the possibility of adding centralized management to Wi-Fi access points today is essential, but incorporating switches is a very remarkable feature that other manufacturers do not have or have just recently implemented.
The whole process in our video
At RedesZone we have created a complete step-by-step video on how to update the firmware of the switches, you can also see the step-by-step wizard on how to create the site, the network and the different profiles for the WiFi access points and also the manageable switches DGS-1210. In the process you will be able to see how the different devices should be incorporated from scratch, and also all the configurations that we have available.
As you have seen in the previous video, the start-up and configuration is really simple thanks to the step-by-step configuration wizard that we have available. Soon we hope that D-Link incorporates these same features in the popular DNH-100 which is the hardware controller with a price of about 100 euros.