What is a WiFi coverage simulator for?
When we have to install a WiFi wireless network, we must see what coverage we will have in each corner of the place where we are going to install the wireless network, with the aim of not leaving any area without coverage, and also, we should have a very good speed Wifi. When we are going to install a Wi-Fi network from scratch, it is essential to use a Wi-Fi coverage simulator to carry out an in-depth study of how many access points we have to install, where is the optimal location to install these Wi-Fi access points, what areas we have of “shadow” where the coverage is going to get bad, and a lot of other information.
WiFi coverage simulators allow us to make a fairly reliable first approximation of everything we need to know, without having to go to the location where we are going to deploy the WiFi network, place a WiFi access point and even several, and start with the measurements manually. Thanks to these simulators, we will be able to have a fairly reliable approximation of what we will find in reality, because they allow us to put all the obstacles that attenuate the WiFi wireless signal, in this way, we will be able to configure all the obstacles in our home in detail.
All manufacturers of wireless network equipment such as Ubiquiti, D-Link or EnGenius, among many others, make available to their WiFi network installation partners the necessary tools to greatly facilitate their measurement work. Thanks to these simulators, we will be able to upload a floor plan of the location where we want to put the WiFi access points, and later configure the “walls”, doors, mirrors that we have at home and many other obstacles that are really bad for coverage wireless.
EnGenius ezWiFi Planner is one of the most interesting WiFi coverage simulators, because it allows us a large number of configuration options so that later the coverage in reality is as close as possible to what is estimated in this simulator. At RedesZone we are going to show you how this simulator works and everything that we must take into account when configuring it.
This is how EnGenius ezWiFi Planner works
A very important detail of ezWiFi Planner is that it is a totally free tool, we do not have any type of limitation for its use, all we have to do is register on the EnGenius website as a partner, once they accept us then we can start using your limitless tool. Of course, being the EnGenius simulator, we will be able to get all the manufacturer’s WiFi access points on the map, but it does not allow us to get APs from other manufacturers, something completely logical and normal that always happens.
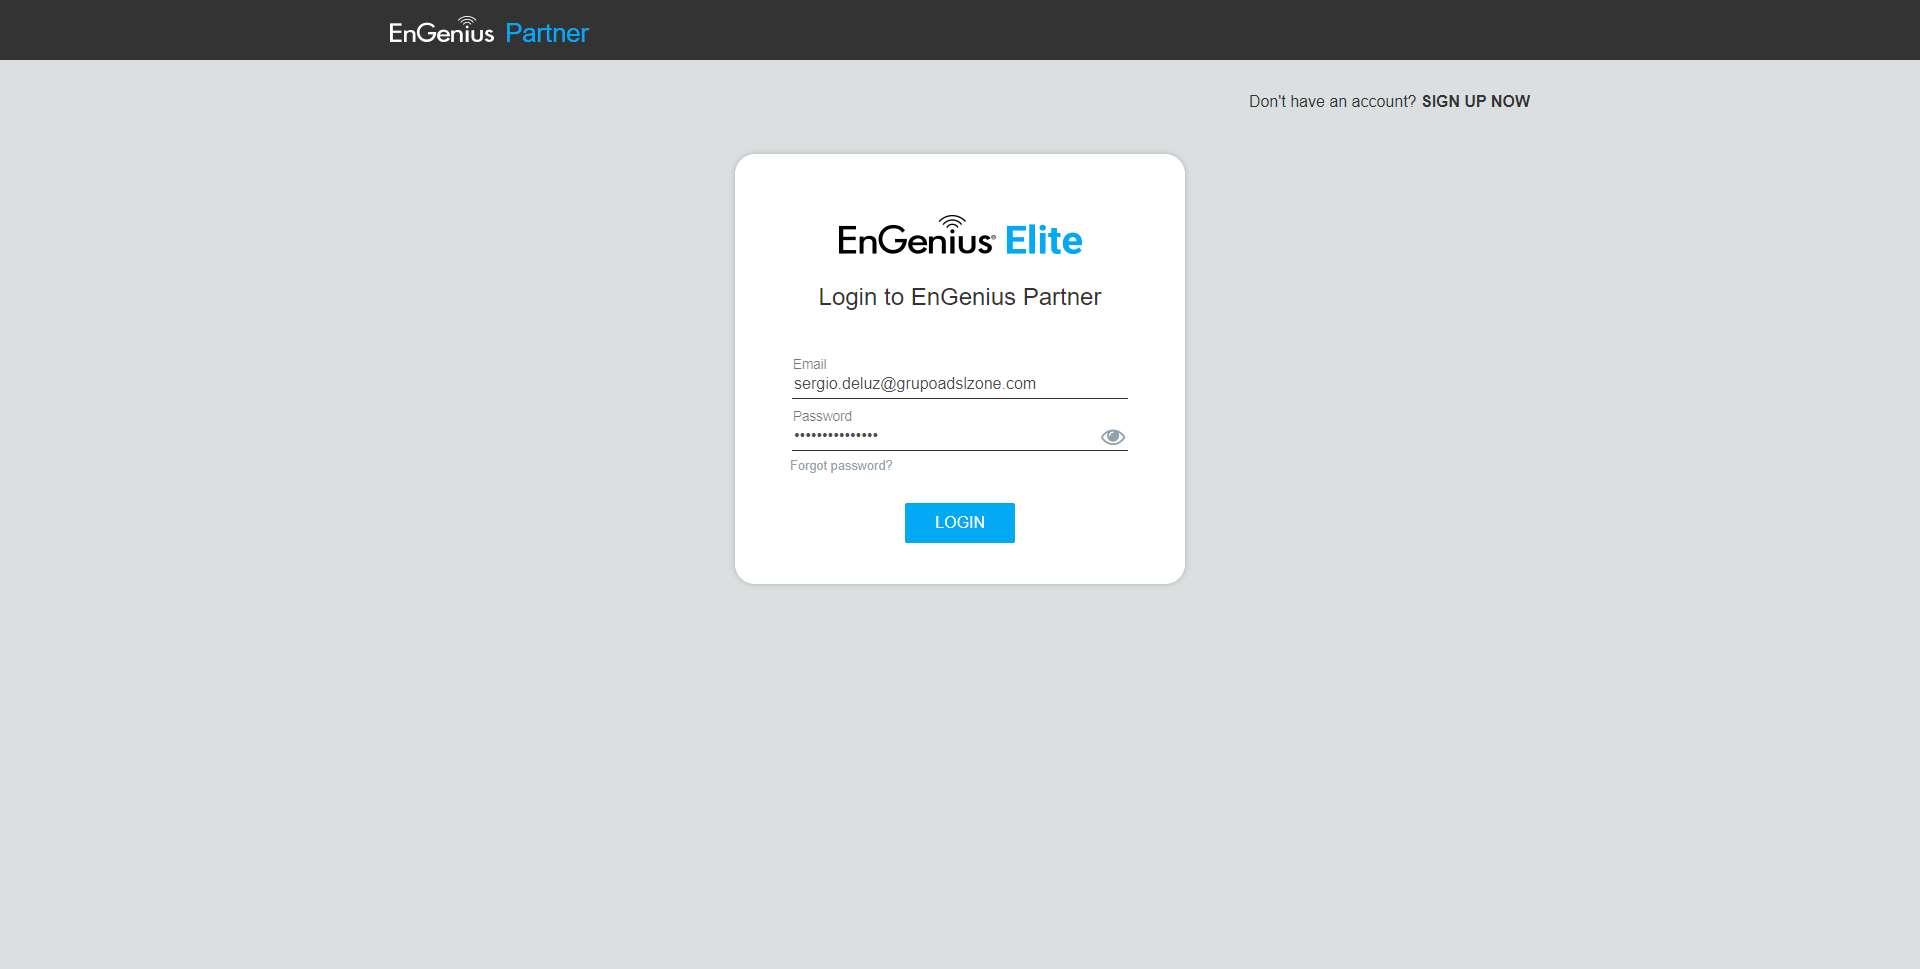
EnGenius Partner Registration and Login
The first thing we must do is register as partner on the official EnGenius website. Once our request is accepted, we can enter with the access credentials that we have previously configured in the registry.
Once we have logged in, we can find interesting information for partners, including the benefits we have when buying and marketing EnGenius equipment. What we are interested in is the WiFi coverage simulator ezWiFi Planner, and this is in the “Tools” section.

One aspect that we would like to highlight about the EnGenius Partners control panel is that we will have a large amount of information about all their products, since we will be able to access advanced resources and even direct support with the manufacturer.
Simulator configuration
To enter the simulator, we have to click on «Tools / ezWiFi Planner«, as you can see below:

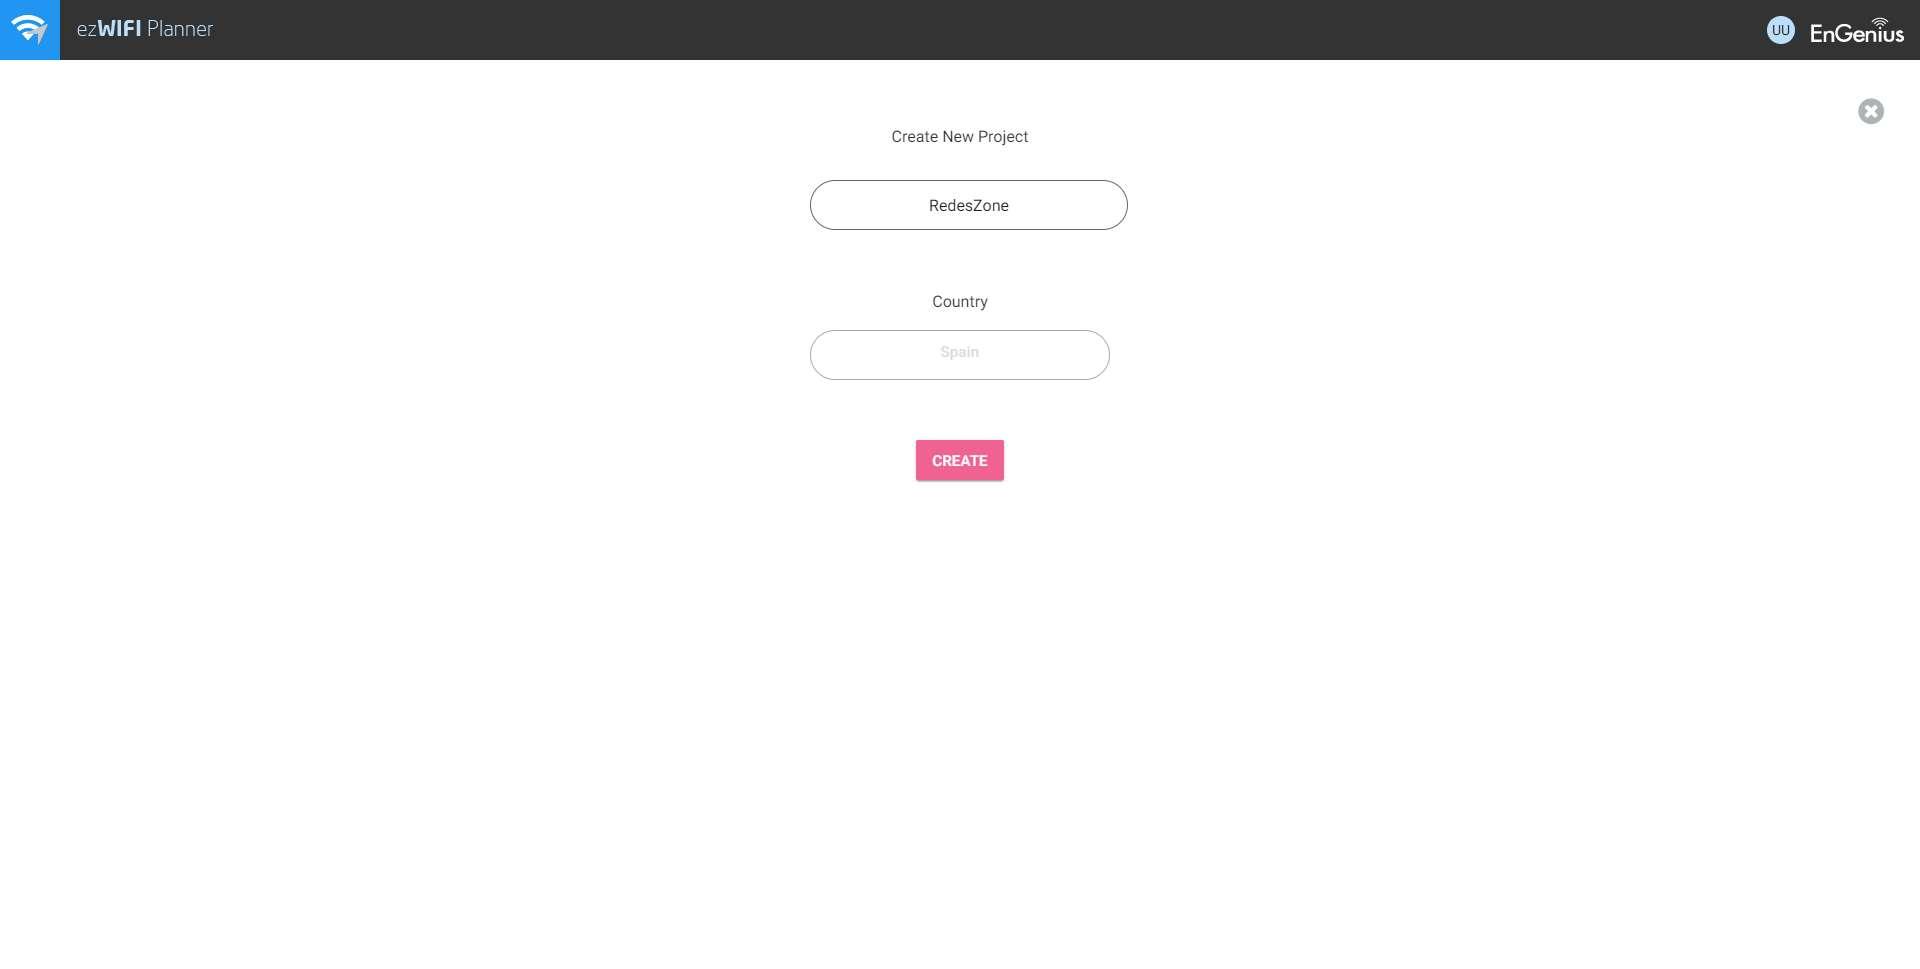
Once inside, the first thing we will have to do is create a new project. We put a name and also the country where we are going to carry out the simulation. It is very important to put the country, because depending on the country the WiFi access points will be able to emit with a greater or lesser power, therefore, it is a really important parameter that we must indicate, otherwise, the simulation will not come close to reality .
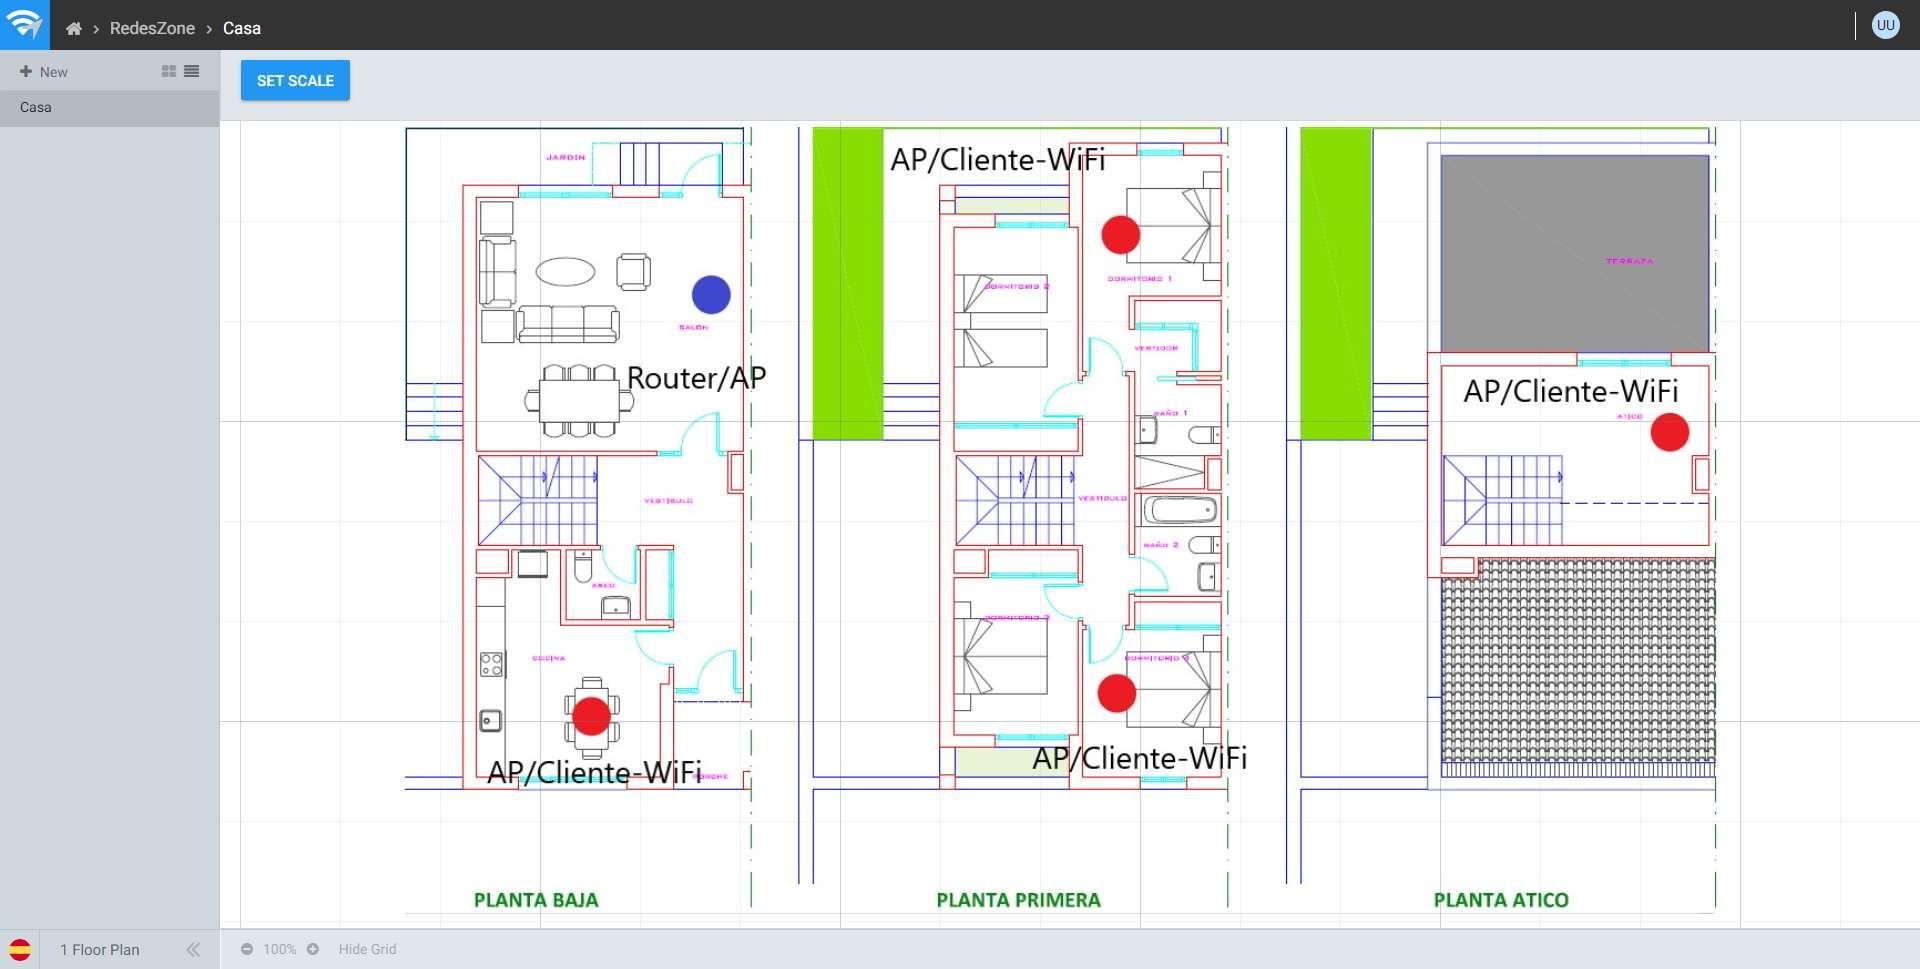
Once we have entered the name of the project and country, we will have to give a name to the floor plan that we have to upload. We can use a floor plan image if it is an indoor installation, which is exactly what we have done. The simulator also allows us to use Google Maps for simulations in outdoor environments, in this case we have not tested it, because most installations are carried out in indoor environments.

Once we have uploaded the floor plan where we want to configure the WiFi wireless network, it is absolutely necessary to scale it. To put it to scale we simply have to click on «Set Scale», we take any measure of the plan, for example, the width of the room, and indicate the real meters it has. Once we have taken the scale, the system will calculate everything to offer us reliable results.
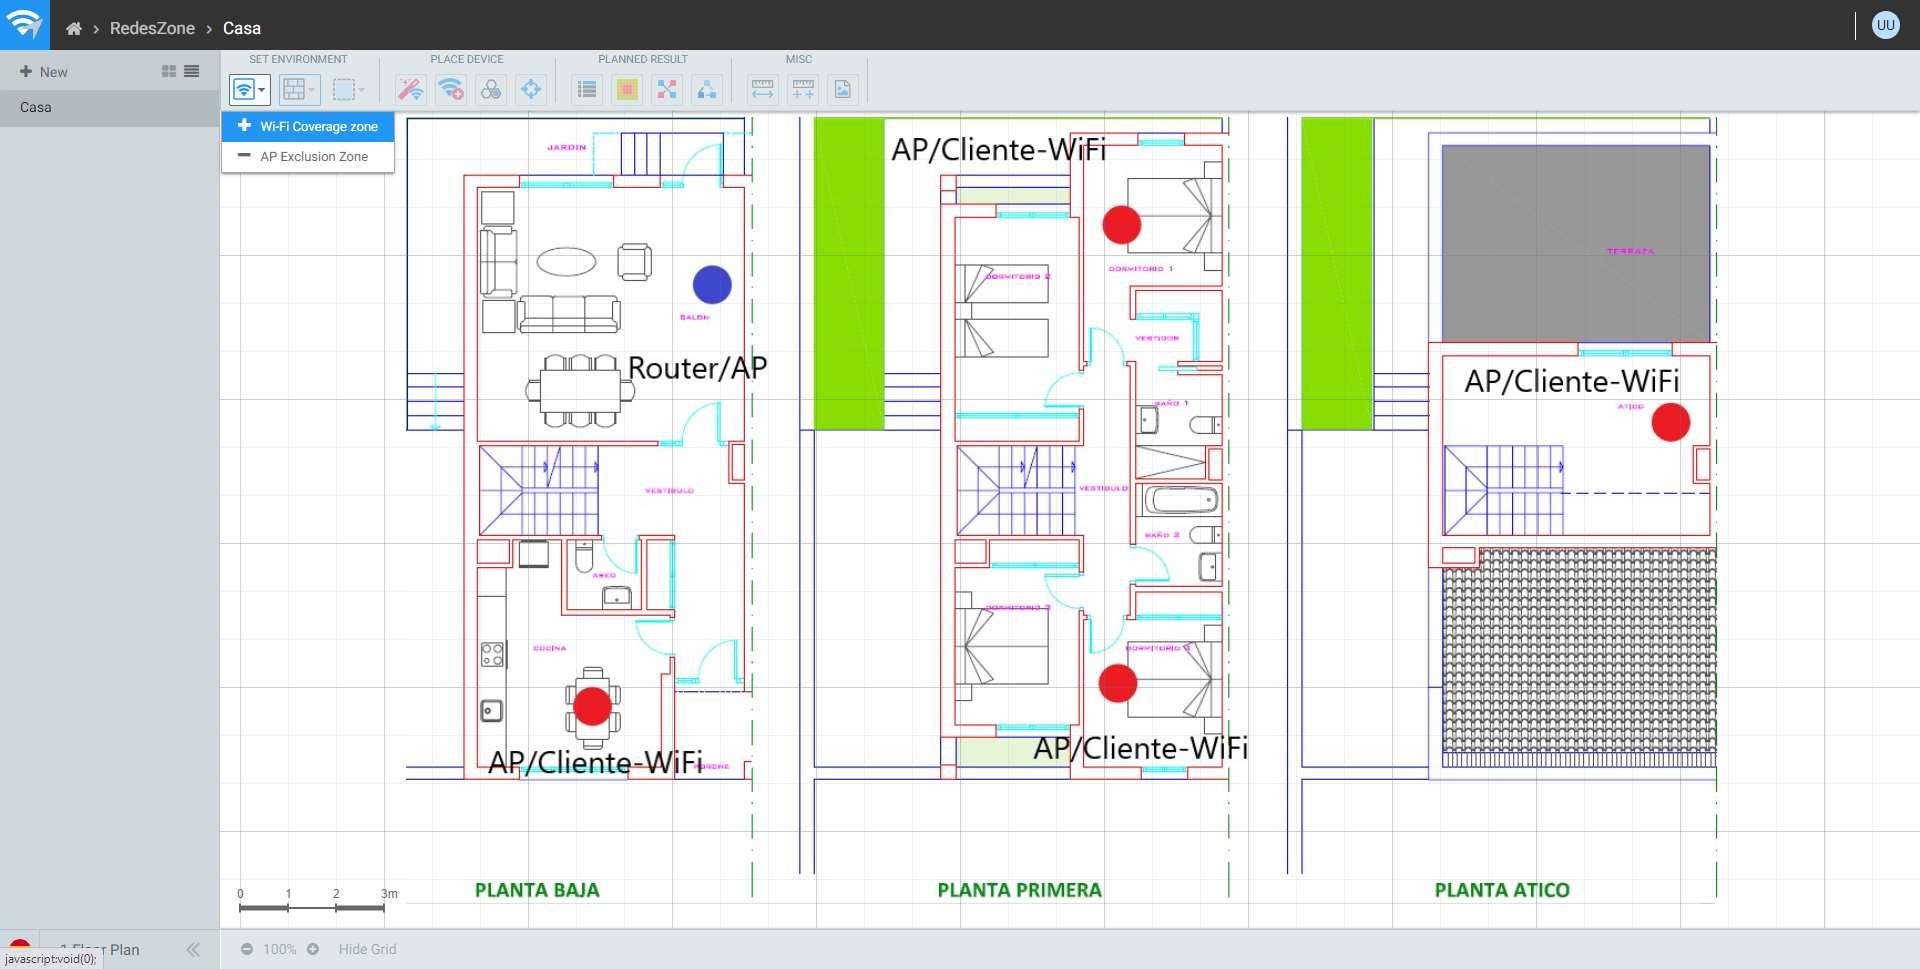
In the upper area is where we can find the different options, we will be able to configure and see the following:
- Set Environment: this option allows us to configure the materials of the walls, doors, partition walls and much other essential information to adequately simulate the wireless network. This option allows us to add the area where we want to provide WiFi coverage, and also allows us to configure an exclusion zone.
- Place Device: these options are where we can choose the different WiFi access points to place them in the different areas of the plan, we can choose between all the interior models of the manufacturer EnGenius, to adapt to what we are going to install later.
- Planned Result: in this menu is where we can see the heat map and even additional information that we can export, in this way, we can know the final result of everything we have configured.
- misc: Other simulator options such as measuring from an origin to a destination based on the configured scale. We can also configure the scale again and even save the image displayed on our PC.
Next, you can see all the options that come out:

The first thing we must do is define the coverage areas, for this we go to «Set Environment» and click on «+ Wi-Fi Coverage zone», if we want to remove any area where we will provide WiFi, we can always click on the option of “-AP Exclusion Zone”.
The obstacles section is the most important part to configure in any WiFi network coverage simulator. Here we must configure our house or the area where we are going to deploy the WiFi network as it is in real life. We will be able to choose between a large number of materials, which are associated with an attenuation in standard dB, in this way, you will be able to calculate if we are going to receive good coverage or not. As you can see, very thick doors and metal ones are the ones that attenuate the signal the most, in addition, thick walls also attenuate a lot.
On the plane we will have to draw again all the walls, doors (closed) and all the areas, including the windows because they are also very important.

The process of completely configuring a basic plan with three floors can take approximately one hour, you must take into account to exactly put all the walls, doors and windows, because depending on what you configure, we will have the final result.
Simulation results
If we click on the results area, we can view the heat map. In this map we will be able to put or remove the different layers of information that we have been putting, we will also be able to choose the different frequency bands (2.4GHz or 5GHz) and even the WiFi channels. In this map we can see an approximation of the coverage received by customers if they connect in the different areas of the house.
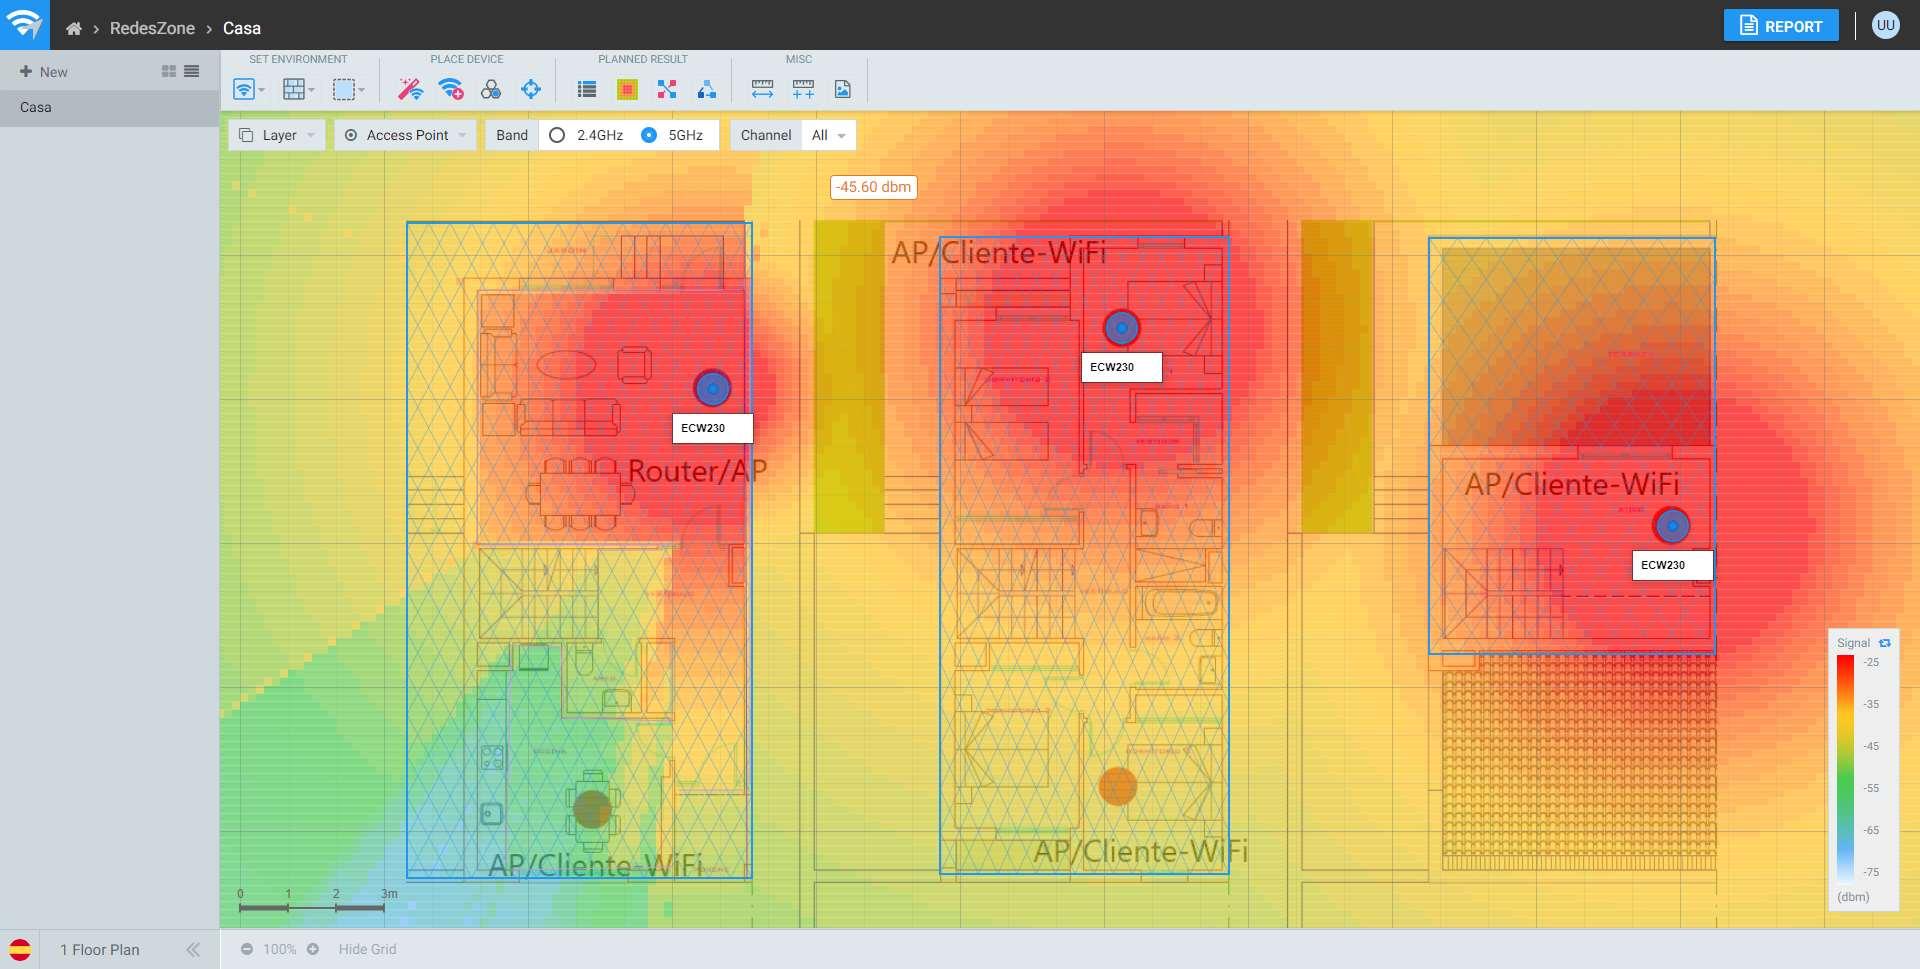
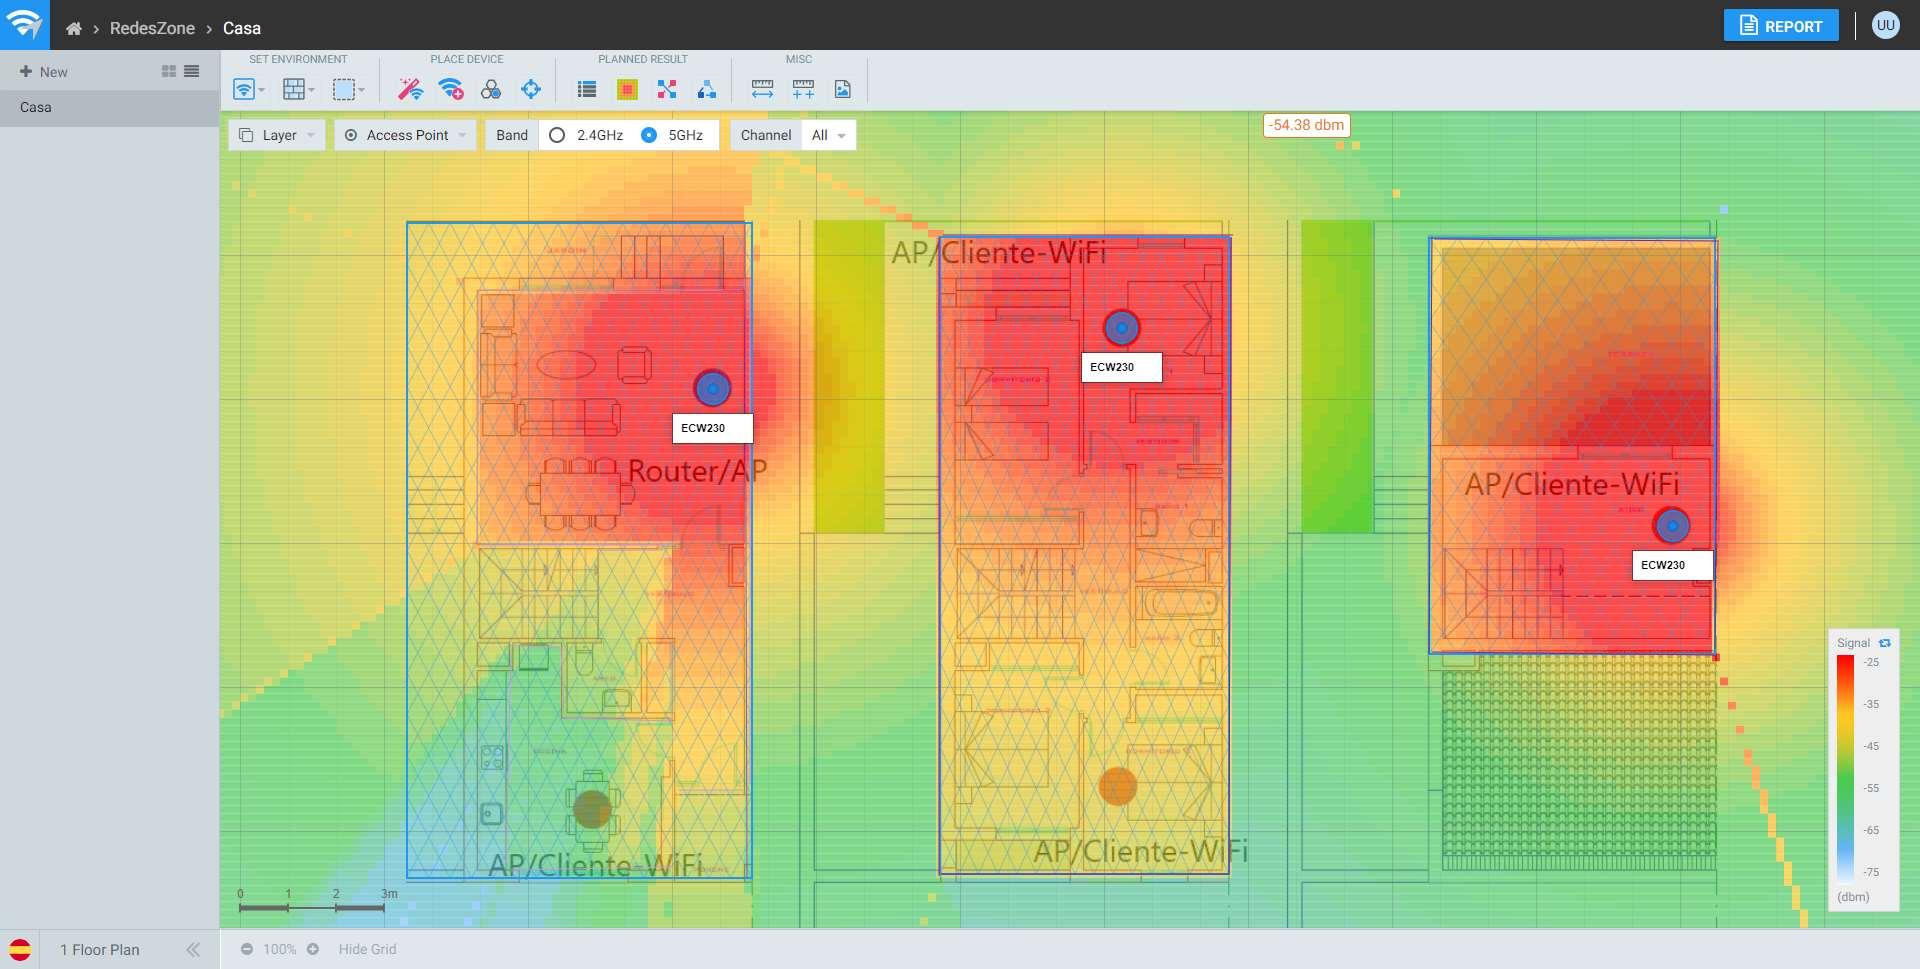
In the following image you can see that the heat map is different, because we have incorporated different obstacles. Depending on the obstacles we put and the related attenuation, we will have a higher level of coverage.
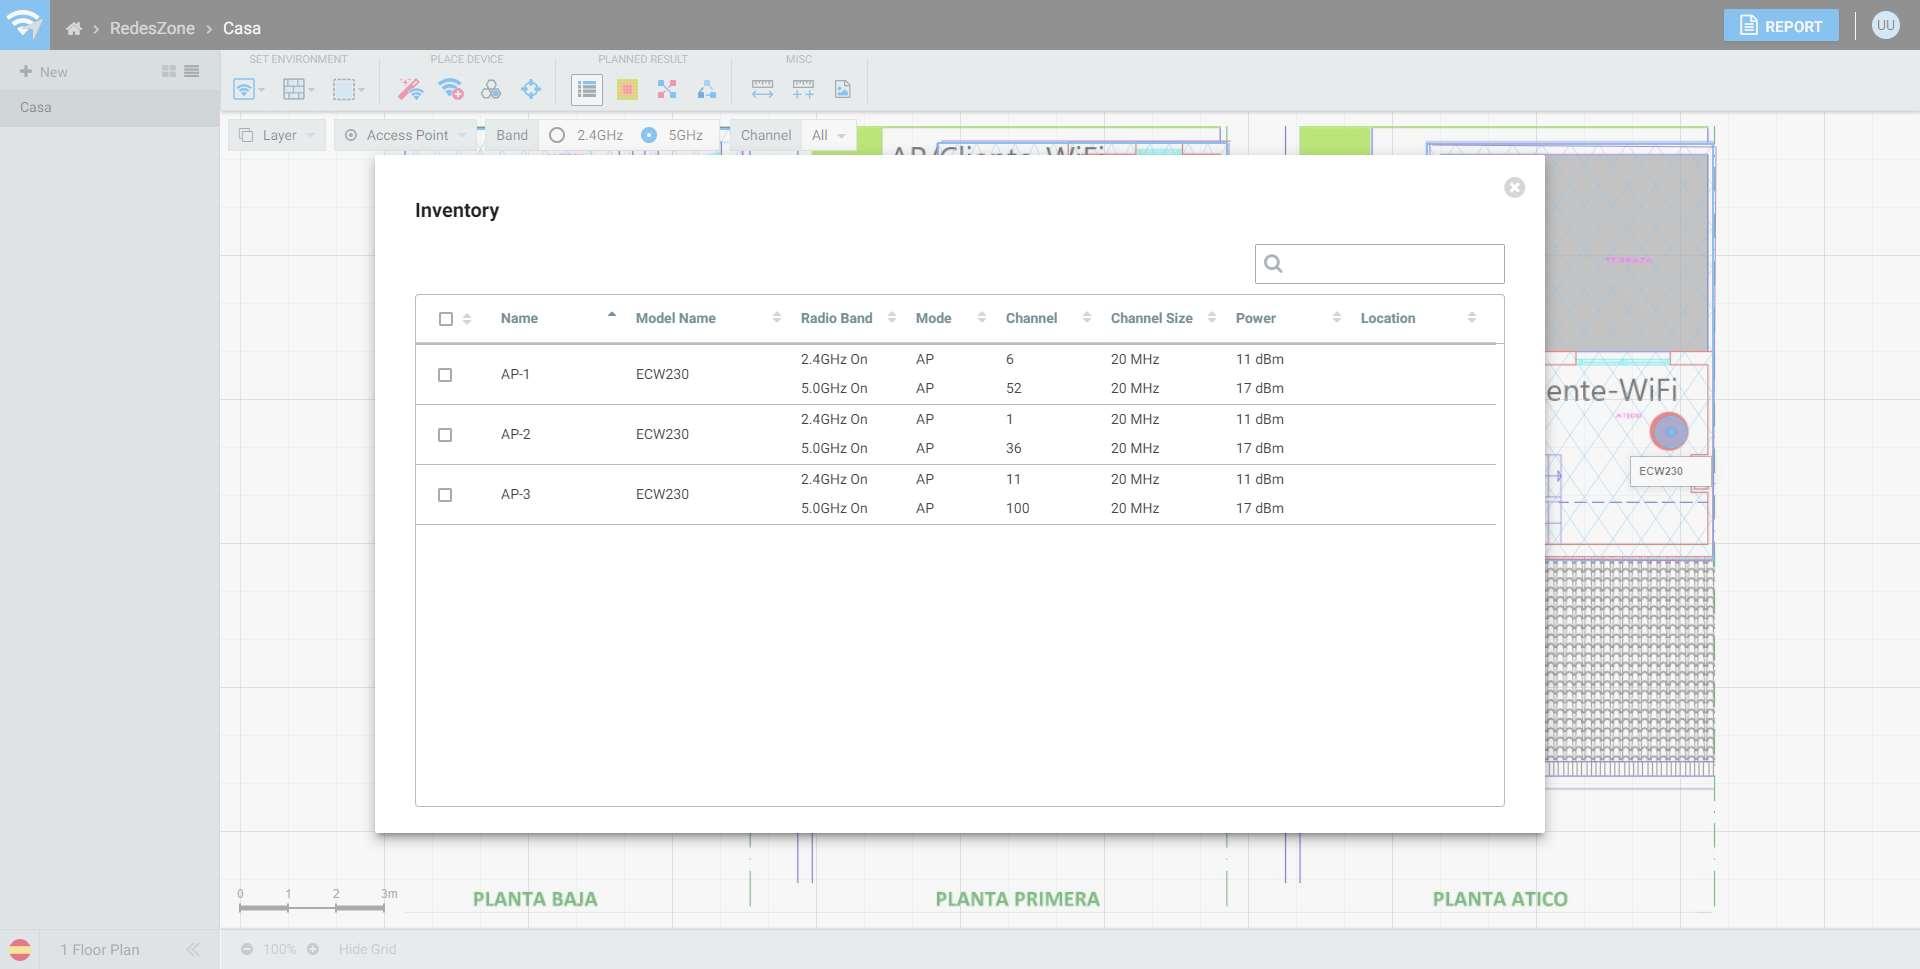
In the “Inventory” section we will be able to see the different WiFi access points that we have taken out, in our case we have taken out three APs model ECW230 that are simultaneous dual band. We will also be able to see the configuration of the channels, channel width, transmission power, etc., ideal for the simulation to match reality as much as possible.
As you have seen, this EnGenius ezWiFi Planner simulator is a very interesting solution to check the coverage of a WiFi wireless network before installing it, however, it is always advisable to verify in the specific location if the simulator has shown us what the measurements indicate. All the simulators of the different manufacturers usually work more or less in the same way, but with their corresponding WiFi access points, so the information may vary from one simulator to another, in addition, we must also take into account the list of obstacles and the attenuation related to them.