Another very common cause is that there is a problem at the software in the system. It is usually related to a Windows update that has been caught or having outdated network card drivers. This can also generate conflicts and cause the DNS server error to appear in Windows 11.
Although it is not the most common in these cases, it is also necessary to take into account the possibility that there is some virus in the system. This can affect any component of the equipment, the configuration or any tool that we use. It could also interfere and cause DNS servers to fail.
What to do to fix it
After explaining why the DNS server error appears in Windows 11, we are going to talk about what steps we must take to solve it. Depending on the specific cause, one of these methods that we are going to see will work. However, you will not have to install anything, since they are easy steps that you can do in Windows.
Change the DNS
The first step you can take is change DNS servers that you are using on Windows. It is one of the reasons why this error may appear and it has an easy solution. What you have to do is change the ones that are predetermined by the operator and put some of the options that are available for free on the network.
Some examples of DNS servers that you can configure in Windows 11 are the following:
- Google: 8.8.8.8 and 8.8.4.4
- cloudflare: 1.1.1.1 and 1.0.0.1
- Quad9: 9.9.9.9 and 149.112.112.112
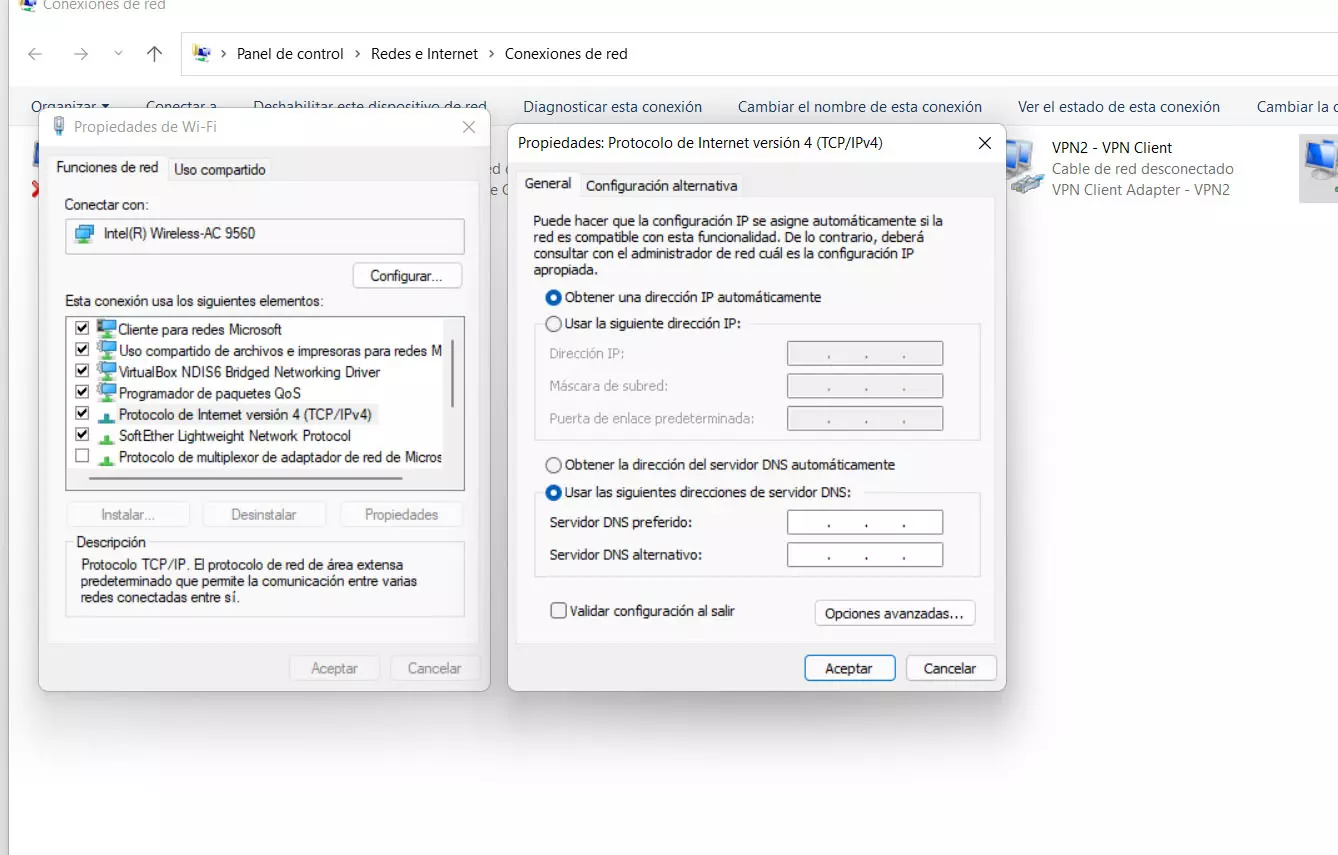
To change it in Windows you have to go to Start, enter Settings, Network and Internet, Advanced network settings, More network adapter options and select the corresponding adapter there. You have to click the right mouse button, go into Properties, select Internet Protocol version 4 and again Properties. There marks Use the following DNS server addresses and put some of the previous options.

Flush the DNS
When problems related to DNS appear, a very common step is to flush and renew them in Windows. It is a simple process and it comes in handy when an error appears or there is an incorrect configuration that causes us to not be able to browse the Internet normally.
It is very simple. You only have to go to Home, enter the windows terminal with administrator permissions and there you execute the following commands, one by one:
- ipconfig /flushdns
- ipconfig /registerdns
- ipconfig /release
- ipconfig /renew
- netsh winsock reset
All these commands will allow you to solve certain problems related to DNS. Once you have executed them all, simply restart the computer and check if you have normal Internet again or the same error continues to appear.
Scan for viruses
It is also possible that the DNS server is not responding in Windows due to some virus. This makes you have to analyze the system and see if there is any malware that you have downloaded by mistake. It is important that you do this periodically, but even more so if a problem of this type appears.
What antivirus to use? The truth is that there are many options. Our advice is that you use a guarantee program that works well and can protect you correctly. For example, Windows Defender is a good solution, but so are others like Avast or Bitdefender. It is better to avoid unknown applications, those that do not have a good rating, those that are tests, etc.
Once you check for viruses and have the system completely clean, try browsing to see if the DNS error no longer appears. That would confirm that it is due to some malicious file on the computer.
Review programs that may interfere
But it is possible that the reason is precisely some security program or any other software that you have installed and that is interfering. Especially this can happen if you have installed an antivirus, firewall or similar that may be blocking the connection and causing problems.
To solve it you can go to Start, enter Settings, Applications and go to Applications and features. All the ones you have installed on your computer appear there. In case you see some strange one, one that you have recently installed and that you think may be the cause of this problem, you just have to uninstall it.
It is also important that you check that you do not have more than one antivirus installed. If you are experiencing problems with your DNS servers, a common reason is that you have more than one security program and they may be causing conflicts.
Update Windows and drivers
One more step you should take is to check that you have correctly updated Windows to the latest version. This is important to maintain security, improve performance and also be able to solve certain errors that may appear, such as problems with DNS.
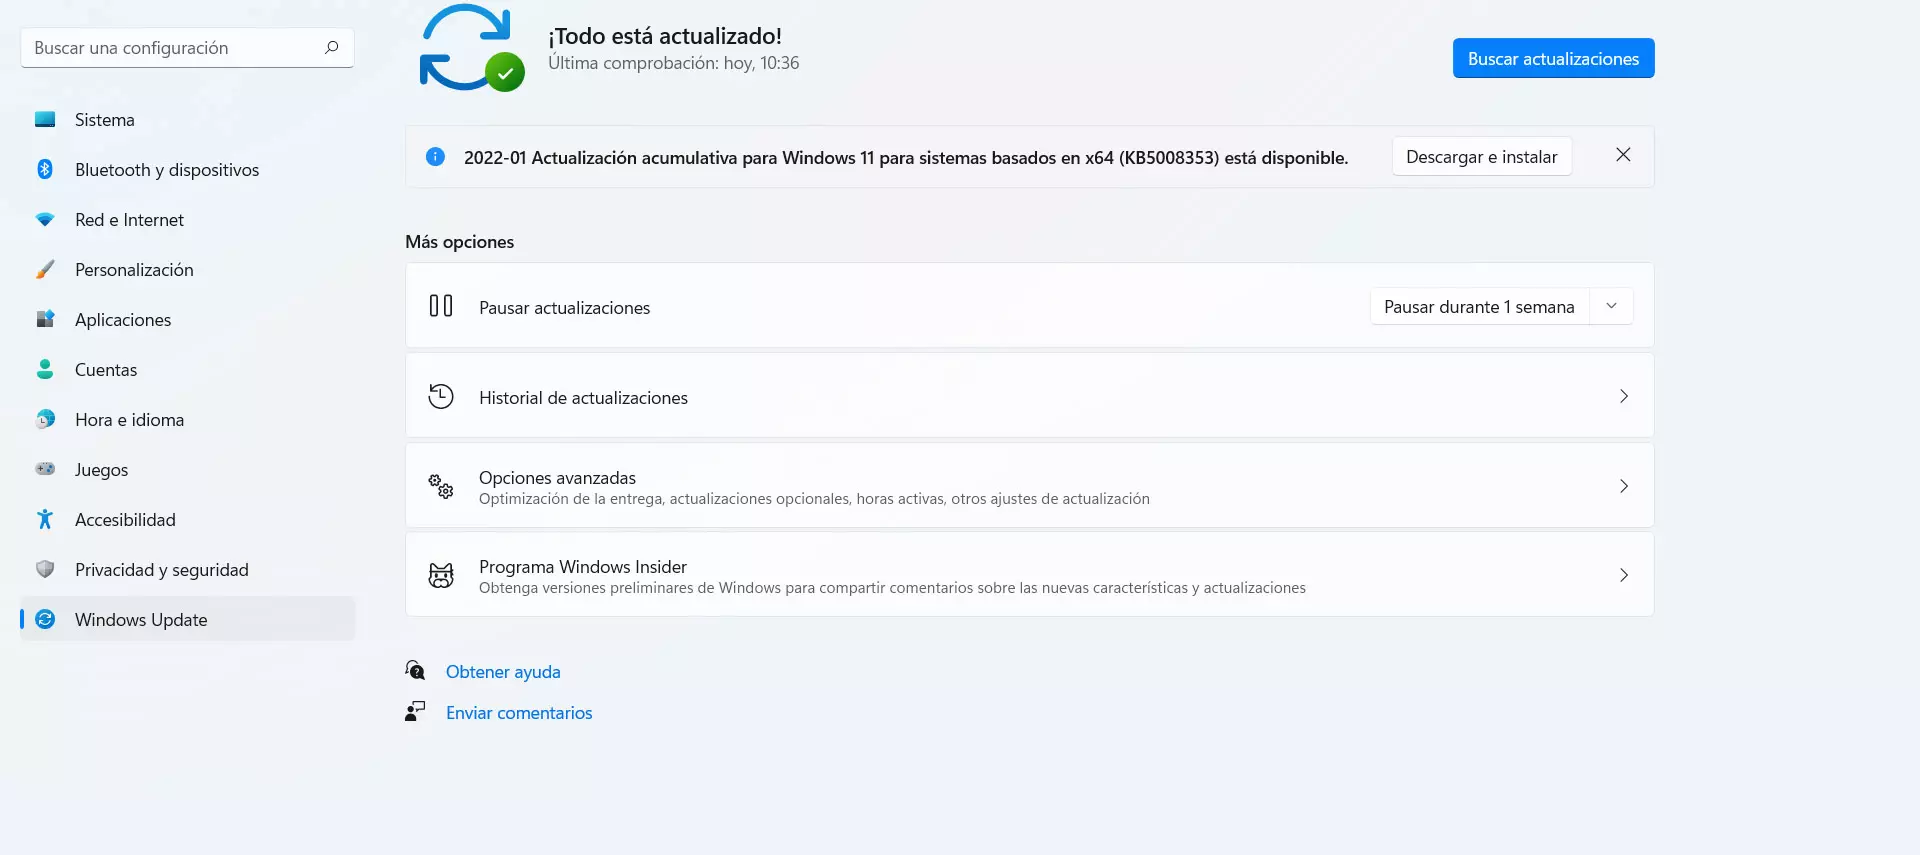
To do this you have to go to Start, enter Settings and go to Windows Update. There you will see possible updates that are pending and install them. This will also help troubleshoot if an update has previously been left hanging.
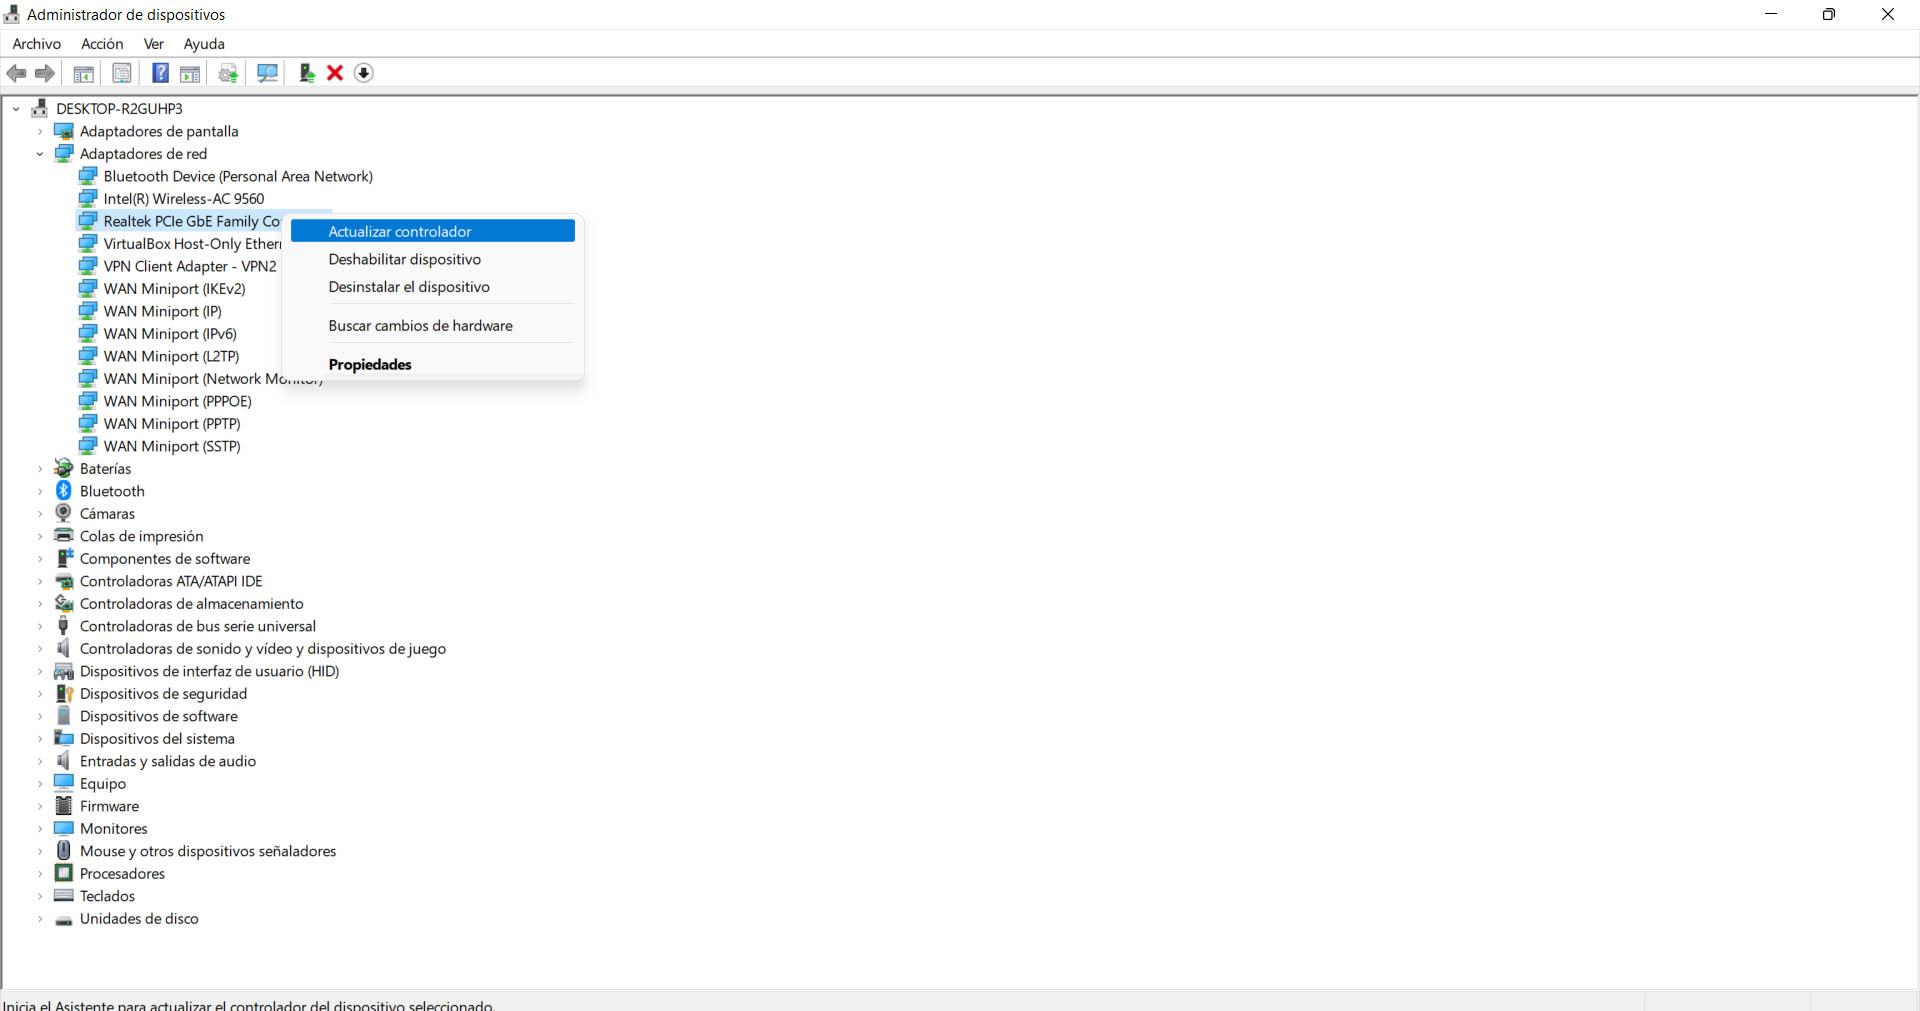
In addition, it is convenient that you review the drivers of the network card. You must always have them updated to the latest version. To do this, go to Start, enter Device Manager and network adapters. There you select the corresponding card, click the right mouse button and click Update driver. Then you restart the system.
In short, by following these steps you can solve the problem with DNS in Windows 11. It is an error that can appear for different reasons and could prevent you from browsing the network normally. It is important that you correct it as soon as possible and, as you have seen, there are different methods for this.