Why is the Wi-Fi channel important?
Choosing one Wi-Fi channel or another may or may not interfere when browsing the Internet. Each of the wifi bands, both the 2.4 GHz and the 5 GHz, have a series of channels. If you connect to a particular one and your neighbors use the same one, you might have trouble getting good speed and quality.
This problem especially occurs in the 2.4 GHz band, since they are overlapping channels and are more limited. The fact that they are overlapping means that if, for example, we connect to channel 3 and the neighbors connect to 2 or 4, there will be problems. We are not necessarily going to have interference by connecting to a specific channel, but also depending on what is around us.
However, a Wi-Fi channel can work fine at a certain time, but start to go wrong at certain times. If, for example, you connect to channel 4 and several neighbors use the same channel or one nearby, perhaps at certain times they have more devices connected and that makes things worse.
For this reason, always choose a channel that is free, that is not being used by anyone else, can help us to have an optimal connection, without cuts and without speed problems. Although many routers will automatically connect to the one they find best, this does not always happen and sometimes you need to check manually.
How to choose the best option
If you’re wondering how to find out which Wi-Fi channel is freer and is the best one to connect to, you can find out easily thanks to the program Acrylic Wi-Fi Home. It is free, although it also has a more complete paid version. But for what interests us, the first option is totally valid.
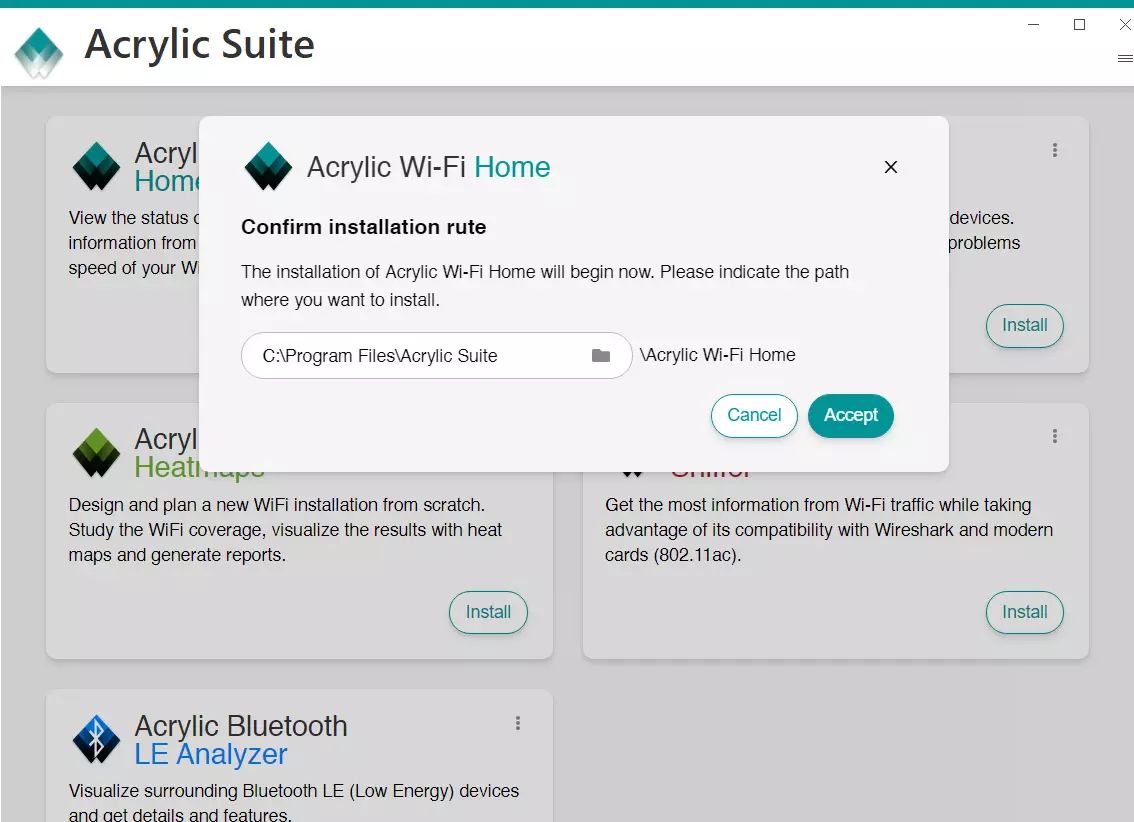
The first thing you have to do is go to their website and download the program. It is available for Windows. You have to hit Download and then start the installation process to be able to use it.
Once the installation is finished, it will automatically show you the different networks it has detected. Both the Wi-Fi networks in the 2.4 GHz band and in the 5 GHz band will appear. Information will appear in each of the detected networks, such as the Wi-Fi channel, which is what interests us in this case. With that you can already get an idea of the congestion that there may be.

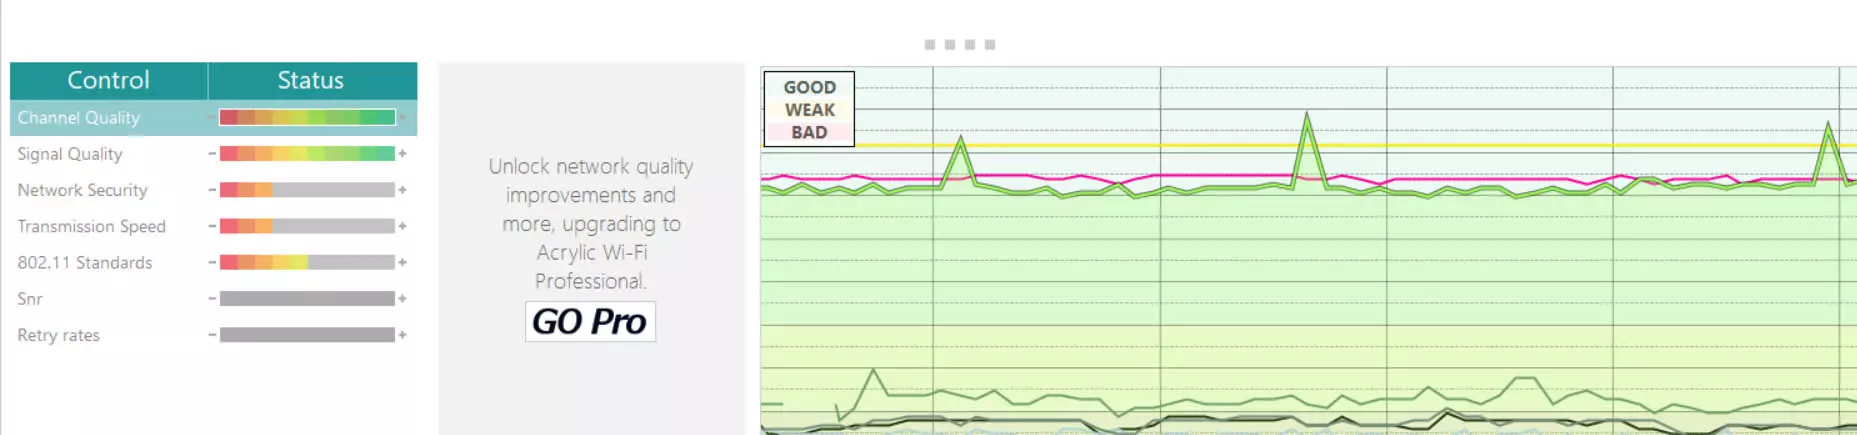
Now, if you click on any of the Wi-Fi networks that appear, it will show a series of information at the bottom. One of the data is the quality of the channel, which will tell you if it is good or if it would be better if you connected to a different one. The more powerful the quality it displays, the better. That means that channel is free. On the other hand, if you see that the quality is weak, it means that it is saturated.
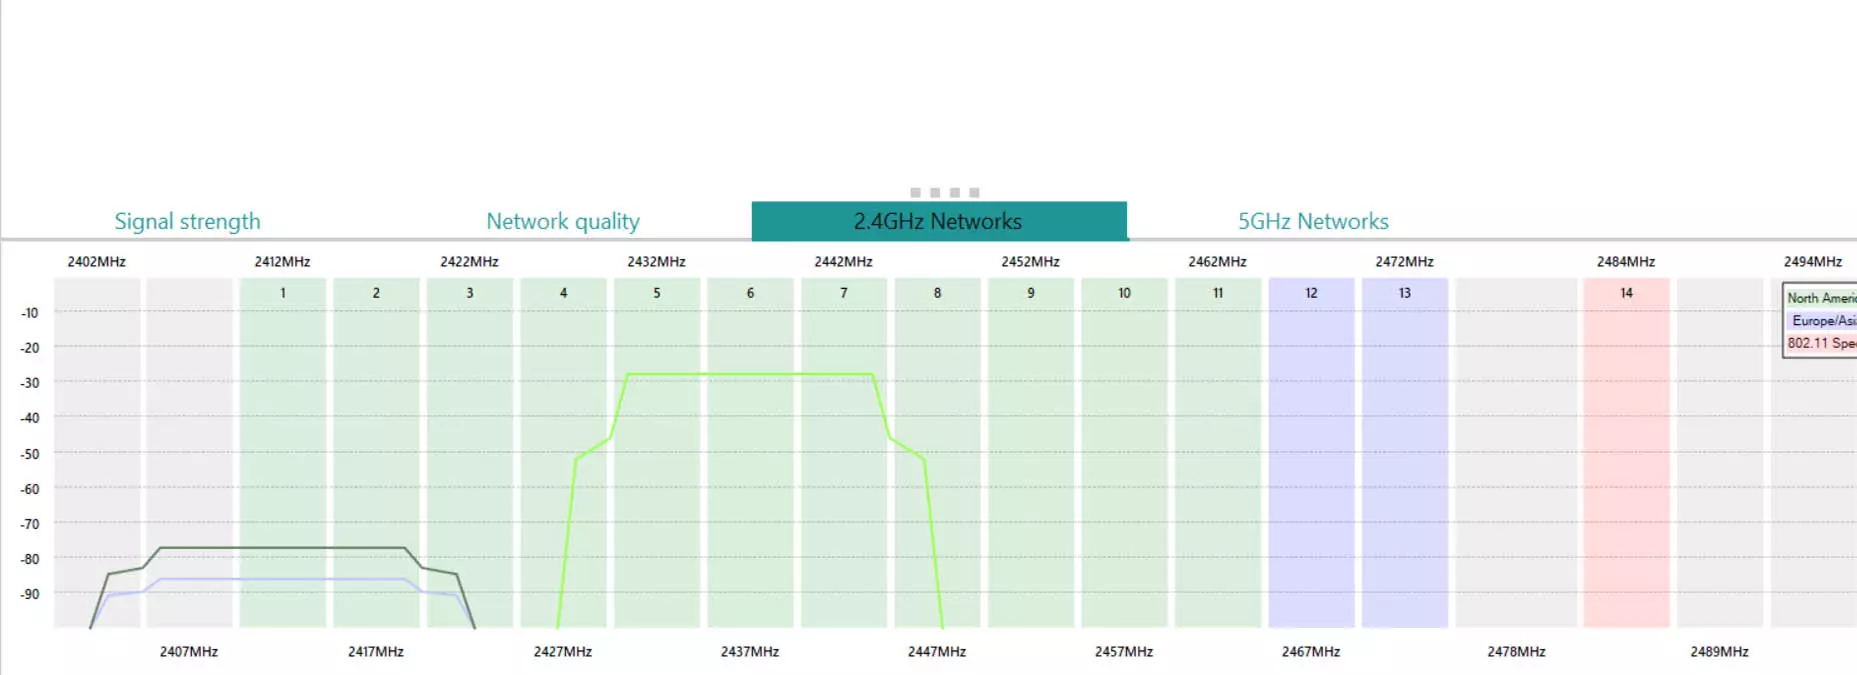
Also, if you go to the top right and activate the advanced mode, you will be able to access 2.4 GHz Networks or 5 GHz Networks and a graph will appear with the networks depending on the channels. This is what will allow you to see, through a graph, the real saturation of the different channels of the Wi-Fi network. You just have to click on the network that interests you and it will be highlighted to see if it has other connected networks around it.
As you can see, finding the best Wi-Fi channel to connect to is very simple with Acrylic Wi-Fi Home. This Windows application is very useful for analyzing the signal, the quality and seeing the saturation of both the 2.4 GHz and 5 GHz bands. In this way, if necessary, you can make changes to the the router configuration.
What to do to change the channel of the router
If after carrying out these steps that we have explained you have realized that you are using a Wi-Fi channel saturated, you can change it in the router and use a different one. This process is simple, although it will depend on what model you have exactly. However, the steps are similar.
The first thing you have to do is enter the router configuration. It is generally accessed through the gateway 192.168.1.1 and entering the password and user to enter the configuration. Now, some routers use a different gateway. To find out, you simply have to go to Start, enter the Command Prompt or Terminal and execute the command ipconfig.
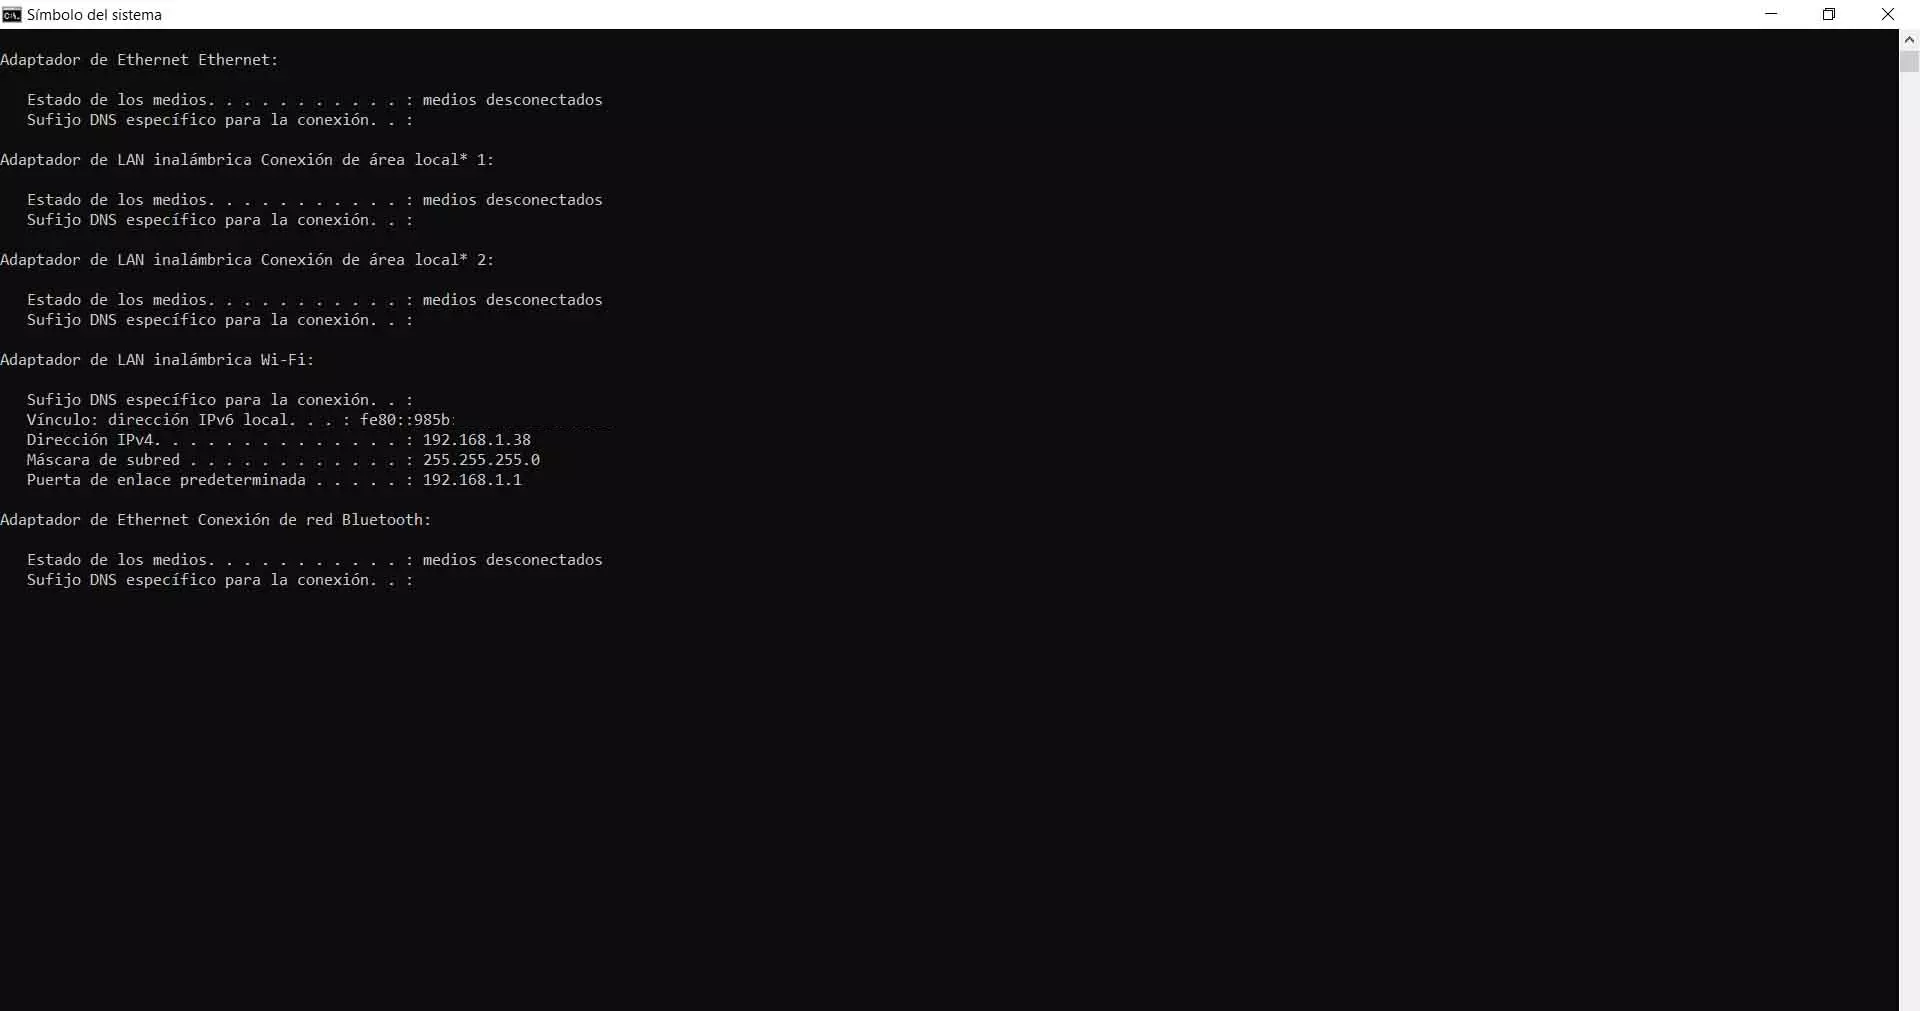
There you will see certain data related to your network. One of them is the default gateway. Now you only have to put it in a browser and enter the router configuration.
In the case of HGU-router of Movistar, to change the channel you have to go to the menu on the top right and click on Wi-Fi. It takes us to a new window where we can configure different sections such as the password or the network name, but also the channel to which we connect. You just have to click on the drop-down menu and choose which one suits you best. You can put Auto or choose a specific one.
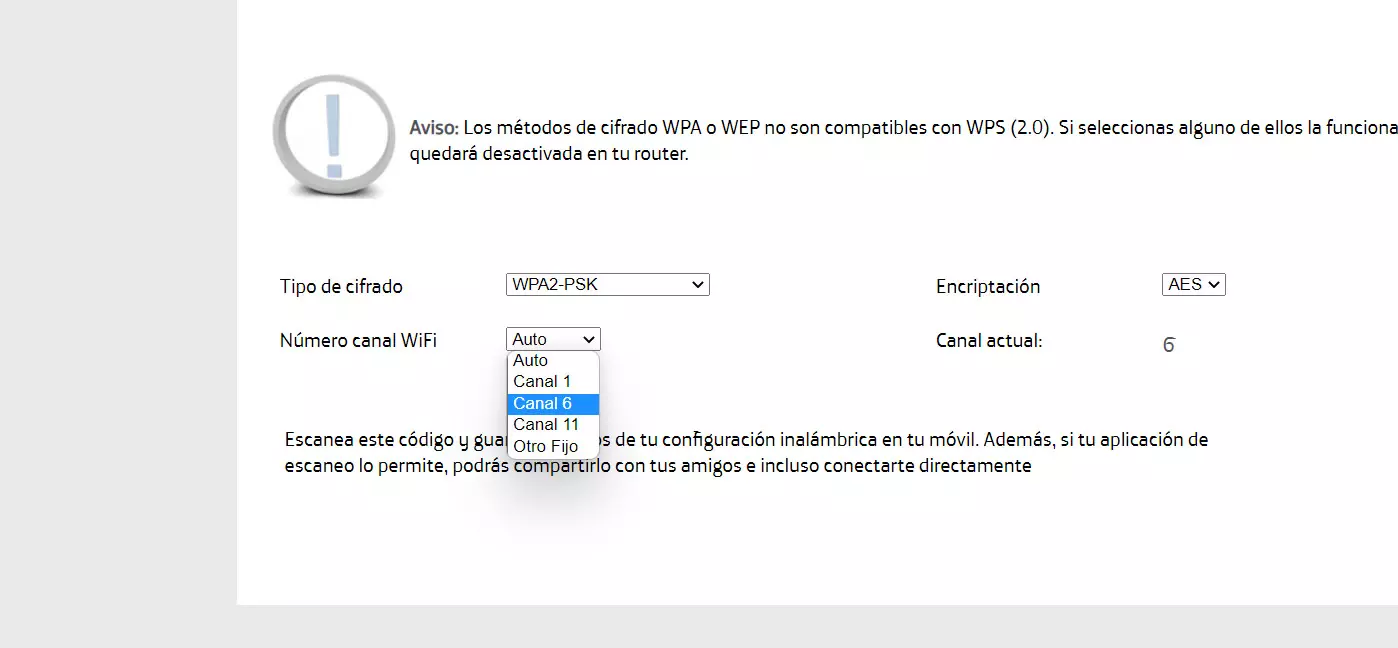
You can do the same process for the 5 GHz band, but in this case you have to click on Wi-Fi Plus. Once again, you just have to pull down the menu and select the one you want to connect to it. In this case you will see more options available.
We have explained these steps with the Movistar HGU router, but if you use any other, the process is similar. You will only have to go into the configuration and look for the Wi-Fi section and there select the channel that interests you. You choose the one that is more free and thus you will avoid that the connection has problems. Some devices allow you to use the mobile application for this type of configuration.
In short, as you have seen, it is very easy to know which is the best Wi-Fi channel to connect to the wireless network. You can use Acrylic Wi-Fi Home for this, which is a program for Windows that works very well. Later you can change the channel in the router settings and thus improve the wireless connection.