D-Link DBG-2000 Firewall Configuration
To configure the firewall or firewall of the D-Link DBG-2000, we must do it in the profile configuration to later apply it and for the device to download the new configuration. It is very important to configure the firewall correctly, because otherwise, we could be left without Internet access by the devices. Before applying the changes We must review very well all the rules that we have setFurthermore, these rules are satisfied in order since they are numbered. As a general rule, the recommendation when creating rules is the following:
- First we create the more specific rules.
- Next, we create the most general rules.
- We must check what is the last rule that is normally an “any”. If we put deny, we will have to have many “permits” above, otherwise, we will be denying all network traffic and there will be no communication.
Once it is clear to us how we should configure the firewall based on the rules, it is also highly recommended to create the rules with a numbering of 10 by 10 or 20 by 20, with the aim of being able to “stick” rules in between , so you don’t have to edit the rules to change their priority number.
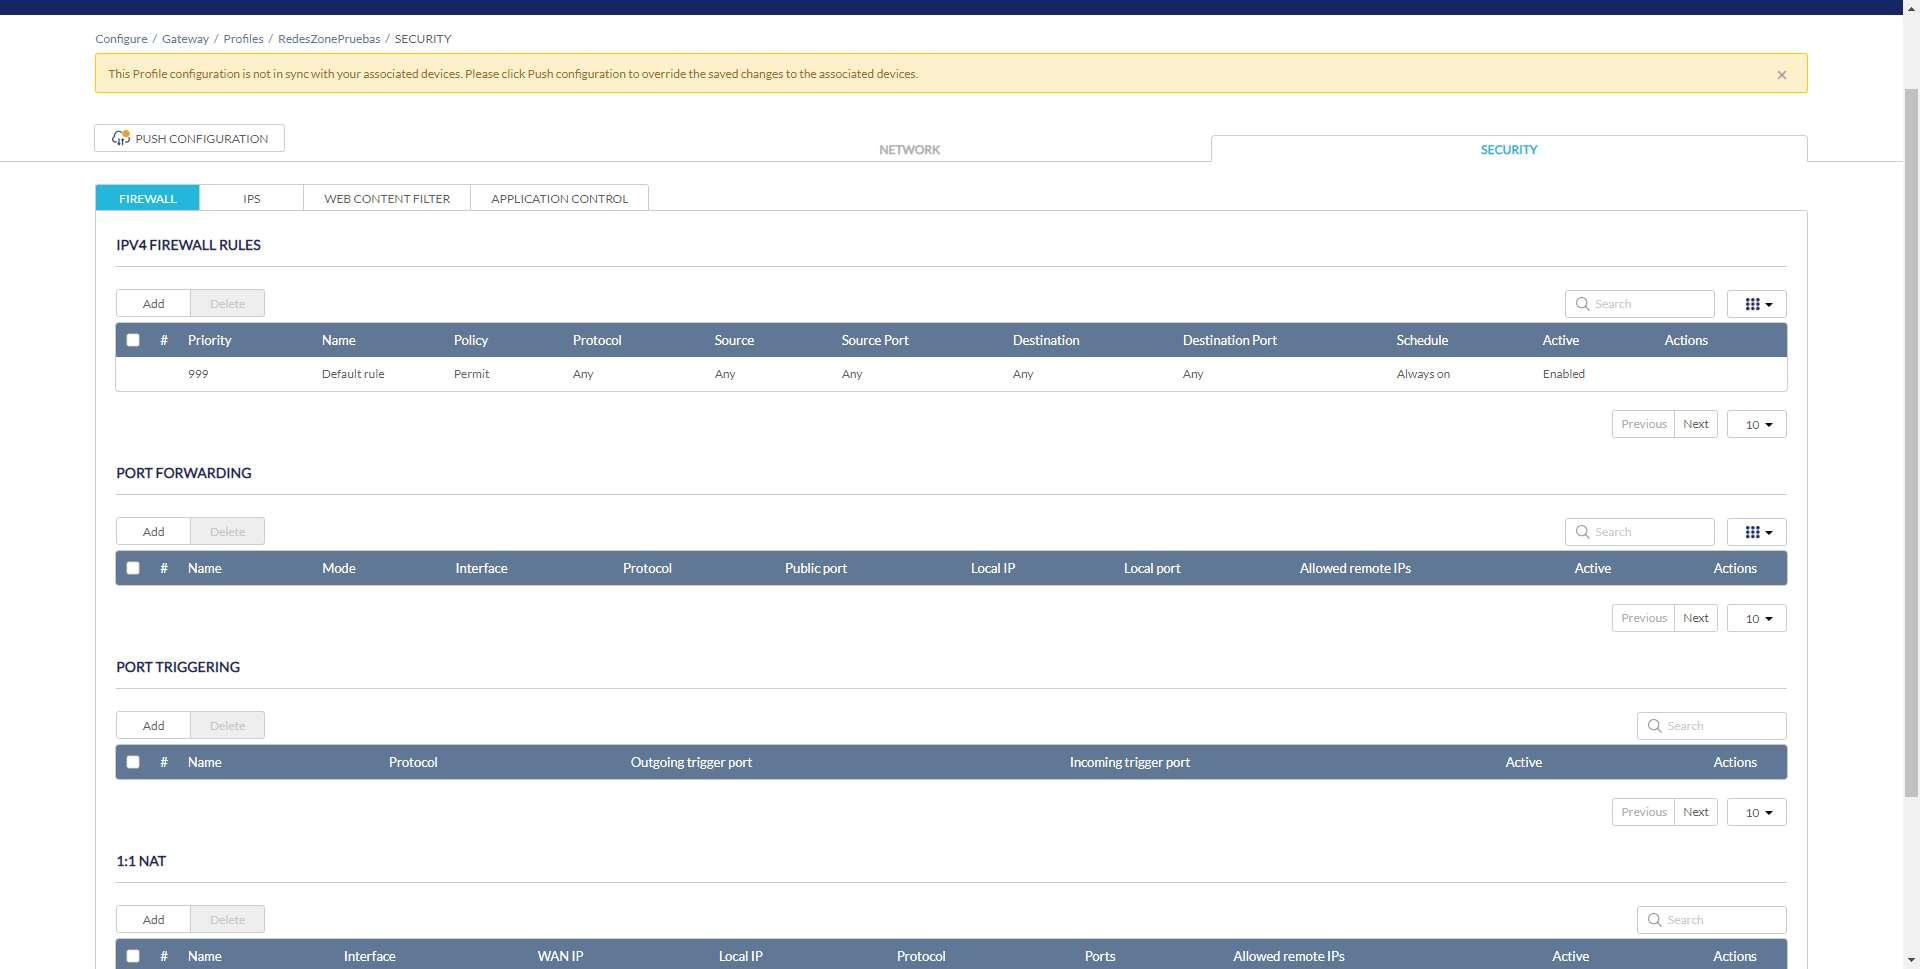
In the configuration menu «Configure / Gateway / Profiles» is where we must go, and click on the «Safety» since all the configurations related to the firewall or firewall are right here.
In the first menu called «Firewall» is where we have all the configuration options available, both for the firewall itself and also for opening ports in NAT with port forwarding, and even port triggering and 1:1 NAT. We are going to focus on the option of «IPv4 Firewall Rules«.
By default, we have created a rule with priority 999 that tells us that it “allows” any protocol, source IP and destination IP, as well as source port and destination port. This means that it allows any type of traffic without any restrictions, and it is always enabled by default. If we want to block all traffic except what is allowed, we’ll need to put a deny all rule at priority 998, just above the allow all 999.
To create a new rule, we must click on «add«, and a new configuration menu will be displayed with the necessary information to carry out the configuration:
- priority: we must put a priority to the rule, the normal thing is to put it “above” the general rule of allowing everything, therefore, the number must be less than the rule 999. We can put up to 999 rules in the firewall.
- Yam: we put a descriptive name to the rule.
- Policy: The action policy, whether to allow or deny traffic that matches this rule.
- Protocol: we can choose the protocol, basically we have to choose between TCP, UDP and ICMP or any of them (blocking at IP address level).
- source: is the source IP address or addresses, we can also put “any” to be any source IP address.
- destination: is the destination IP address or addresses, we can also put “any” to be any destination IP address.
- Schedule: allows us to use this rule always, or in a certain period of time.
If we pass the cursor over the question mark icon in each option that we have seen, it will allow us to know more about what options we have available. For example, we will be able to set a priority from 1 to 998 (because 999 is already occupied). We will also be able to put several source/destination IP addresses, and even a range of IP addresses. Below, you can see all the available options:
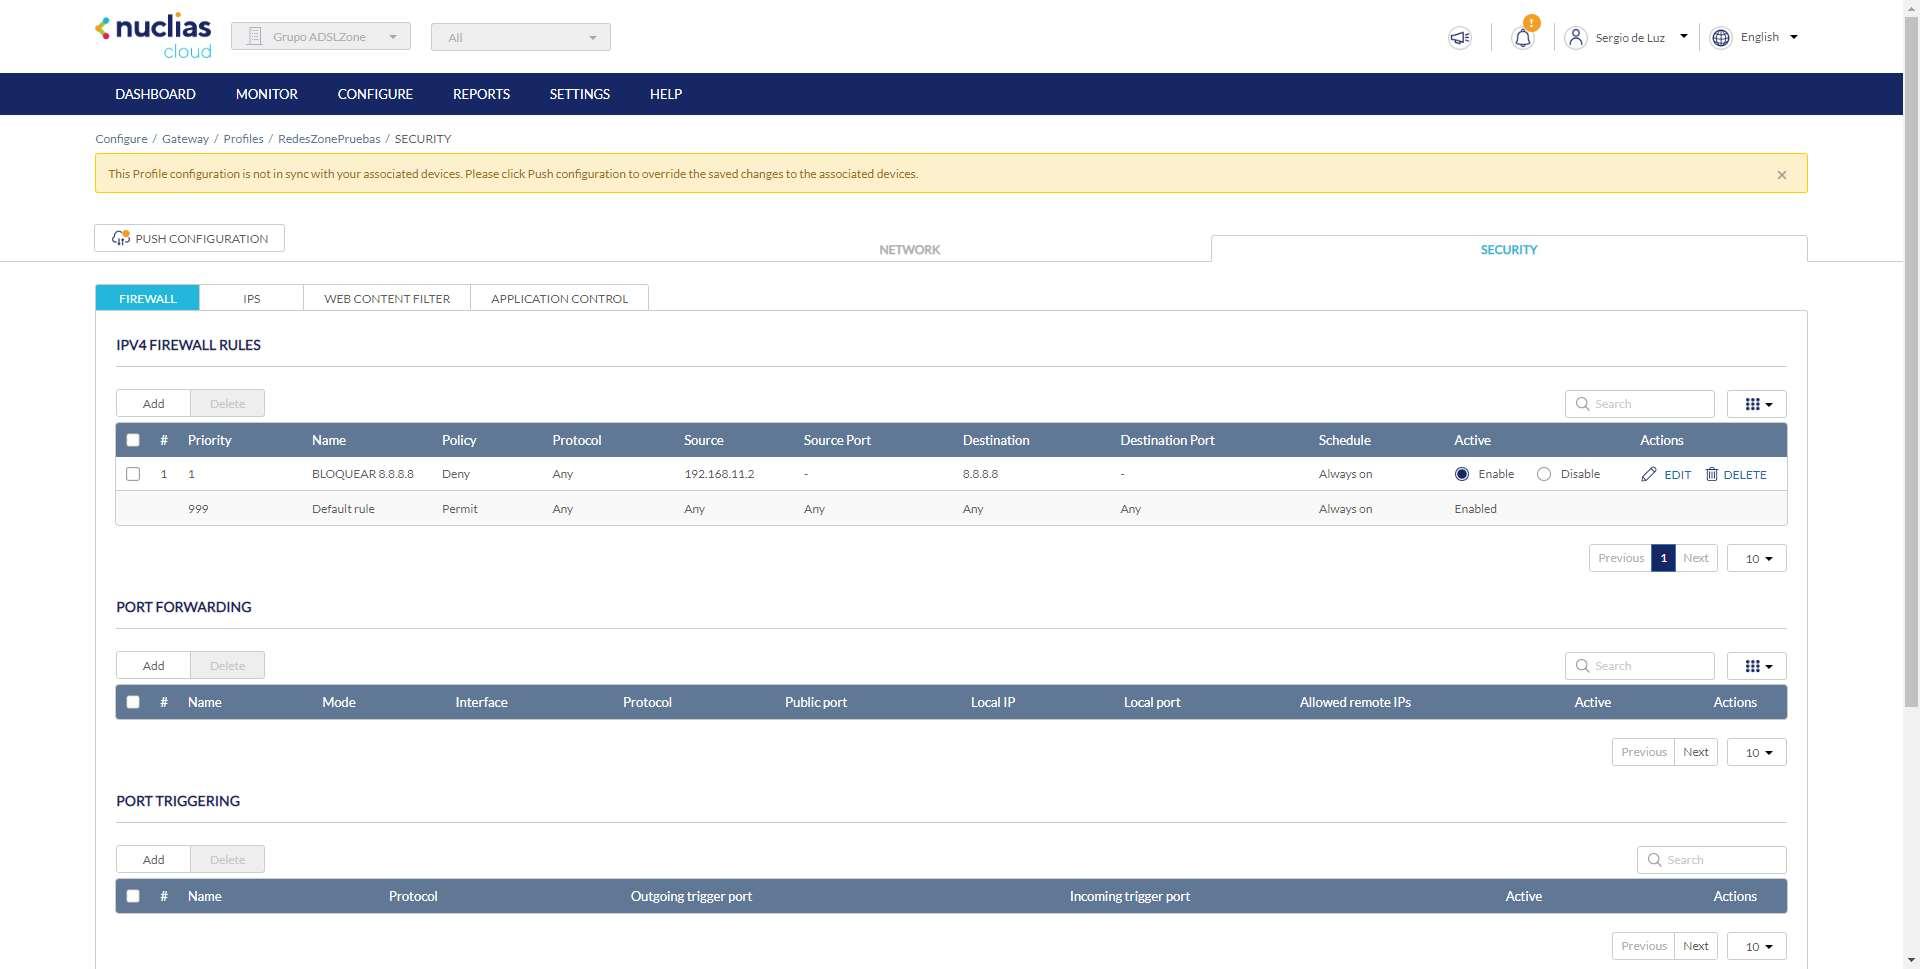
Once we have already added the rule, we will be able to see it in order of priority, as you can see below. A very important detail is that we must look in the “Active” column if it is “enable” or “disable”. By default it will be disabled, we have to enable it specifically. Once the configuration is done, click on the “Push Configuration” button to apply the changes to the DBG-2000.
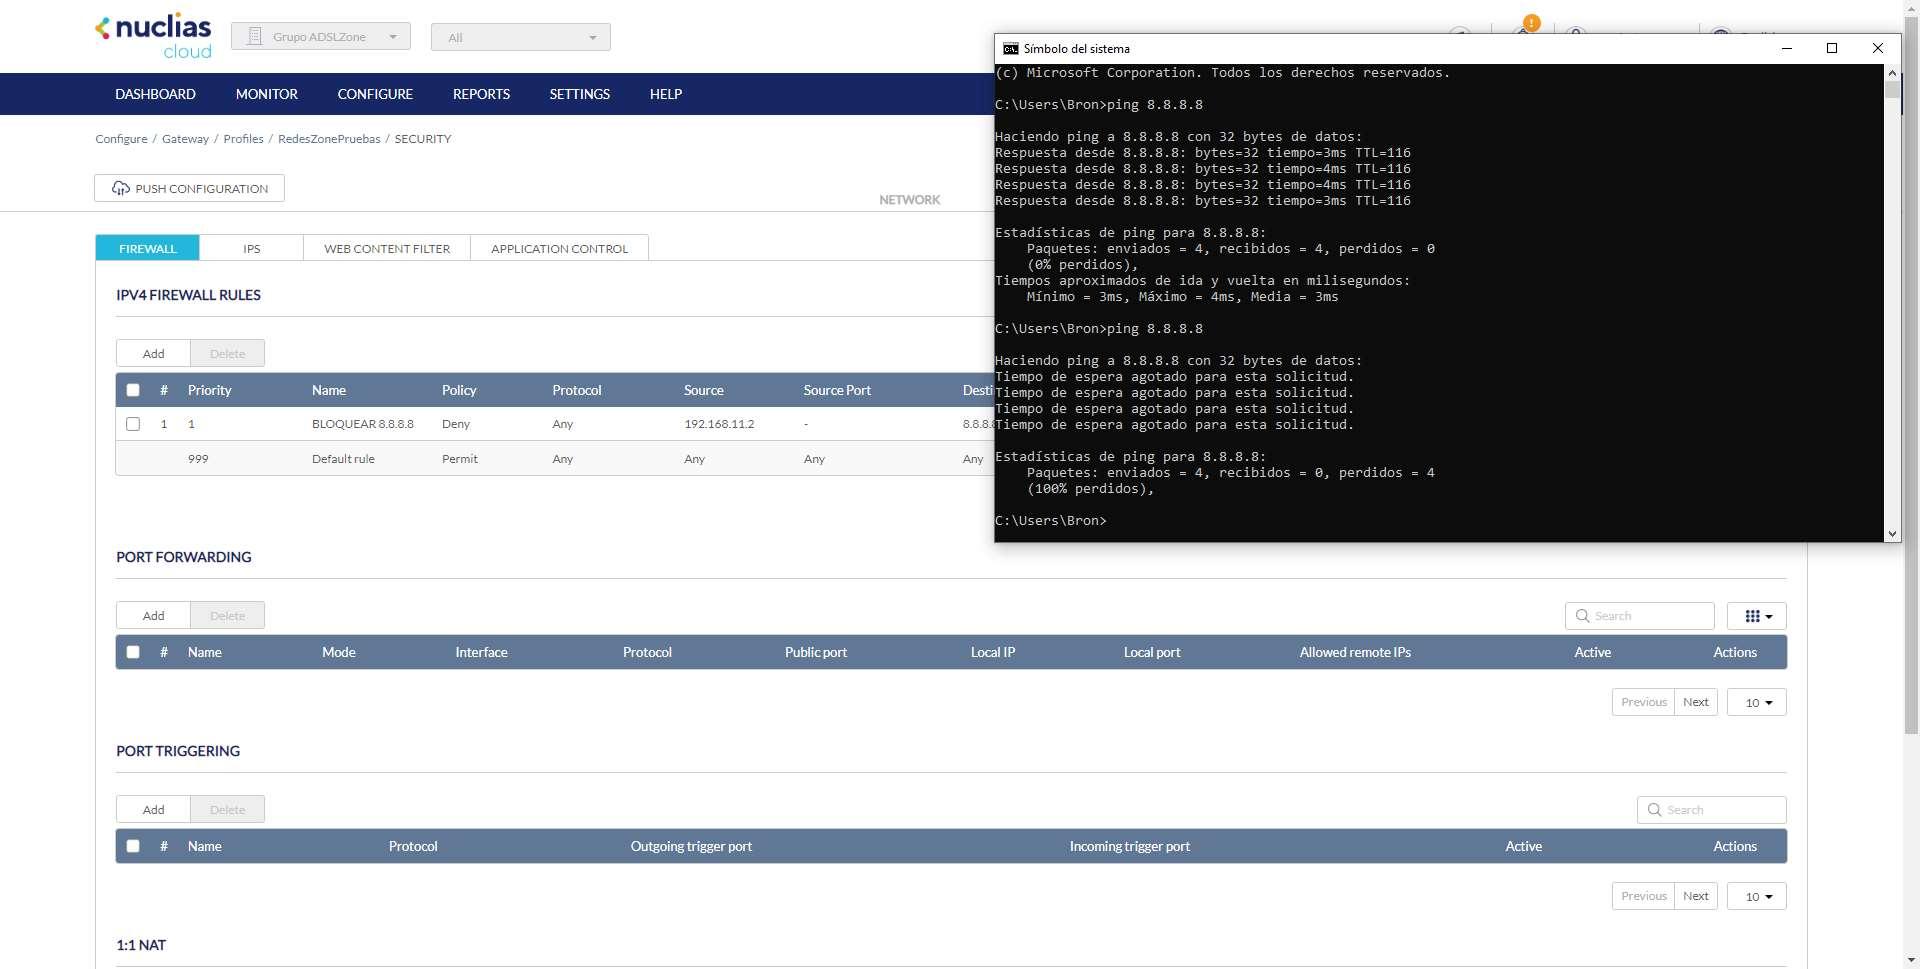
If we wait a few seconds, we can see that at first we do have communication with Google’s DNS through ping, and later when we apply the rule this communication is cut off directly. Of course, this rule only affects our IP address, the rest of the IPs will be able to communicate because we have the allow everything rule just below.
As we have explained to you before, it is always recommended that you put the most specific rules with the highest priority (lowest number), and the most general rules with the lowest priority (highest number).
As you have seen, we have a fairly configurable firewall or firewall, although we miss somewhat more advanced options since it is a professional team. For example, we might have options to block protocols like ESP, AH, OSPF, and many others. We could also have the ability to block only certain types of ICMP packets and not all, just like with the TCP protocol and allow us to block certain TCP messages and not the entire protocol.
IDS/IPS Configuration
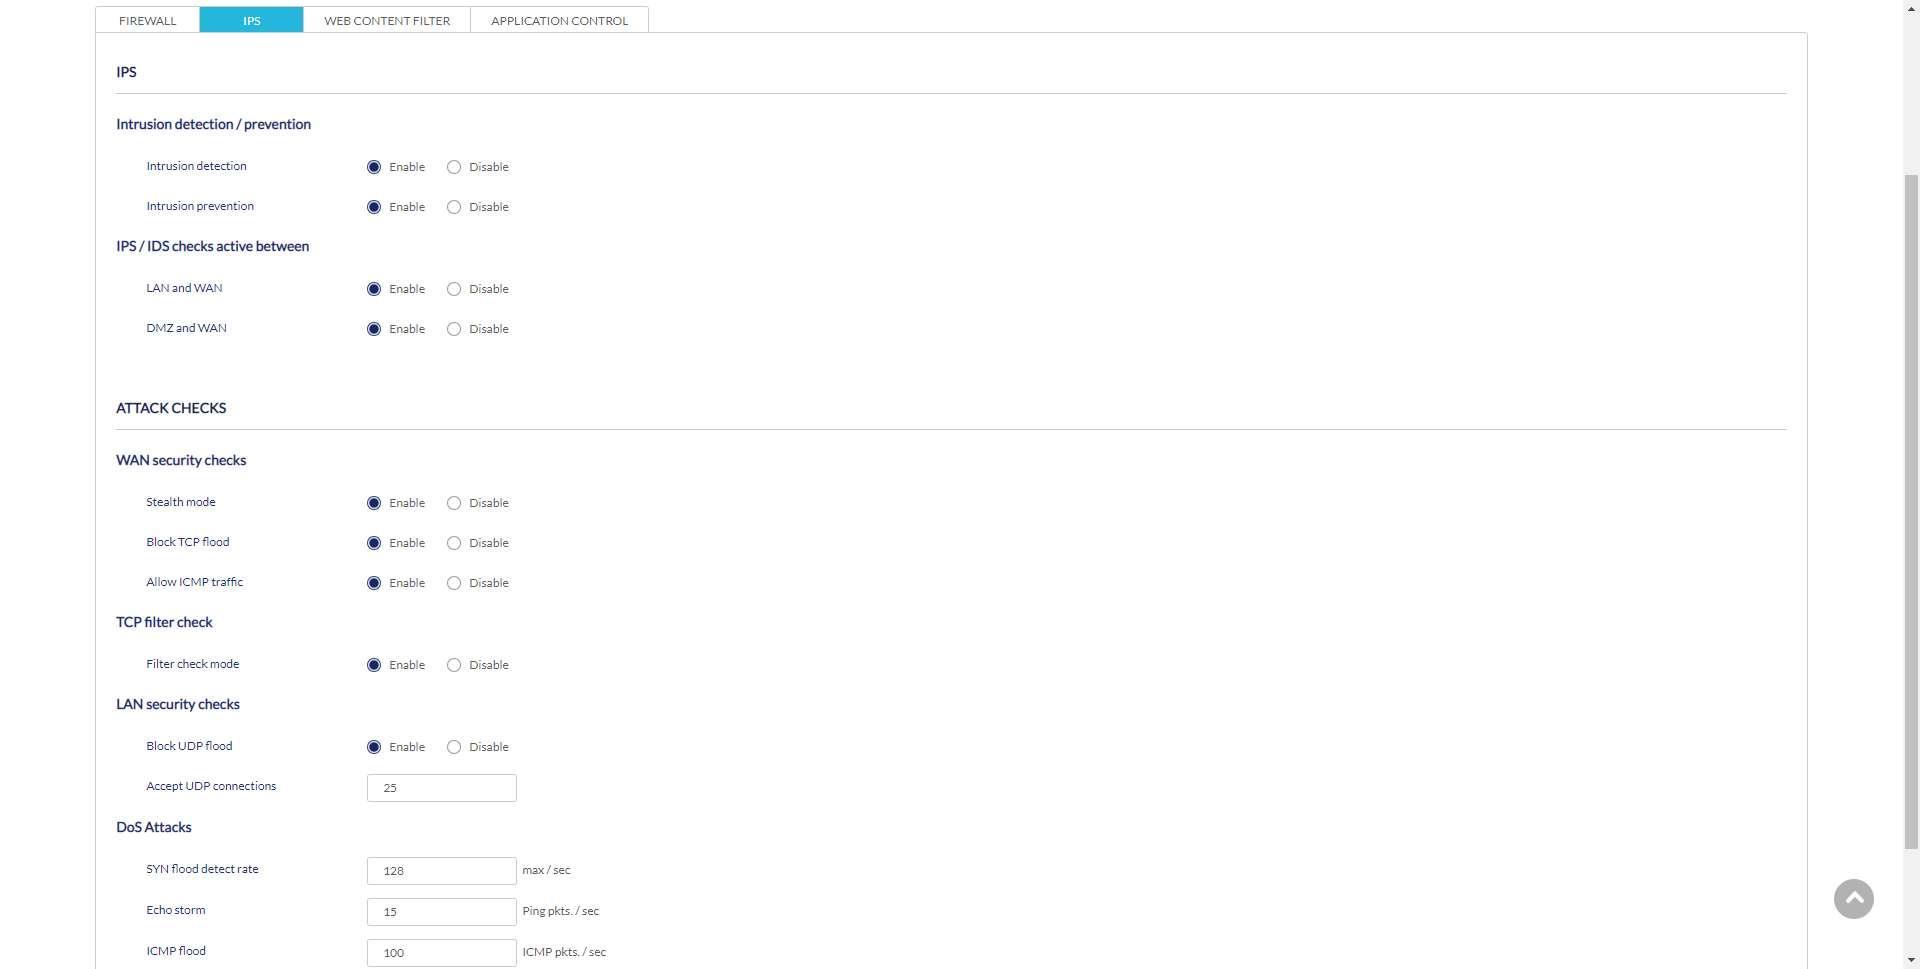
In the “IPS” section is where we will find all the available options regarding the configuration of the intrusion detection and prevention system. In this menu we will not have the possibility to see or configure any signature by ourselves, all the signatures are those provided by the manufacturer D-Link. The only thing that we are going to be able to do is activate or deactivate the different configuration options available. Something that we would like to highlight is that we can activate the IPS to control the traffic from the LAN to the WAN, as well as from the DMZ to the WAN, to avoid possible attacks with local origin.
Nuclias Cloud also allows us to enable different security measures on the WAN, such as blocking TCP Flood attacks, and even denying ICMP traffic on the WAN so that nobody can ping us on the WAN. We also have the possibility to block UDP Flood on the LAN, and configure the system to mitigate DoS attacks.
As you can see, in the IPS part we are not going to have too many configuration options, on the one hand, it is good not to “saturate” the technical team with so many available options, this will be worth it for the vast majority of businesses and companies perfectly, without the need to go to more advanced solutions such as Snort or Suricata, which are the most popular. However, we miss that we cannot see the signatures downloaded from D-Link, nor that we cannot put our own signatures on the platform to use them.