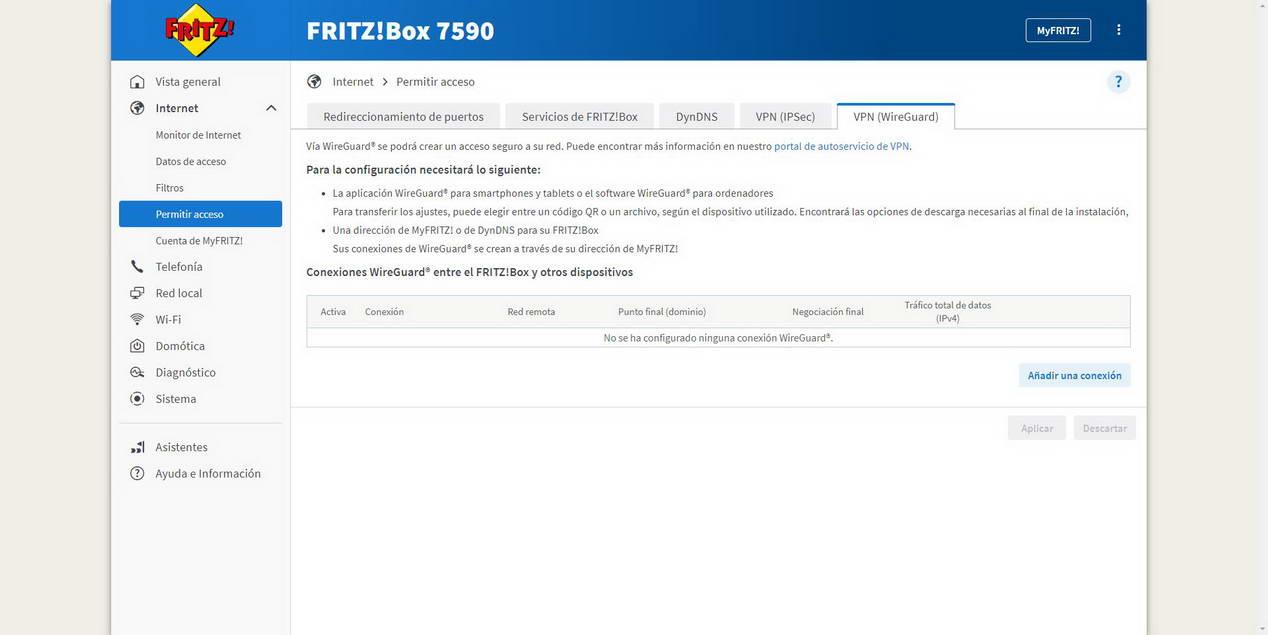
The VPN server configuration with this new WireGuard protocol It’s in the “menu”Internet / Allow access«. In this configuration menu you can also find port forwarding, access to the different FRITZ!Box services, dynamic DNS configuration with DynDNS and other providers, as well as the configuration of the two VPN protocols that we have available.
To configure the server, we go to the menu «VPN (WireGuard)«, in this menu it will give us a brief description of this protocol and what we will need for everything to work correctly:
- The WireGuard application for smartphones and tablets, or the official program for our computer (PC, Mac, Linux, etc.).
- Using the address of MyFRITZ! or the personalized dynamic DNS that we want.
Once we have met these requirements, we can click on «Add a connection» and start with the setup wizard.
In the first menu we have two configuration options:
- simplified installation: With this configuration we can configure the VPN server with this protocol so that one or more clients can connect to the router and access the local network and redirect the Internet. The VPN architecture is to connect remote clients to the home local network so that they can go out to the Internet safely. This is the option you should choose in the vast majority of cases.
- Custom settings: With this configuration you will be able to create VPN connections between two networks with WireGuard, for example, you could connect to a remote WireGuard VPN server, communicate two routers with each other (Site-to-Site architecture) and more. You should only choose this option if you are going to do a “special” configuration like the ones indicated.
We choose “simplified installation» which is to configure the VPN server correctly so that clients (smartphones, tablets, laptops) connect to the home VPN server remotely, and access both shared resources and the Internet. Click on «To follow» and it will take a few seconds to get to the next screen, this is because you are generating the public and private keys internally, and the process takes a while.

As soon as the key creation process is finished, we have two options to configure the client (smartphones, tablets and PCs):
- smartphones and tablets: you can scan the QR code through the WireGuard app, we choose the “Import via QR code” option, we scan it and the client will automatically be configured correctly.
- computer or laptop: we can download the configuration file in plain text, to later import the configuration in the WireGuard client of the PC, be it Windows, Linux or MacOS.

Below each method we have a brief explanation of how it would work, if we follow the steps that it indicates we will not have any problem when configuring it.

When downloading the configuration file, we can see it with any text editor:

If we do not want to do Internet redirection, that is, go out to the Internet through the VPN server of our router, then in the “AllowedIPs” section you should remove the 0.0.0.0/0 since it indicates that all traffic is routed through the VPN tunnel.
If we click on the “Close” button we cannot download the configuration again for security reasons, in case you forget it, you will have to delete the configuration and create it again.

In the main menu of «Internet / Allow Access / VPN (WireGuard)» We can see the VPN connection that we have just created, as you can see, it is activated and we can even temporarily deactivate it at any time. It will also tell us what private IP address the associated VPN client has. When the connection is established we can see the source IP address, the final negotiation and also the total data traffic exchanged.

If we click on “Edit” we can change the name of the WireGuard connection without problems, the rest of the options cannot be edited or changed. An important aspect is that the “Agreed Key” is the “PreSharedKey” that we have seen before, but in this menu we do not have the private key for security reasons, so it will not help us to access this menu and see the public key and the pre-shared key.

Once we have finished the complete configuration, in the main menu we can see one or more profiles with the name “Remote access”, one for each VPN client that we have configured.

As you can see, configuring the VPN server on this router is really very simple. Now we are going to show you how the connection is made on a PC and the speed that we can obtain.
Configuration of VPN clients and speed test
Our recommendation is that you use the official WireGuard clients, either for PC (Windows, Linux or MacOS) as well as for smartphones and tablets. In this example we have used the official client for the computer with the Windows 11 operating system. All we have to do is click on “Add tunnel” and load the configuration file that we have downloaded from the FRITZ!Box. Once loaded, click on the profile and click on “Activate” to proceed with the connection.

You will see that the connection is established in less than two seconds, and we will be able to see the connection status at all times, as well as the data transferred through the VPN tunnel.
As for the speed achieved, with the FRITZ!Box 7590 router, which is already quite a few years old, we have achieved a download speed of 135Mbps and an upload speed of almost 200Mbps, an outstanding result considering the hardware. Newer models like the FRITZ!Box 5590 Fiber or the FRITZ!Box 7590 AX will achieve more speed, since their processor is more powerful.

Once we have seen what the client configuration is like, we are going to show you the menus available in the advanced configuration of the router.
WireGuard Advanced Settings
In the advanced configuration menu, or rather, “Custom configuration” we can make different VPN connections very quickly and easily.

In the first configuration we can directly import the WireGuard configuration in the router, in addition, it allows us different configurations such as “send all network traffic through the VPN”, allow NetBIOS through the connection and also the possibility that only certain devices from the local network must be accessible through this VPN connection. In this way, we can easily import the configuration file from services like NordVPN, Surfshark and others.


In the “Custom settings” menu we can also answer yes or no to different questions that it asks us, to facilitate the advanced configuration of the router, such as, for example, carrying out a Site-to-Site VPN and communicating two networks with each other.
As you have seen, the WireGuard configuration is very simple but effective, much faster and easier than configuring an IPsec connection as we had up to now. In all the FRITZ!Box reviews we have told you that we are missing a protocol other than IPsec, such as OpenVPN or WireGuard, and here we have the latter that will provide us with the best possible download and upload performance.