Why limit Internet speed in Windows
You may be wondering why this option could be useful. think of one limited internet rate. For example if you are sharing data from mobile to computer. You will have a number of gigabytes available and if you use a program that consumes a lot of resources, such as the browser, you could use up that data in a short time.
But mainly this is going to be interesting when we have a limited connection in terms of speed. For example, if we connect to a Wi-Fi that arrives very weak or if we have a contracted connection with a very limited bandwidth. As soon as we use certain applications, such as streaming videos in high definition or downloading, we can exhaust the bandwidth.
That could cause problems if we connect to another computer at the same time. We would not have bandwidth enough to, for example, make a video call without interruptions or open a web page. In these cases, it may be interesting to put a limit on the speed of the Internet and thus avoid consuming resources.
You will be able to put that limit on a specific application. In addition, you can put a limit on the download speed, but also on the upload speed. You will be able to establish what most interests you at that given moment and thus avoid problems that may affect your connection. In any case, you can remove it and have it consume everything the program needs again.
Steps to limit download and upload
In order to limit the download and upload speed in Windows to certain programs, you will have to install additional software. That program is called NetLimiter, is free and available for Windows. With it you can put a limit on the download or upload speed at any time.
Install NetLimiter
Therefore, the first step to limit downloading or uploading in Windows is to install NetLimiter. To do this you have to go to its official page and to the download section. The app will start downloading automatically and the installation process is easy. It will take more or less depending on your system, but it shouldn’t take more than a couple of minutes.
It will ask you to choose the path where you are going to install the application, accept the terms and follow the process. Once finished you can hit the button Start. An icon will automatically appear on the taskbar, which you can use to open or close the program whenever you need it.
put a limit
When you have installed it and see the icon appear, you can start it. It will automatically show you a screen with different applications that can consume data or that are consuming resources at that moment. You will see, for example, the Google Chrome browser. Next to each program you will see the download and upload rate in real time.
That already gives you an idea of what each program is consuming. If you see that an application has a very high download or upload rate, you can check that it is consuming a lot of bandwidth. If, for example, you try to open a YouTube video in Chrome, you will see that the download rate automatically increases.
How can you set a limit? It is really simple. To do this, you only have to click on the program that interests you, such as the browser, and it will automatically show you a series of options on the right side. The one that interests you is the Limit, which you can select both down and up. Click on Not established and a bar will be displayed to put what interests you.
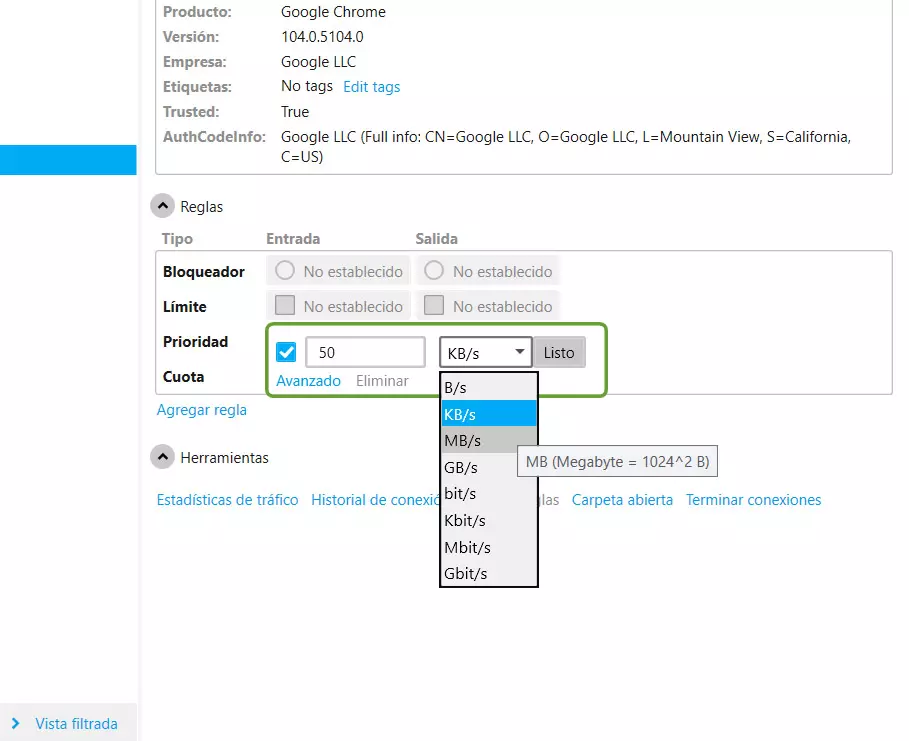
there you can set the limit that interests you You can do it both up and down and both in a single program and in any other you want. If, for example, you want to give it a limit of 300 KBps, then you simply have to put it in the box and hit OK for the changes to be applied.
Delete a limit
If at any given moment you want remove that limit that you have put, what you have to do is click again on the program that interests you, click on Limit and the one you have previously established will appear, for example those 300 KBps that we mentioned. You may have put it down or up.
That added option will appear and you only have to hit Delete. From that moment on, the program will connect to the Internet normally again, without taking into account any download or upload limits.
Prioritize a program
You may be interested in a program having higher priority to use available resources. For example, if you have a download application, you may want it to download faster and take full advantage of the download speed you have contracted. This is very useful when you don’t have a lot of bandwidth.
What you have to do in this case is click on the program that interests you, go to the right and click on Priority. There you can assign a low, normal, high or critical priority. This will help better manage the available resources of that team.

In short, by following these steps that we have shown you will be able to use NetLimiter to establish a limit on the download or upload speed in Windows. If you have certain programs that you are not interested in that consume a lot of data and exhaust the bandwidth that your connection has, it is a very useful tool. You will be able to install it in the different versions of Windows and control consumption more.